Page 31 of 217
Opening and closing
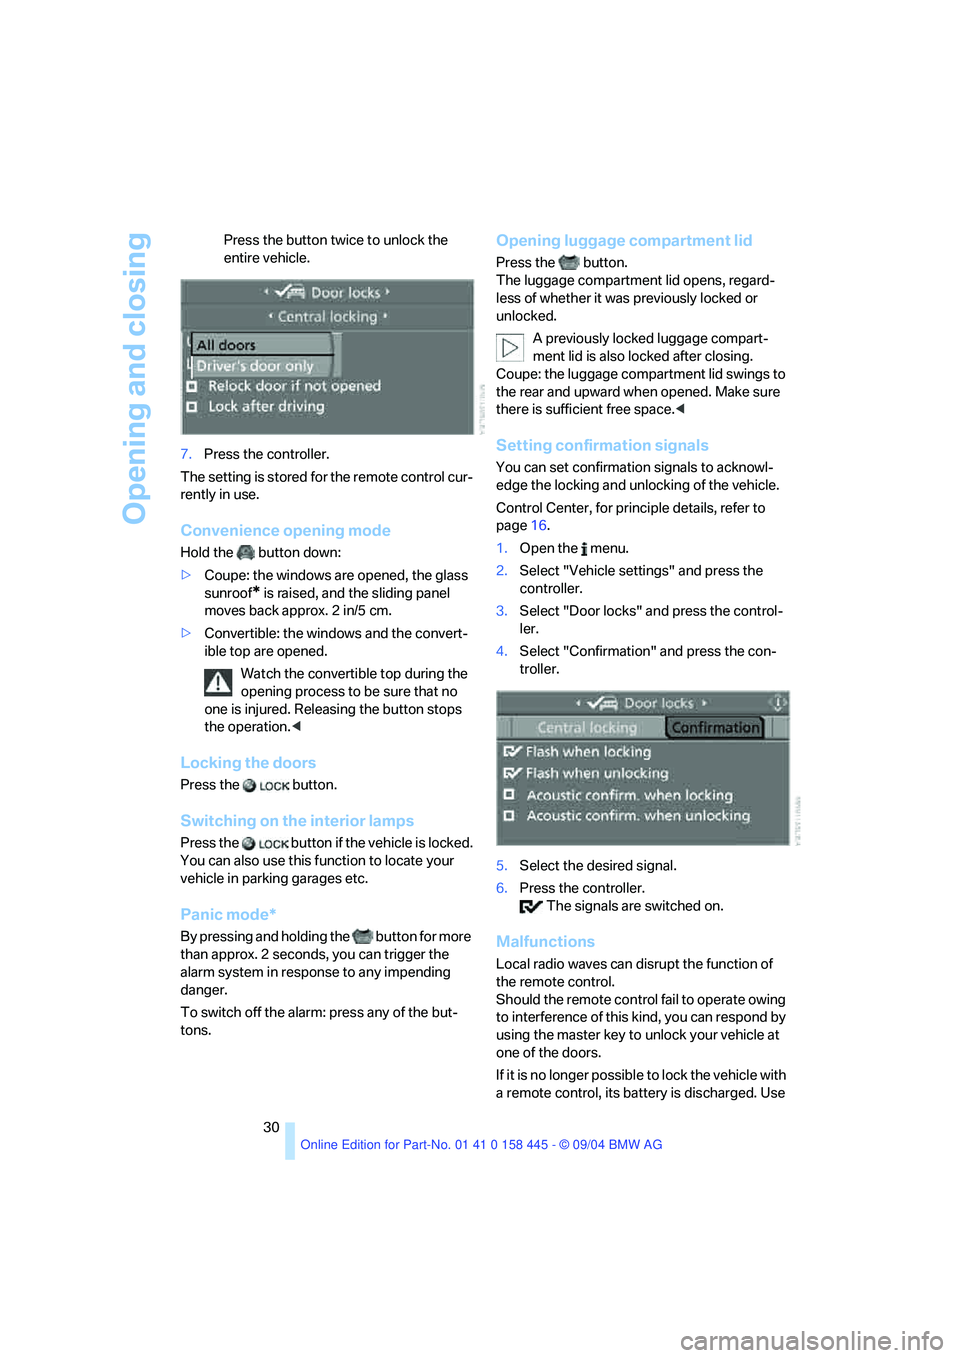
30 Press the button twice to unlock the
entire vehicle.
7.Press the controller.
The setting is stored for the remote control cur-
rently in use.
Convenience opening mode
Hold the button down:
>Coupe: the windows are opened, the glass
sunroof
* is raised, and the sliding panel
moves back approx. 2 in/5 cm.
>Convertible: the windows and the convert-
ible top are opened.
Watch the convertible top during the
opening process to be sure that no
one is injured. Releasing the button stops
the operation.<
Locking the doors
Press the button.
Switching on the interior lamps
Press the button if the vehicle is locked.
You can also use this function to locate your
vehicle in parking garages etc.
Panic mode*
By pressing and holding the button for more
than approx. 2 seconds, you can trigger the
alarm system in response to any impending
danger.
To switch off the alarm: press any of the but-
tons.
Opening luggage compartment lid
Press the button.
The luggage compartment lid opens, regard-
less of whether it was previously locked or
unlocked.
A previously locked luggage compart-
ment lid is also locked after closing.
Coupe: the luggage compartment lid swings to
the rear and upward when opened. Make sure
there is sufficient free space.<
Setting confirmation signals
You can set confirmation signals to acknowl-
edge the locking and unlocking of the vehicle.
Control Center, for principle details, refer to
page16.
1.Open the menu.
2.Select "Vehicle settings" and press the
controller.
3.Select "Door locks" and press the control-
ler.
4.Select "Confirmation" and press the con-
troller.
5.Select the desired signal.
6.Press the controller.
The signals are switched on.
Malfunctions
Local radio waves can disrupt the function of
the remote control.
Should the remote control fail to operate owing
to interference of this kind, you can respond by
using the master key to unlock your vehicle at
one of the doors.
If it is no longer poss ible to lock the vehicle with
a remote control, its battery is discharged. Use
Page 101 of 217
Practical interior accessories
100
Practical interior accessories
Integrated universal remote
control*
The concept
The integrated universal remote control
replaces up to three different hand-held trans-
mitters for various items of radio-controlled
equipment such as door openers and house
alarm systems. The integrated universal remote
control registers and stores signals from the
original hand-held transmitters.
The signal of an original hand-held transmitter
can be programmed into one of the three mem-
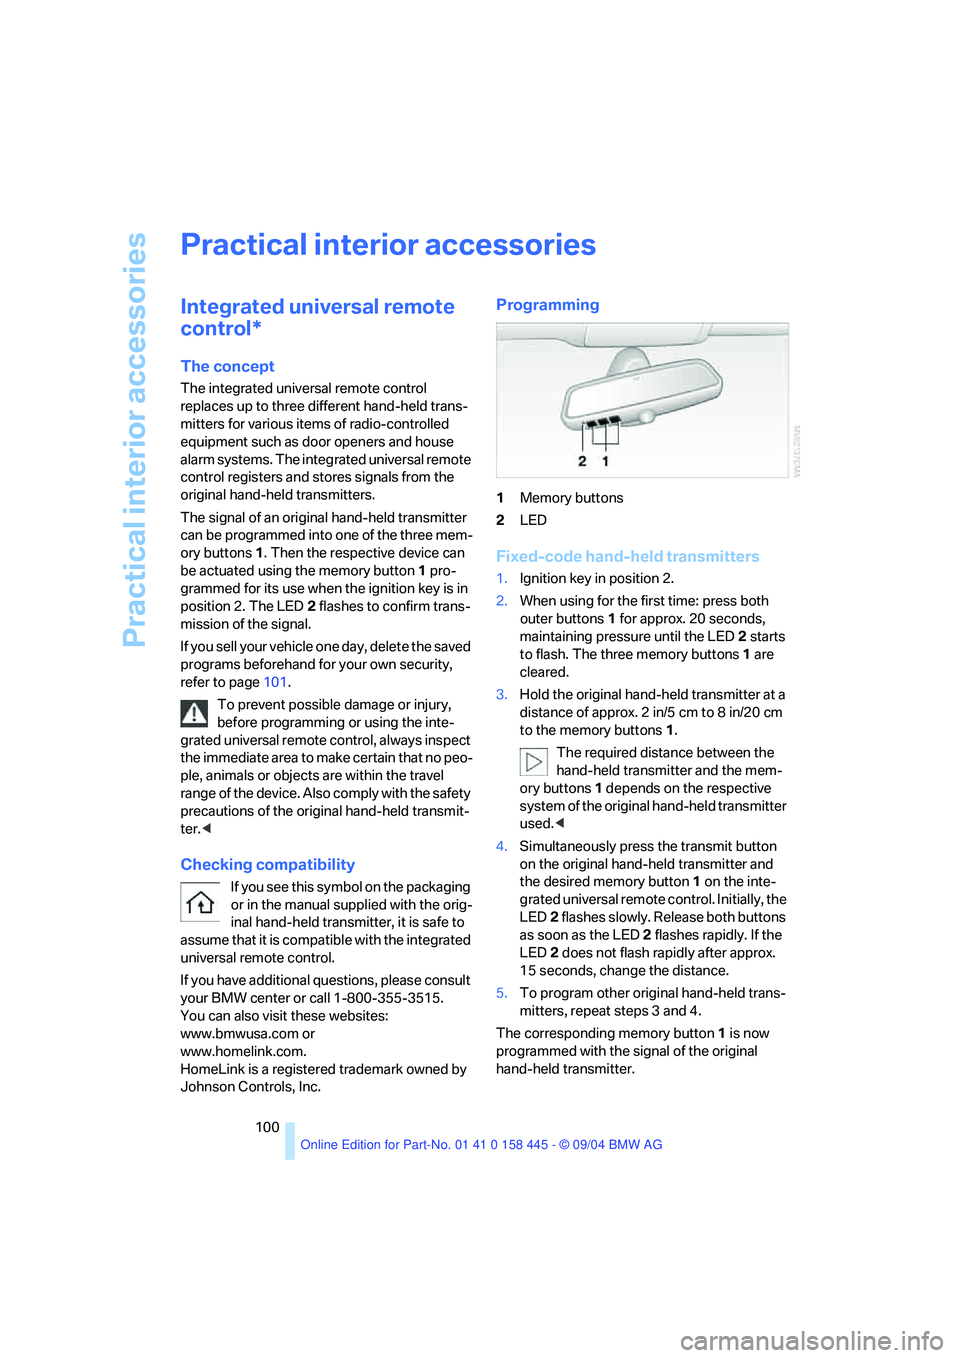
ory buttons1. Then the respective device can
be actuated using the memory button1 pro-
grammed for its use when the ignition key is in
position 2. The LED2 flashes to confirm trans-
mission of the signal.
If you sell your vehicle one day, delete the saved
programs beforehand for your own security,
refer to page101.
To prevent possible damage or injury,
before programming or using the inte-
grated universal remote control, always inspect
the immediate area to make certain that no peo-
ple, animals or objects are within the travel
range of the device. Also comply with the safety
precautions of the original hand-held transmit-
ter.<
Checking compatibility
If you see this symbol on the packaging
or in the manual supplied with the orig-
inal hand-held transmitter, it is safe to
assume that it is compatible with the integrated
universal remote control.
If you have additional questions, please consult
your BMW center or call 1-800-355-3515.
You can also visit these websites:
www.bmwusa.com or
www.homelink.com.
HomeLink is a registered trademark owned by
Johnson Controls, Inc.
Programming
1Memory buttons
2LED
Fixed-code hand-held transmitters
1.Ignition key in position 2.
2.When using for the first time: press both
outer buttons 1 for approx. 20 seconds,
maintaining pressure until the LED 2 starts
to flash. The three memory buttons1 are
cleared.
3.Hold the original hand-held transmitter at a
distance of approx. 2 in/5 cm to 8 in/20 cm
to the memory buttons1.
The required distance between the
hand-held transmitter and the mem-
ory buttons1 depends on the respective
system of the original hand-held transmitter
used.<
4.Simultaneously press the transmit button
on the original hand-held transmitter and
the desired memory button1 on the inte-
grated universal remote control. Initially, the
LED2 flashes slowly. Release both buttons
as soon as the LED 2 flashes rapidly. If the
LED2 does not flash rapidly after approx.
15 seconds, change the distance.
5.To program other original hand-held trans-
mitters, repeat steps 3 and 4.
The corresponding memory button1 is now
programmed with the signal of the original
hand-held transmitter.
Page 132 of 217
Entertainment
Operation of the radio and CD
as well as their tone settings
are described in this chapter.
Entertainment
Page 133 of 217
On/off and tone
132
On/off and tone
The following audio sources have shared
controls and setting options:
>Radio Business
>CD player
>CD changer
*
Controls
The audio sources can be operated using:
>Buttons near CD player
>Control Center
>Buttons on the steering wheel, refer to
page11
Buttons near CD player
The layout of the buttons can vary depending
on your vehicle's equipment.
Equipment with single drive:Equipment with two drives:
1Sound output for Entertainment on/off,
volume
>Press: to switch on/off.
When you switch on, the last set radio
station or CD track is played.
>Turn: to adjust volume.
2Drive for audio CDs
3 Eject CD
4Station scan/track scan
>Change radio station.
>Select track for CD player and
CD changer.
5Drive for navigation DVDs
Operation using Control Center
Control Center, for principle details, refer to
page16.
1.Press button.
This opens the start menu.
Page 134 of 217
Navigation
Entertainment
Driving tips
133Reference
At a glance
Controls
Communications
Mobility
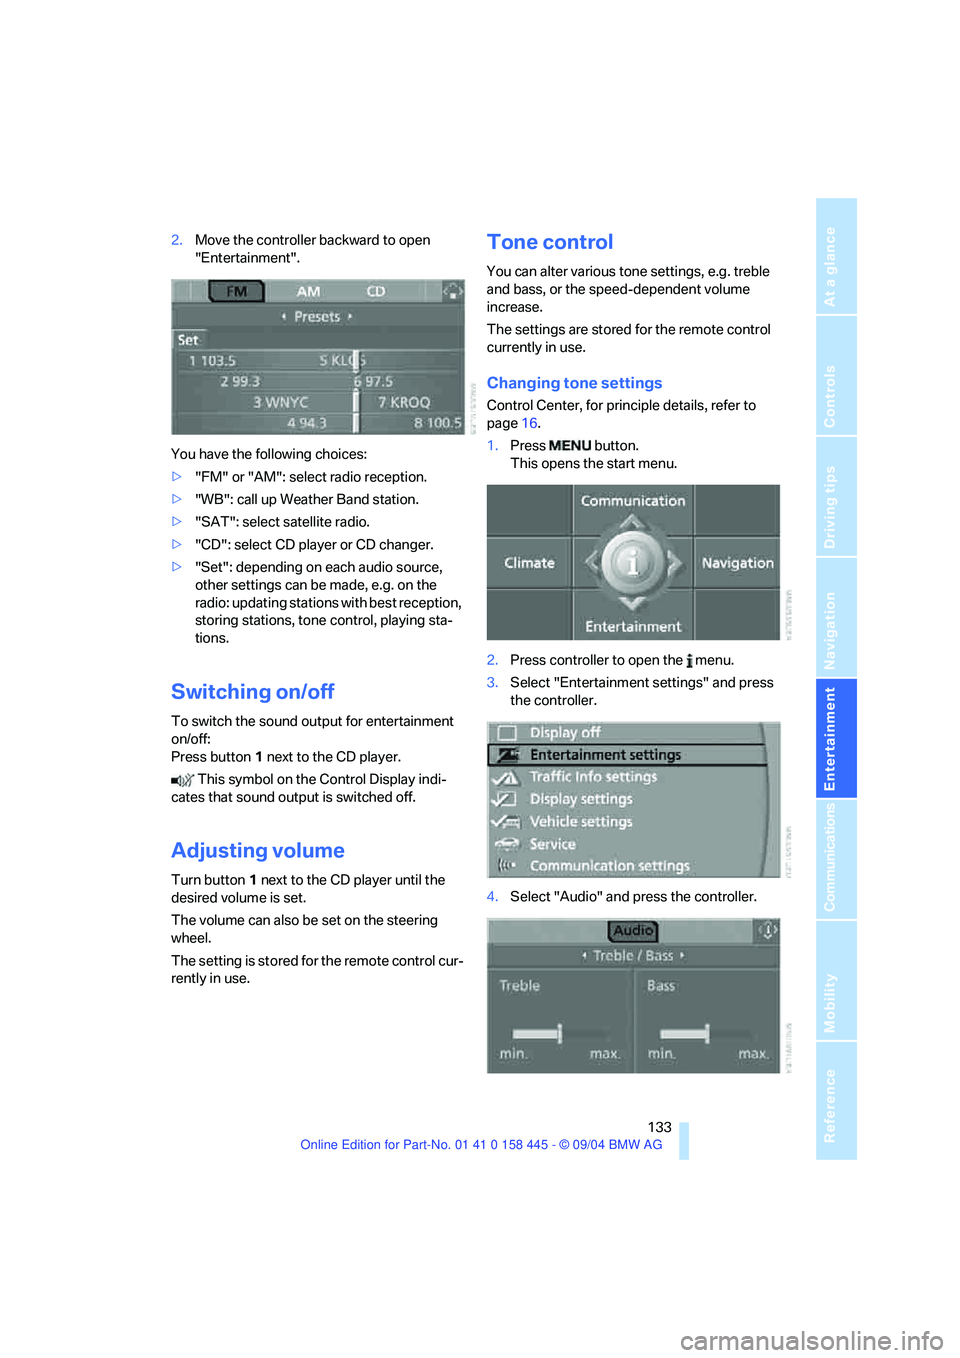
2.Move the controller backward to open
"Entertainment".
You have the following choices:
>"FM" or "AM": select radio reception.
>"WB": call up Weather Band station.
>"SAT": select satellite radio.
>"CD": select CD player or CD changer.
>"Set": depending on each audio source,
other settings can be made, e.g. on the
radio: updating stations with best reception,
storing stations, tone control, playing sta-
tions.
Switching on/off
To switch the sound output for entertainment
on/off:
Press button1 next to the CD player.
This symbol on the Control Display indi-
cates that sound output is switched off.
Adjusting volume
Turn button1 next to the CD player until the
desired volume is set.
The volume can also be set on the steering
wheel.
The setting is stored for the remote control cur-
rently in use.
Tone control
You can alter various tone settings, e.g. treble
and bass, or the speed-dependent volume
increase.
The settings are stored for the remote control
currently in use.
Changing tone settings
Control Center, for principle details, refer to
page16.
1.Press button.
This opens the start menu.
2.Press controller to open the menu.
3.Select "Entertainment settings" and press
the controller.
4.Select "Audio" and press the controller.
Page 137 of 217
Radio
136
Radio
Your radio provides reception of the FM and AM
wavebands.
Listening to the radio
Press the button if the sound output is switched
off.
Control Center, for principle details, refer to
page16.
1.Press button.
This opens the start menu.
2.Move the controller backward to open
"Entertainment".
3.Select "FM" or "AM".4.Press the controller.
Stations are shown on the Control Display on
the basis of various selection criteria, e.g. "Pre-
sets".
If no station is displayed for "Autostore" or the
displayed station cannot be received, update
the stations with the strongest reception, refer
to page138.
Changing station
turn the controller.
In addition to the stations currently displayed,
you can have stations with another selection
criterion displayed.
You can choose from the following selection
criteria:
>"Autostore":
The stations with the strongest signal, refer
to page138.
>"Presets":
Stations you have stored, refer to page138.
Page 138 of 217
Navigation
Entertainment
Driving tips
137Reference
At a glance
Controls
Communications
Mobility
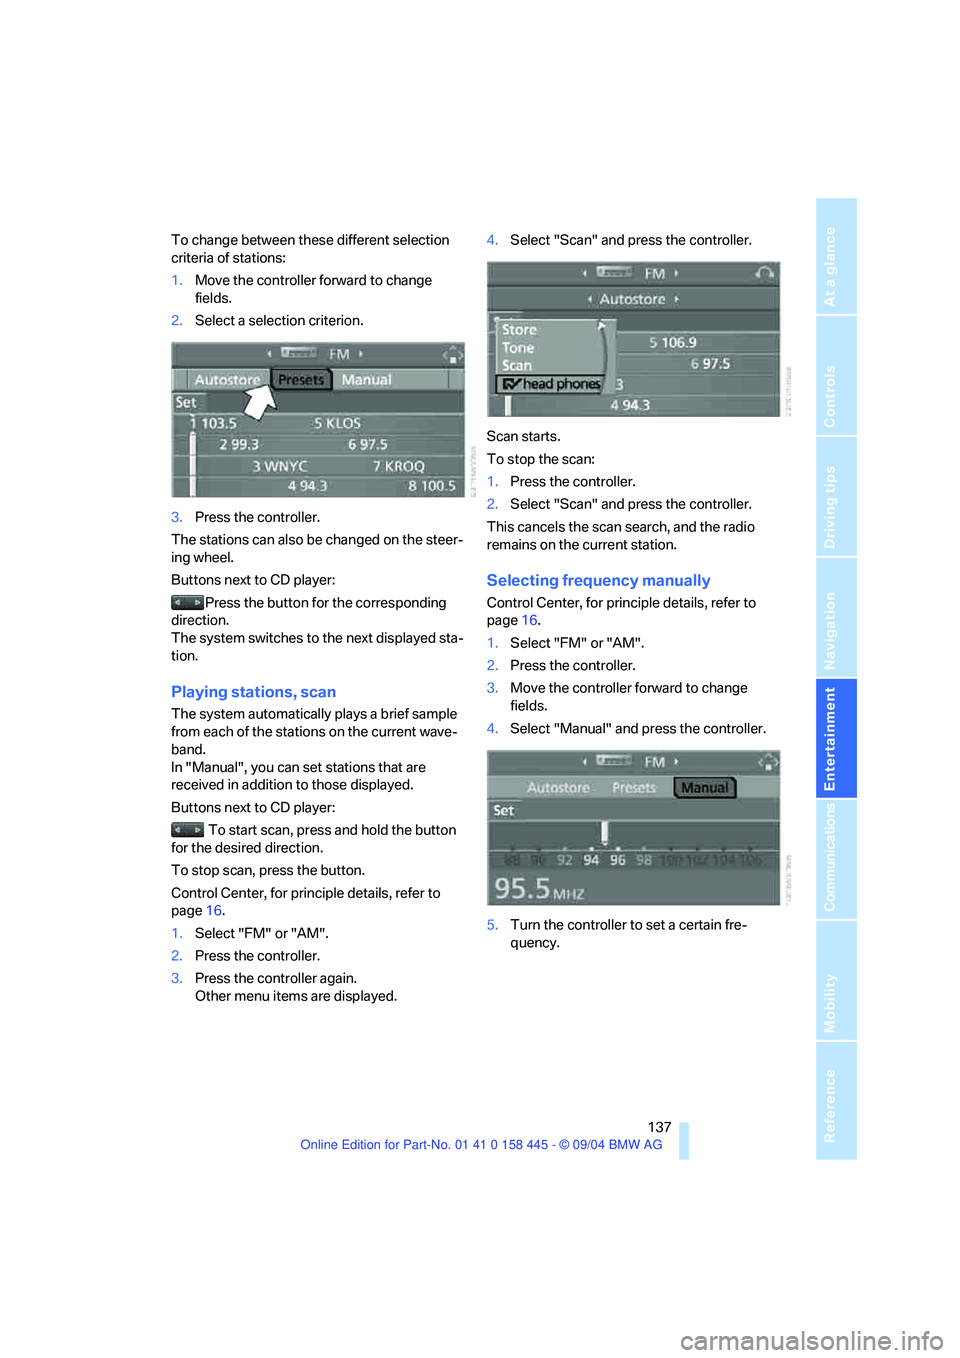
To change between these different selection
criteria of stations:
1.Move the controller forward to change
fields.
2.Select a selection criterion.
3.Press the controller.
The stations can also be changed on the steer-
ing wheel.
Buttons next to CD player:
Press the button for the corresponding
direction.
The system switches to the next displayed sta-
tion.
Playing stations, scan
The system automatically plays a brief sample
from each of the stations on the current wave-
band.
In "Manual", you can set stations that are
received in addition to those displayed.
Buttons next to CD player:
To start scan, press and hold the button
for the desired direction.
To stop scan, press the button.
Control Center, for principle details, refer to
page16.
1.Select "FM" or "AM".
2.Press the controller.
3.Press the controller again.
Other menu items are displayed.4.Select "Scan" and press the controller.
Scan starts.
To stop the scan:
1.Press the controller.
2.Select "Scan" and press the controller.
This cancels the scan search, and the radio
remains on the current station.
Selecting frequency manually
Control Center, for principle details, refer to
page16.
1.Select "FM" or "AM".
2.Press the controller.
3.Move the controller forward to change
fields.
4.Select "Manual" and press the controller.
5.Turn the controller to set a certain fre-
quency.
Page 139 of 217
Radio
138
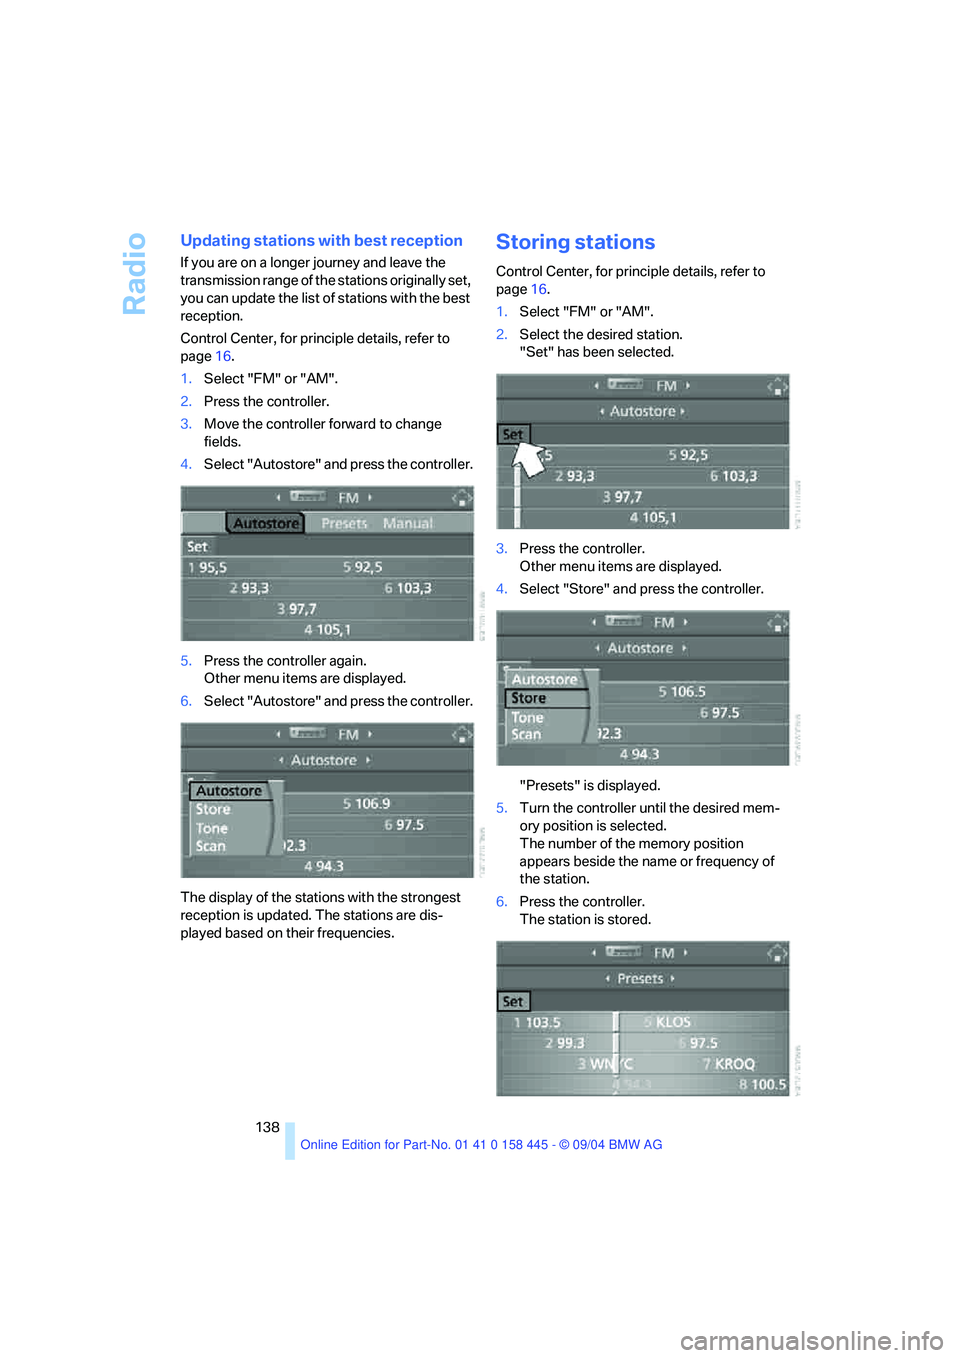
Updating stations with best reception
If you are on a longer journey and leave the
transmission range of the stations originally set,
you can update the list of stations with the best
reception.
Control Center, for principle details, refer to
page16.
1.Select "FM" or "AM".
2.Press the controller.
3.Move the controller forward to change
fields.
4.Select "Autostore" and press the controller.
5.Press the controller again.
Other menu items are displayed.
6.Select "Autostore" and press the controller.
The display of the stations with the strongest
reception is updated. The stations are dis-
played based on their frequencies.
Storing stations
Control Center, for principle details, refer to
page16.
1.Select "FM" or "AM".
2.Select the desired station.
"Set" has been selected.
3.Press the controller.
Other menu items are displayed.
4.Select "Store" and press the controller.
"Presets" is displayed.
5.Turn the controller until the desired mem-
ory position is selected.
The number of the memory position
appears beside the name or frequency of
the station.
6.Press the controller.
The station is stored.