2005 BMW 530I remote start
[x] Cancel search: remote startPage 29 of 221
Opening and closing
28
Opening and closing
The key set
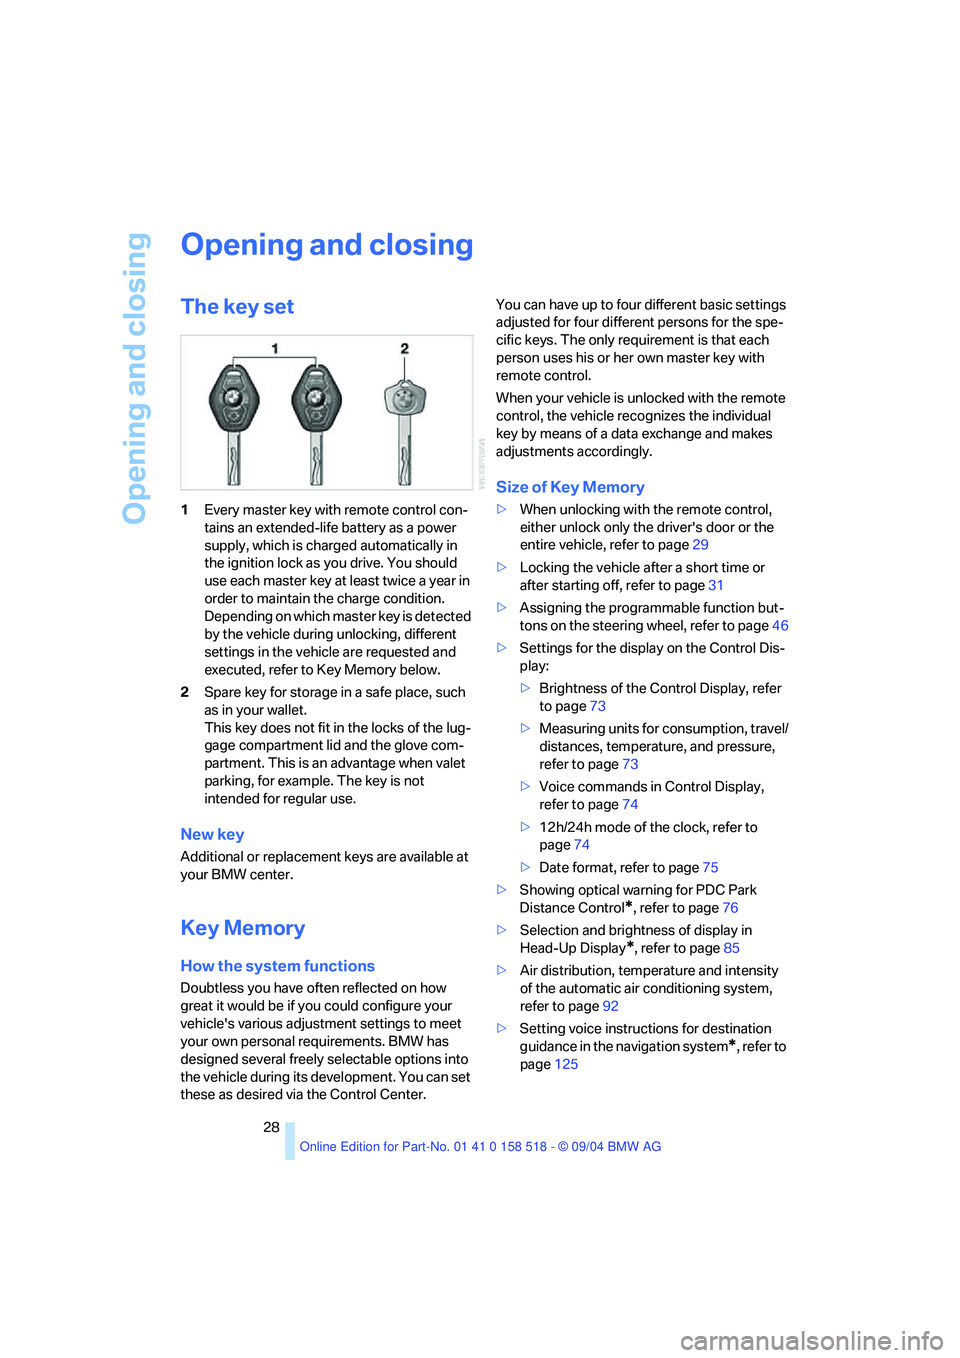
1Every master key with remote control con-
tains an extended-life battery as a power
supply, which is charged automatically in
the ignition lock as you drive. You should
use each master key at least twice a year in
order to maintain the charge condition.
Depending on which master key is detected
by the vehicle during unlocking, different
settings in the vehicle are requested and
executed, refer to Key Memory below.
2Spare key for storage in a safe place, such
as in your wallet.
This key does not fit in the locks of the lug-
gage compartment lid and the glove com-
partment. This is an advantage when valet
parking, for example. The key is not
intended for regular use.
New key
Additional or replacement keys are available at
your BMW center.
Key Memory
How the system functions
Doubtless you have often reflected on how
great it would be if you could configure your
vehicle's various adjustment settings to meet
your own personal requirements. BMW has
designed several freely selectable options into
the vehicle during its development. You can set
these as desired via the Control Center.You can have up to four different basic settings
adjusted for four different persons for the spe-
cific keys. The only requirement is that each
person uses his or her own master key with
remote control.
When your vehicle is unlocked with the remote
control, the vehicle recognizes the individual
key by means of a data exchange and makes
adjustments accordingly.
Size of Key Memory
>When unlocking with the remote control,
either unlock only the driver's door or the
entire vehicle, refer to page29
>Locking the vehicle after a short time or
after starting off, refer to page31
>Assigning the programmable function but-
tons on the steering wheel, refer to page46
>Settings for the display on the Control Dis-
play:
>Brightness of the Control Display, refer
to page73
>Measuring units for consumption, travel/
distances, temperature, and pressure,
refer to page73
>Voice commands in Control Display,
refer to page74
>12h/24h mode of the clock, refer to
page74
>Date format, refer to page75
>Showing optical warning for PDC Park
Distance Control
*, refer to page76
>Selection and brightness of display in
Head-Up Display
*, refer to page85
>Air distribution, temperature and intensity
of the automatic air conditioning system,
refer to page92
>Setting voice instructions for destination
guidance in the navigation system
*, refer to
page125
Page 74 of 221

Controls
73Reference
At a glance
Driving tips
Communication
Navigation
Entertainment
Mobility
Starting and stopping
>Select "Start" and press the controller.
The stopwatch starts at the displayed time.
>Select "Reset" and press the controller.
The stopwatch is reset and it restarts if it
was running beforehand.
>Select "Stop" and press the controller.
This stops the timer.
Taking an intermediate time reading
Select "Interim time" and press the controller.
The interim time appears below the ongoing
primary stopwatch count.
All of the remaining functions remain
available at all times while the stopwatch
is running. The stopwatch continues operation
in the background.<
Settings on Control Display
Brightness of Control Display
The brightness is automatically adapted to the
ambient lighting conditions. However, you can
change the base setting.
Control Center, for principle details, refer to
page16.
1.Press button.
This opens the start menu.
2.Press the controller to open the menu.
3.Select "Display settings" and press the
controller.
4.Select "Brightness" and press the control-
ler.5.If necessary, move the controller to the right
to select "Display Offset".
6.Turn the controller until the desired setting
is selected.
The setting is stored for the remote control cur-
rently in use.
Measurement units
You can change the measurement units for
consumption, distances, temperature and
pressure.
1.Open the menu.
2.Select "Display settings" and press the
controller.
3.Select "Units" and press the controller.
4.Select the menu item to be set.
5.Press the controller.
6.Select the desired measurement unit and
press the controller.
The settings are stored for the remote control
currently in use.
Page 78 of 221
Controls
77Reference
At a glance
Driving tips
Communication
Navigation
Entertainment
Mobility
Control Center, for principle details, refer to
page16.
1.Press button.
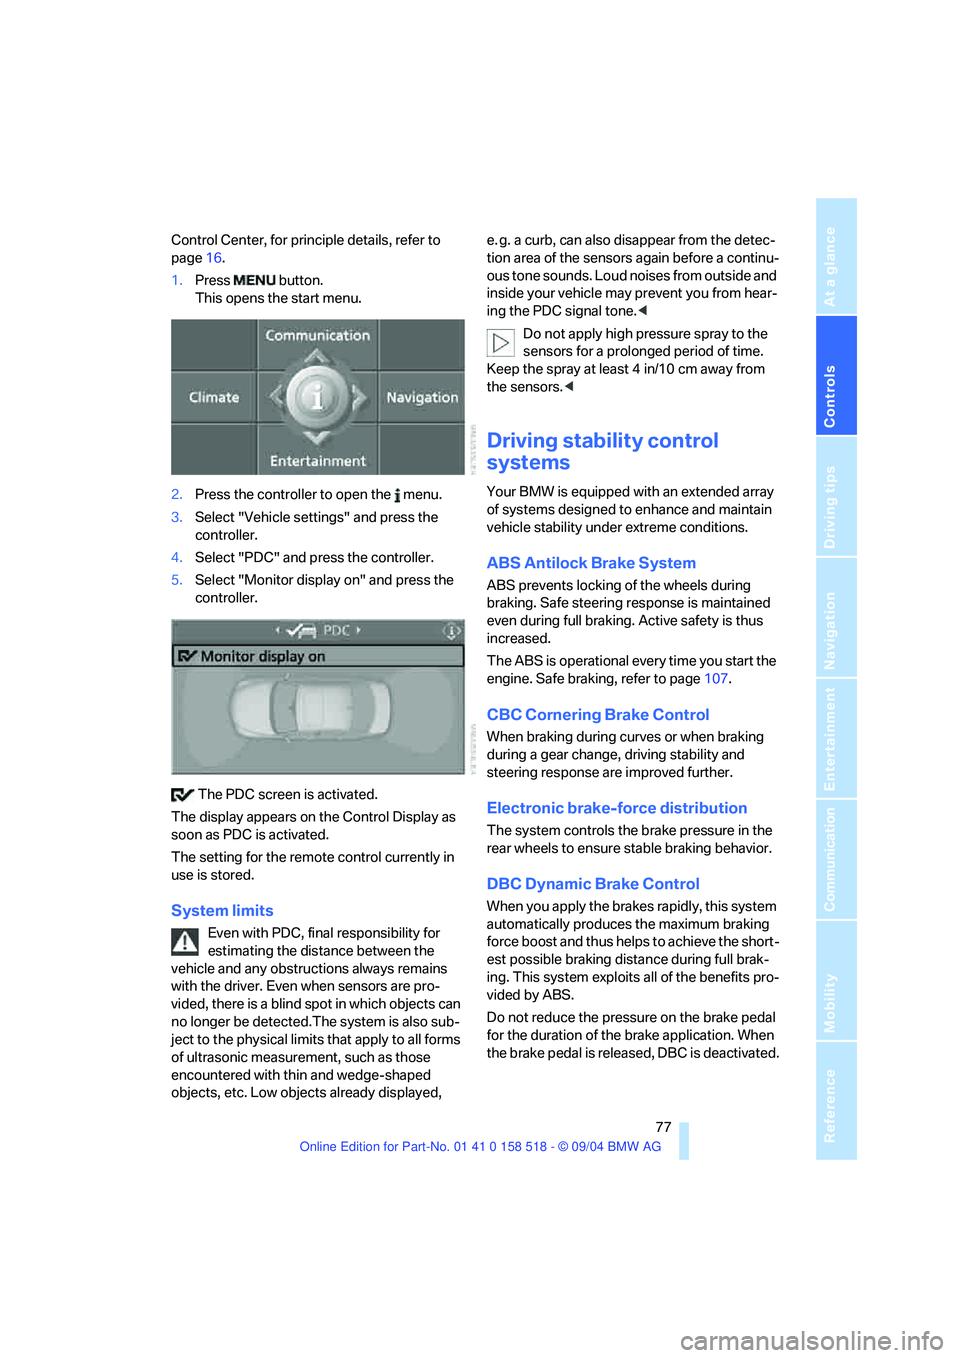
This opens the start menu.
2.Press the controller to open the menu.
3.Select "Vehicle settings" and press the
controller.
4.Select "PDC" and press the controller.
5.Select "Monitor display on" and press the
controller.
The PDC screen is activated.
The display appears on the Control Display as
soon as PDC is activated.
The setting for the remote control currently in
use is stored.
System limits
Even with PDC, final responsibility for
estimating the distance between the
vehicle and any obstructions always remains
with the driver. Even when sensors are pro-
vided, there is a blind spot in which objects can
no longer be detected.The system is also sub-
ject to the physical limits that apply to all forms
of ultrasonic measurement, such as those
encountered with thin and wedge-shaped
objects, etc. Low objects already displayed, e. g. a curb, can also disappear from the detec-
tion area of the sensors again before a continu-
ous tone sounds. Loud noises from outside and
inside your vehicle may prevent you from hear-
ing the PDC signal tone.<
Do not apply high pressure spray to the
sensors for a prolonged period of time.
Keep the spray at least 4 in/10 cm away from
the sensors.<
Driving stability control
systems
Your BMW is equipped with an extended array
of systems designed to enhance and maintain
vehicle stability under extreme conditions.
ABS Antilock Brake System
ABS prevents locking of the wheels during
braking. Safe steering response is maintained
even during full braking. Active safety is thus
increased.
The ABS is operational every time you start the
engine. Safe braking, refer to page107.
CBC Cornering Brake Control
When braking during curves or when braking
during a gear change, driving stability and
steering response are improved further.
Electronic brake-force distribution
The system controls the brake pressure in the
rear wheels to ensure stable braking behavior.
DBC Dynamic Brake Control
When you apply the brakes rapidly, this system
automatically produces the maximum braking
force boost and thus helps to achieve the short-
est possible braking distance during full brak-
ing. This system exploits all of the benefits pro-
vided by ABS.
Do not reduce the pressure on the brake pedal
for the duration of the brake application. When
the brake pedal is released, DBC is deactivated.
Page 86 of 221
Controls
85Reference
At a glance
Driving tips
Communication
Navigation
Entertainment
Mobility
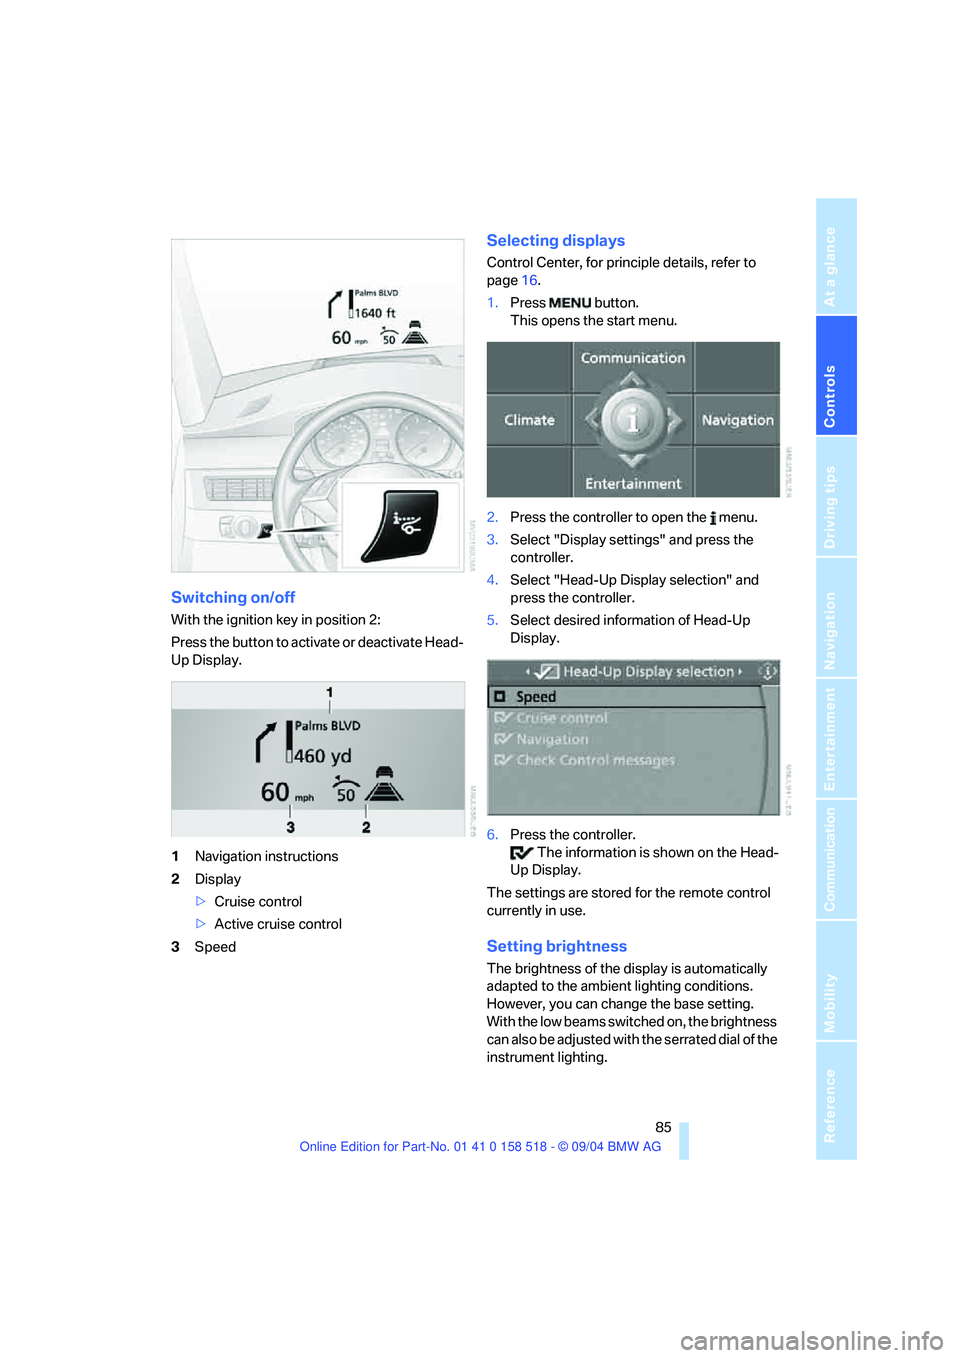
Switching on/off
With the ignition key in position 2:
Press the button to activate or deactivate Head-
Up Display.
1Navigation instructions
2Display
>Cruise control
>Active cruise control
3Speed
Selecting displays
Control Center, for principle details, refer to
page16.
1.Press button.
This opens the start menu.
2.Press the controller to open the menu.
3.Select "Display settings" and press the
controller.
4.Select "Head-Up Display selection" and
press the controller.
5.Select desired information of Head-Up
Display.
6.Press the controller.
The information is shown on the Head-
Up Display.
The settings are stored for the remote control
currently in use.
Setting brightness
The brightness of the display is automatically
adapted to the ambient lighting conditions.
However, you can change the base setting.
With the low beams switched on, the brightness
can also be adjusted with the serrated dial of the
instrument lighting.
Page 93 of 221

A congenial climate
92 The recirculated-air mode should not be used
over an extended period of time, as the air qual-
ity inside the vehicle deteriorates continu-
ously.<
Residual heat mode
Press this button when the engine
is switched off, but warm.
The heat stored in the engine is
used to heat the passenger com-
partment, e.g. while stopped at a school to pick
up a child.
You can adjust the automatic climate control
settings in ignition key position 1.
Provided that the engine has warmed to its nor-
mal operating temperature and the battery is
charged, you can use this function for up to
15 minutes after switching off the ignition. The
LED in the button lights up to confirm compli-
ance with both of these conditions.
Switching off automatic climate control
The air volume, the heater and the
cooling function are all switched
off.
You can restart the automatic cli-
mate control by pressing any of its buttons
except the REST button.
Settings using Control Center
Ignition key:
>On vehicles with separate drives for audio
CDs and navigation DVDs, ignition key in
position 2
>In vehicles with one drive for audio CDs,
ignition key in position 1Control Center, for principle details, refer to
page16.
1.Press button.
This opens the start menu.
2.Move the controller to the left to open "Cli-
mate".
You can set the following:
>Manual air distribution, separate for driver's
side and passenger side
>Adjusting temperature in upper body region
>Intensity of the AUTO program
The settings are stored for the remote control
currently in use.
Manual air distribution
You can preset your air distribution yourself and
also individually adjust the air temperature in
the upper body area.
1.Select "Vent settings" and press the con-
troller.
2.Move the controller to select the desired
field and turn the controller to adjust the air
distribution.
1Airflow directed toward the windshield and
side windows, driver's side only
2Airflow for the upper body
Page 97 of 221
Practical interior accessories
96
Practical interior accessories
Integrated universal remote
control*
The concept
The integrated universal remote control can
replace as many as three hand-held transmit-
ters for various remote-controlled accessories,
such as door openers and house alarm sys-
tems. The integrated universal remote control
registers and stores signals from the original
hand-held transmitters.
The signal of an original hand-held transmitter
can be programmed on one of the three mem-
ory buttons1. Then with the ignition key in
position 2, this programmed memory button1
can be used to operate the relevant accessory.
The LED 2 flashes to confirm transmission of
the signal.
Should you sell your vehicle one day, be sure to
delete the stored programs beforehand for your
safety, refer to page97.
To prevent possible damage or injury,
before programming or using the inte-
grated universal remote control, always inspect
the immediate area to make certain that no peo-
ple, animals or objects are within the travel
range of the device. Also, comply with the
safety precautions of the original hand-held
transmitter.<
Checking compatibility
If you see this symbol on the packaging
or in the manual supplied with the orig-
inal hand-held transmitter, it is safe to
assume that it is compatible with the integrated
universal remote control.
If you have additional questions, please
consult your BMW center or call 1-800-
355-3515.
You can also visit these websites:
www.bmwusa.com or
www.homelink.com. HomeLink is a registered trademark owned by
Johnson Controls, Inc.<
Programming
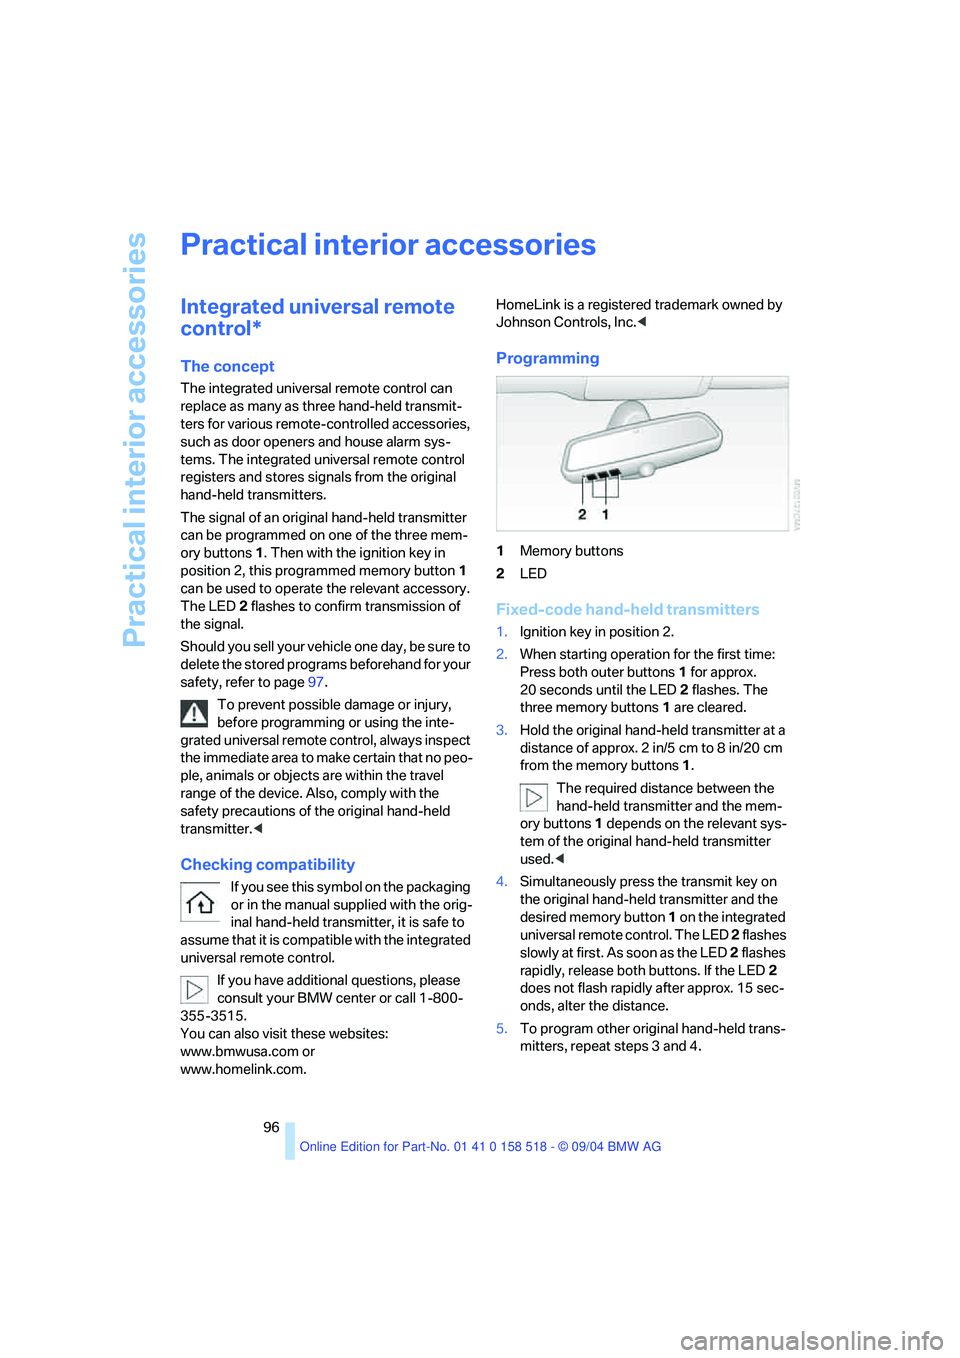
1Memory buttons
2LED
Fixed-code hand-held transmitters
1.Ignition key in position 2.
2.When starting operation for the first time:
Press both outer buttons1 for approx.
20 seconds until the LED2 flashes. The
three memory buttons 1 are cleared.
3.Hold the original hand-held transmitter at a
distance of approx. 2 in/5 cm to 8 in/20 cm
from the memory buttons1.
The required distance between the
hand-held transmitter and the mem-
ory buttons1 depends on the relevant sys-
tem of the original hand-held transmitter
used.<
4.Simultaneously press the transmit key on
the original hand-held transmitter and the
desired memory button 1 on the integrated
universal remote control. The LED 2 flashes
slowly at first. As soon as the LED 2 flashes
rapidly, release both buttons. If the LED2
does not flash rapidly after approx. 15 sec-
onds, alter the distance.
5.To program other original hand-held trans-
mitters, repeat steps 3 and 4.
Page 127 of 221

Destination guidance
126 4.Select "Languages" and press the control-
ler.
5.Select "Navigation voice instructions on"
and press the controller.
The voice instructions are switched on.
The setting is stored for the remote control cur-
rently in use.
Repeat voice instructions and cancel
With the programmable buttons on the steering
wheel, you can also execute the following func-
tions, refer to page46:
>Repeat the voice instruction:
Press button.
>Switch voice instructions on/off:
Hold the button down.
Adjusting volume
1.Repeat the last voice instruction, if neces-
sary.
2.Turn the button during the voice instruction
to select the desired volume.
This volume is independent of the volume of the
audio and video sources.
The setting is stored for the remote control cur-
rently in use.
Route display
You have the option of displaying various views
of the route during destination guidance.
Displaying arrow view
1.Select "Navigation" and press the control-
ler.
2.Select "Arrow display" and press the con-
troller.
Displaying route map
You can have your current position displayed on
a map. After starting the destination guidance,
the planned route is shown on the map.
Page 134 of 221
Navigation
Entertainment
Driving tips
133Reference
At a glance
Controls
Communication
Mobility
Operation using Control Center
Control Center, for principle details, refer to
page16.
1.Press button.
This opens the start menu.
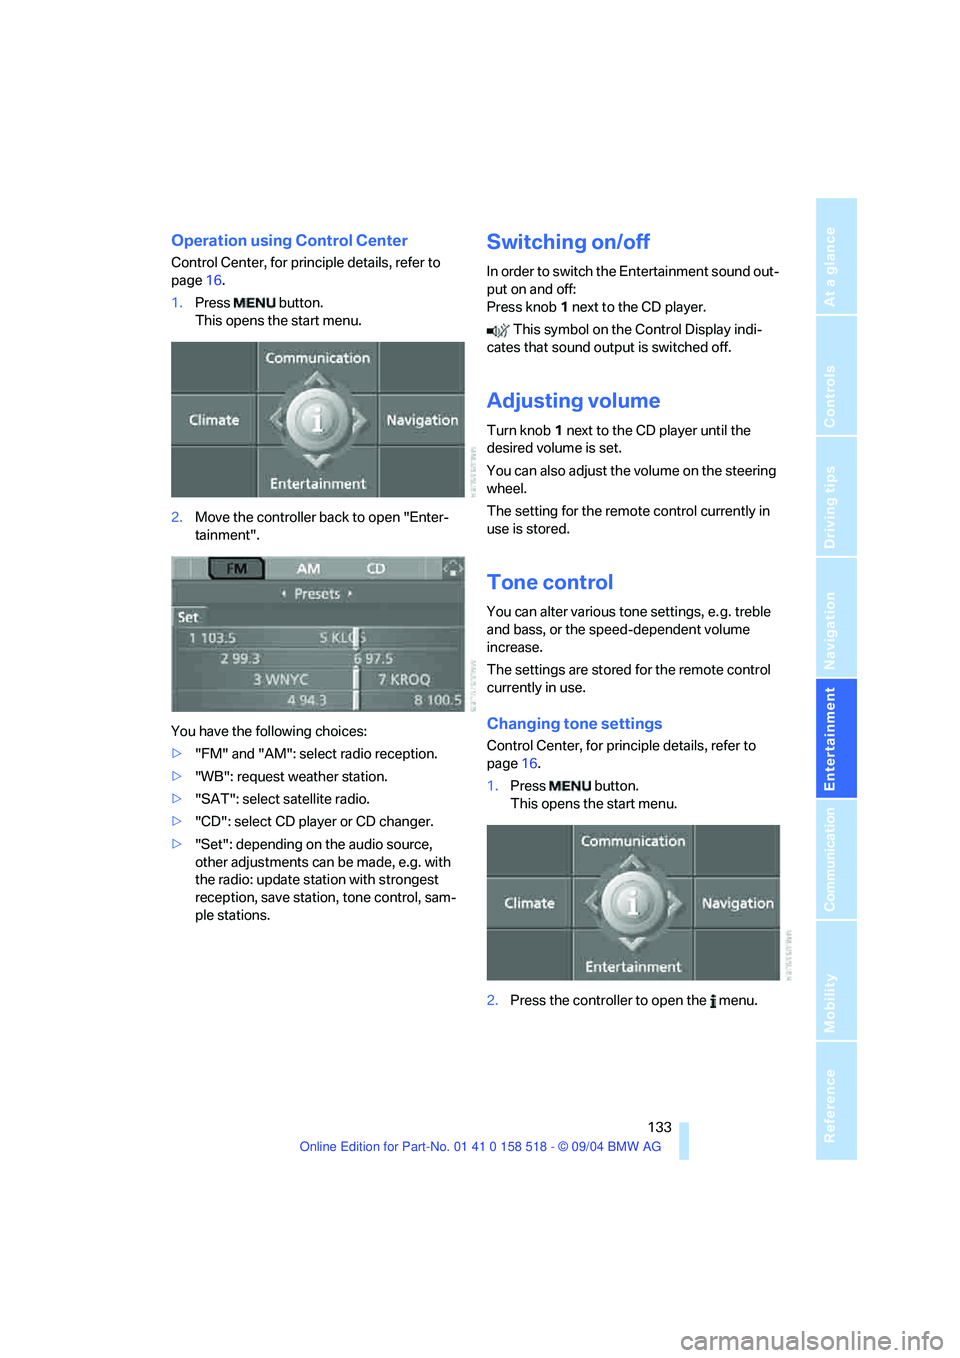
2.Move the controller back to open "Enter-
tainment".
You have the following choices:
>"FM" and "AM": select radio reception.
>"WB": request weather station.
>"SAT": select satellite radio.
>"CD": select CD player or CD changer.
>"Set": depending on the audio source,
other adjustments can be made, e.g. with
the radio: update station with strongest
reception, save station, tone control, sam-
ple stations.
Switching on/off
In order to switch the Entertainment sound out-
put on and off:
Press knob1 next to the CD player.
This symbol on the Control Display indi-
cates that sound output is switched off.
Adjusting volume
Turn knob1 next to the CD player until the
desired volume is set.
You can also adjust the volume on the steering
wheel.
The setting for the remote control currently in
use is stored.
Tone control
You can alter various tone settings, e. g. treble
and bass, or the speed-dependent volume
increase.
The settings are stored for the remote control
currently in use.
Changing tone settings
Control Center, for principle details, refer to
page16.
1.Press button.
This opens the start menu.
2.Press the controller to open the menu.