2005 BMW 525I SEDAN brake light
[x] Cancel search: brake lightPage 65 of 221

Driving
64
Driver interventions
Anytime the driver presses down on the
accelerator pedal, any automatic braking
action by the system is interrupted until the
pedal is fully released. After doing this, release
the accelerator and the system again controls
your cruising speed and distance setting. While
driving with activated system, resting your foot
on the accelerator pedal will cause the system
not to brake even if necessary. Be certain that
floormats or other objects on the vehicle floor
do not interfere with movement of the accelera-
tor pedal.<
While active cruise control is capable of
braking your vehicle automatically when
you approach a slower vehicle ahead, it is
important to be aware that the ability of the sys-
tem to apply the brakes is also limited, particu-
larly if you are driving down a steep grade or
when you reduce your desired speed sharply.
The system cannot stop your vehicle. It uses
only a portion of braking system capacity and
does not utilize the full capacity of the vehicle
braking system. Therefore, the system cannot
decrease your speed for large differences in
speed between your vehicle and the vehicle
ahead. Examples: during emergency braking,
when you approach a vehicle traveling at a
much lower speed than your own speed such as
approaching a toll booth or when a much slower
vehicle cuts in front of you at close range.<
Whenever active cruise control
recognizes a situation that requires
driver braking because the system
capacity has been reached or has
been exceeded, the system alerts
the driver by flashing this symbol in the instru-
ment cluster and sounding a signal.
Swerving vehicles
When a vehicle moves from an adjacent lane
into your lane, active cruise control will not rec-
ognize this vehicle until it is fully in your lane
ahead of your vehicle.
Malfunction
The indicator lamp lights up and a mes-
sage appears on the Control Display.
The build-up of foreign matter, e. g.,
snow, ice, dirt, road debris etc., can lead to
reduced detection performance of active cruise
control. You should check the sensor under the
front bumper and clean it as necessary prior to
driving your vehicle. If the sensor becomes cov-
ered by foreign matter or has a malfunction, it is
possible that the sensor will no longer be able to
detect vehicles in front of you. After the system
recognizes that the sensor is no longer func-
tional, a message is displayed on the Control
Display and an acoustic signal is emitted.
When the system does not recognize any
objects, e.g. on infrequently traveled roads
without a shoulder or guard rails, the system
can automatically deactivate temporarily.
Page 79 of 221
Technology for comfort, convenience and safety
78
DSC Dynamic Stability Control
The system prevents traction loss in the driving
wheels when starting off and accelerating. DSC
also detects unstable driving conditions such
as a fishtailing rear end or sliding of the front
wheels. In these cases, DSC helps the vehicle
maintain a safe course within physical limits by
reducing engine output and through braking
actions in the individual wheels.
The DSC is operational every time you start the
engine.
The laws of physics cannot be repealed,
even with DSC. An appropriate driving
style always remains the responsibility of the
driver. Therefore, do not reduce the additional
safety margin again by taking risks.<
DTC Dynamic Traction Control
DTC is a version of DSC in which the drive out-
put is optimized for particular road conditions,
e.g. unplowed snow-covered roads. The sys-
tem assures the maximal drive output, but with
reduced driving stability. It is therefore neces-
sary to drive with appropriate caution.
You may find it useful to briefly activate DTC
under the following special circumstances:
>When driving on snowy inclines, in slush, or
on unplowed, snow-covered road surfaces
>When rocking a stuck vehicle free or start-
ing off in deep snow or on loose ground
>When driving with snow chains
Activating DTC
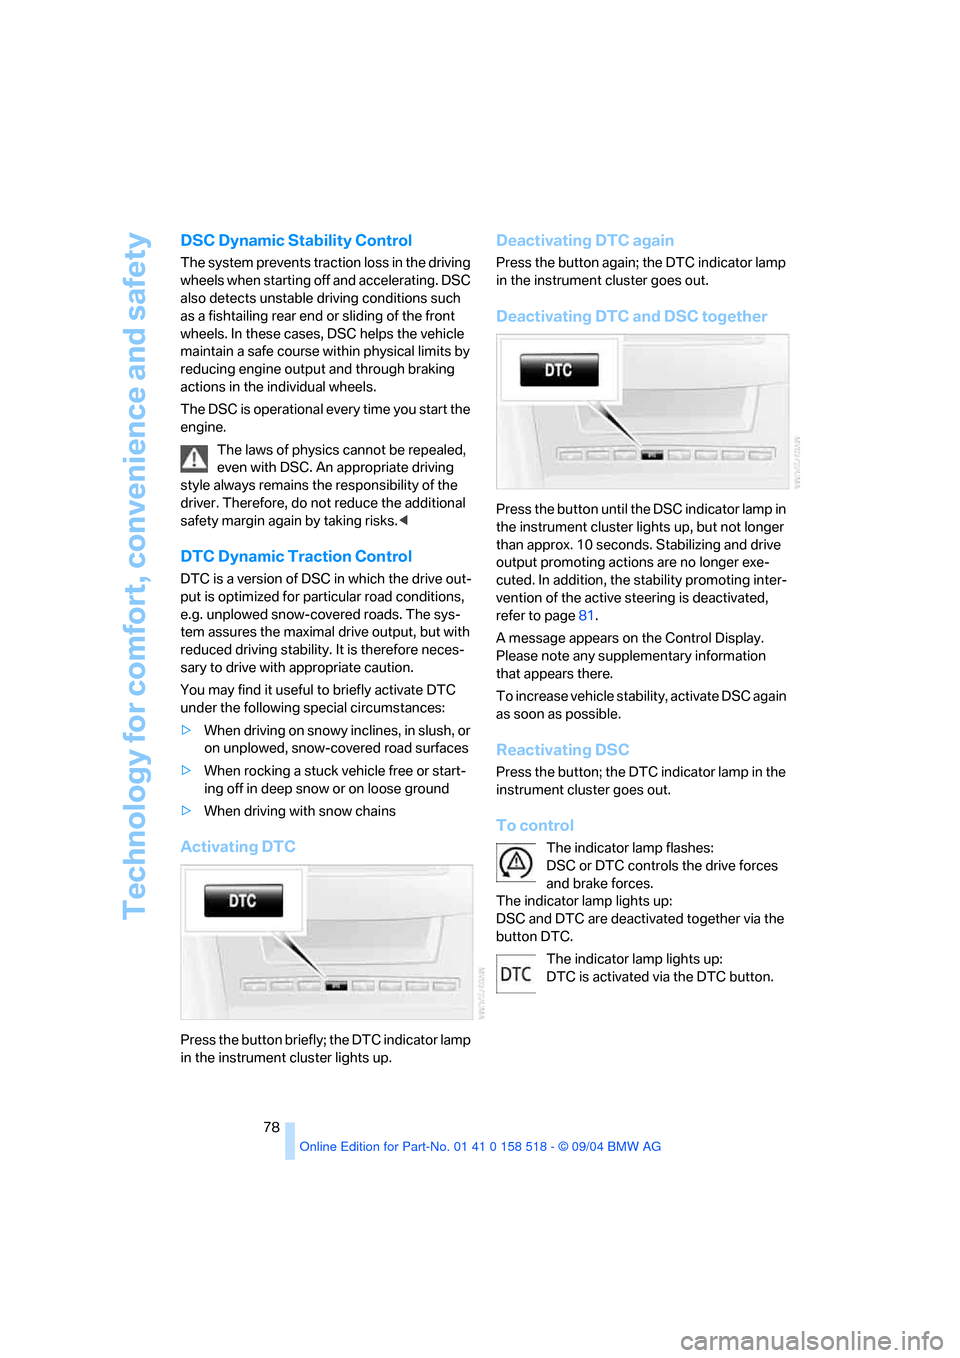
Press the button briefly; the DTC indicator lamp
in the instrument cluster lights up.
Deactivating DTC again
Press the button again; the DTC indicator lamp
in the instrument cluster goes out.
Deactivating DTC and DSC together
Press the button until the DSC indicator lamp in
the instrument cluster lights up, but not longer
than approx. 10 seconds. Stabilizing and drive
output promoting actions are no longer exe-
cuted. In addition, the stability promoting inter-
vention of the active steering is deactivated,
refer to page81.
A message appears on the Control Display.
Please note any supplementary information
that appears there.
To increase vehicle stability, activate DSC again
as soon as possible.
Reactivating DSC
Press the button; the DTC indicator lamp in the
instrument cluster goes out.
To control
The indicator lamp flashes:
DSC or DTC controls the drive forces
and brake forces.
The indicator lamp lights up:
DSC and DTC are deactivated together via the
button DTC.
The indicator lamp lights up:
DTC is activated via the DTC button.
Page 80 of 221

Controls
79Reference
At a glance
Driving tips
Communication
Navigation
Entertainment
Mobility
Malfunction in vehicle stability-control
systems
The brake system warning lamp lights
up in red, appearing together with the
indicator lamps for ABS and DSC. A
message appears on the Control Dis-
play. The driving stability control sys-
tems are deactivated. Conventional
braking efficiency remains available
without limitations. While you may con-
tinue, you should remember to proceed cau-
tiously and drive defensively while avoiding full
brake applications. Have the system checked
as soon as possible.
Display of the previously described
malfunction on Canadian models.
The indicator lamp for DSC lights up; a
message appears on the Control Dis-
play. DSC and DTC are deactivated.
The stability maintenance functions are no
longer available. The vehicle remains in running
order. Have the system checked as soon as
possible.
The warning lamp for the brake system
lights up in yellow; a message appears
on the Control Display. DBC has failed.
Have the system checked as soon as possible.
Display of the previously described
malfunction on Canadian models.
Active roll stabilization*
The concept
Active roll stabilization minimizes body roll and
optimizes vehicle stability during cornering and
evasive maneuvers.
Dynamic stabilizers at the front and rear axles
form the basis for active roll stabilization. Sus-
pension compliance adapts to suit driving con-
ditions, varying from performance-oriented during cornering to smooth and comfort-ori-
ented when the vehicle is proceeding in a
straight line. During vehicle operation, the sys-
tem continuously runs through closed-loop
control cycles lasting only fractions of a second.
The system assumes operational status each
time you start the engine.
Malfunction
The warning lamp lights up and a mes-
sage appears on the Control Display.
There is a malfunction in the system.
Have the system checked as soon as possible.
If there is a malfunction in the system,
please remember to adapt your speed
accordingly, especially in curves. The suspen-
s i o n w il l b e n o t i c ea b ly s o f t e r a n d t h e v e h i cl e w il l
display a greater tendency to tilt during corner-
ing and in crosswinds. If a message stating that
you should stop appears on the Control Display,
stop and switch off the engine as soon as pos-
sible. In this case the oil level in the reservoir
may have dropped below the minimum, possi-
bly owing to a leak in the hydraulic system. Do
not continue driving. Contact your BMW cen-
ter.<
Flat Tire Monitor
The concept
The Flat Tire Monitor keeps track of the infla-
tion pressures in the four mounted tires as you
drive. The system provides an alert whenever
the inflation pressure drops significantly in rela-
tion to the pressure in another tire.
In the event of a pressure loss, the rolling radius
and therefore the rotation speed of the wheels
change. This change is detected and is
reported as a flat tire.
Functional requirement
In order to assure the reliable reporting of a flat
tire, the system must be initialized for the cor-
rect tire inflation pressure.
Perform the initialization immediately
after correcting the inflation pressure,
Page 83 of 221
Technology for comfort, convenience and safety
82
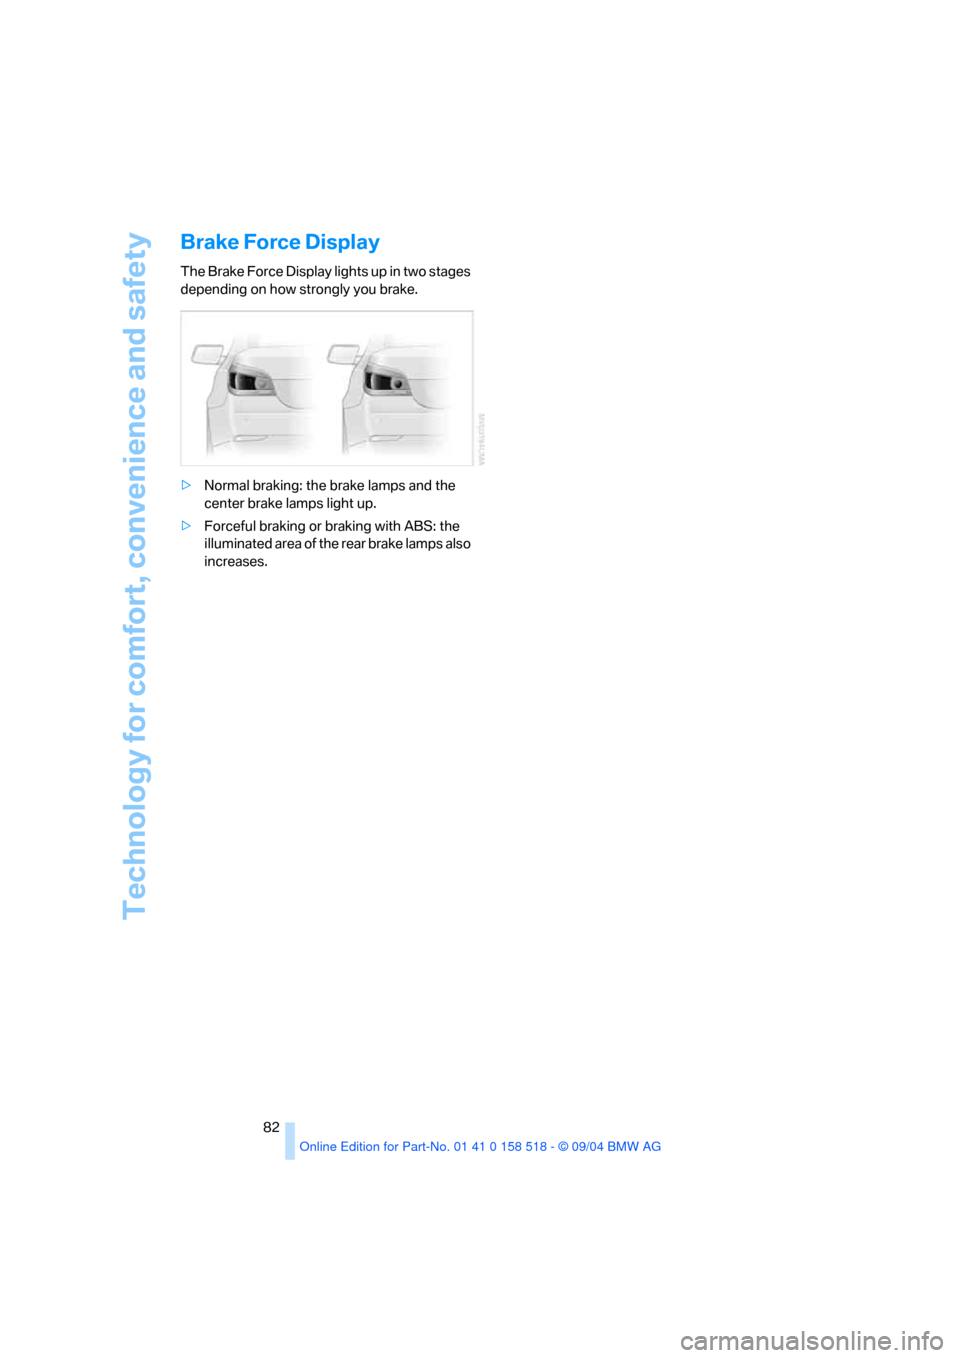
Brake Force Display
The Brake Force Display lights up in two stages
depending on how strongly you brake.
>Normal braking: the brake lamps and the
center brake lamps light up.
>Forceful braking or braking with ABS: the
illuminated area of the rear brake lamps also
increases.
Page 108 of 221
Driving tips
107Reference
At a glance
Controls
Communication
Navigation
Entertainment
Mobility
Portable phone in the vehicle
BMW discourages the use of mobile
communications devices, e. g. portable
phones, inside the vehicle without a direct con-
nection to an outside antenna. Otherwise, the
vehicle electronics and mobile communication
device can influence one another. In addition,
there is no assurance that the radiation which
results from transmission will be dissipated
from the vehicle interior.<
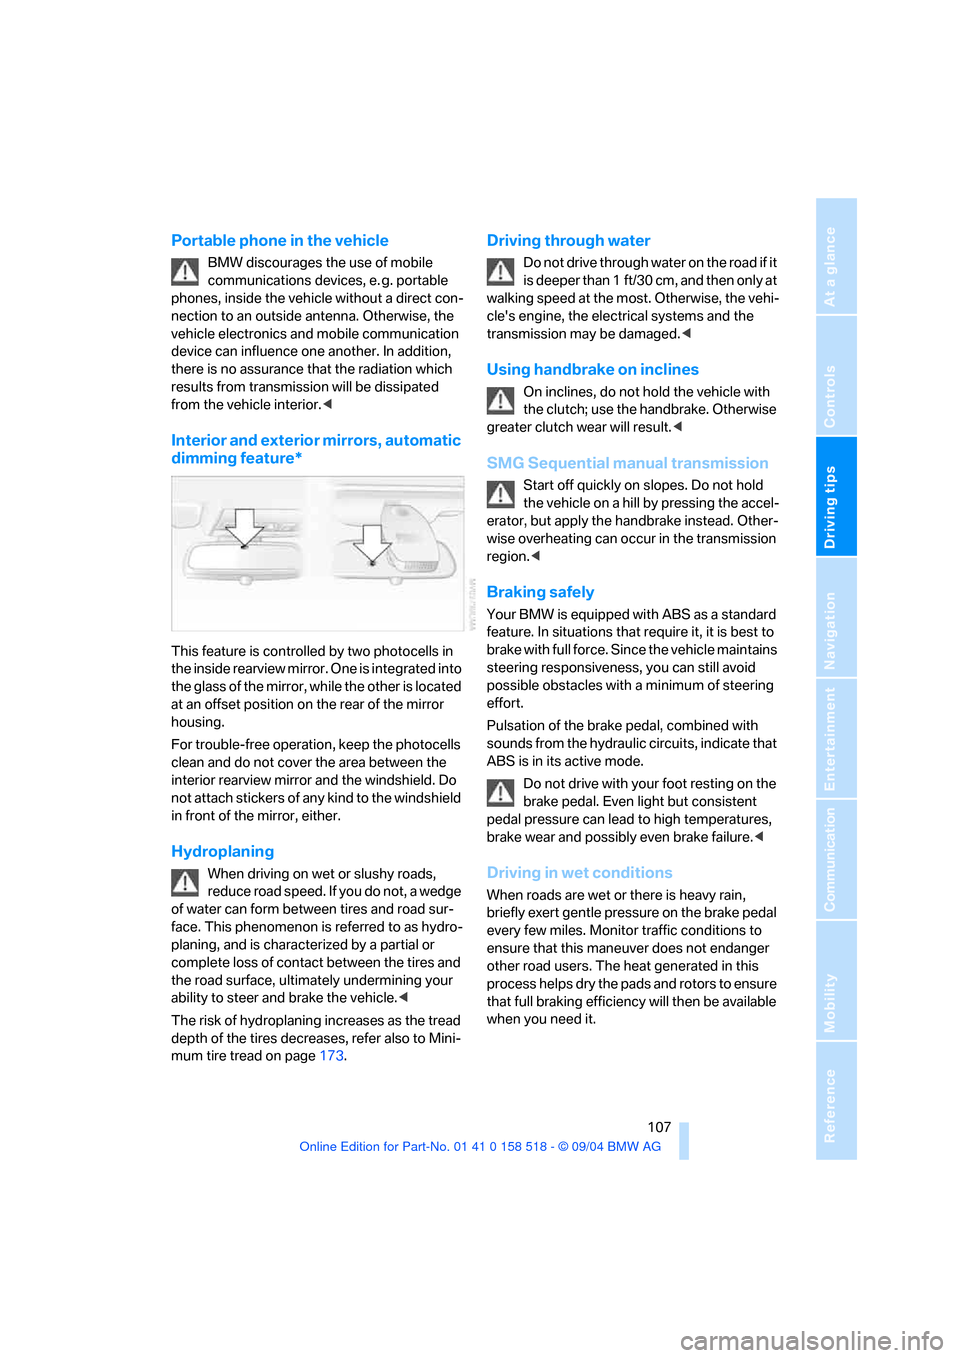
Interior and exterior mirrors, automatic
dimming feature*
This feature is controlled by two photocells in
the inside rearview mirror. One is integrated into
the glass of the mirror, while the other is located
at an offset position on the rear of the mirror
housing.
For trouble-free operation, keep the photocells
clean and do not cover the area between the
interior rearview mirror and the windshield. Do
not attach stickers of any kind to the windshield
in front of the mirror, either.
Hydroplaning
When driving on wet or slushy roads,
reduce road speed. If you do not, a wedge
of water can form between tires and road sur-
face. This phenomenon is referred to as hydro-
planing, and is characterized by a partial or
complete loss of contact between the tires and
the road surface, ultimately undermining your
ability to steer and brake the vehicle.<
The risk of hydroplaning increases as the tread
depth of the tires decreases, refer also to Mini-
mum tire tread on page173.
Driving through water
Do not drive through water on the road if it
is deeper than 1 ft/30 cm, and then only at
walking speed at the most. Otherwise, the vehi-
cle's engine, the electrical systems and the
transmission may be damaged.<
Using handbrake on inclines
On inclines, do not hold the vehicle with
the clutch; use the handbrake. Otherwise
greater clutch wear will result.<
SMG Sequential manual transmission
Start off quickly on slopes. Do not hold
the vehicle on a hill by pressing the accel-
erator, but apply the handbrake instead. Other-
wise overheating can occur in the transmission
region.<
Braking safely
Your BMW is equipped with ABS as a standard
feature. In situations that require it, it is best to
brake with full force. Since the vehicle maintains
steering responsiveness, you can still avoid
possible obstacles with a minimum of steering
effort.
Pulsation of the brake pedal, combined with
sounds from the hydraulic circuits, indicate that
ABS is in its active mode.
Do not drive with your foot resting on the
brake pedal. Even light but consistent
pedal pressure can lead to high temperatures,
brake wear and possibly even brake failure.<
Driving in wet conditions
When roads are wet or there is heavy rain,
briefly exert gentle pressure on the brake pedal
every few miles. Monitor traffic conditions to
ensure that this maneuver does not endanger
other road users. The heat generated in this
process helps dry the pads and rotors to ensure
that full braking efficiency will then be available
when you need it.
Page 109 of 221
Things to remember when driving
108
Hills
To prevent overheating and the resulting
reduced efficiency of the brake system,
drive long or steep downhill gradients in the
gear in which the least braking is required. Even
light but consistent pedal pressure can lead to
high temperatures, brake wear and possibly
even brake failure.<
You can further enhance the engine's braking
action by selecting a lower gear in the automatic
transmission's manual mode, downshifting as
far as first gear on extremely steep stretches,
refer to page56. This strategy helps you avoid
placing excessive loads on the brake system.
Never drive with the clutch pressed or
allow the vehicle to coast with the trans-
mission in Neutral – or with the engine switched
off – there is no engine braking when the trans-
mission is in Neutral, and no power-assist for
brakes and steering when the engine is not run-
ning.
Never allow floor mats, carpets or any other
objects to protrude into the area around the
accelerator and brake pedals and obstruct their
movement.<
Corrosion on brake rotors
When the vehicle is driven only occasionally,
during extended periods when the vehicle is not
used at all, and in operating conditions where
brake applications are less frequent, there is an
increased tendency for corrosion to form on
rotors, while contaminants accumulate on the
brake pads. This occurs because the minimum
pressure which must be exerted by the pads
during brake applications to clean the rotors is
not reached.
Should corrosion form on the brake rotors, the
brakes will tend to respond with a pulsating
effect that even extended application will fail to
cure.
When the vehicle is parked
Condensation forms in the air conditioner sys-
tem during operation, and then exits under the
vehicle.
Traces of condensed water under the
vehicle are therefore normal
.
Before driving into a car wash
To prevent the exterior mirrors on this vehicle
from being damaged, always fold them in by
hand before entering an automatic car wash.
Cargo loading
To avoid loading the tires beyond their
approved carrying capacity, never over-
load the vehicle. Overloading can lead to over-
heating and increases the rate at which damage
develops inside the tires. The ultimate result
can assume the form of a sudden blow-out.<
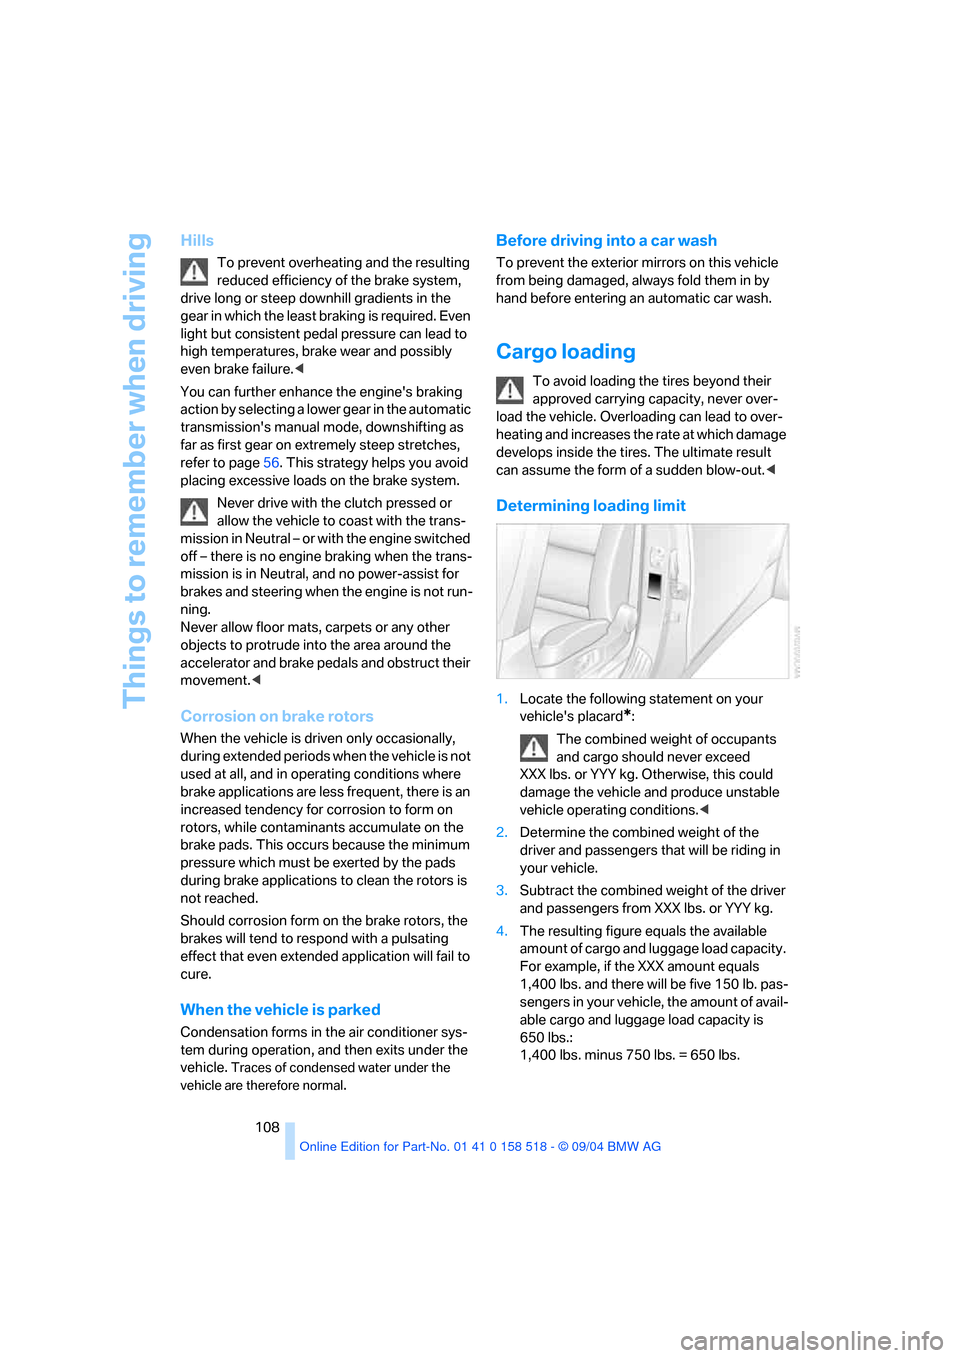
Determining loading limit
1.Locate the following statement on your
vehicle's placard
*:
The combined weight of occupants
and cargo should never exceed
XXX lbs. or YYY kg. Otherwise, this could
damage the vehicle and produce unstable
vehicle operating conditions.<
2.Determine the combined weight of the
driver and passengers that will be riding in
your vehicle.
3.Subtract the combined weight of the driver
and passengers from XXX lbs. or YYY kg.
4.The resulting figure equals the available
amount of cargo and luggage load capacity.
For example, if the XXX amount equals
1,400 lbs. and there will be five 150 lb. pas-
sengers in your vehicle, the amount of avail-
able cargo and luggage load capacity is
650 lbs.:
1,400 lbs. minus 750 lbs. = 650 lbs.
Page 180 of 221
Mobility
179Reference
At a glance
Controls
Driving tips
Communica-
Navigation
Entertainment
sure to escape, then continue turning to
open.
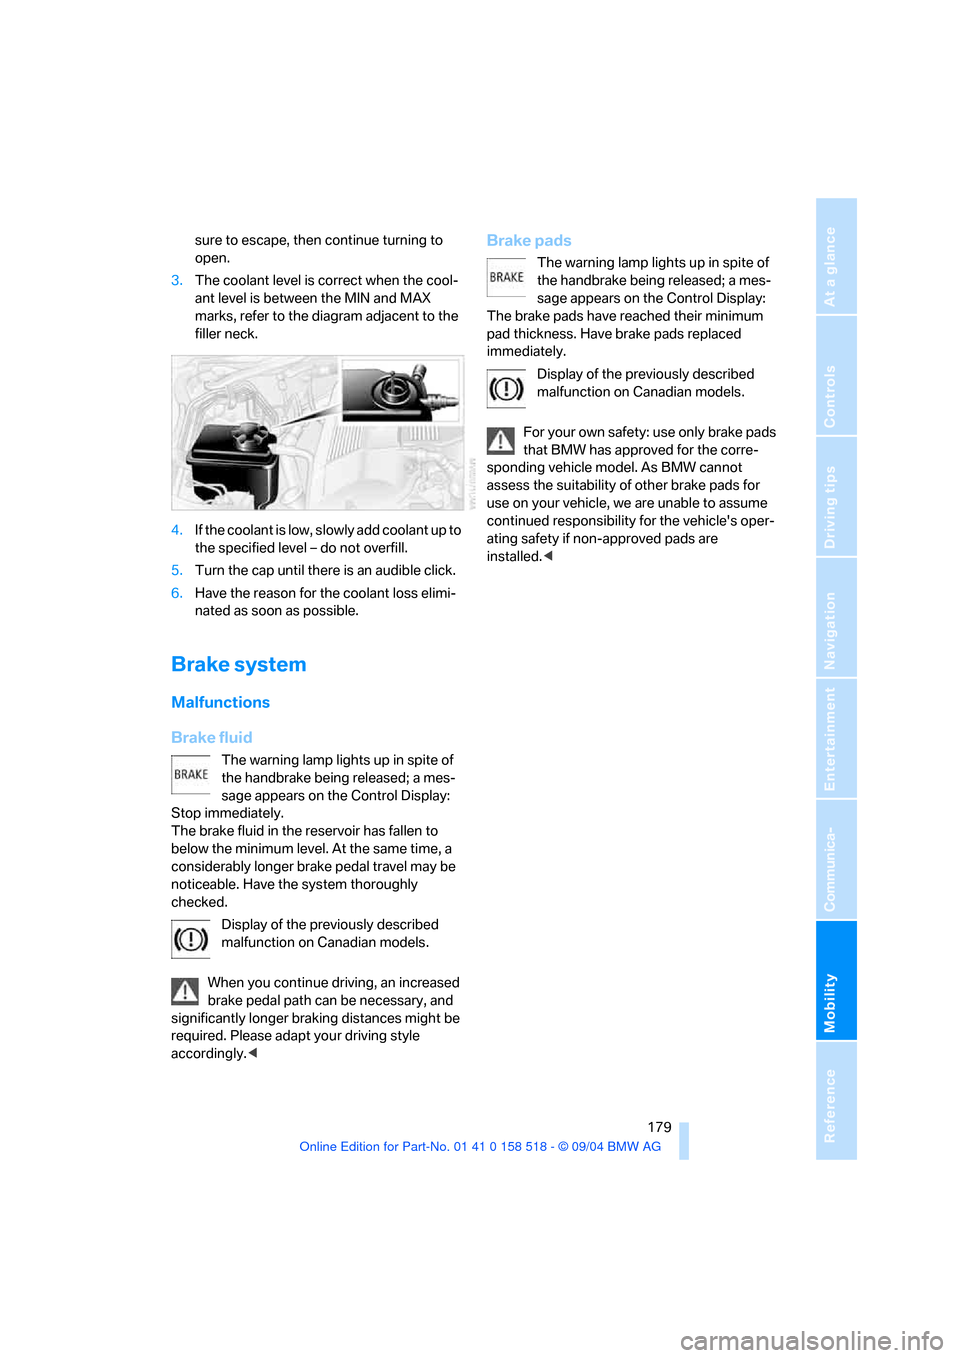
3.The coolant level is correct when the cool-
ant level is between the MIN and MAX
marks, refer to the diagram adjacent to the
filler neck.
4.If the coolant is low, slowly add coolant up to
the specified level – do not overfill.
5.Turn the cap until there is an audible click.
6.Have the reason for the coolant loss elimi-
nated as soon as possible.
Brake system
Malfunctions
Brake fluid
The warning lamp lights up in spite of
the handbrake being released; a mes-
sage appears on the Control Display:
Stop immediately.
The brake fluid in the reservoir has fallen to
below the minimum level. At the same time, a
considerably longer brake pedal travel may be
noticeable. Have the system thoroughly
checked.
Display of the previously described
malfunction on Canadian models.
When you continue driving, an increased
brake pedal path can be necessary, and
significantly longer braking distances might be
required. Please adapt your driving style
accordingly.<
Brake pads
The warning lamp lights up in spite of
the handbrake being released; a mes-
sage appears on the Control Display:
The brake pads have reached their minimum
pad thickness. Have brake pads replaced
immediately.
Display of the previously described
malfunction on Canadian models.
For your own safety: use only brake pads
that BMW has approved for the corre-
sponding vehicle model. As BMW cannot
assess the suitability of other brake pads for
use on your vehicle, we are unable to assume
continued responsibility for the vehicle's oper-
ating safety if non-approved pads are
installed.<
Page 185 of 221
Replacing components
184
Side-mounted turn signals
Bulb 5 watts, W 5 W
1.Press back against the front edge of the
light with the tip of your finger, then pivot it
out.
2.Turn the bulb holder to the left and remove.
3.Extract the bulb for replacement.
Side marker lamps, front and rear
To replace, please go to your BMW center or a
workshop that works according to BMW repair
procedures with correspondingly trained per-
sonnel.
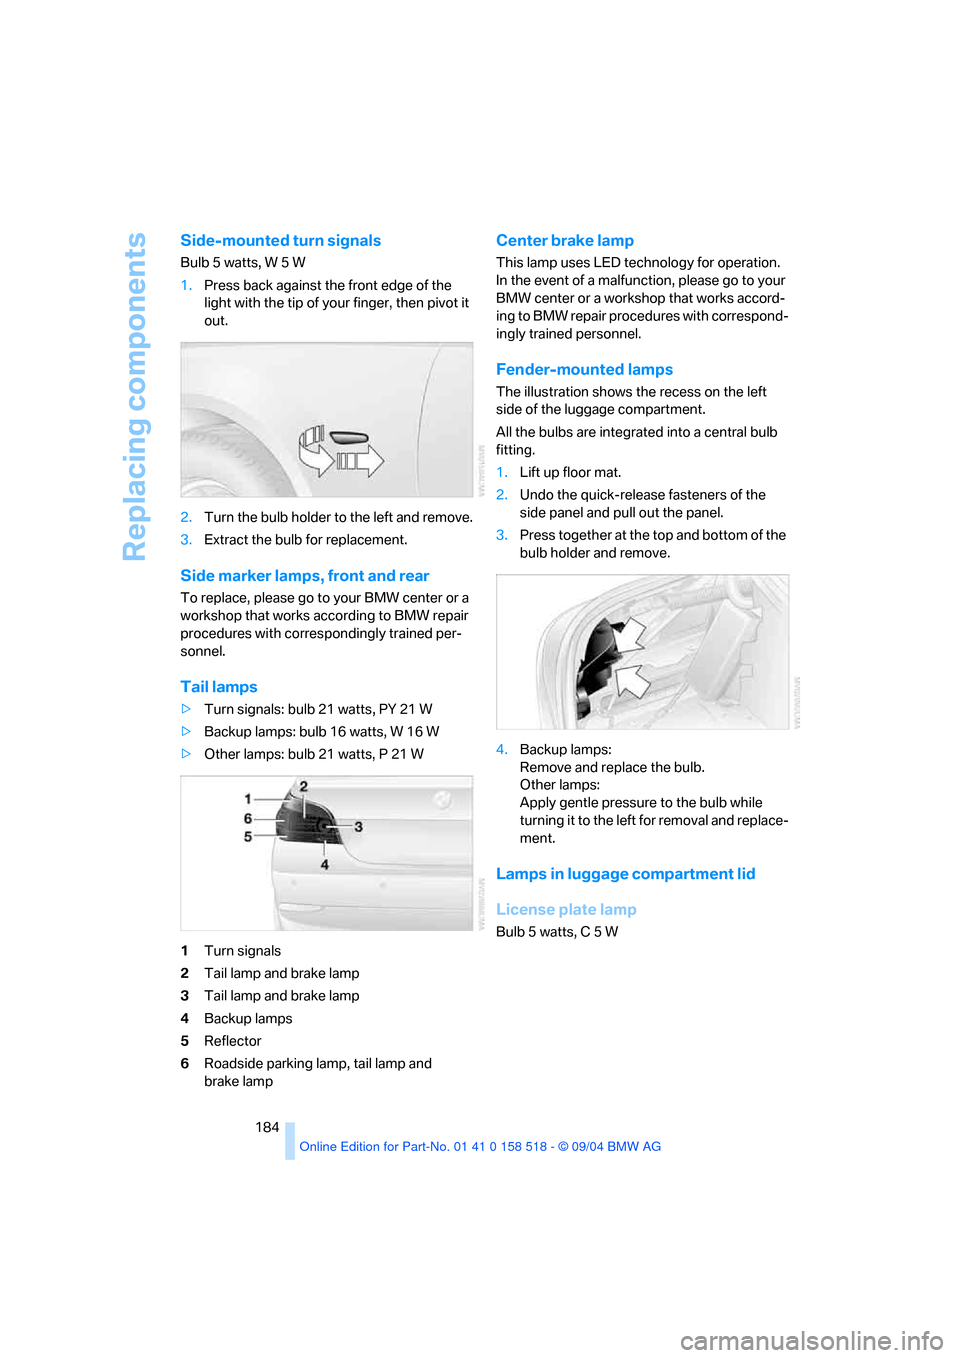
Tail lamps
>Turn signals: bulb 21 watts, PY 21 W
>Backup lamps: bulb 16 watts, W 16 W
>Other lamps: bulb 21 watts, P 21 W
1Turn signals
2Tail lamp and brake lamp
3Tail lamp and brake lamp
4Backup lamps
5Reflector
6Roadside parking lamp, tail lamp and
brake lamp
Center brake lamp
This lamp uses LED technology for operation.
In the event of a malfunction, please go to your
BMW center or a workshop that works accord-
ing to BMW repair procedures with correspond-
ingly trained personnel.
Fender-mounted lamps
The illustration shows the recess on the left
side of the luggage compartment.
All the bulbs are integrated into a central bulb
fitting.
1.Lift up floor mat.
2.Undo the quick-release fasteners of the
side panel and pull out the panel.
3.Press together at the top and bottom of the
bulb holder and remove.
4.Backup lamps:
Remove and replace the bulb.
Other lamps:
Apply gentle pressure to the bulb while
turning it to the left for removal and replace-
ment.
Lamps in luggage compartment lid
License plate lamp
Bulb 5 watts, C 5 W