2005 BMW 525I remote control
[x] Cancel search: remote controlPage 42 of 221
Controls
41Reference
At a glance
Driving tips
Communication
Navigation
Entertainment
Mobility
Safety feature
1.Close the driver's door and turn the ignition
key to position 0 or 2.
2.Press the desired memory button1 or2
and maintain pressure until the adjustment
process has been completed.
If the button was pressed inadvertently:
press the button again; the LED goes out.
Position stored in key
The positions of the driver's seat, the external
rearview mirrors, and steering wheel are stored
for the remote key currently in use.
You can choose when the position is requested:
>Request when unlocking vehicle
>Request when opening driver's door
Control Center, for principle details, refer to
page16.
1.Open the menu.
2.Select "Vehicle settings" and press the
controller.
3.Select "Door locks" and press the control-
ler.
4.Select "Central locking" and press the con-
troller.
5.Select "Last seat pos." and press the con-
troller.
6.Select "After unlocking" or "After opening
door" and press the controller.
To cancel the request:
Select "Deactivated" and press the controller.
When using this feature, always make
sure that the footwell behind the driver's
seat is empty and unobstructed. Failure to do so could cause injury or damage to persons or
objects behind the seat as a result of a rearward
movement of the seat.<
Passenger-side exterior mirror tilt
function*
Automatic curb monitor
Activating
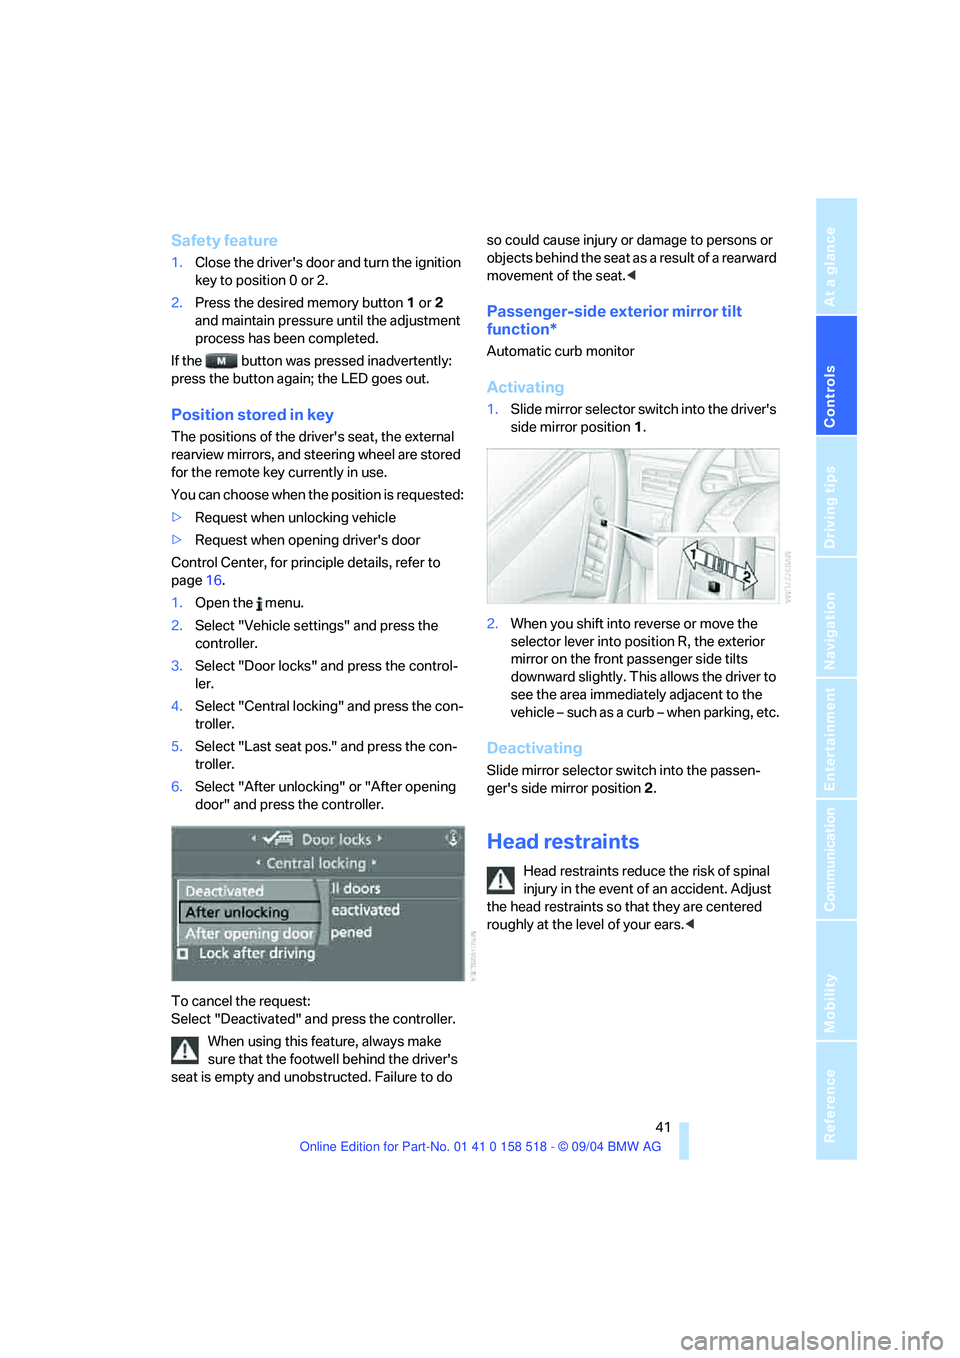
1.Slide mirror selector switch into the driver's
side mirror position 1.
2.When you shift into reverse or move the
selector lever into position R, the exterior
mirror on the front passenger side tilts
downward slightly. This allows the driver to
see the area immediately adjacent to the
vehicle – such as a curb – when parking, etc.
Deactivating
Slide mirror selector switch into the passen-
ger's side mirror position 2.
Head restraints
Head restraints reduce the risk of spinal
injury in the event of an accident. Adjust
the head restraints so that they are centered
roughly at the level of your ears.<
Page 47 of 221
Adjustments
46
Steering wheel heater*
Press the button with the ignition key in
position 2.
When the steering wheel heater is operating,
the LED in the button lights up.
Programmable buttons* on the
steering wheel
You can assign the function buttons individu-
ally.
Control Center, for principle details, refer to
page16.
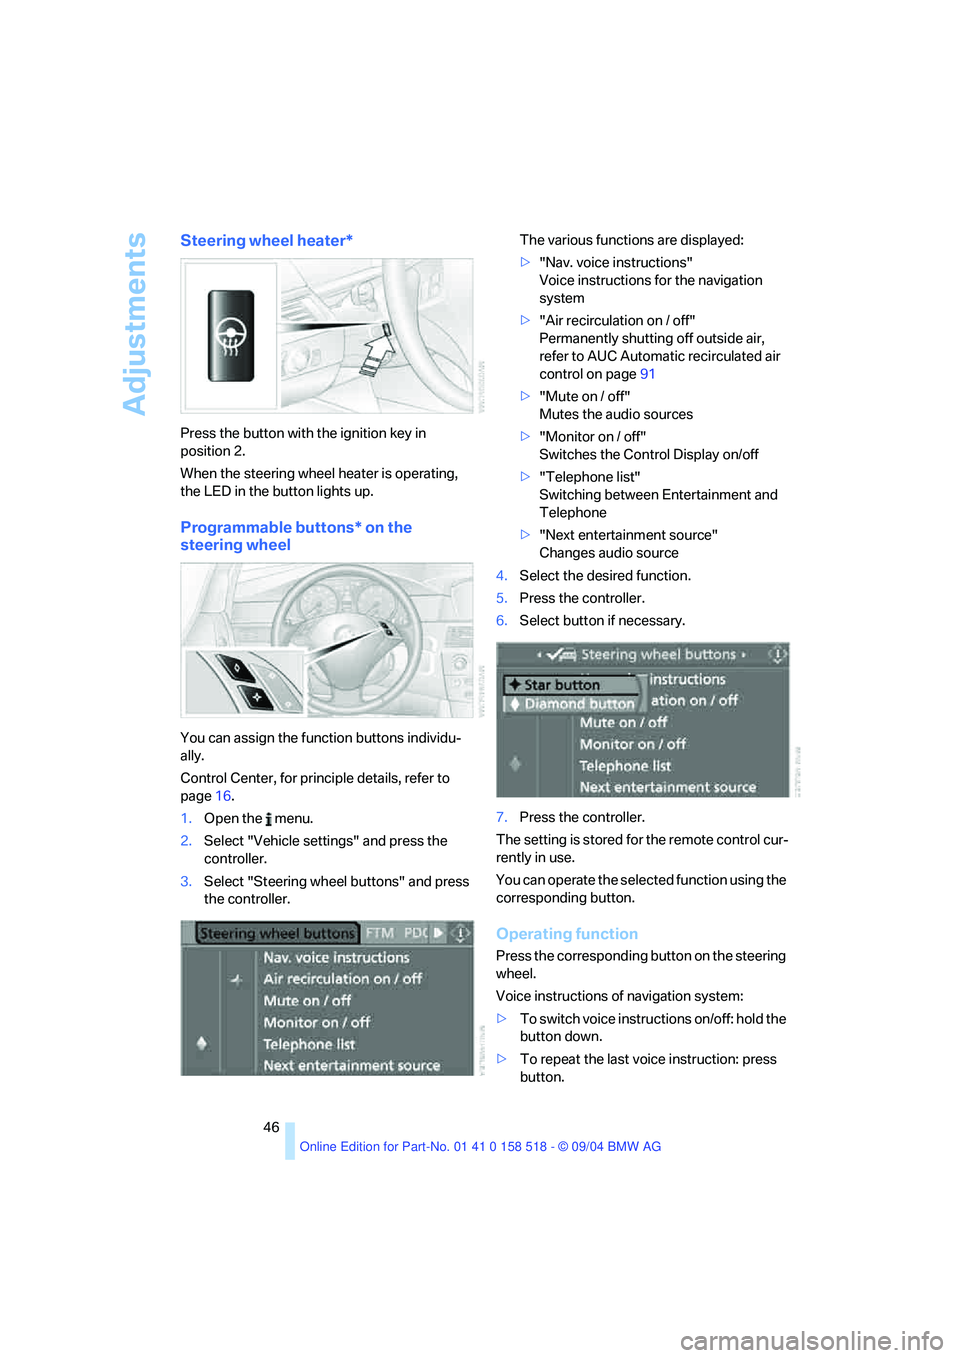
1.Open the menu.
2.Select "Vehicle settings" and press the
controller.
3.Select "Steering wheel buttons" and press
the controller.The various functions are displayed:
>"Nav. voice instructions"
Voice instructions for the navigation
system
>"Air recirculation on / off"
Permanently shutting off outside air,
refer to AUC Automatic recirculated air
control on page91
>"Mute on / off"
Mutes the audio sources
>"Monitor on / off"
Switches the Control Display on/off
>"Telephone list"
Switching between Entertainment and
Telephone
>"Next entertainment source"
Changes audio source
4.Select the desired function.
5.Press the controller.
6.Select button if necessary.
7.Press the controller.
The setting is stored for the remote control cur-
rently in use.
You can operate the selected function using the
corresponding button.
Operating function
Press the corresponding button on the steering
wheel.
Voice instructions of navigation system:
>To switch voice instructions on/off: hold the
button down.
>To repeat the last voice instruction: press
button.
Page 74 of 221

Controls
73Reference
At a glance
Driving tips
Communication
Navigation
Entertainment
Mobility
Starting and stopping
>Select "Start" and press the controller.
The stopwatch starts at the displayed time.
>Select "Reset" and press the controller.
The stopwatch is reset and it restarts if it
was running beforehand.
>Select "Stop" and press the controller.
This stops the timer.
Taking an intermediate time reading
Select "Interim time" and press the controller.
The interim time appears below the ongoing
primary stopwatch count.
All of the remaining functions remain
available at all times while the stopwatch
is running. The stopwatch continues operation
in the background.<
Settings on Control Display
Brightness of Control Display
The brightness is automatically adapted to the
ambient lighting conditions. However, you can
change the base setting.
Control Center, for principle details, refer to
page16.
1.Press button.
This opens the start menu.
2.Press the controller to open the menu.
3.Select "Display settings" and press the
controller.
4.Select "Brightness" and press the control-
ler.5.If necessary, move the controller to the right
to select "Display Offset".
6.Turn the controller until the desired setting
is selected.
The setting is stored for the remote control cur-
rently in use.
Measurement units
You can change the measurement units for
consumption, distances, temperature and
pressure.
1.Open the menu.
2.Select "Display settings" and press the
controller.
3.Select "Units" and press the controller.
4.Select the menu item to be set.
5.Press the controller.
6.Select the desired measurement unit and
press the controller.
The settings are stored for the remote control
currently in use.
Page 75 of 221
Everything under control
74
Language on Control Display
Control Center, for principle details, refer to
page16.
1.Open the menu.
2.Select "Display settings" and press the
controller.
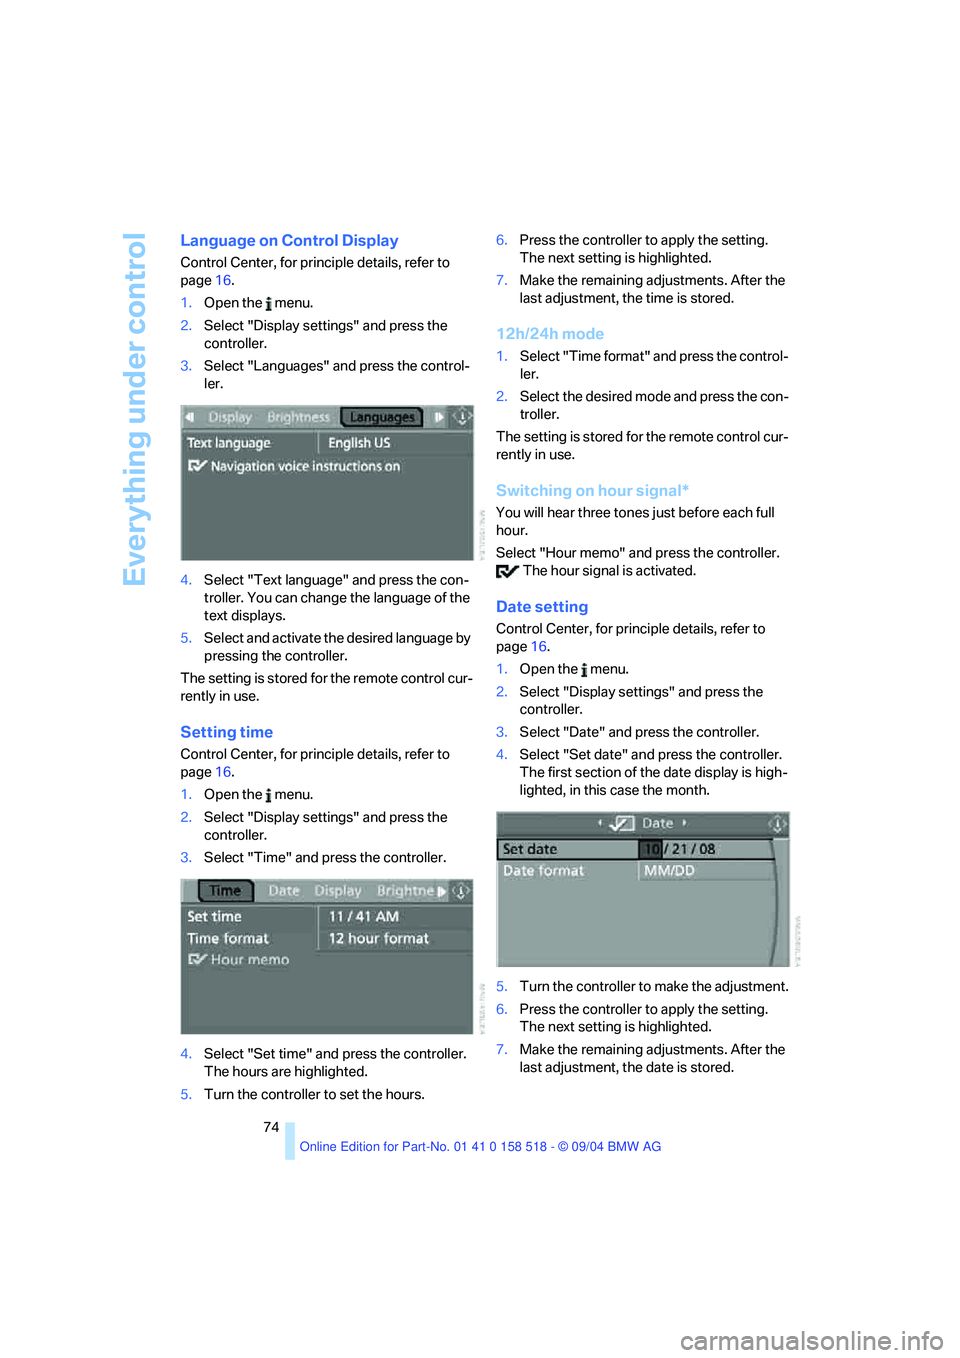
3.Select "Languages" and press the control-
ler.
4.Select "Text language" and press the con-
troller. You can change the language of the
text displays.
5.Select and activate the desired language by
pressing the controller.
The setting is stored for the remote control cur-
rently in use.
Setting time
Control Center, for principle details, refer to
page16.
1.Open the menu.
2.Select "Display settings" and press the
controller.
3.Select "Time" and press the controller.
4.Select "Set time" and press the controller.
The hours are highlighted.
5.Turn the controller to set the hours.6.Press the controller to apply the setting.
The next setting is highlighted.
7.Make the remaining adjustments. After the
last adjustment, the time is stored.
12h/24h mode
1.Select "Time format" and press the control-
ler.
2.Select the desired mode and press the con-
troller.
The setting is stored for the remote control cur-
rently in use.
Switching on hour signal*
You will hear three tones just before each full
hour.
Select "Hour memo" and press the controller.
The hour signal is activated.
Date setting
Control Center, for principle details, refer to
page16.
1.Open the menu.
2.Select "Display settings" and press the
controller.
3.Select "Date" and press the controller.
4.Select "Set date" and press the controller.
The first section of the date display is high-
lighted, in this case the month.
5.Turn the controller to make the adjustment.
6.Press the controller to apply the setting.
The next setting is highlighted.
7.Make the remaining adjustments. After the
last adjustment, the date is stored.
Page 76 of 221
Controls
75Reference
At a glance
Driving tips
Communication
Navigation
Entertainment
Mobility
Changing date format
1.Select "Date format" and press the control-
ler.
2.Select the desired format and press the
controller.
The setting is stored for the remote control cur-
rently in use.
Page 78 of 221
Controls
77Reference
At a glance
Driving tips
Communication
Navigation
Entertainment
Mobility
Control Center, for principle details, refer to
page16.
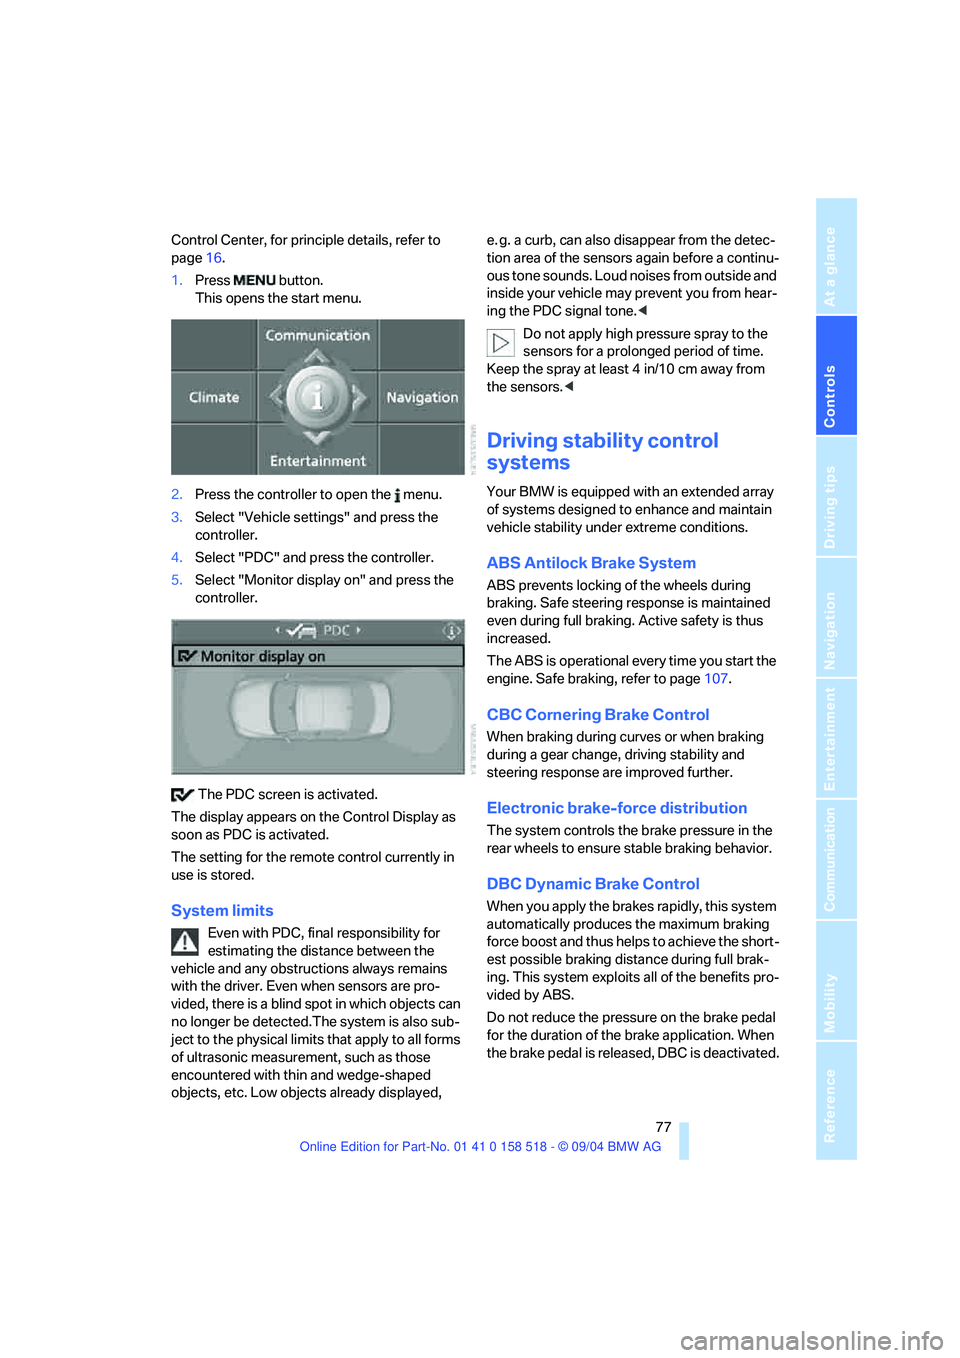
1.Press button.
This opens the start menu.
2.Press the controller to open the menu.
3.Select "Vehicle settings" and press the
controller.
4.Select "PDC" and press the controller.
5.Select "Monitor display on" and press the
controller.
The PDC screen is activated.
The display appears on the Control Display as
soon as PDC is activated.
The setting for the remote control currently in
use is stored.
System limits
Even with PDC, final responsibility for
estimating the distance between the
vehicle and any obstructions always remains
with the driver. Even when sensors are pro-
vided, there is a blind spot in which objects can
no longer be detected.The system is also sub-
ject to the physical limits that apply to all forms
of ultrasonic measurement, such as those
encountered with thin and wedge-shaped
objects, etc. Low objects already displayed, e. g. a curb, can also disappear from the detec-
tion area of the sensors again before a continu-
ous tone sounds. Loud noises from outside and
inside your vehicle may prevent you from hear-
ing the PDC signal tone.<
Do not apply high pressure spray to the
sensors for a prolonged period of time.
Keep the spray at least 4 in/10 cm away from
the sensors.<
Driving stability control
systems
Your BMW is equipped with an extended array
of systems designed to enhance and maintain
vehicle stability under extreme conditions.
ABS Antilock Brake System
ABS prevents locking of the wheels during
braking. Safe steering response is maintained
even during full braking. Active safety is thus
increased.
The ABS is operational every time you start the
engine. Safe braking, refer to page107.
CBC Cornering Brake Control
When braking during curves or when braking
during a gear change, driving stability and
steering response are improved further.
Electronic brake-force distribution
The system controls the brake pressure in the
rear wheels to ensure stable braking behavior.
DBC Dynamic Brake Control
When you apply the brakes rapidly, this system
automatically produces the maximum braking
force boost and thus helps to achieve the short-
est possible braking distance during full brak-
ing. This system exploits all of the benefits pro-
vided by ABS.
Do not reduce the pressure on the brake pedal
for the duration of the brake application. When
the brake pedal is released, DBC is deactivated.
Page 86 of 221
Controls
85Reference
At a glance
Driving tips
Communication
Navigation
Entertainment
Mobility
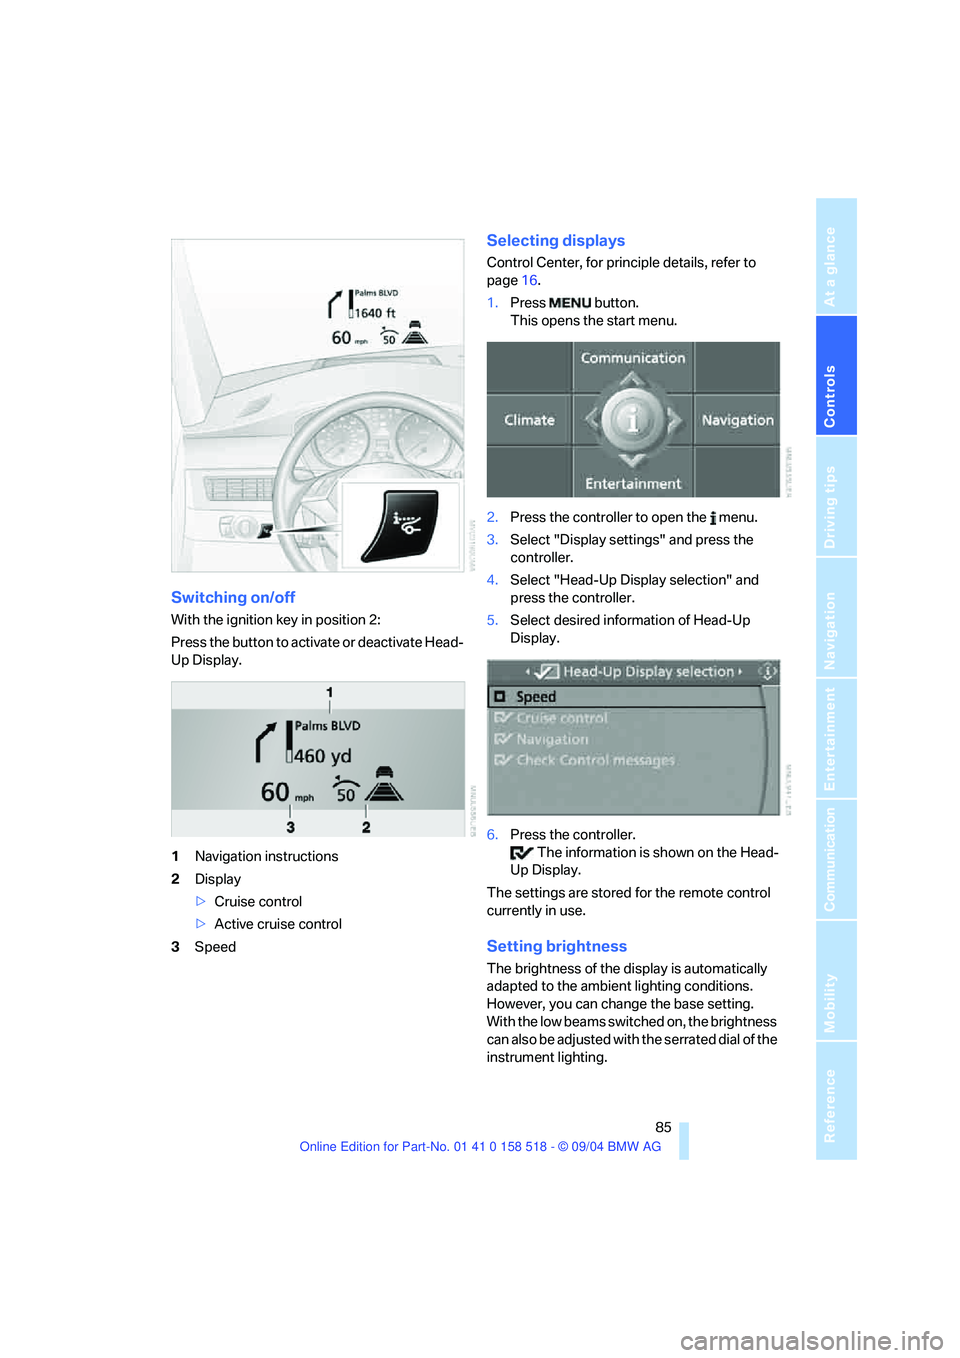
Switching on/off
With the ignition key in position 2:
Press the button to activate or deactivate Head-
Up Display.
1Navigation instructions
2Display
>Cruise control
>Active cruise control
3Speed
Selecting displays
Control Center, for principle details, refer to
page16.
1.Press button.
This opens the start menu.
2.Press the controller to open the menu.
3.Select "Display settings" and press the
controller.
4.Select "Head-Up Display selection" and
press the controller.
5.Select desired information of Head-Up
Display.
6.Press the controller.
The information is shown on the Head-
Up Display.
The settings are stored for the remote control
currently in use.
Setting brightness
The brightness of the display is automatically
adapted to the ambient lighting conditions.
However, you can change the base setting.
With the low beams switched on, the brightness
can also be adjusted with the serrated dial of the
instrument lighting.
Page 87 of 221
Technology for comfort, convenience and safety
86 Control Center, for principle details, refer to
page16.
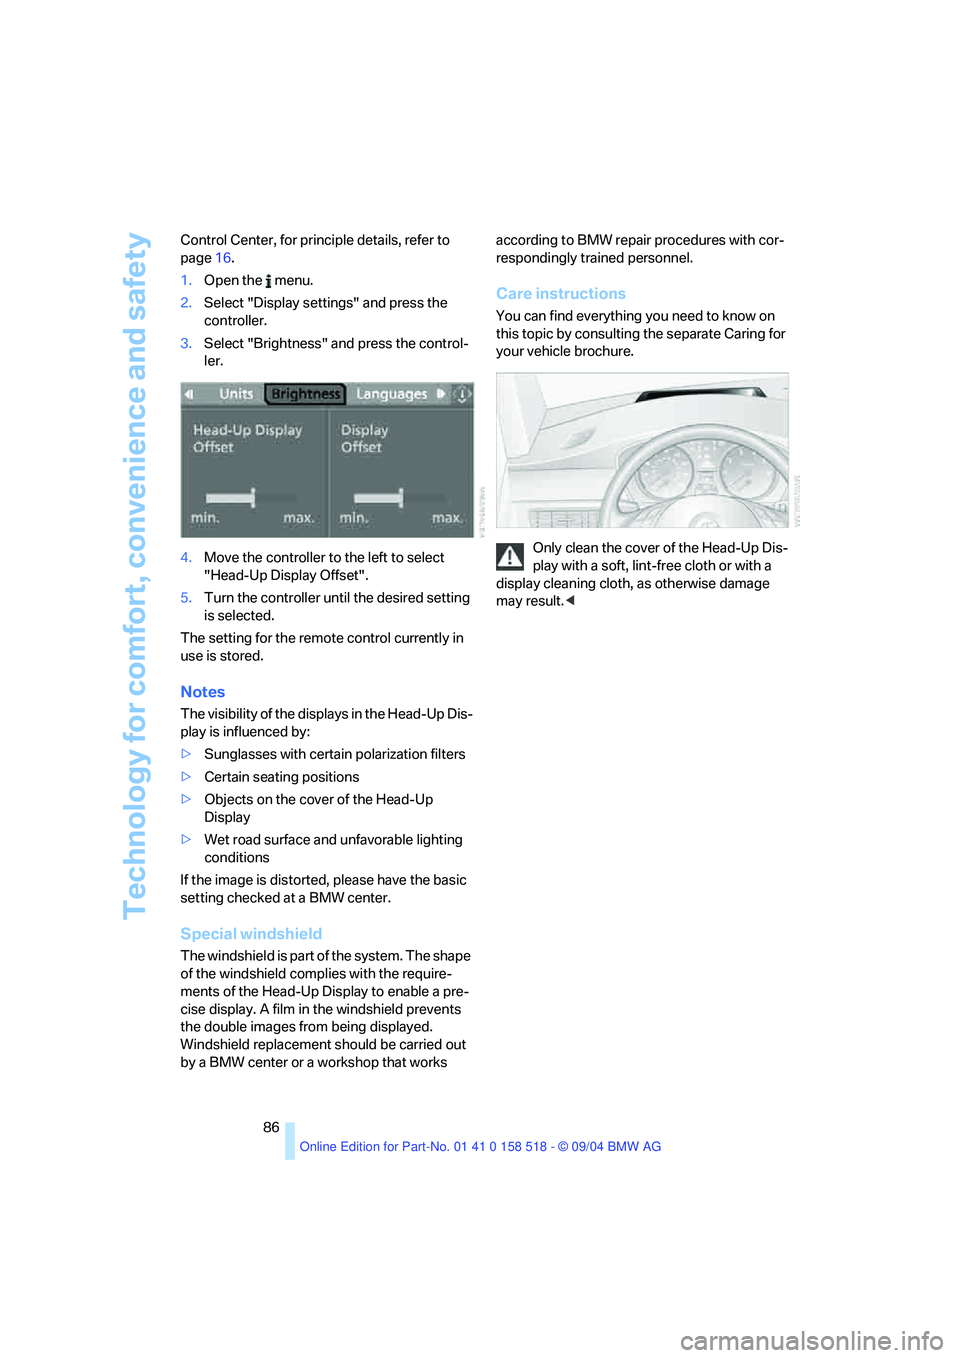
1.Open the menu.
2.Select "Display settings" and press the
controller.
3.Select "Brightness" and press the control-
ler.
4.Move the controller to the left to select
"Head-Up Display Offset".
5.Turn the controller until the desired setting
is selected.
The setting for the remote control currently in
use is stored.
Notes
The visibility of the displays in the Head-Up Dis-
play is influenced by:
>Sunglasses with certain polarization filters
>Certain seating positions
>Objects on the cover of the Head-Up
Display
>Wet road surface and unfavorable lighting
conditions
If the image is distorted, please have the basic
setting checked at a BMW center.
Special windshield
The windshield is part of the system. The shape
of the windshield complies with the require-
ments of the Head-Up Display to enable a pre-
cise display. A film in the windshield prevents
the double images from being displayed.
Windshield replacement should be carried out
by a BMW center or a workshop that works according to BMW repair procedures with cor-
respondingly trained personnel.
Care instructions
You can find everything you need to know on
this topic by consulting the separate Caring for
your vehicle brochure.
Only clean the cover of the Head-Up Dis-
play with a soft, lint-free cloth or with a
display cleaning cloth, as otherwise damage
may result.<