2005 BMW 525I key
[x] Cancel search: keyPage 36 of 221

Controls
35Reference
At a glance
Driving tips
Communication
Navigation
Entertainment
Mobility
Opening and closing windows
Ignition key in position 1, refer to page51:
>Press switch to resistance point:
The window continues to open as long as
you keep the switch pressed.
>Press switch beyond resistance point:
The window opens automatically. Pressing
the switch again stops the opening move-
ment.
You can close the windows in the same manner
by pulling the switch.
After switching off ignition
You can still operate the windows:
>With the Ignition key in position 1 for
approx. 15 minutes
>With the ignition key in position 0 or with the
ignition key removed, for approx. 1 minute,
as long as a front door has not been opened.
For information on using the convenience oper-
ation at the door lock or with the remote control,
refer to page30 or31.
Anti-trapping mechanism
If the closing force rises beyond a predefined
threshold during closing, the system will imme-
diately stop moving the window prior to lower-
ing it slightly.
Despite the anti-trapping mechanism
inspect the window's travel path prior to
closing it, as the safety system might fail to
detect certain kinds of obstructions, such as
thin objects, and the window would continue
closing.
Pulling the switch beyond the resistance point
and holding it limits the response of the anti-trapping mechanism. In this case, if the closing
force exceeds a defined threshold, the window
will only open a few inches/millimeters.
If the switch is pulled past the resistance point
again within approx. 4 seconds, the anti-trap-
ping mechanism will be deactivated.<
Safety switch
With the safety switch, you can prevent the rear
windows from being opened or closed via the
switches in the rear passenger area, by chil-
dren, for example. The LED lights up when this
safety feature is activated.
Always press the safety switch when chil-
dren ride in the rear, as otherwise
unchecked closing of the windows could lead to
injuries.<
Accessories in window area
After installing any accessory – such as a
clamp-on antenna for a portable phone – within
the window's travel range, you will need to have
the system reinitialized for use under the new
conditions. BMW recommends having this
work done by your BMW center.
Glass sunroof, electric*
To prevent injuries, exercise care when
closing the glass sunroof and keep it in
your field of vision until it is shut.
When leaving the vehicle, always remove the
ignition key and close the doors to prevent chil-
dren from operating the sunroof and injuring
themselves.<
Page 37 of 221

Opening and closing
36 Ignition key in position 1, refer to page51.
Raising
Press switch.
>When the glass sunroof is closed, it is raised
slightly and the sliding visor opens slightly.
>When the glass sunroof is open, it automat-
ically travels into the raised position. The
sliding visor remains completely open.
Do not use force to close the headliner
insert with the glass sunroof in its raised
position, as damage to the mechanism could
result.<
Opening, Closing
>Press switch back to the resistance point.
The glass sunroof and the sliding visor open
together for as long as you hold the switch
in position.
>Press switch back past the resistance point.
The glass sunroof and the sliding visor open
automatically. Briefly press the switch again
to stop the opening movement.
In a similar manner, the glass sunroof and the
sliding visor close when you slide the switch
forward. The sliding visor remains open and
must be closed by hand.
For information on using the convenience oper-
ation at the door lock or with the remote control,
refer to page30 or31.
After switching off ignition
You can still operate the sunroof:
>With the Ignition key in position 1 for
approx. 15 minutes
>With the ignition key in position 0 or with the
ignition key removed, for approx. 1 minute,
as long as a front door has not been opened.
Automatic opening and closing
Press the switch past the resistance point.
The following movements are also automatic:
>When the sunroof is open, press the switch
in the lifting direction: the sunroof is raised
all the way.
>When the sunroof is raised, press the
switch in the opening direction: the sunroof
is opened all the way.
Pressing the switch again stops the motion.
Anti-trapping mechanism
If the glass sunroof encounters resistance when
closing from roughly the center of the sunroof
opening or when closing from the raised posi-
tion, the closing action is interrupted and the
glass sunroof reopens a short way.
Despite the anti-trapping mechanism
inspect the sunroof's travel path prior to
closing it, as the safety system might fail to
detect certain kinds of obstructions, such as
very thin objects, and the sunroof would con-
tinue closing.
Pressing the switch beyond the resistance
point and holding it there deactivates the anti-
trapping mechanism.<
Following interruptions in electrical
power supply
After a power loss, the sunroof may only
respond to the lift command. The system must
be initialized. BMW recommends having this
work done by your BMW center.
Page 41 of 221
Adjustments
40 The upper hips and spinal column receive sup-
plementary support to help you maintain a
relaxed, upright sitting position.
>Increase or decrease curvature: push
switch forward or back.
>Shift curvature up or down: push switch up
or down.
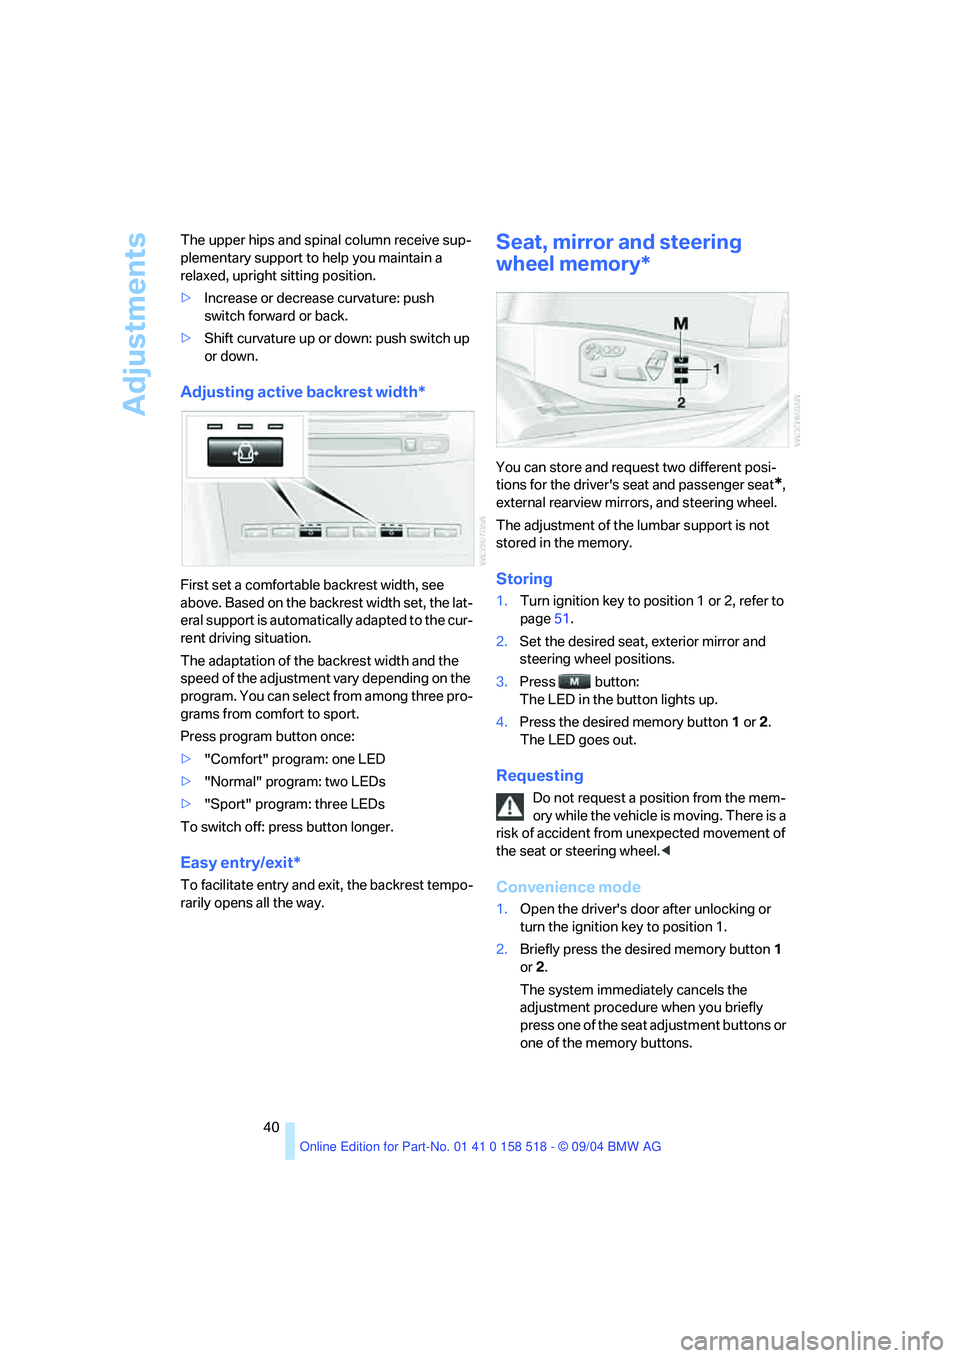
Adjusting active backrest width*
First set a comfortable backrest width, see
above. Based on the backrest width set, the lat-
eral support is automatically adapted to the cur-
rent driving situation.
The adaptation of the backrest width and the
speed of the adjustment vary depending on the
program. You can select from among three pro-
grams from comfort to sport.
Press program button once:
>"Comfort" program: one LED
>"Normal" program: two LEDs
>"Sport" program: three LEDs
To switch off: press button longer.
Easy entry/exit*
To facilitate entry and exit, the backrest tempo-
rarily opens all the way.
Seat, mirror and steering
wheel memory*
You can store and request two different posi-
tions for the driver's seat and passenger seat
*,
external rearview mirrors, and steering wheel.
The adjustment of the lumbar support is not
stored in the memory.
Storing
1.Turn ignition key to position 1 or 2, refer to
page51.
2.Set the desired seat, exterior mirror and
steering wheel positions.
3.Press button:
The LED in the button lights up.
4.Press the desired memory button1 or2.
The LED goes out.
Requesting
Do not request a position from the mem-
ory while the vehicle is moving. There is a
risk of accident from unexpected movement of
the seat or steering wheel.<
Convenience mode
1.Open the driver's door after unlocking or
turn the ignition key to position 1.
2.Briefly press the desired memory button1
or2.
The system immediately cancels the
adjustment procedure when you briefly
press one of the seat adjustment buttons or
one of the memory buttons.
Page 42 of 221
Controls
41Reference
At a glance
Driving tips
Communication
Navigation
Entertainment
Mobility
Safety feature
1.Close the driver's door and turn the ignition
key to position 0 or 2.
2.Press the desired memory button1 or2
and maintain pressure until the adjustment
process has been completed.
If the button was pressed inadvertently:
press the button again; the LED goes out.
Position stored in key
The positions of the driver's seat, the external
rearview mirrors, and steering wheel are stored
for the remote key currently in use.
You can choose when the position is requested:
>Request when unlocking vehicle
>Request when opening driver's door
Control Center, for principle details, refer to
page16.
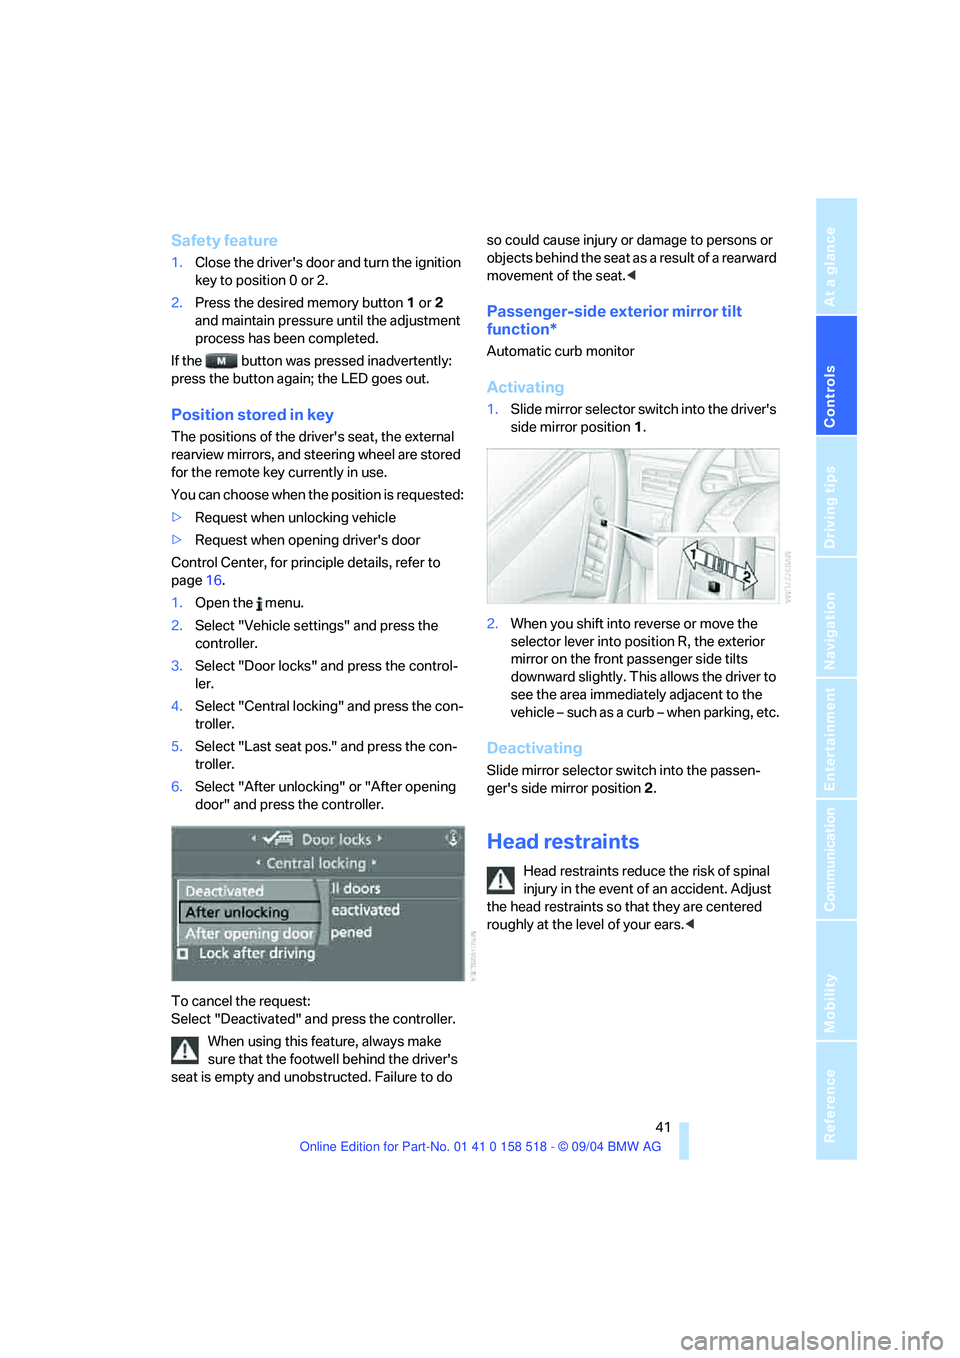
1.Open the menu.
2.Select "Vehicle settings" and press the
controller.
3.Select "Door locks" and press the control-
ler.
4.Select "Central locking" and press the con-
troller.
5.Select "Last seat pos." and press the con-
troller.
6.Select "After unlocking" or "After opening
door" and press the controller.
To cancel the request:
Select "Deactivated" and press the controller.
When using this feature, always make
sure that the footwell behind the driver's
seat is empty and unobstructed. Failure to do so could cause injury or damage to persons or
objects behind the seat as a result of a rearward
movement of the seat.<
Passenger-side exterior mirror tilt
function*
Automatic curb monitor
Activating
1.Slide mirror selector switch into the driver's
side mirror position 1.
2.When you shift into reverse or move the
selector lever into position R, the exterior
mirror on the front passenger side tilts
downward slightly. This allows the driver to
see the area immediately adjacent to the
vehicle – such as a curb – when parking, etc.
Deactivating
Slide mirror selector switch into the passen-
ger's side mirror position 2.
Head restraints
Head restraints reduce the risk of spinal
injury in the event of an accident. Adjust
the head restraints so that they are centered
roughly at the level of your ears.<
Page 45 of 221
Adjustments
44
Rear
The operating concept is the same as for the
front heated seats.
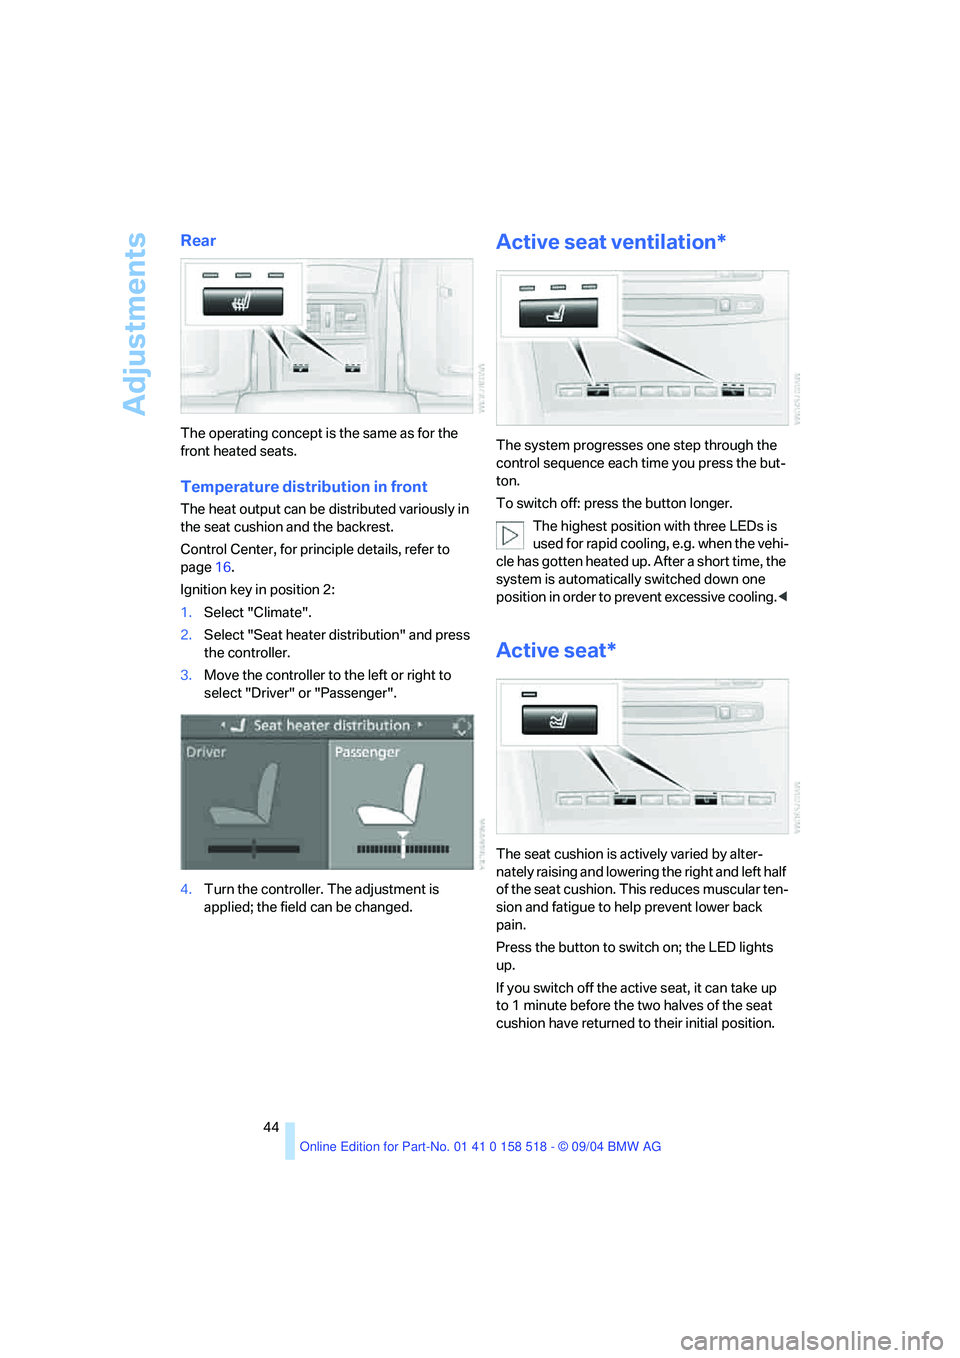
Temperature distribution in front
The heat output can be distributed variously in
the seat cushion and the backrest.
Control Center, for principle details, refer to
page16.
Ignition key in position 2:
1.Select "Climate".
2.Select "Seat heater distribution" and press
the controller.
3.Move the controller to the left or right to
select "Driver" or "Passenger".
4.Turn the controller. The adjustment is
applied; the field can be changed.
Active seat ventilation*
The system progresses one step through the
control sequence each time you press the but-
ton.
To switch off: press the button longer.
The highest position with three LEDs is
used for rapid cooling, e.g. when the vehi-
cle has gotten heated up. After a short time, the
system is automatically switched down one
position in order to prevent excessive cooling.<
Active seat*
The seat cushion is actively varied by alter-
nately raising and lowering the right and left half
of the seat cushion. This reduces muscular ten-
sion and fatigue to help prevent lower back
pain.
Press the button to switch on; the LED lights
up.
If you switch off the active seat, it can take up
to 1 minute before the two halves of the seat
cushion have returned to their initial position.
Page 46 of 221
Controls
45Reference
At a glance
Driving tips
Communication
Navigation
Entertainment
Mobility
Mirrors
Exterior mirrors
The mirror on the passenger side fea-
tures a lens with a more convex surface
than the mirror installed on the driver's side.
When estimating the distance between yourself
and other traffic, bear in mind that the objects
reflected in the mirror are closer than they
appear. This means that estimations of the dis-
tance to following traffic should not be regarded
as precise.<
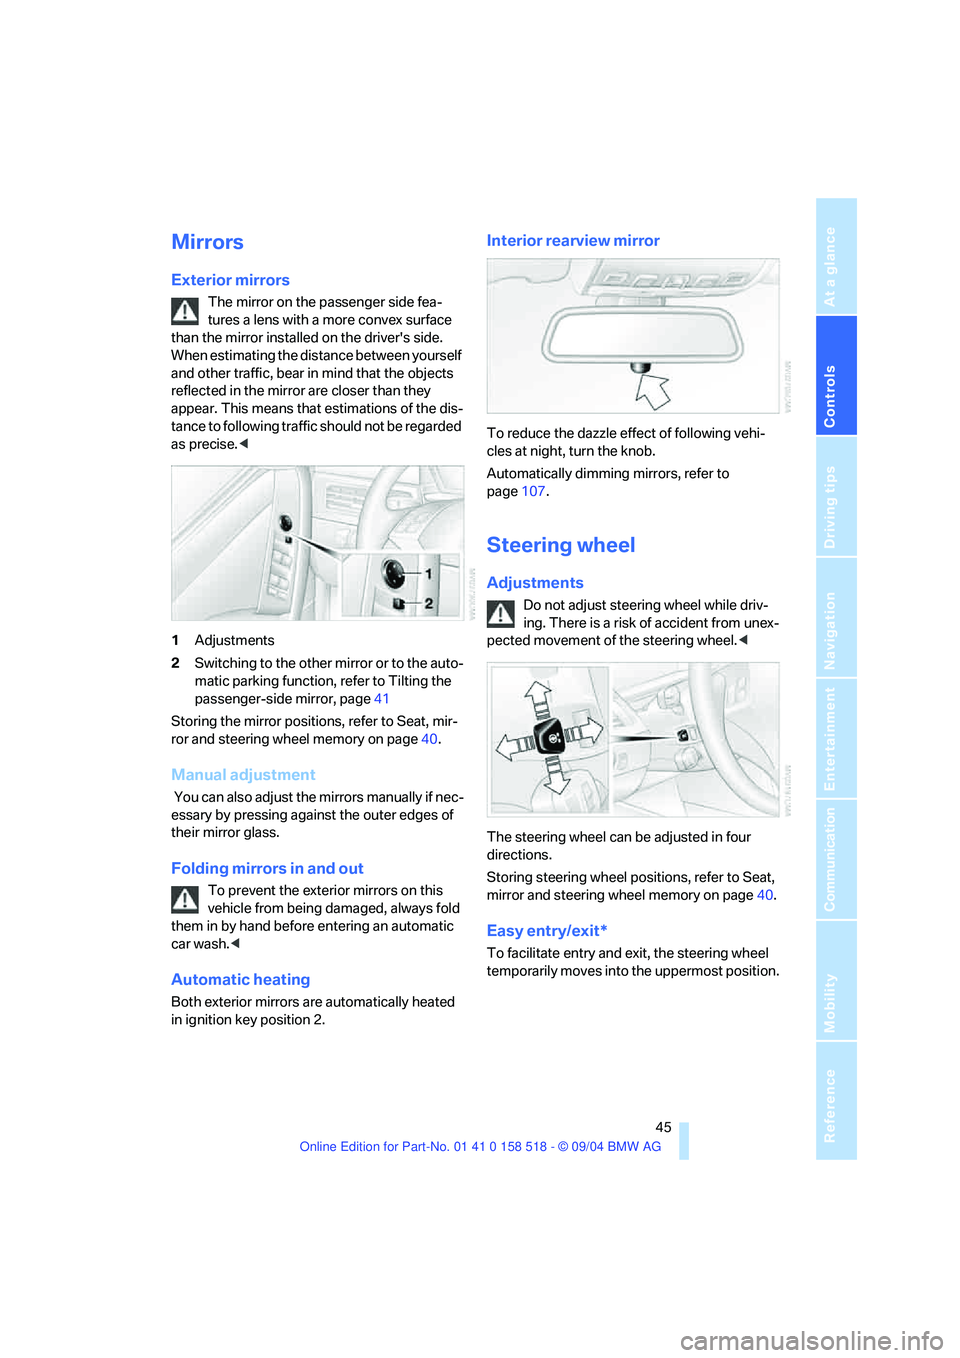
1Adjustments
2Switching to the other mirror or to the auto-
matic parking function, refer to Tilting the
passenger-side mirror, page41
Storing the mirror positions, refer to Seat, mir-
ror and steering wheel memory on page40.
Manual adjustment
You can also adjust the mirrors manually if nec-
essary by pressing against the outer edges of
their mirror glass.
Folding mirrors in and out
To prevent the exterior mirrors on this
vehicle from being damaged, always fold
them in by hand before entering an automatic
car wash.<
Automatic heating
Both exterior mirrors are automatically heated
in ignition key position 2.
Interior rearview mirror
To reduce the dazzle effect of following vehi-
cles at night, turn the knob.
Automatically dimming mirrors, refer to
page107.
Steering wheel
Adjustments
Do not adjust steering wheel while driv-
ing. There is a risk of accident from unex-
pected movement of the steering wheel.<
The steering wheel can be adjusted in four
directions.
Storing steering wheel positions, refer to Seat,
mirror and steering wheel memory on page40.
Easy entry/exit*
To facilitate entry and exit, the steering wheel
temporarily moves into the uppermost position.
Page 47 of 221
Adjustments
46
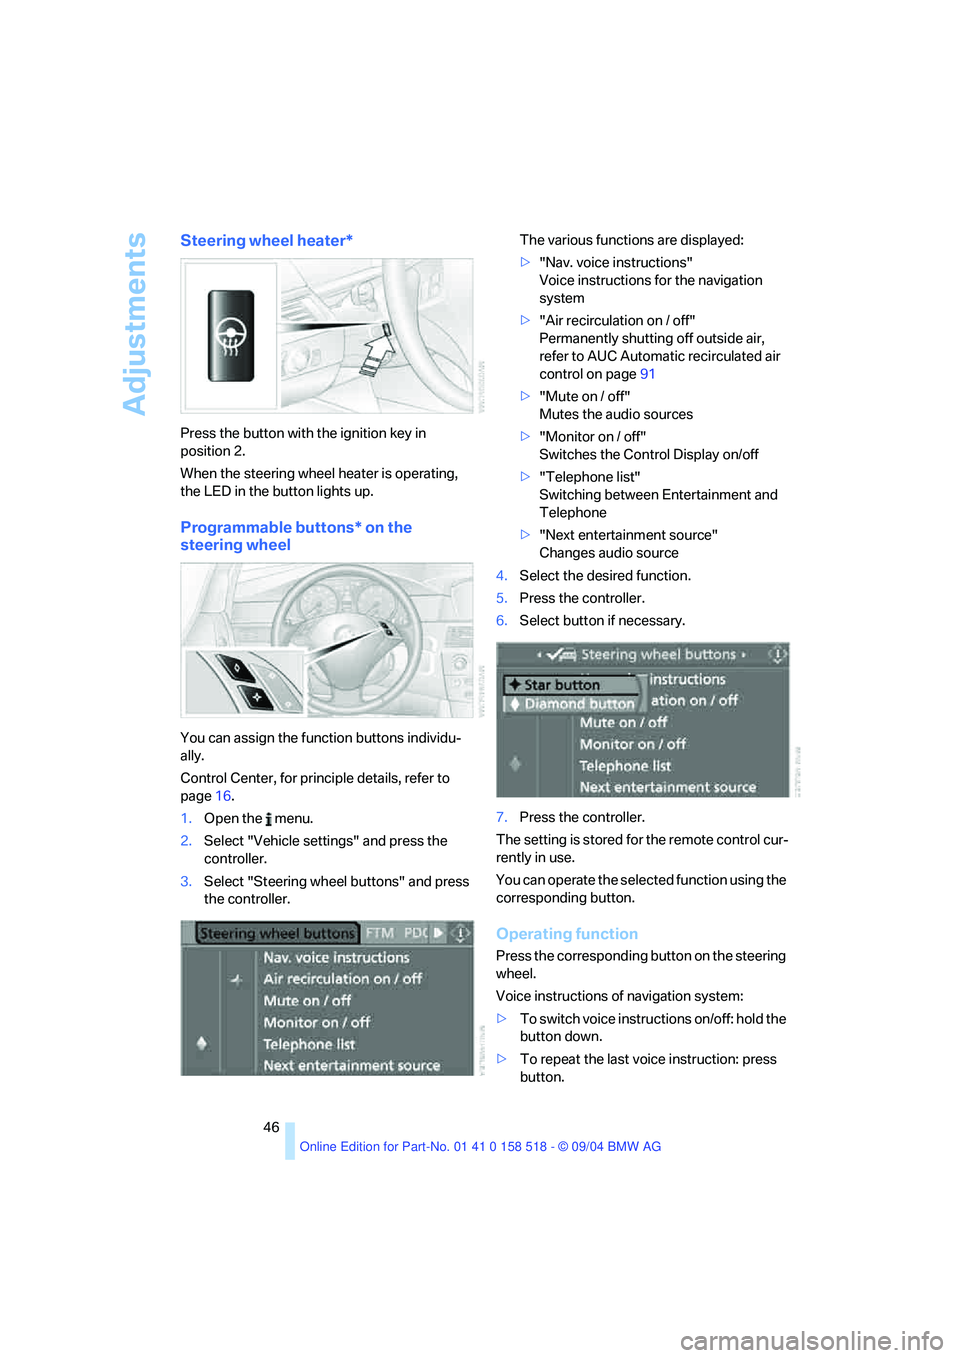
Steering wheel heater*
Press the button with the ignition key in
position 2.
When the steering wheel heater is operating,
the LED in the button lights up.
Programmable buttons* on the
steering wheel
You can assign the function buttons individu-
ally.
Control Center, for principle details, refer to
page16.
1.Open the menu.
2.Select "Vehicle settings" and press the
controller.
3.Select "Steering wheel buttons" and press
the controller.The various functions are displayed:
>"Nav. voice instructions"
Voice instructions for the navigation
system
>"Air recirculation on / off"
Permanently shutting off outside air,
refer to AUC Automatic recirculated air
control on page91
>"Mute on / off"
Mutes the audio sources
>"Monitor on / off"
Switches the Control Display on/off
>"Telephone list"
Switching between Entertainment and
Telephone
>"Next entertainment source"
Changes audio source
4.Select the desired function.
5.Press the controller.
6.Select button if necessary.
7.Press the controller.
The setting is stored for the remote control cur-
rently in use.
You can operate the selected function using the
corresponding button.
Operating function
Press the corresponding button on the steering
wheel.
Voice instructions of navigation system:
>To switch voice instructions on/off: hold the
button down.
>To repeat the last voice instruction: press
button.
Page 52 of 221
Controls
51Reference
At a glance
Driving tips
Communication
Navigation
Entertainment
Mobility
Driving
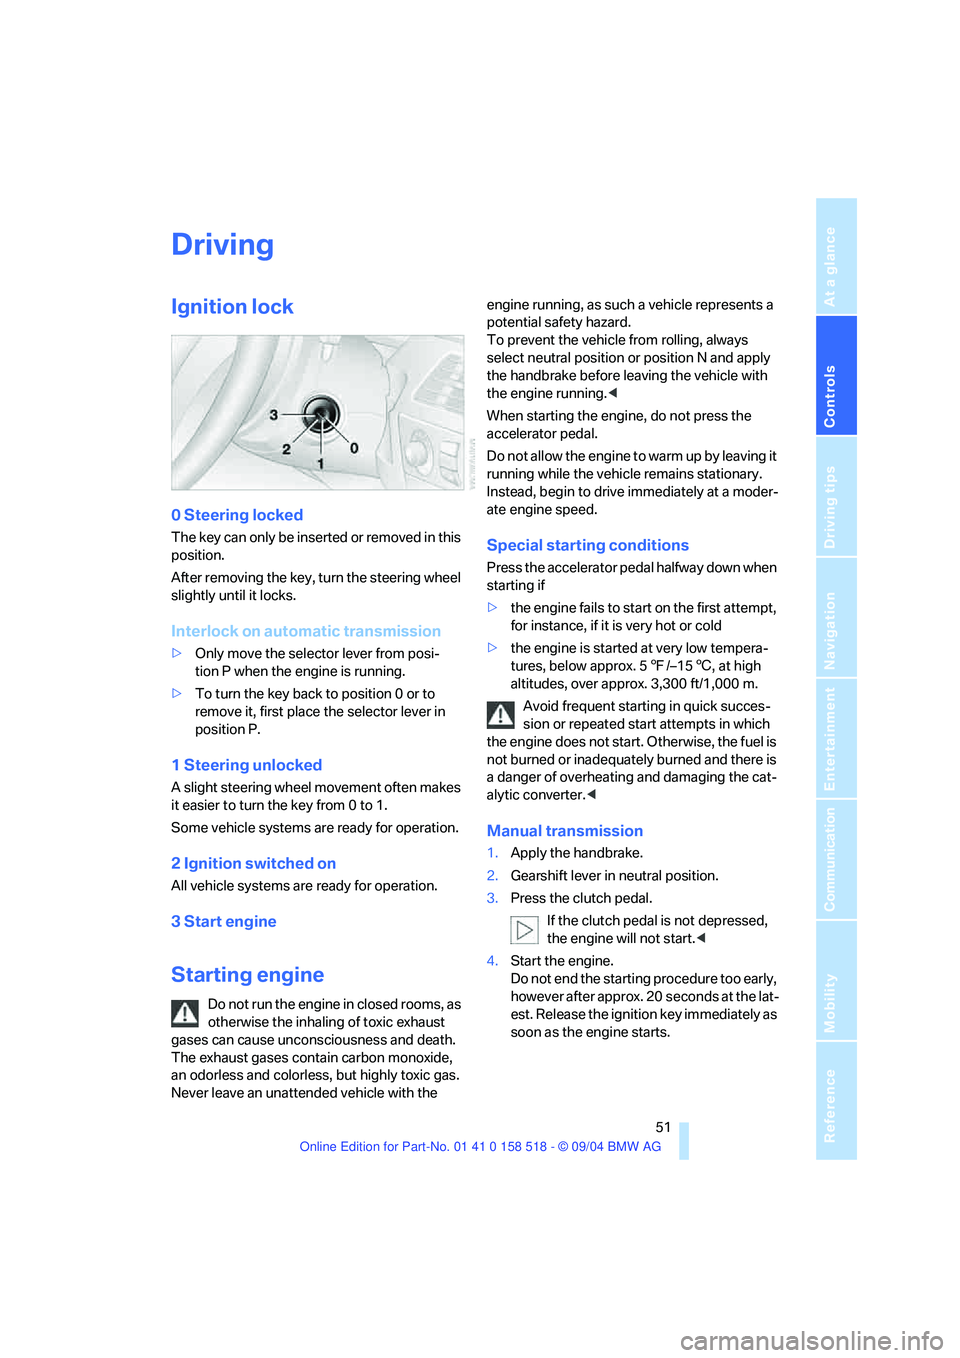
Ignition lock
0 Steering locked
The key can only be inserted or removed in this
position.
After removing the key, turn the steering wheel
slightly until it locks.
Interlock on automatic transmission
>Only move the selector lever from posi-
tion P when the engine is running.
>To turn the key back to position 0 or to
remove it, first place the selector lever in
position P.
1 Steering unlocked
A slight steering wheel movement often makes
it easier to turn the key from 0 to 1.
Some vehicle systems are ready for operation.
2 Ignition switched on
All vehicle systems are ready for operation.
3 Start engine
Starting engine
Do not run the engine in closed rooms, as
otherwise the inhaling of toxic exhaust
gases can cause unconsciousness and death.
The exhaust gases contain carbon monoxide,
an odorless and colorless, but highly toxic gas.
Never leave an unattended vehicle with the engine running, as such a vehicle represents a
potential safety hazard.
To prevent the vehicle from rolling, always
select neutral position or position N and apply
the handbrake before leaving the vehicle with
the engine running.<
When starting the engine, do not press the
accelerator pedal.
Do not allow the engine to warm up by leaving it
running while the vehicle remains stationary.
Instead, begin to drive immediately at a moder-
ate engine speed.
Special starting conditions
Press the accelerator pedal halfway down when
starting if
>the engine fails to start on the first attempt,
for instance, if it is very hot or cold
>the engine is started at very low tempera-
tures, below approx. 57/–156, at high
altitudes, over approx. 3,300 ft/1,000 m.
Avoid frequent starting in quick succes-
sion or repeated start attempts in which
the engine does not start. Otherwise, the fuel is
not burned or inadequately burned and there is
a danger of overheating and damaging the cat-
alytic converter.<
Manual transmission
1.Apply the handbrake.
2.Gearshift lever in neutral position.
3.Press the clutch pedal.
If the clutch pedal is not depressed,
the engine will not start.<
4.Start the engine.
Do not end the starting procedure too early,
however after approx. 20 seconds at the lat-
est. Release the ignition key immediately as
soon as the engine starts.