Page 127 of 221
Destination guidance
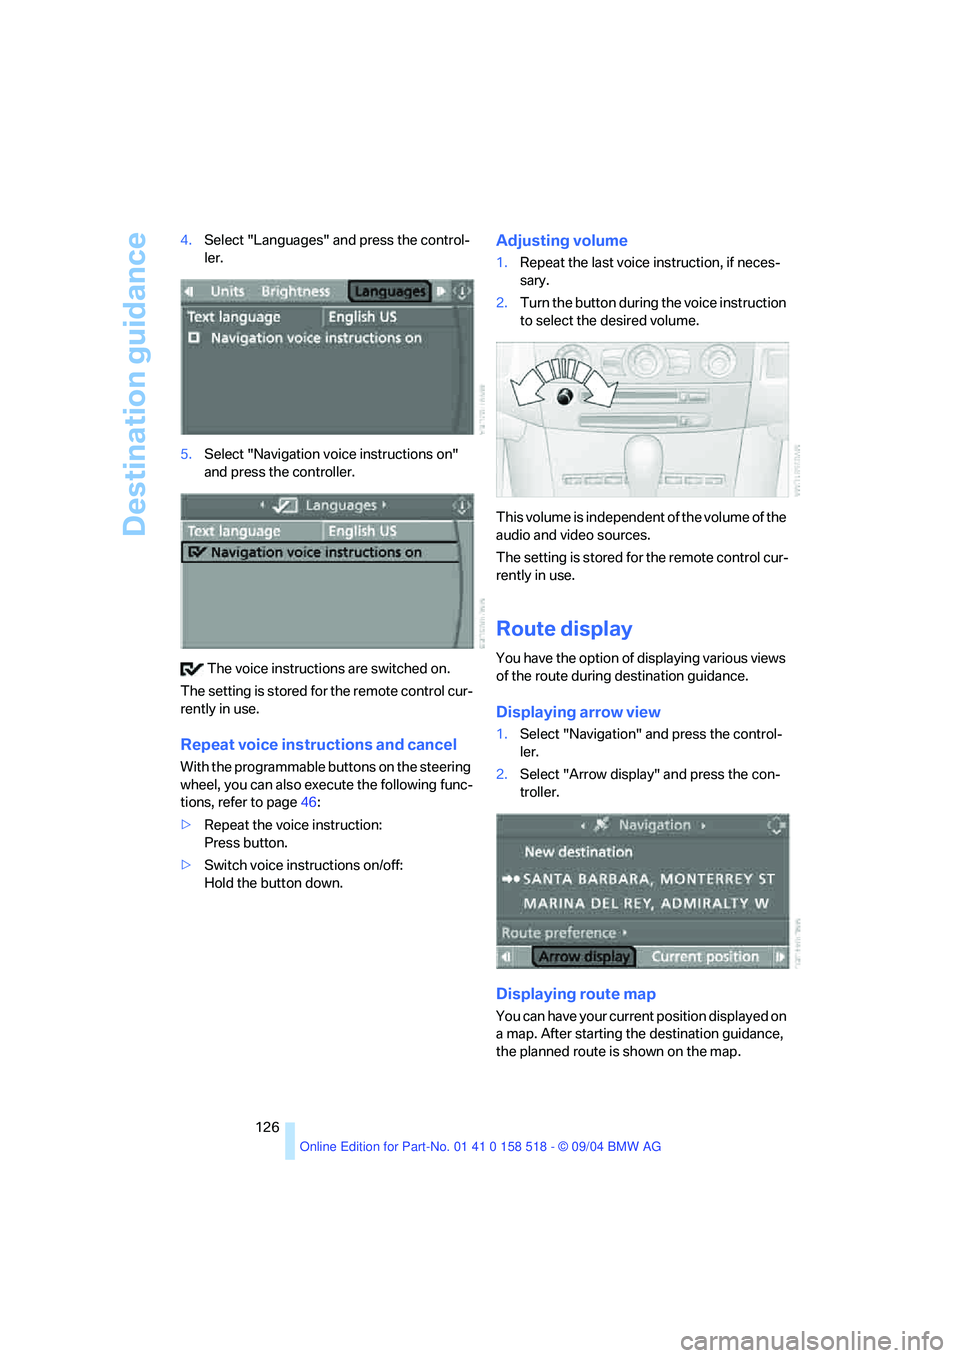
126 4.Select "Languages" and press the control-
ler.
5.Select "Navigation voice instructions on"
and press the controller.
The voice instructions are switched on.
The setting is stored for the remote control cur-
rently in use.
Repeat voice instructions and cancel
With the programmable buttons on the steering
wheel, you can also execute the following func-
tions, refer to page46:
>Repeat the voice instruction:
Press button.
>Switch voice instructions on/off:
Hold the button down.
Adjusting volume
1.Repeat the last voice instruction, if neces-
sary.
2.Turn the button during the voice instruction
to select the desired volume.
This volume is independent of the volume of the
audio and video sources.
The setting is stored for the remote control cur-
rently in use.
Route display
You have the option of displaying various views
of the route during destination guidance.
Displaying arrow view
1.Select "Navigation" and press the control-
ler.
2.Select "Arrow display" and press the con-
troller.
Displaying route map
You can have your current position displayed on
a map. After starting the destination guidance,
the planned route is shown on the map.
Page 128 of 221
Navigation
Driving tips
127Reference
At a glance
Controls
Communication
Entertainment
Mobility
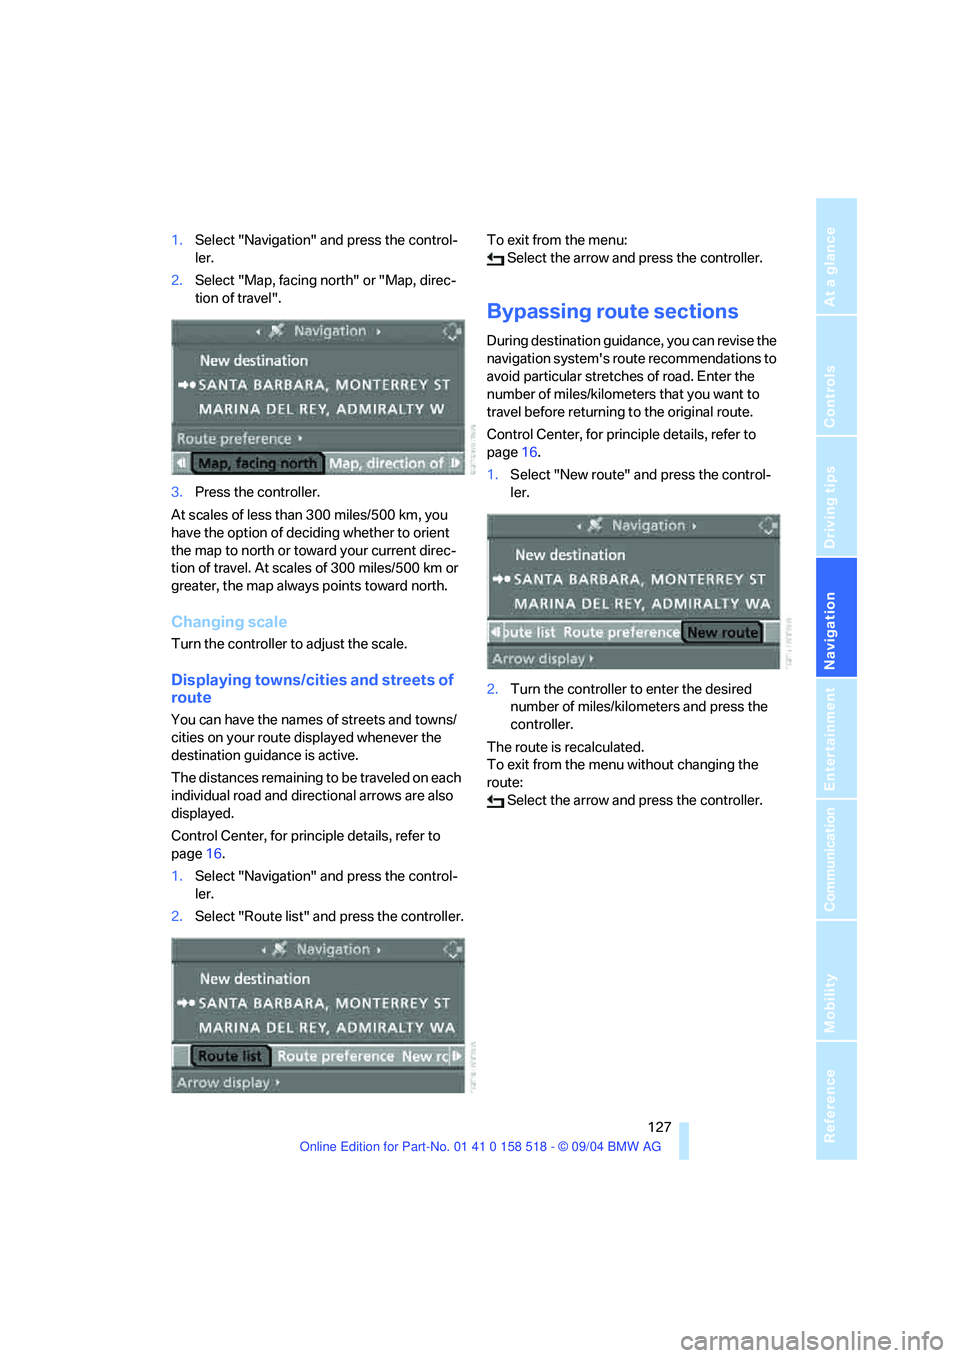
1.Select "Navigation" and press the control-
ler.
2.Select "Map, facing north" or "Map, direc-
tion of travel".
3.Press the controller.
At scales of less than 300 miles/500 km, you
have the option of deciding whether to orient
the map to north or toward your current direc-
tion of travel. At scales of 300 miles/500 km or
greater, the map always points toward north.
Changing scale
Turn the controller to adjust the scale.
Displaying towns/cities and streets of
route
You can have the names of streets and towns/
cities on your route displayed whenever the
destination guidance is active.
The distances remaining to be traveled on each
individual road and directional arrows are also
displayed.
Control Center, for principle details, refer to
page16.
1.Select "Navigation" and press the control-
ler.
2.Select "Route list" and press the controller.To exit from the menu:
Select the arrow and press the controller.
Bypassing route sections
During destination guidance, you can revise the
navigation system's route recommendations to
avoid particular stretches of road. Enter the
number of miles/kilometers that you want to
travel before returning to the original route.
Control Center, for principle details, refer to
page16.
1.Select "New route" and press the control-
ler.
2.Turn the controller to enter the desired
number of miles/kilometers and press the
controller.
The route is recalculated.
To exit from the menu without changing the
route:
Select the arrow and press the controller.
Page 129 of 221

What to do if …
128
What to do if …
What to do if …
>a navigation DVD is inserted, but an instruc-
tion to insert the DVD appears on the Con-
trol Display?
The navigation DVD may not be the correct
DVD for the navigation system. This infor-
mation is indicated on the DVD label.
>you request the current position of your
vehicle, but do not receive a precise dis-
play?
The system is unable to receive enough
GPS signals at your current position owing
to obstructions, your current position is not
yet available on your navigation DVD, or the
system is in the process of calculating your
current position. As a rule, reception is
guaranteed when you are in the open.
>the destination guidance does not accept a
destination?
The data of the destination is not stored on
the navigation DVD that is loaded. Select a
destination that is as close as possible to
the original.
>the destination guidance does not accept
an address without the street name?
On the navigation DVD, no downtown area
can be determined for the city or town
entered. Enter any street, or a destination
such as the railway station in the selected
town, and then start the destination guid-
ance.>you want to enter a destination for the des-
tination guidance, but it is not possible to
select the letters for your desired entry?
The data of the destination is not stored on
the navigation DVD that is loaded. In this
case, the system will not offer you any let-
ters to choose from. Select a destination
that is as close as possible to the original.
>the system stops furnishing directions on
which way to turn as you approach intersec-
tions?
You are driving in an area that has not yet
been completely recorded on the naviga-
tion DVD. Instead of an arrow indicating a
turn, you will see an arrow which indicates
the general direction of your planned route.
Or you have left the recommended route
and the system requires a few seconds to
calculate a new recommended route.
>the navigation system does not react to
entries?
If the battery was disconnected, it takes
about 10 minutes before the system is once
again operational.
Page 130 of 221
Navigation
Driving tips
129Reference
At a glance
Controls
Communication
Entertainment
Mobility
Page 133 of 221
On/off and tone
132
On/off and tone
The following audio sources have shared
controls and setting options:
>Radio Business
>CD player
>CD changer
*
Controls
The audio sources can be operated using:
>Buttons in the region of the CD player
>Control Center
>Remote control
*
>Buttons on the steering wheel, refer to
page10
Buttons in the region of the CD player
The layout of the buttons can vary depending
on your vehicle's equipment.
Equipment with single drive:Equipment with two drives:
1Sound output for entertainment on/off,
volume
>Press: switch on/off.
When you switch on, the last set radio
station or CD track is played.
>Turn: adjust volume.
2Drive for audio CDs
3 Eject CD
4Station scan/track search
>Change radio station.
>Select track for CD player and
CD changer.
5Drive for navigation DVDs
Page 134 of 221
Navigation
Entertainment
Driving tips
133Reference
At a glance
Controls
Communication
Mobility
Operation using Control Center
Control Center, for principle details, refer to
page16.
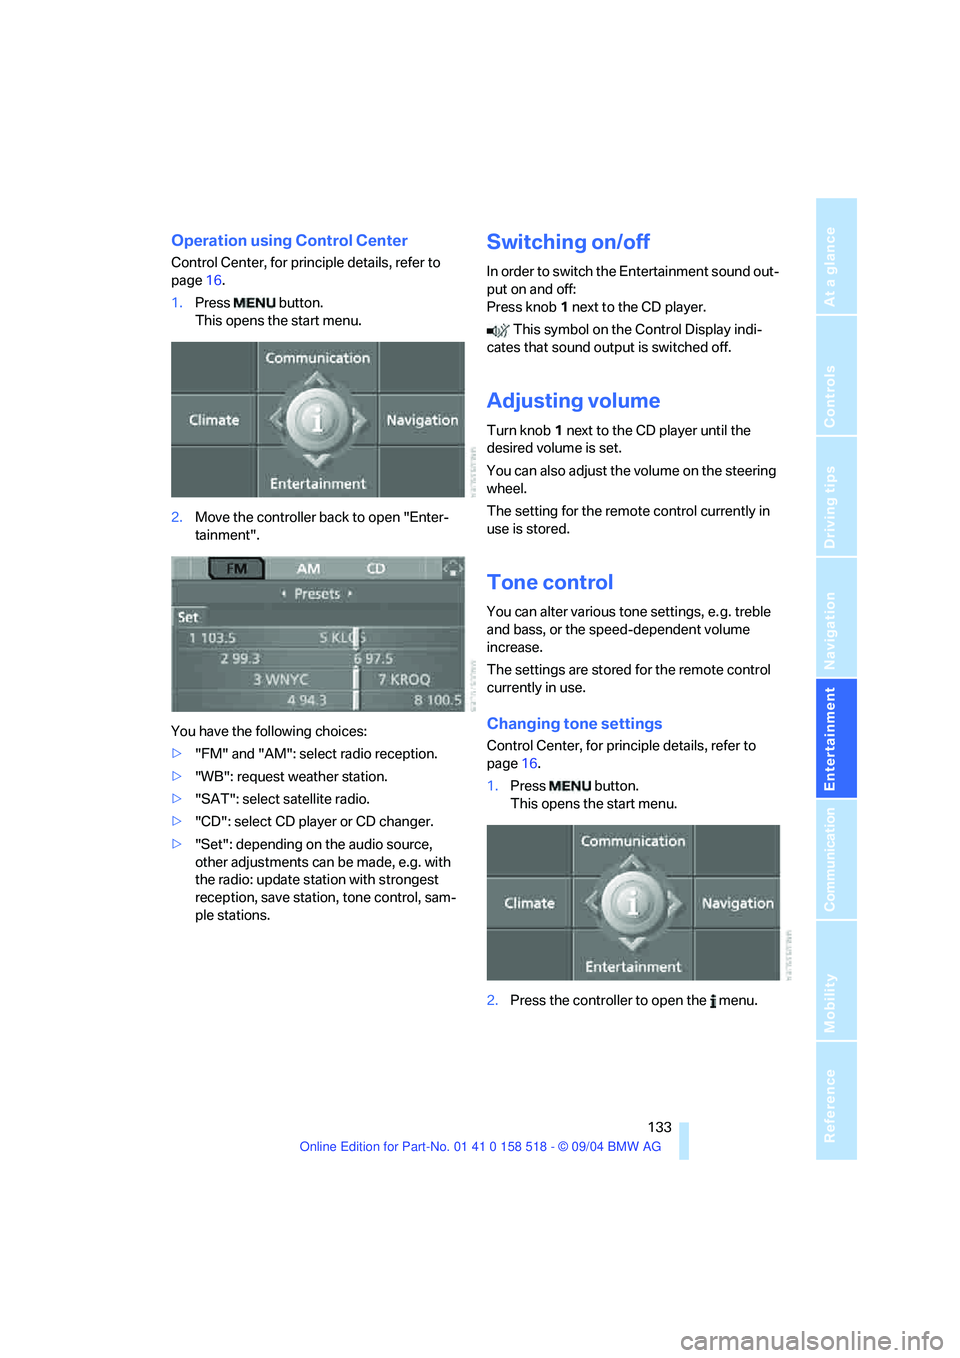
1.Press button.
This opens the start menu.
2.Move the controller back to open "Enter-
tainment".
You have the following choices:
>"FM" and "AM": select radio reception.
>"WB": request weather station.
>"SAT": select satellite radio.
>"CD": select CD player or CD changer.
>"Set": depending on the audio source,
other adjustments can be made, e.g. with
the radio: update station with strongest
reception, save station, tone control, sam-
ple stations.
Switching on/off
In order to switch the Entertainment sound out-
put on and off:
Press knob1 next to the CD player.
This symbol on the Control Display indi-
cates that sound output is switched off.
Adjusting volume
Turn knob1 next to the CD player until the
desired volume is set.
You can also adjust the volume on the steering
wheel.
The setting for the remote control currently in
use is stored.
Tone control
You can alter various tone settings, e. g. treble
and bass, or the speed-dependent volume
increase.
The settings are stored for the remote control
currently in use.
Changing tone settings
Control Center, for principle details, refer to
page16.
1.Press button.
This opens the start menu.
2.Press the controller to open the menu.
Page 136 of 221
Navigation
Entertainment
Driving tips
135Reference
At a glance
Controls
Communication
Mobility
2.Turn the controller.
The adjustment is applied; the field can be
changed.
Professional LOGIC7 HiFi System*
You can select a spatial sound effect that
improves the spatial acoustics in all frequency
ranges.
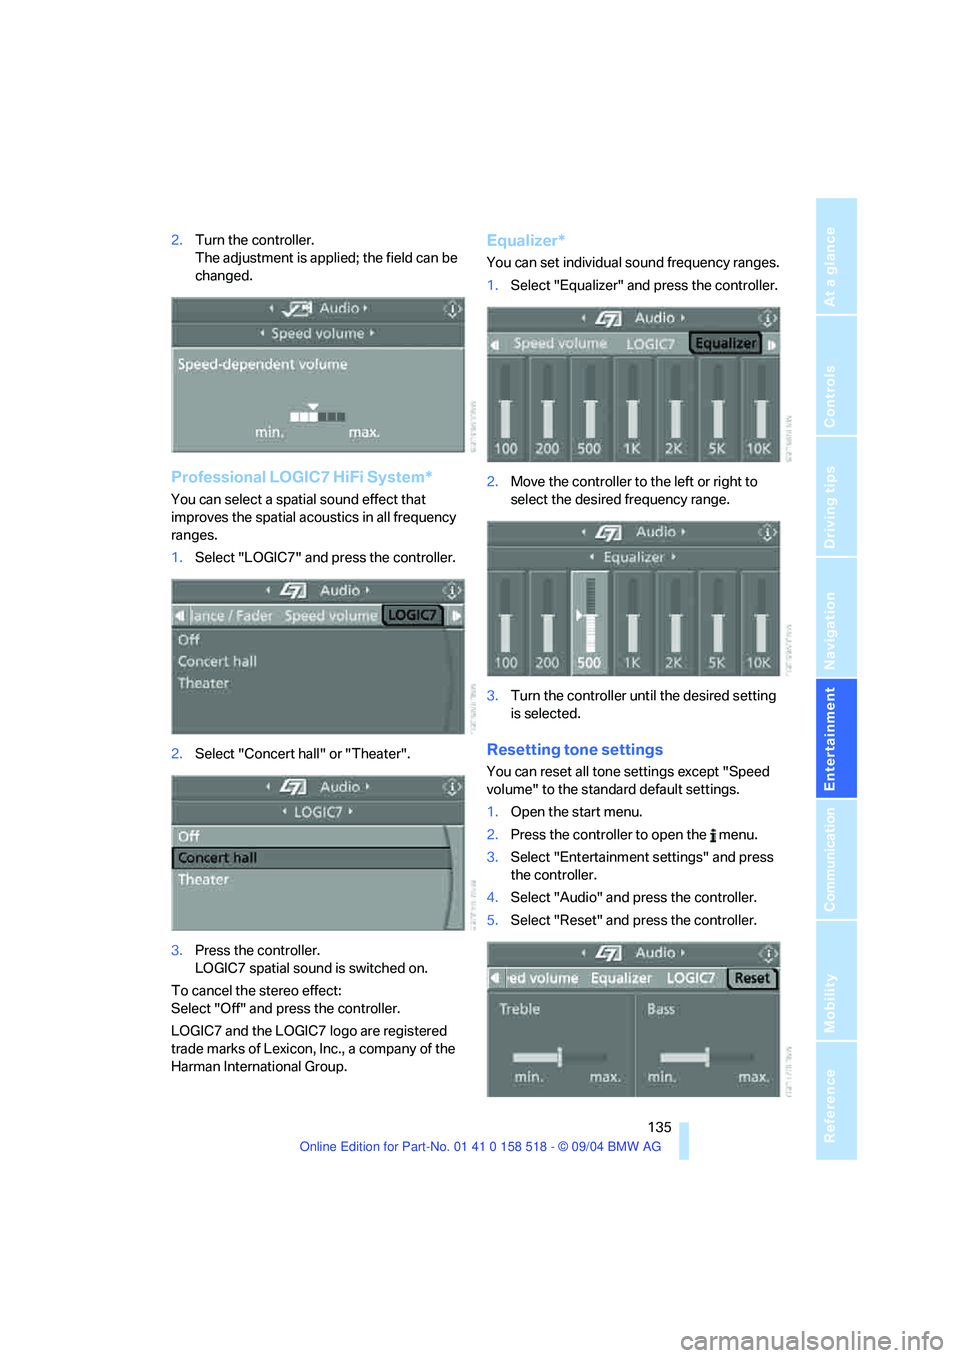
1.Select "LOGIC7" and press the controller.
2.Select "Concert hall" or "Theater".
3.Press the controller.
LOGIC7 spatial sound is switched on.
To cancel the stereo effect:
Select "Off" and press the controller.
LOGIC7 and the LOGIC7 logo are registered
trade marks of Lexicon, Inc., a company of the
Harman International Group.
Equalizer*
You can set individual sound frequency ranges.
1.Select "Equalizer" and press the controller.
2.Move the controller to the left or right to
select the desired frequency range.
3.Turn the controller until the desired setting
is selected.
Resetting tone settings
You can reset all tone settings except "Speed
volume" to the standard default settings.
1.Open the start menu.
2.Press the controller to open the menu.
3.Select "Entertainment settings" and press
the controller.
4.Select "Audio" and press the controller.
5.Select "Reset" and press the controller.
Page 137 of 221
On/off and tone
136
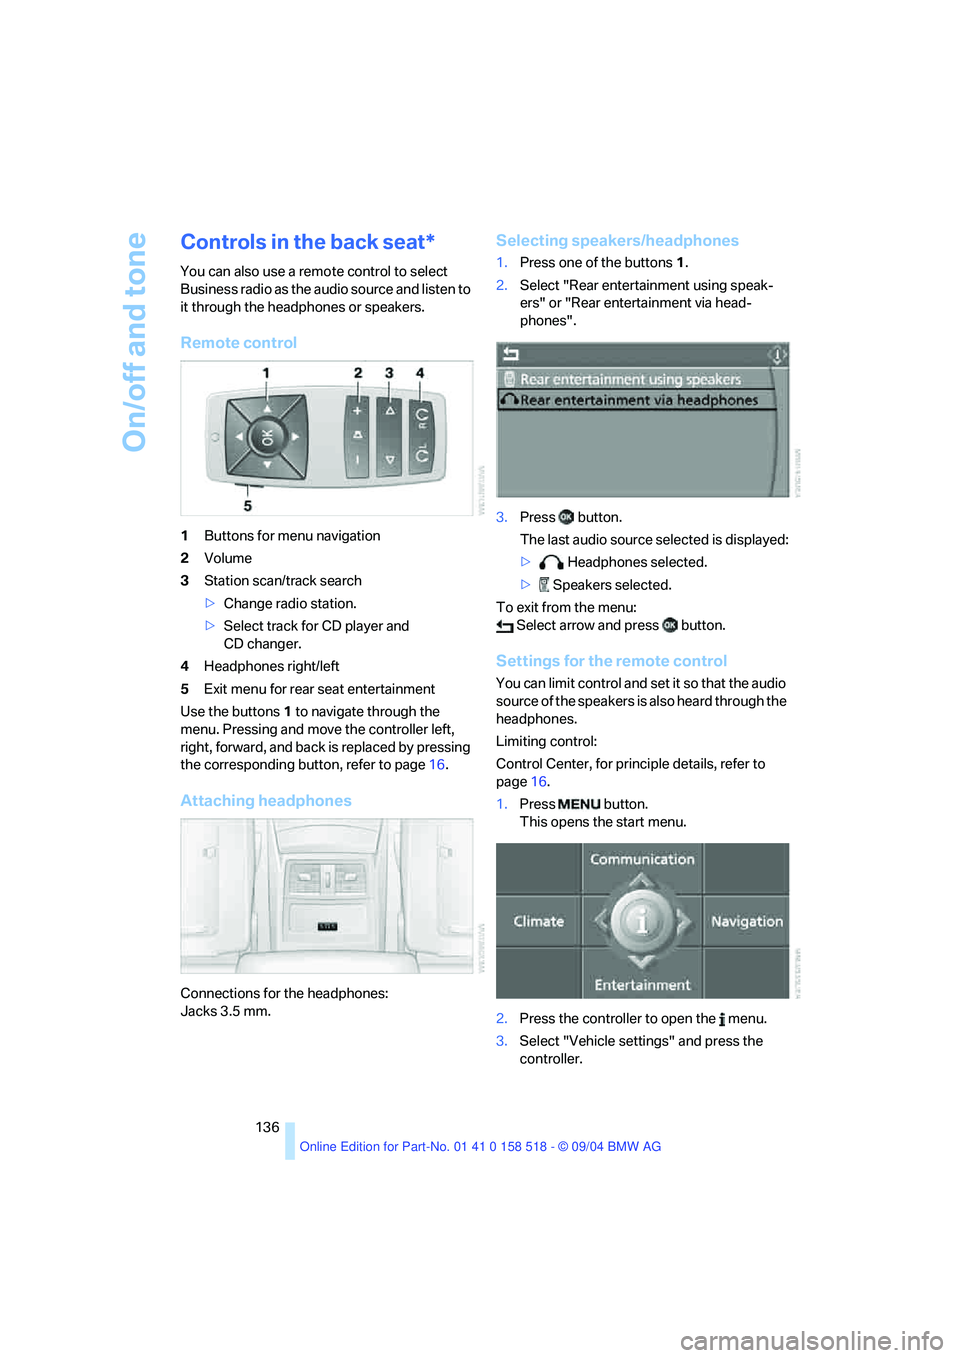
Controls in the back seat*
You can also use a remote control to select
Business radio as the audio source and listen to
it through the headphones or speakers.
Remote control
1Buttons for menu navigation
2Volume
3Station scan/track search
>Change radio station.
>Select track for CD player and
CD changer.
4Headphones right/left
5Exit menu for rear seat entertainment
Use the buttons1 to navigate through the
menu. Pressing and move the controller left,
right, forward, and back is replaced by pressing
the corresponding button, refer to page16.
Attaching headphones
Connections for the headphones:
Jacks 3.5 mm.
Selecting speakers/headphones
1.Press one of the buttons1.
2.Select "Rear entertainment using speak-
ers" or "Rear entertainment via head-
phones".
3.Press button.
The last audio source selected is displayed:
> Headphones selected.
> Speakers selected.
To exit from the menu:
Select arrow and press button.
Settings for the remote control
You can limit control and set it so that the audio
source of the speakers is also heard through the
headphones.
Limiting control:
Control Center, for principle details, refer to
page16.
1.Press button.
This opens the start menu.
2.Press the controller to open the menu.
3.Select "Vehicle settings" and press the
controller.