2005 BMW 330XI SEDAN CD changer
[x] Cancel search: CD changerPage 4 of 223
Reference
At a glance
Controls
Driving tips
Communications
Navigation
Entertainment
Mobility
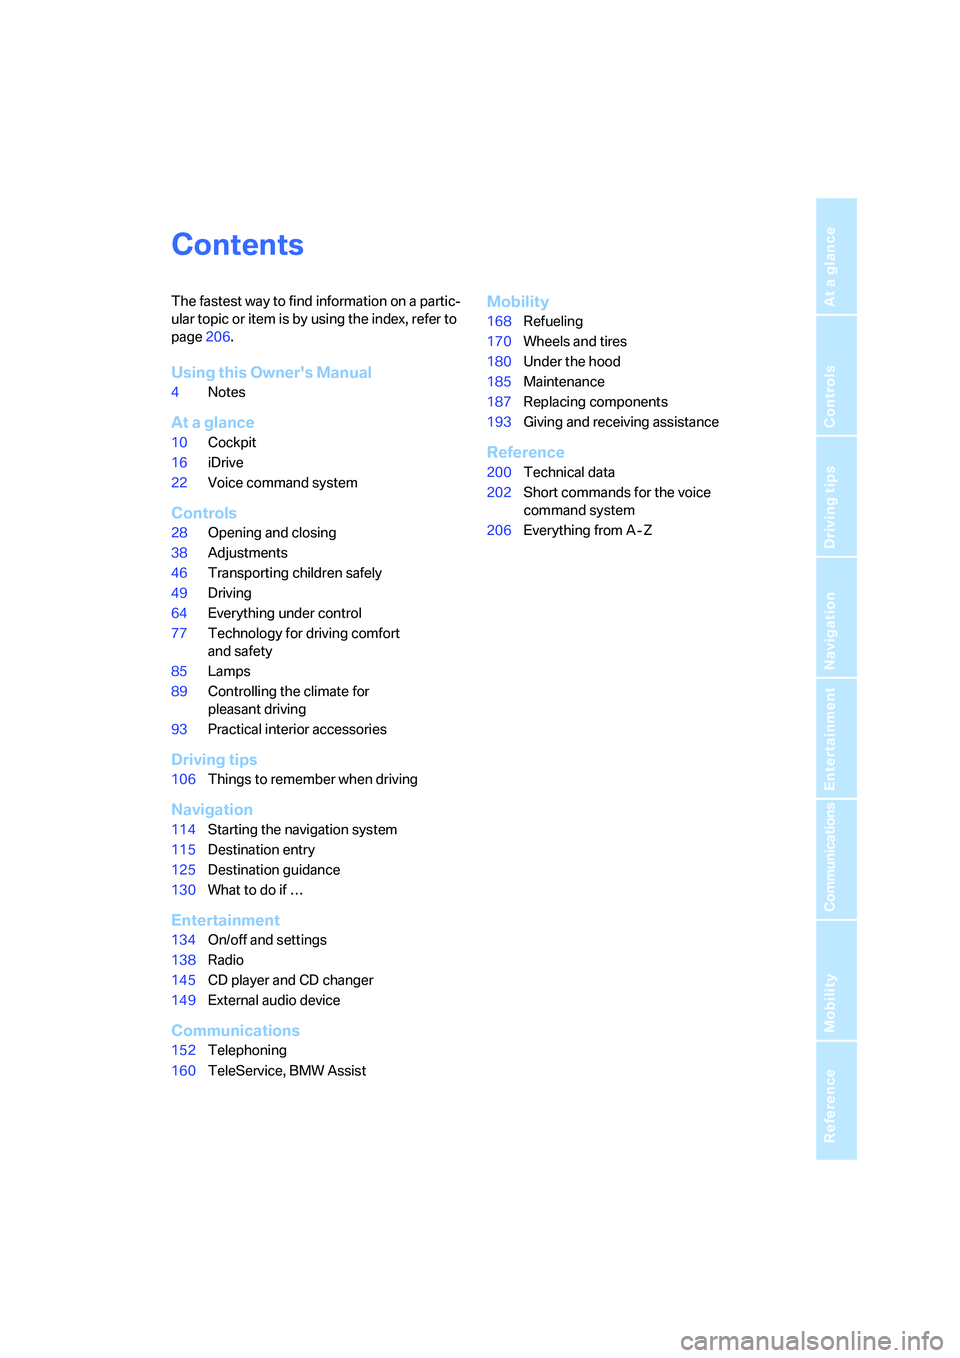
Contents
The fastest way to find information on a partic-
ular topic or item is by using the index, refer to
page206.
Using this Owner's Manual
4Notes
At a glance
10Cockpit
16iDrive
22Voice command system
Controls
28Opening and closing
38Adjustments
46Transporting children safely
49Driving
64Everything under control
77Technology for driving comfort
and safety
85Lamps
89Controlling the climate for
pleasant driving
93Practical interior accessories
Driving tips
106Things to remember when driving
Navigation
114Starting the navigation system
115Destination entry
125Destination guidance
130What to do if …
Entertainment
134On/off and settings
138Radio
145CD player and CD changer
149External audio device
Communications
152Telephoning
160TeleService, BMW Assist
Mobility
168Refueling
170Wheels and tires
180Under the hood
185Maintenance
187Replacing components
193Giving and receiving assistance
Reference
200Technical data
202Short commands for the voice
command system
206Everything from A - Z
Page 18 of 223
At a glance
17Reference
Controls
Driving tips
Communications
Navigation
Entertainment
Mobility
Menu overview
Communication
>Telephone*
>BMW Assist* or TeleService*
Navigation
>Navigation system
>Onboard information, e.g. for displaying the
average fuel consumption.
Entertainment
>Radio
>CD player and CD changer
*
>External audio device
Climate
>Air distribution
>Automatic program
menu
>Switching off Control Display
>Tone and display settings
>Settings for traffic information
>Settings for your vehicle, e.g. for the central
locking system
>Display of service requirements and dates
for statutory emissions and vehicle inspec-
tions
>Settings for telephone
Operating principle
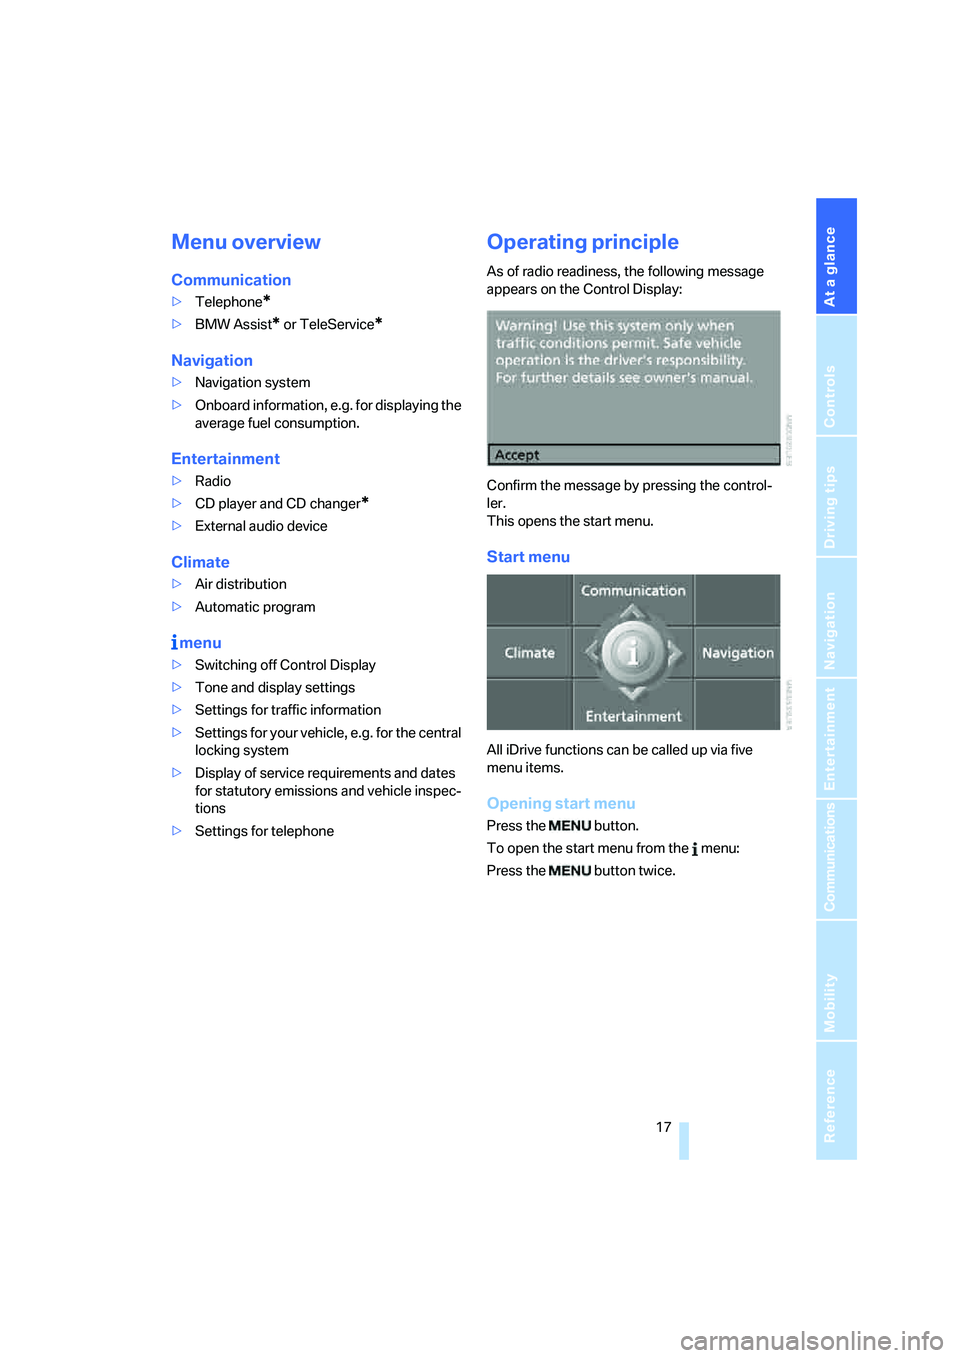
As of radio readiness, the following message
appears on the Control Display:
Confirm the message by pressing the control-
ler.
This opens the start menu.
Start menu
All iDrive functions can be called up via five
menu items.
Opening start menu
Press the button.
To open the start menu from the menu:
Press the button twice.
Page 24 of 223
At a glance
23Reference
Controls
Driving tips
Communications
Navigation
Entertainment
Mobility
This symbol appears on the Control Display
when you can input additional voice com-
mands.
If no further spoken commands are possible,
continue by operating the item of equipment via
iDrive.
Terminating or canceling voice
command system
Press the button on the steering wheel or in
the center console
or
Voice commands
Having the possible voice commands
read aloud
You can have the system read aloud the possi-
ble voice commands related to the selected
menu item on the Control Display.
To have the possible voice commands read out
to you:
For instance, if you have selected "CD", the
spoken commands available for operating the
CD player and CD changer are read out.
Opening help
Using alternative voice commands
There are often a number of commands to run a
function, e.g.:
Calling up functions immediately via
short commands
Short commands enable you to perform certain
functions immediately, irrespective of which
menu item is selected, refer to page202.
Opening the start menu
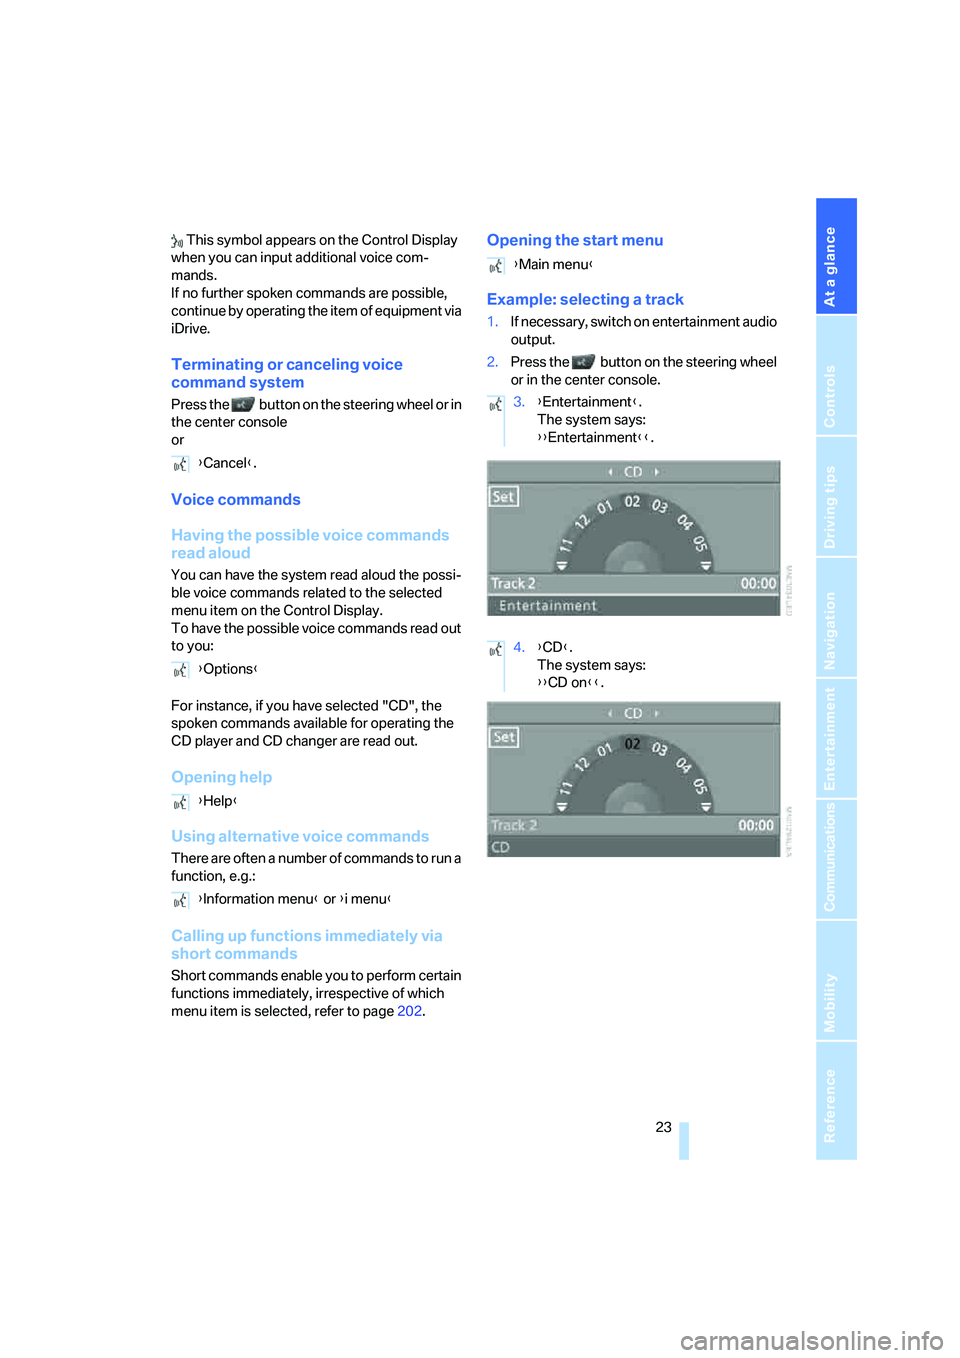
Example: selecting a track
1.If necessary, switch on entertainment audio
output.
2.Press the button on the steering wheel
or in the center console.
{Cancel}.
{Options}
{Help}
{Information menu} or {i menu}
{Main menu}
3.{Entertainment}.
The system says:
{{Entertainment}}.
4.{CD}.
The system says:
{{CD on}}.
Page 135 of 223
On/off and settings
134
On/off and settings
The following audio sources have shared con-
trols and setting options:
>Radio Professional
>CD player
>CD changer
*
Controls
The audio sources can be operated using:
>Buttons near the CD player
>iDrive
>Buttons
on the steering wheel, refer to
page10
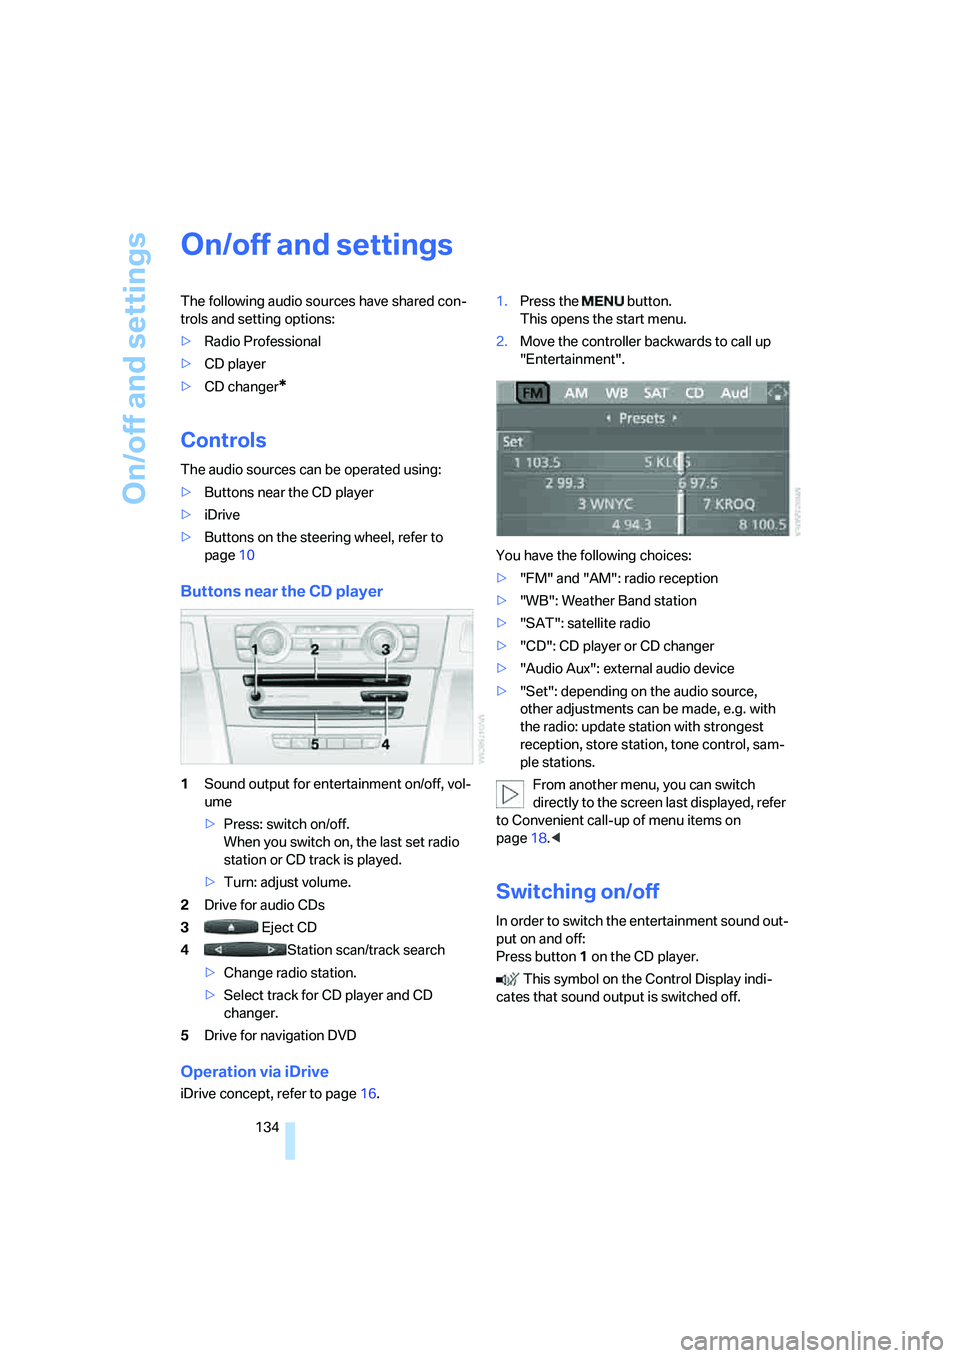
Buttons near the CD player
1Sound output for entertainment on/off, vol-
ume
>Press: switch on/off.
When you switch on, the last set radio
station or CD track is played.
>Turn: adjust volume.
2Drive for audio CDs
3 Eject CD
4Station scan/track search
>Change radio station.
>Select track for CD player and CD
changer.
5Drive for navigation DVD
Operation via iDrive
iDrive concept, refer to page16.1.Press the button.
This opens the start menu.
2.Move the controller backwards to call up
"Entertainment".
You have the following choices:
>"FM" and "AM": radio reception
>"WB": Weather Band station
>"SAT": satellite radio
>"CD": CD player or CD changer
>"Audio Aux": external audio device
>"Set": depending on the audio source,
other adjustments can be made, e.g. with
the radio: update station with strongest
reception, store station, tone control, sam-
ple stations.
From another menu, you can switch
directly to the screen last displayed, refer
to Convenient call-up of menu items on
page18.<
Switching on/off
In order to switch the entertainment sound out-
put on and off:
Press button1 on the CD player.
This symbol on the Control Display indi-
cates that sound output is switched off.
Page 146 of 223
Navigation
Entertainment
Driving tips
145Reference
At a glance
Controls
Communications
Mobility
CD player and CD changer
Listening to CDs
Starting the CD player
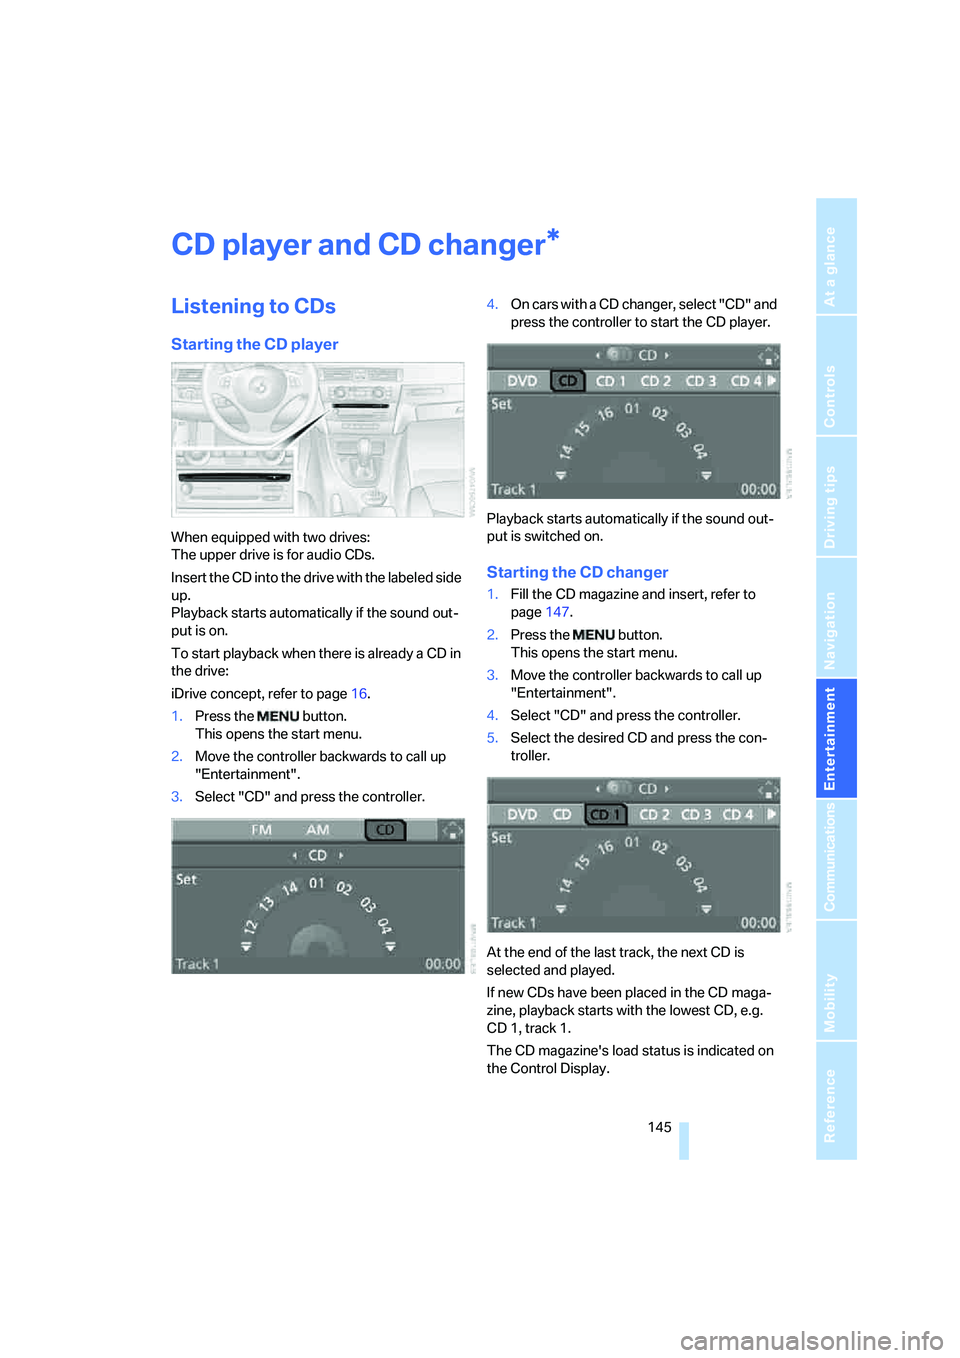
When equipped with two drives:
The upper drive is for audio CDs.
Insert the CD into the drive with the labeled side
up.
Playback starts automatically if the sound out-
put is on.
To start playback when there is already a CD in
the drive:
iDrive concept, refer to page16.
1.Press the button.
This opens the start menu.
2.Move the controller backwards to call up
"Entertainment".
3.Select "CD" and press the controller.4.O n c a r s w i t h a C D c h a n g e r , s e l e c t " C D " a n d
press the controller to start the CD player.
Playback starts automatically if the sound out-
put is switched on.
Starting the CD changer
1.Fill the CD magazine and insert, refer to
page147.
2.Press the button.
This opens the start menu.
3.Move the controller backwards to call up
"Entertainment".
4.Select "CD" and press the controller.
5.Select the desired CD and press the con-
troller.
At the end of the last track, the next CD is
selected and played.
If new CDs have been placed in the CD maga-
zine, playback starts with the lowest CD, e.g.
CD 1, track 1.
The CD magazine's load status is indicated on
the Control Display.
*
Page 147 of 223
CD player and CD changer
146
Selecting a track
Buttons on the CD player
Press the button for the appropriate
direction as often as necessary until the desired
track on the current CD is reached.
The CD starts to play at the start of the track.
The track is displayed on the Control Display.
You can also change the track with buttons on
the steering wheel, refer to page10.
Via iDrive
Turn the controller to select a track.
Sampling tracks, Scan
All tracks on the current CD are automatically
sampled once in succession.
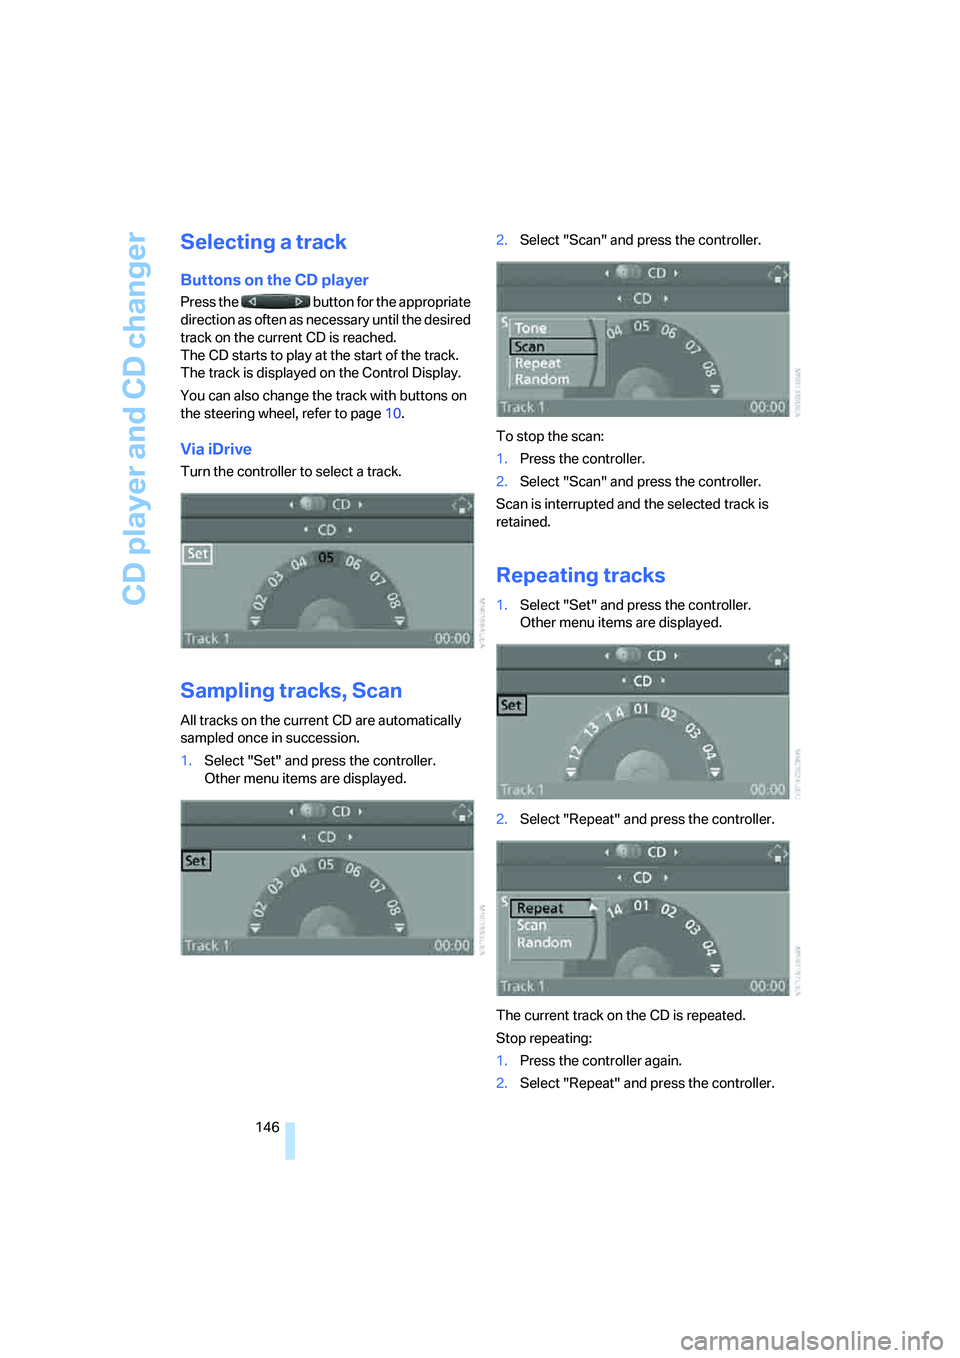
1.Select "Set" and press the controller.
Other menu items are displayed.2.Select "Scan" and press the controller.
To stop the scan:
1.Press the controller.
2.Select "Scan" and press the controller.
Scan is interrupted and the selected track is
retained.
Repeating tracks
1.Select "Set" and press the controller.
Other menu items are displayed.
2.Select "Repeat" and press the controller.
The current track on the CD is repeated.
Stop repeating:
1.Press the controller again.
2.Select "Repeat" and press the controller.
Page 148 of 223
Navigation
Entertainment
Driving tips
147Reference
At a glance
Controls
Communications
Mobility
Random play sequence
The tracks on the current CD are played once
each in random order.
1.Select "Set" and press the controller.
Other menu items are displayed.
2.Select "Random" and press the controller.
Stop random function:
1.Press the controller.
2.Select "Random" and press the controller.
Fast forward/reverse
Buttons on the CD player:
Press and hold the button for the
corresponding direction.
The tracks can be heard, but reproduction is
distorted.
CD magazine
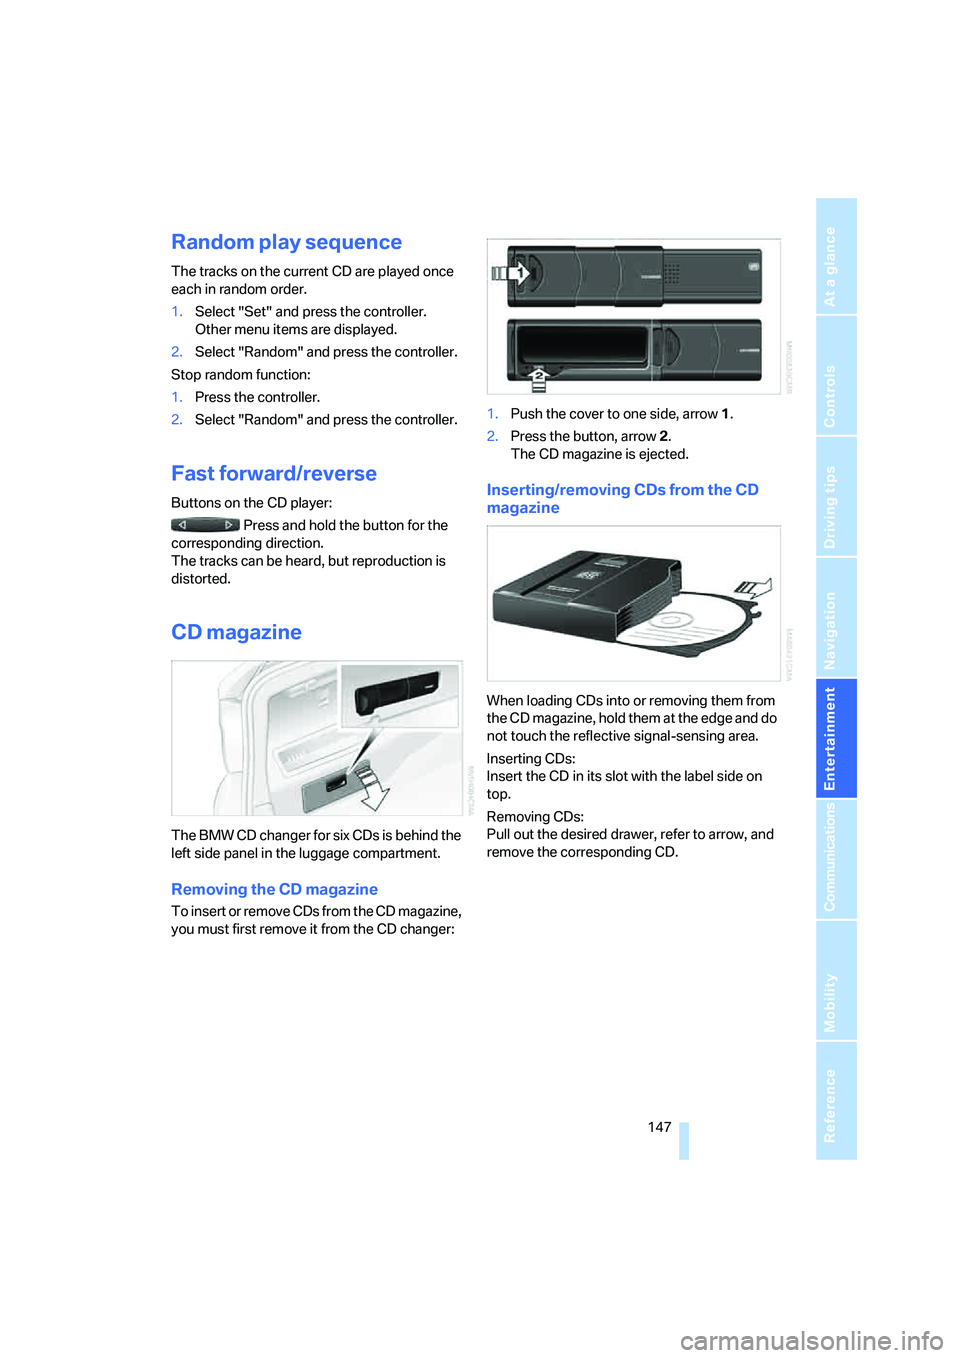
The BMW CD changer for six CDs is behind the
left side panel in the luggage compartment.
Removing the CD magazine
To insert or remove CDs from the CD magazine,
you must first remove it from the CD changer:1.Push the cover to one side, arrow 1.
2.Press the button, arrow 2.
The CD magazine is ejected.
Inserting/removing CDs from the CD
magazine
When loading CDs into or removing them from
the CD magazine, hold them at the edge and do
not touch the reflective signal-sensing area.
Inserting CDs:
Insert the CD in its slot with the label side on
top.
Removing CDs:
Pull out the desired drawer, refer to arrow, and
remove the corresponding CD.
Page 149 of 223
CD player and CD changer
148
Inserting the CD magazine
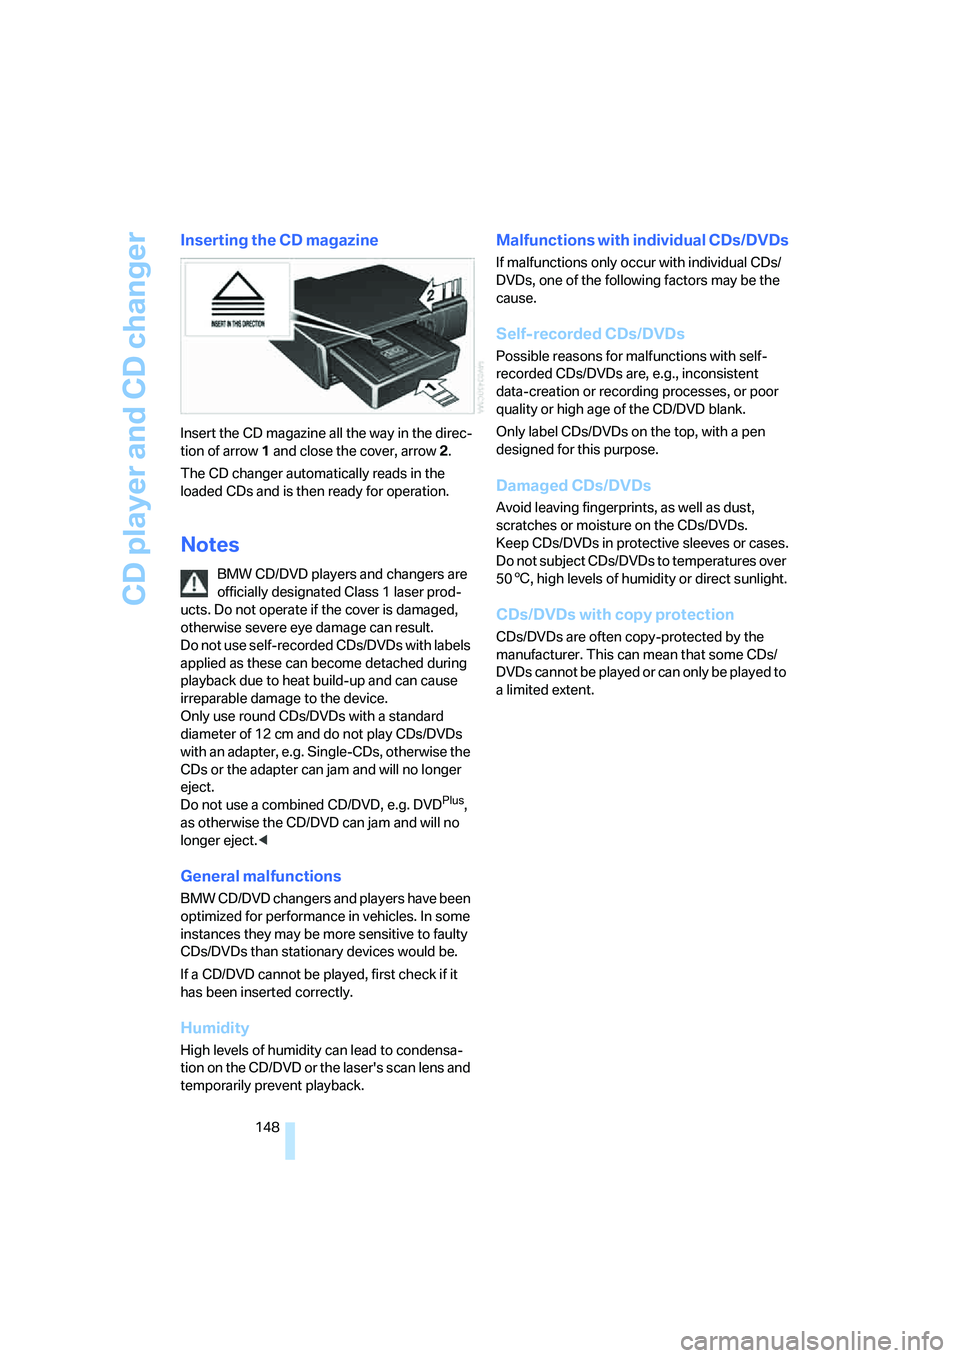
Insert the CD magazine all the way in the direc-
tion of arrow 1 and close the cover, arrow 2.
The CD changer automatically reads in the
loaded CDs and is then ready for operation.
Notes
BMW CD/DVD players and changers are
officially designated Class 1 laser prod-
ucts. Do not operate if the cover is damaged,
otherwise severe eye damage can result.
Do not use self-recorded CDs/DVDs with labels
applied as these can become detached during
playback due to heat build-up and can cause
irreparable damage to the device.
Only use round CDs/DVDs with a standard
diameter of 12 cm and do not play CDs/DVDs
with an adapter, e.g. Single-CDs, otherwise the
CDs or the adapter can jam and will no longer
eject.
Do not use a combined CD/DVD, e.g. DVD
Plus,
as otherwise the CD/DVD can jam and will no
longer eject.<
General malfunctions
BMW CD/DVD changers and players have been
optimized for performance in vehicles. In some
instances they may be more sensitive to faulty
CDs/DVDs than stationary devices would be.
If a CD/DVD cannot be played, first check if it
has been inserted correctly.
Humidity
High levels of humidity can lead to condensa-
tion on the CD/DVD or the laser's scan lens and
temporarily prevent playback.
Malfunctions with individual CDs/DVDs
If malfunctions only occur with individual CDs/
DVDs, one of the following factors may be the
cause.
Self-recorded CDs/DVDs
Possible reasons for malfunctions with self-
recorded CDs/DVDs are, e.g., inconsistent
data-creation or recording processes, or poor
quality or high age of the CD/DVD blank.
Only label CDs/DVDs on the top, with a pen
designed for this purpose.
Damaged CDs/DVDs
Avoid leaving fingerprints, as well as dust,
scratches or moisture on the CDs/DVDs.
Keep CDs/DVDs in protective sleeves or cases.
Do not subject CDs/DVDs to temperatures over
506, high levels of humidity or direct sunlight.
CDs/DVDs with copy protection
CDs/DVDs are often copy-protected by the
manufacturer. This can mean that some CDs/
DVDs cannot be played or can only be played to
a limited extent.