2005 BMW 330XI SEDAN ECU
[x] Cancel search: ECUPage 102 of 223
Controls
101Reference
At a glance
Driving tips
Communications
Navigation
Entertainment
Mobility
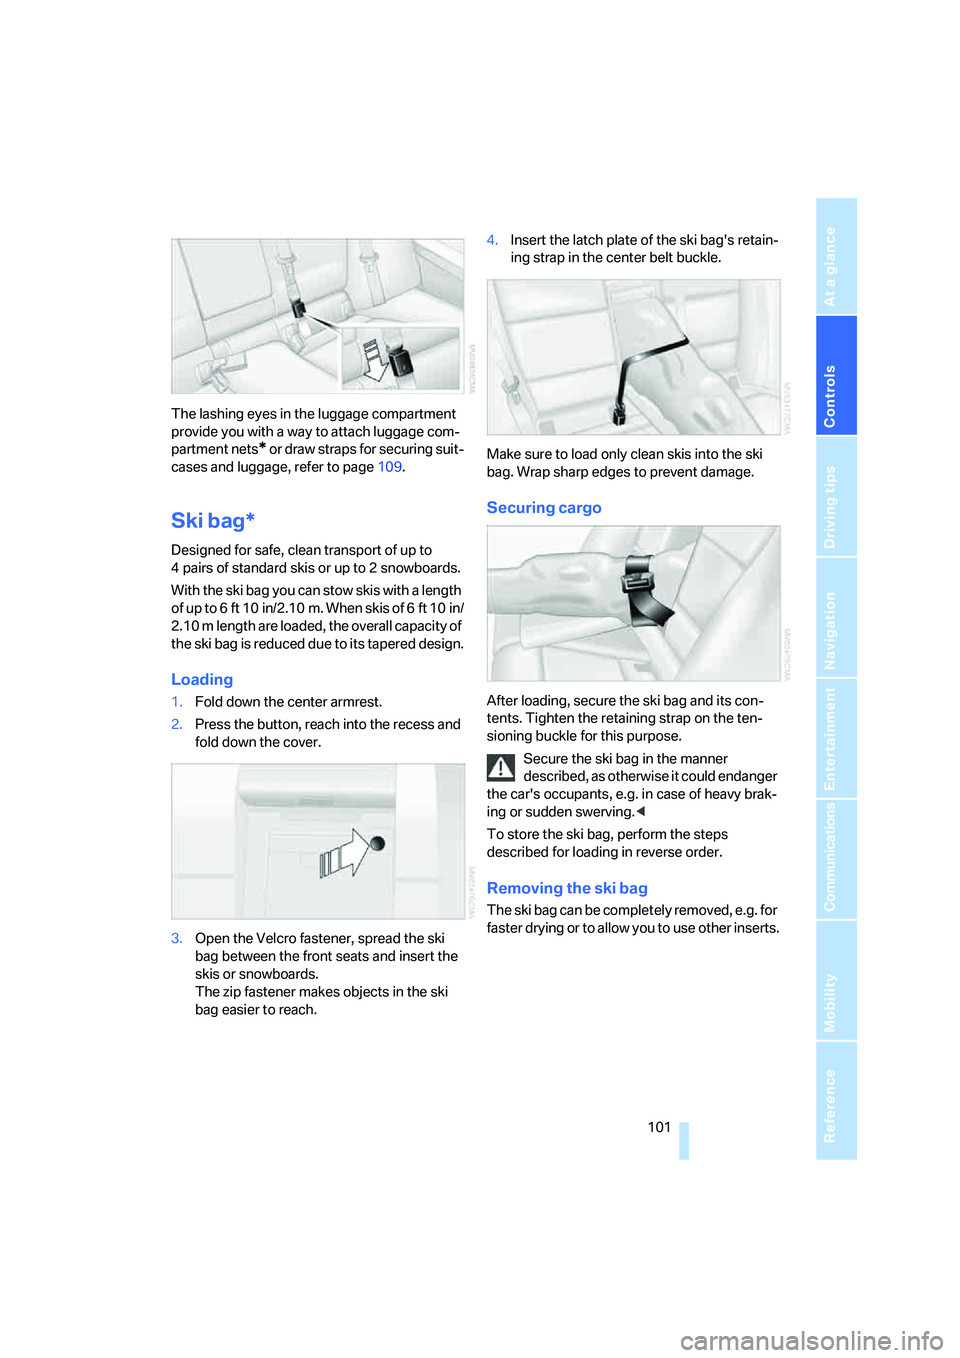
The lashing eyes in the luggage compartment
provide you with a way to attach luggage com-
partment nets
* or draw straps for securing suit-
cases and luggage, refer to page109.
Ski bag*
Designed for safe, clean transport of up to
4 pairs of standard skis or up to 2 snowboards.
With the ski bag you can stow skis with a length
of up to 6ft 10in/2.10m. When skis of 6ft 10in/
2.10 m length are loaded, the overall capacity of
the ski bag is reduced due to its tapered design.
Loading
1.Fold down the center armrest.
2.Press the button, reach into the recess and
fold down the cover.
3.Open the Velcro fastener, spread the ski
bag between the front seats and insert the
skis or snowboards.
The zip fastener makes objects in the ski
bag easier to reach.4.Insert the latch plate of the ski bag's retain-
ing strap in the center belt buckle.
Make sure to load only clean skis into the ski
bag. Wrap sharp edges to prevent damage.
Securing cargo
After loading, secure the ski bag and its con-
tents. Tighten the retaining strap on the ten-
sioning buckle for this purpose.
Secure the ski bag in the manner
described, as otherwise it could endanger
the car's occupants, e.g. in case of heavy brak-
ing or sudden swerving.<
To store the ski bag, perform the steps
described for loading in reverse order.
Removing the ski bag
The ski bag can be completely removed, e.g. for
faster drying or to allow you to use other inserts.
Page 110 of 223
Driving tips
109Reference
At a glance
Controls
Communications
Navigation
Entertainment
Mobility
Load
The permissible load is the total of the weight of
occupants and cargo/luggage. The greater the
weight of the occupants, the less cargo/lug-
gage can be transported.
Stowing cargo
>Position heavy objects as low and as far for-
ward as possible, ideally directly behind the
respective seat backs.
>Cover sharp edges and corners.
>For very heavy cargo when the rear seat is
not occupied, secure each safety belt in the
opposite buckle.
Securing cargo
>Smaller and relatively light items can be
retained with tensioning straps or draw
straps
*.
>Heavy-duty cargo straps
* for securing
larger and heavier objects are available at
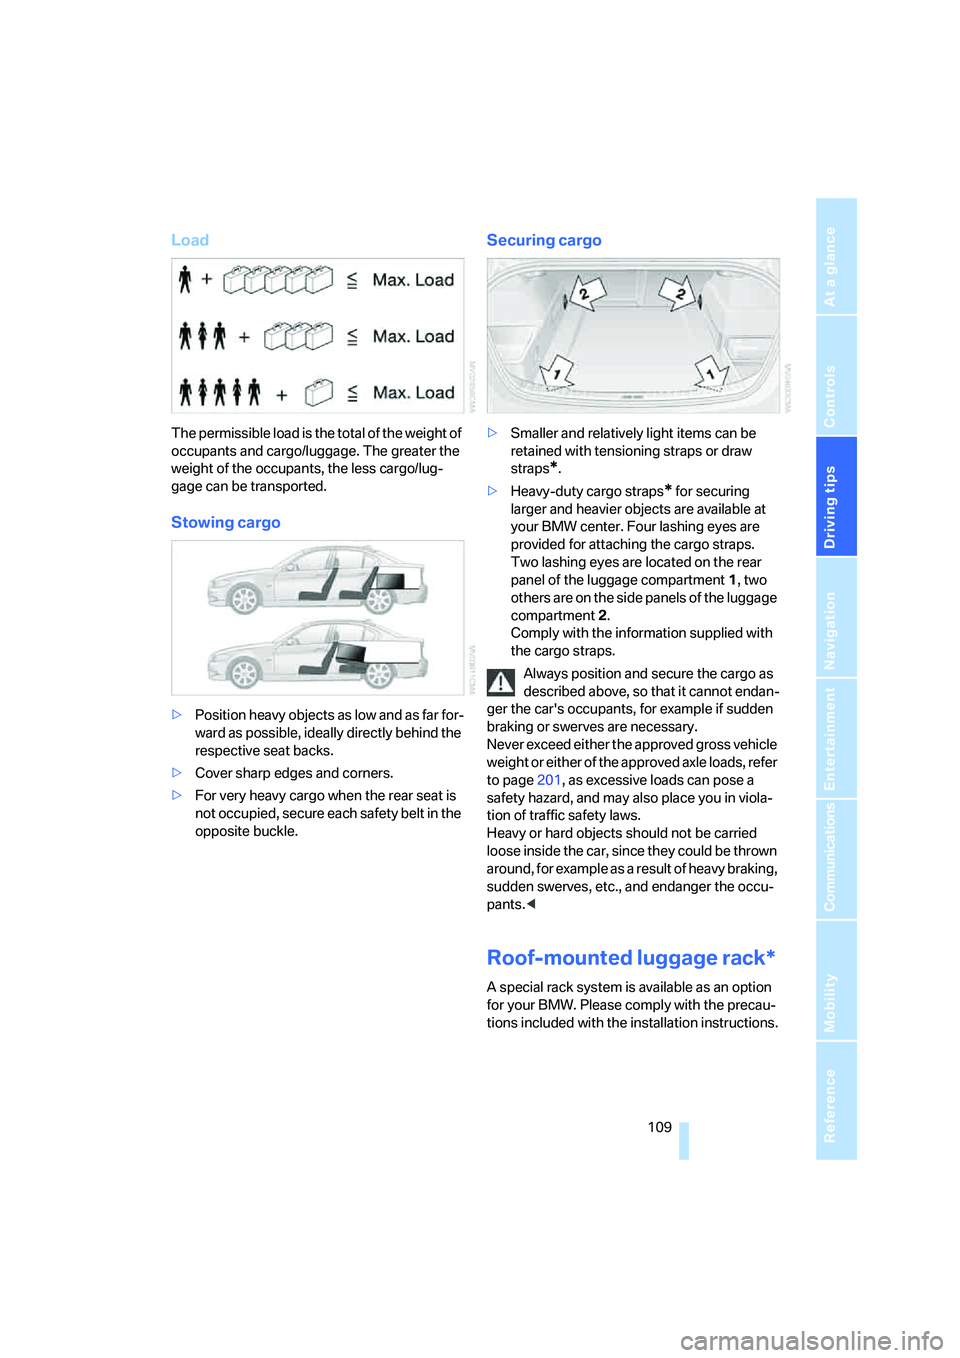
your BMW center. Four lashing eyes are
provided for attaching the cargo straps.
Two lashing eyes are located on the rear
panel of the luggage compartment 1, two
others are on the side panels of the luggage
compartment 2.
Comply with the information supplied with
the cargo straps.
Always position and secure the cargo as
described above, so that it cannot endan-
ger the car's occupants, for example if sudden
braking or swerves are necessary.
Never exceed either the approved gross vehicle
weight or either of the approved axle loads, refer
to page201, as excessive loads can pose a
safety hazard, and may also place you in viola-
tion of traffic safety laws.
Heavy or hard objects should not be carried
loose inside the car, since they could be thrown
around, for example as a result of heavy braking,
sudden swerves, etc., and endanger the occu-
pants.<
Roof-mounted luggage rack*
A special rack system is available as an option
for your BMW. Please comply with the precau-
tions included with the installation instructions.
Page 111 of 223
Things to remember when driving
110
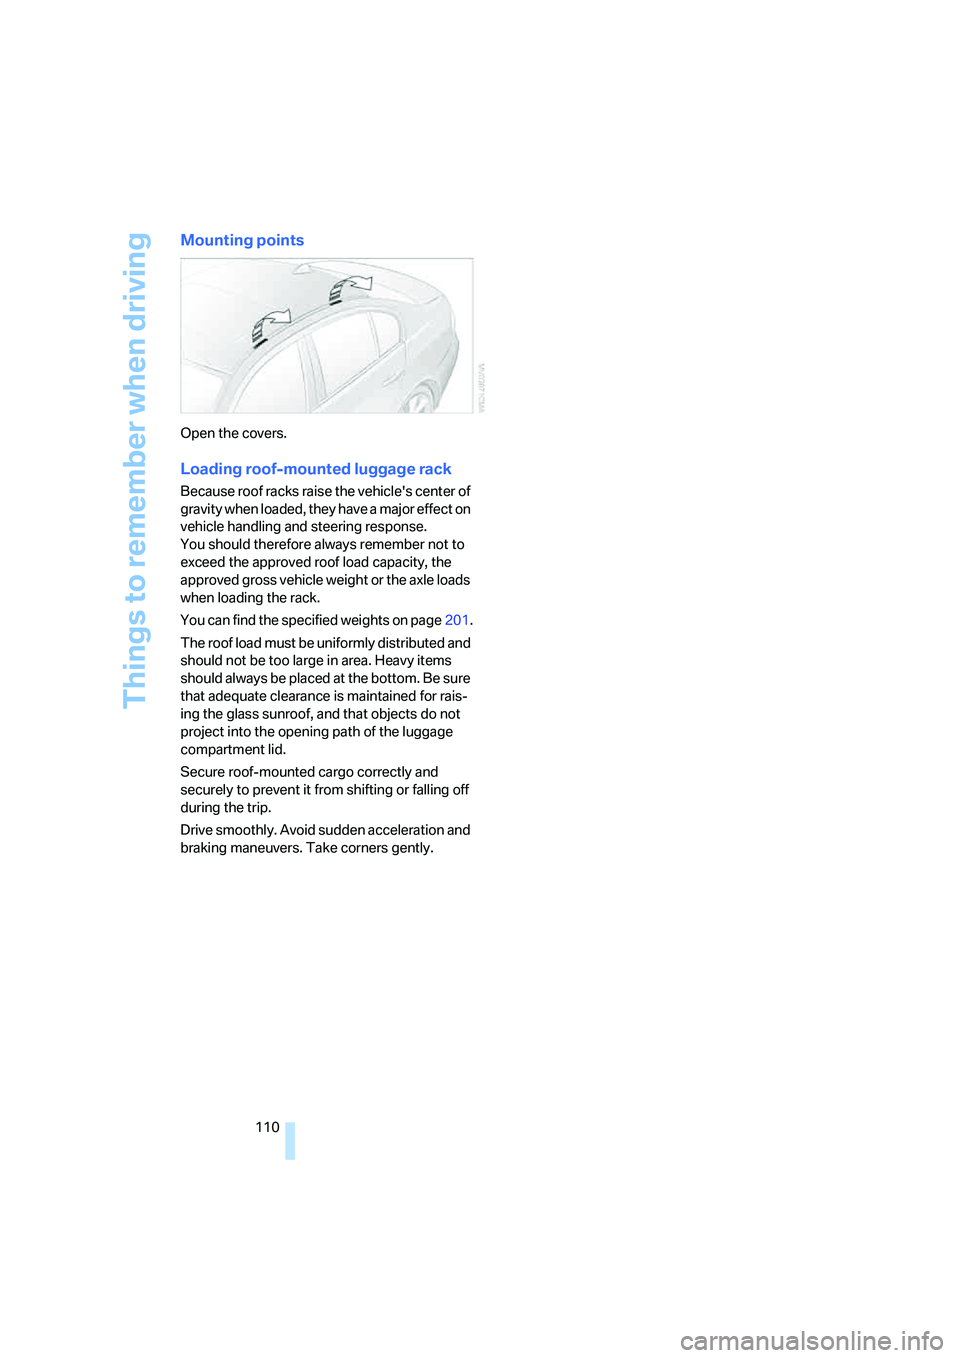
Mounting points
Open the covers.
Loading roof-mounted luggage rack
Because roof racks raise the vehicle's center of
gravity when loaded, they have a major effect on
vehicle handling and steering response.
You should therefore always remember not to
exceed the approved roof load capacity, the
approved gross vehicle weight or the axle loads
when loading the rack.
You can find the specified weights on page201.
The roof load must be uniformly distributed and
should not be too large in area. Heavy items
should always be placed at the bottom. Be sure
that adequate clearance is maintained for rais-
ing the glass sunroof, and that objects do not
project into the opening path of the luggage
compartment lid.
Secure roof-mounted cargo correctly and
securely to prevent it from shifting or falling off
during the trip.
Drive smoothly. Avoid sudden acceleration and
braking maneuvers. Take corners gently.
Page 129 of 223
Destination guidance
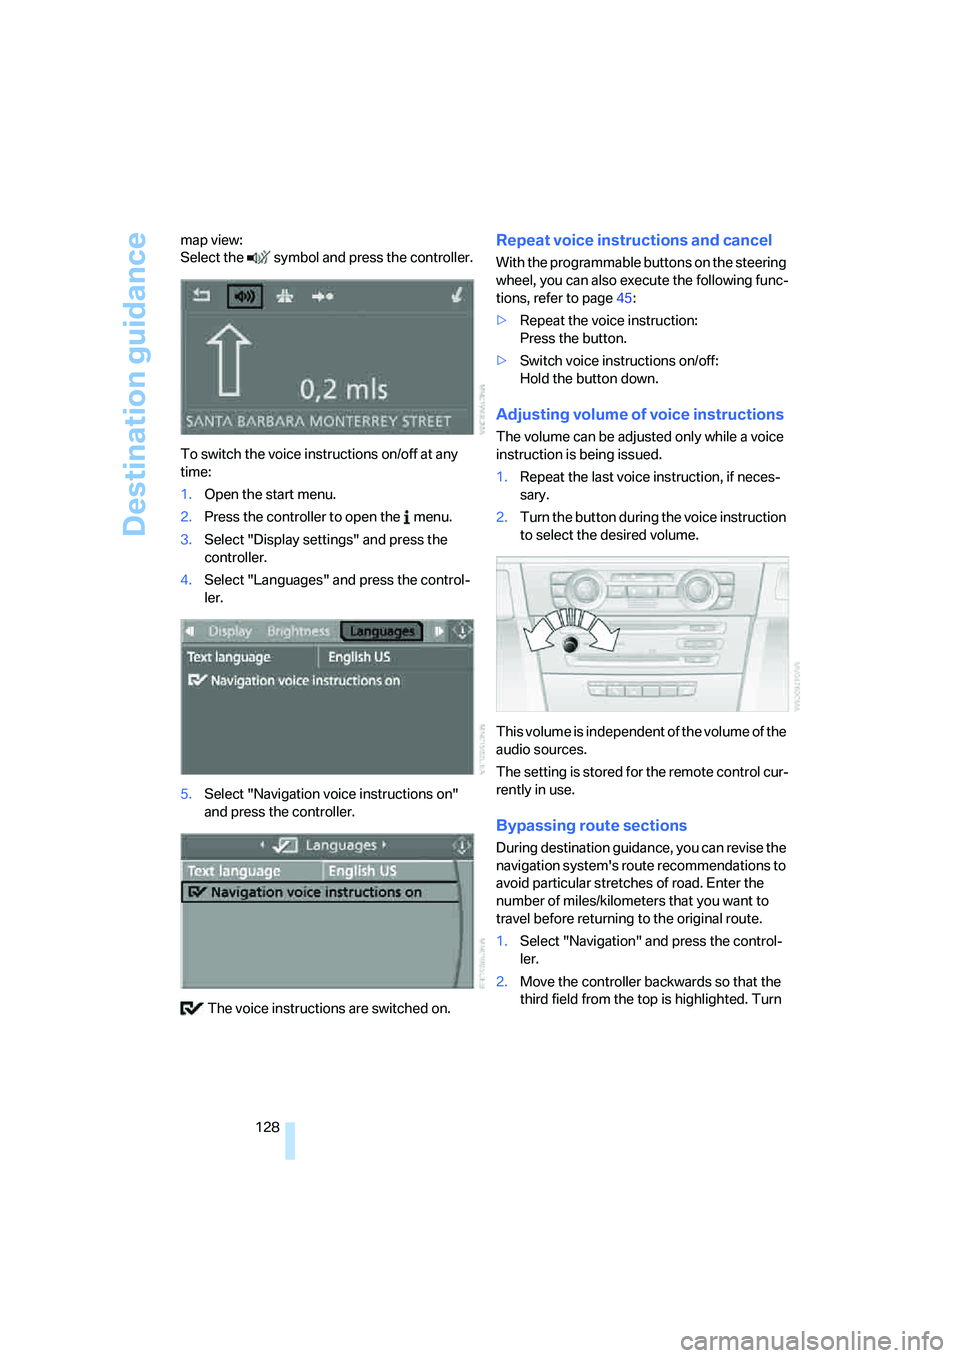
128 map view:
Select the symbol and press the controller.
To switch the voice instructions on/off at any
time:
1.Open the start menu.
2.Press the controller to open the menu.
3.Select "Display settings" and press the
controller.
4.Select "Languages" and press the control-
ler.
5.Select "Navigation voice instructions on"
and press the controller.
The voice instructions are switched on.
Repeat voice instructions and cancel
With the programmable buttons on the steering
wheel, you can also execute the following func-
tions, refer to page45:
>Repeat the voice instruction:
Press the button.
>Switch voice instructions on/off:
Hold the button down.
Adjusting volume of voice instructions
The volume can be adjusted only while a voice
instruction is being issued.
1.Repeat the last voice instruction, if neces-
sary.
2.Turn the button during the voice instruction
to select the desired volume.
This volume is independent of the volume of the
audio sources.
The setting is stored for the remote control cur-
rently in use.
Bypassing route sections
During destination guidance, you can revise the
navigation system's route recommendations to
avoid particular stretches of road. Enter the
number of miles/kilometers that you want to
travel before returning to the original route.
1.Select "Navigation" and press the control-
ler.
2.Move the controller backwards so that the
third field from the top is highlighted. Turn
Page 181 of 223
Under the hood
180
Under the hood
Do not work on the car unless you pos-
sess the necessary technical knowledge.
If you are unfamiliar with the statutory guide-
lines, have any work on the vehicle performed
only by a BMW center or by a workshop that
work according to BMW repair procedures with
correspondingly trained personnel. If this work
is not carried out properly, there is a danger of
subsequent damage and related safety haz-
ards.<
Hood
Releasing
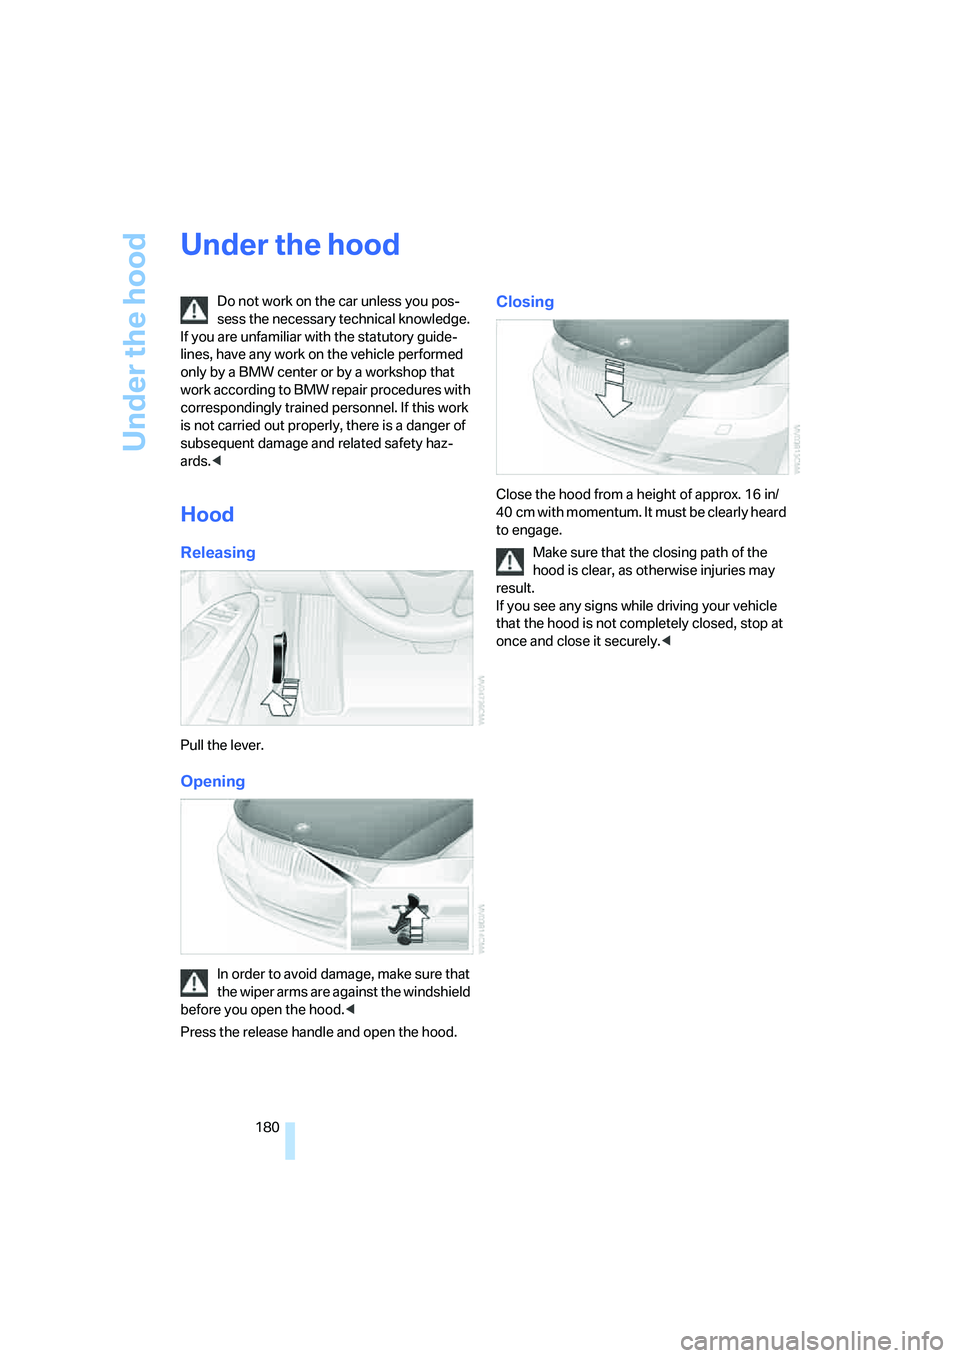
Pull the lever.
Opening
In order to avoid damage, make sure that
the wiper arms are against the windshield
before you open the hood.<
Press the release handle and open the hood.
Closing
Close the hood from a height of approx. 16 in/
4 0 c m w i t h m o m e n t um . I t m u st b e c l e a r l y h e a r d
to engage.
Make sure that the closing path of the
hood is clear, as otherwise injuries may
result.
If you see any signs while driving your vehicle
that the hood is not completely closed, stop at
once and close it securely.<
Page 192 of 223
Mobility
191Reference
At a glance
Controls
Driving tips
Communications
Navigation
Entertainment
according to BMW repair procedures with cor-
respondingly trained personnel.
Light-emitting diodes LEDs
Light-emitting diodes installed behind translu-
c e n t l e n s e s s e r v e a s t h e l i g h t s o u r c e f o r m a n y o f
the controls and displays in your vehicle. These
light-emitting diodes, which operate using a
concept similar to that applied in conventional
lasers, are officially designated as Class 1 light-
emitting diodes.
Do not remove the covers or expose the
eyes directly to the unfiltered light source
for several hours at a time, as this could cause
irritation to the retina.<
Changing wheels
Your BMW is equipped with Run-Flat Tires as
standard. This removes the need to change a
wheel immediately in the event of a puncture.
The symbol identifying Run-Flat Tires is a circle
with the letters RSC on the sidewall, refer to
Run-Flat Tires, page178.
When mounting new tires or changing over
from summer to winter tires and vice versa,
mount Run-Flat Tires for your own safety. In the
event of a flat, moreover, no spare wheel is
available. Your BMW center will be glad to
advise you. Refer also to New wheels and tires,
page178.
The tools for changing wheels are avail-
able as optional accessories from your
BMW center.<
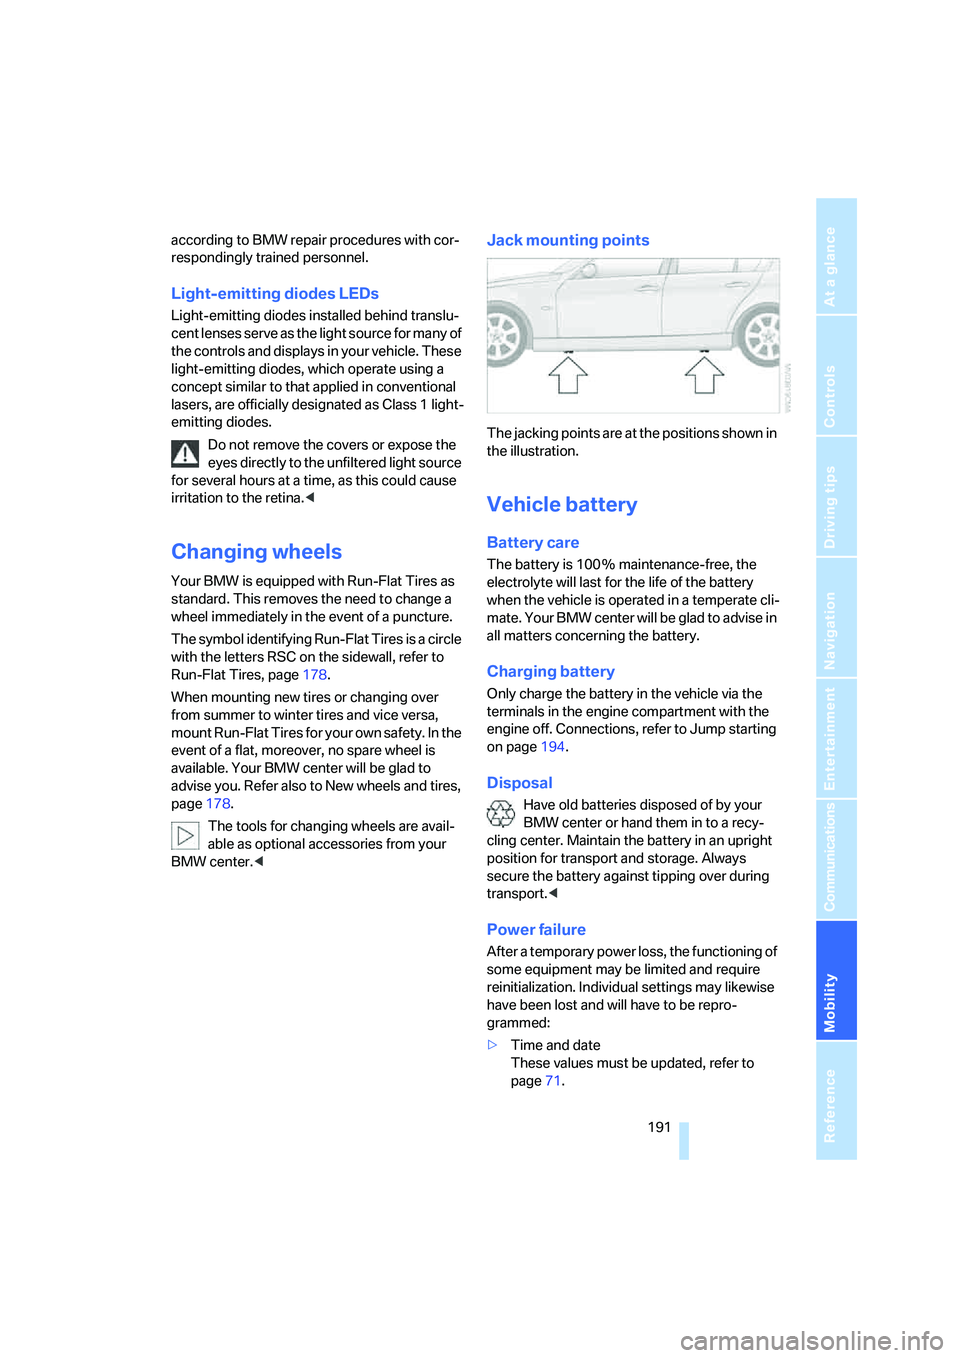
Jack mounting points
The jacking points are at the positions shown in
the illustration.
Vehicle battery
Battery care
The battery is 100 % maintenance-free, the
electrolyte will last for the life of the battery
when the vehicle is operated in a temperate cli-
mate. Your BMW center will be glad to advise in
all matters concerning the battery.
Charging battery
Only charge the battery in the vehicle via the
terminals in the engine compartment with the
engine off. Connections, refer to Jump starting
on page194.
Disposal
Have old batteries disposed of by your
BMW center or hand them in to a recy-
cling center. Maintain the battery in an upright
position for transport and storage. Always
secure the battery against tipping over during
transport.<
Power failure
After a temporary power loss, the functioning of
some equipment may be limited and require
reinitialization. Individual settings may likewise
have been lost and will have to be repro-
grammed:
>Time and date
These values must be updated, refer to
page71.
Page 197 of 223
Giving and receiving assistance
196
Vehicles with automatic transmission
Selector lever in position N.
Changing selector lever positions, refer to
page52.
Do not exceed a towing speed of 45 mph
or 70 km/h and a towing distance of
90 miles/150 km, as otherwise the automatic
transmission may be damaged.<
Towing methods
In some countries, towing with tow bars or
ropes is not permitted in public traffic.
Familiarize yourself with the regulations on tow-
ing in the respective country.
With tow bar
The towing vehicle must not be lighter
than the towed vehicle, otherwise it may
be impossible to maintain control.<
The tow fittings used should be on the same
side on both vehicles. Should it prove impossi-
ble to avoid mounting the tow bar at an angle,
please observe the following:
>Clearance and maneuvering capability will
be sharply limited during cornering.
>The tow bar will generate lateral forces if it is
attached offset.
Secure the tow bar to the tow fitting only.
Otherwise damage to other vehicle parts
could result.<
With tow rope
When starting off in the towing vehicle, make
sure that the tow rope is taut.
To avoid jerking and the associated
stresses on vehicle components when
towing, always use nylon ropes or nylon straps.
Secure the tow rope to the tow fitting only. Oth-
erwise damage to other vehicle parts could
result.<
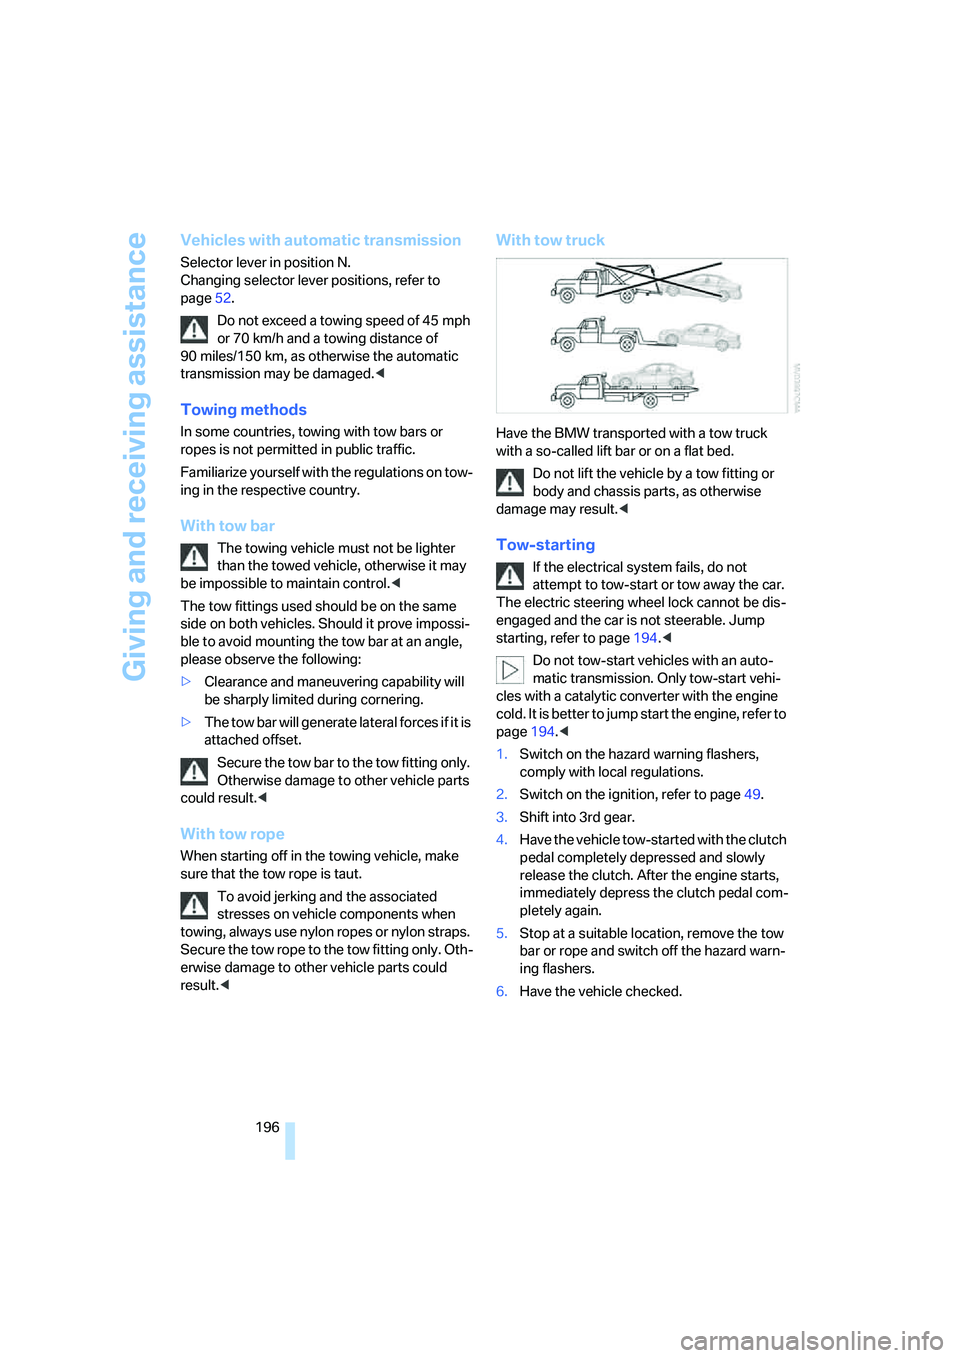
With tow truck
Have the BMW transported with a tow truck
with a so-called lift bar or on a flat bed.
Do not lift the vehicle by a tow fitting or
body and chassis parts, as otherwise
damage may result.<
Tow-starting
If the electrical system fails, do not
attempt to tow-start or tow away the car.
The electric steering wheel lock cannot be dis-
engaged and the car is not steerable. Jump
starting, refer to page194.<
Do not tow-start vehicles with an auto-
matic transmission. Only tow-start vehi-
cles with a catalytic converter with the engine
cold. It is better to jump start the engine, refer to
page194.<
1.Switch on the hazard warning flashers,
comply with local regulations.
2.Switch on the ignition, refer to page49.
3.Shift into 3rd gear.
4.Have the vehicle tow-started with the clutch
pedal completely depressed and slowly
release the clutch. After the engine starts,
immediately depress the clutch pedal com-
pletely again.
5.Stop at a suitable location, remove the tow
bar or rope and switch off the hazard warn-
ing flashers.
6.Have the vehicle checked.
Page 209 of 223

Everything from A - Z
208 Car battery, refer to Vehicle
battery191
Car care, refer to Caring for
your vehicle brochure
Car-care products, refer to
Caring for your vehicle
brochure
"Car Data"66
Care, refer to Caring for your
vehicle brochure
Cargo, securing109
Cargo loading
– stowing cargo109
– vehicle108
Caring for artificial leather,
refer to Caring for your
vehicle brochure
Caring for leather, refer to
Caring for your vehicle
brochure
Caring for light-alloy wheels,
refer to Caring for your
vehicle brochure
Caring for plastic, refer to
Caring for your vehicle
brochure
Caring for the carpet, refer to
Caring for your vehicle
brochure
Caring for the vehicle finish,
refer to Caring for your
vehicle brochure
Car jack
– jacking points191
Car key, refer to Integrated
key/remote control28
Car phone152
– installation location, refer to
Center armrest96
– refer to Portable phone152
– refer to separate Owner's
Manual
Car radio, refer to Radio138
Car wash108
– also refer to Caring for your
vehicle brochure
Catalytic converter, refer to
Hot exhaust system106
"Categories"142CBS Condition Based
Service185
"CD"134,145
CD changer145
– controls134
– fast forward/reverse147
– installation location147
– playing a track146
– random order147
– repeating a track146
– selecting a CD145
– selecting a track146
– switching on/off134
– tone control135
– volume135
CD player145
– controls134
– fast forward/reverse147
– playing a track
146
– random order147
– repeating a track146
– selecting a track146
– switching on/off134
– tone control135
– volume135
Center armrest96
Center brake lamp
– replacing bulbs190
Center console, refer to
Around the center
console14
"Central locking"30
Central locking
– from inside32
– from outside29
Central locking system29
Changing bulbs187
Changing the language on the
Control Display76
Changing the measurement
units on the Control
Display68
Changing wheels191
Chassis number, refer to
Engine compartment181
Check Control73
"Check Control
messages"75
Check Gas Cap168Checking the air pressure,
refer to Tire inflation
pressure170
Child-restraint fixing system
LATCH48
Child-restraint systems46
Child-safety lock48
Child seats46
Chrome parts, care, refer to
Caring for your vehicle
brochure
Cigarette lighter99
– socket99
Cleaning, refer to Caring for
your vehicle brochure
Cleaning headlamps54
– washer fluid55
"Climate"90
Clock64
– 12h/24h mode72
– setting time71
Closing
– from inside32
– from outside30
Clothes hooks97
Cold start, refer to Starting the
engine49
Combined instrument, refer to
Instrument cluster12
Comfort area, refer to Around
the center console14
"Communication"153
"Communication
settings"160
Compact disc, refer to
– CD changer145
– CD player145
Compact wheel
– inflation pressure
172,173,174,175
Compartment for remote
control, refer to Ignition
lock49
Compass94
Computer65
– displays on Control
Display66
– hour signal72
Computer, refer to iDrive16