2005 BMW 330XI IDRIVE SEDAN transmission
[x] Cancel search: transmissionPage 61 of 223

Driving
60 >When you deactivate the Dynamic Stability
Control DSC
>When DSC or ABS is intervening
>When the system does not recognize any
objects for a longer period of time, e.g. on
infrequently traveled roads without a shoul-
der or guard rails, or if the radar sensor is
covered with dirt, refer to page61
>When you actuate the handbrake while driv-
ing
When the system is deactivated, you
must brake the vehicle yourself and/or
maneuver as necessary, otherwise there is a
risk of accident.<
Warning lamp
The warning lamp comes on when
active cruise control has been auto-
matically deactivated due to one of
the following factors: you are driving under a
speed of 20 mph or 30 km/h, the handbrake is
applied, or DSC is intervening. A message
appears on the Control Display.
Resuming stored desired speed and
distance
Press button 4.
The stored speed and distance are regained
and maintained.
In the following instances, the stored speed is
deleted and can no longer be resumed:
>When driving control systems are interven-
ing
>In cars with manual transmission: when you
shift gears very slowly or engage neutral
gear
>In cars with automatic transmission: when
you engage selector lever position N
>When the ignition is switched off
Displays in the instrument cluster
1Stored desired speed
2Shows yellow: vehicle detected ahead
Flashes in red: system cannot maintain dis-
tance; driver must brake the vehicle
Flashes in yellow: driving control systems
are intervening; cruise control is deacti-
vated
3Selected distance to vehicle ahead
The indicator lights up as soon as the sys-
tem is activated.
4Selected desired speed is temporarily dis-
played
If --- mph or --- km/h temporarily appears
in the instrument cluster display, it is pos-
sible that the system prerequisites for operation
are currently not met. Calling up Check Control
messages, refer to page74.<
Warning lamps
The indicator2 flashes in red; a
signal sounds.
The system indicates that you
must brake and/or maneuver the
vehicle yourself. Active cruise con-
trol cannot automatically restore the distance to
the vehicle ahead.
This indicator does not release you, however,
from your responsibility to adapt your desired
speed and driving style to prevailing driving
conditions.
The indicator 2 flashes in yellow.
The prerequisites for operating
active cruise control are not met,
e.g. as a result of ABS or DSC
Page 78 of 223

Controls
77Reference
At a glance
Driving tips
Communications
Navigation
Entertainment
Mobility
Technology for driving comfort and safety
PDC Park Distance Control*
The concept
The PDC assists you with maneuvering in tight
parking spaces. Acoustic signals and a visual
indicator
warn you of the presence of an object
in front of
* or behind your car. To measure the
distance, there are four ultrasonic sensors in
each bumper. The sensors at the front
* and at
the two rear corners have a range of approx.
24 in/60 cm; the rear middle sensors have
approx. 5 ft/1.50 m.
PDC is a parking aid that can indicate
objects when they are approached
slowly, as is usually the case when parking.
Avoid approaching an object at high speed, as
otherwise physical circumstances may lead to
the system warning being issued too late.<
Automatic mode
With the engine running or the ignition switched
on, the system is activated automatically after
approx. 1 second when you engage reverse
gear or move the automatic transmission selec-
tor lever to position R. Wait this short period
before driving.
Manual operation*
Press the button, the LED lights up.
Deactivating manual mode
Press the button again; the LED goes out.
The system is automatically deactivated once
the vehicle travels approx. 165 ft/50 m or exceeds a speed of roughly 20 mph or 30 km/h;
the LED goes out. You can reactivate the sys-
tem manually as needed.
Signal tones
When nearing an object, its position is indicated
correspondingly by an interval tone. For exam-
ple, the tone sounds at the rear if the system
detects an object behind the car. As the dis-
tance between vehicle and object decreases,
the intervals between the tones become
shorter. If the distance to the nearest object
falls to below roughly 1 ft/30 cm, then a contin-
uous tone sounds.
The warning signal is canceled after approx.
3 seconds, if you are moving parallel to a wall.
Malfunction
The indicator lamp in the instrument
cluster comes on. PDC is malfunc-
tioning. A message appears on the
Control Display. Have the system checked.
To avoid this problem, keep the sensors clean
and free of ice or snow in order to ensure that
they will continue to operate effectively.
Manual mode
The LED above the button flashes in addition.
PDC with optical warning
You can also have the system show distances
to objects on the Control Display. The contours
of distant objects are shown on the Control Dis-
play even before the acoustic signal sounds.
The setting is stored for the remote control cur-
rently in use.
iDrive concept, refer to page16.
1.Open the start menu.
2.Press the controller to open the menu.
3.Select "Vehicle settings" and press the
controller.
Page 107 of 223
Things to remember when driving
106
Things to remember when driving
Break-in period
Moving parts need breaking-in time to adjust to
each other. Please follow the instructions below
in order to achieve the optimal service life and
economy of operation for your vehicle.
Engine and differential
Up to 1,250 miles/2,000 km:
Attempt to vary both engine and vehicle
speeds, but refrain from exceeding an engine
speed of 4,500 rpm or a driving speed of
100 mph or 160 km/h.
Always obey all official speed limits.
Avoid full-throttle operation and use of the
transmission's kick-down mode.
Once you have driven 1,250 miles/2,000 km,
the engine and vehicle speeds can be gradually
increased.
Tires
Due to technical factors associated with their
manufacture, tires do not achieve their full trac-
tion potential until after an initial break-in
period. Therefore, drive reservedly during the
first 200 miles/300 km.
Brake system
Brakes require an initial break-in period of
approx. 300 miles/500 km to achieve optimized
contact and wear patterns between brake pads
and rotors. Drive with caution during this break-
in period.
Clutch
The function of the clutch reaches its optimal
level only after a distance driven of approx.
300 miles/500 km. During this break-in period,
engage the clutch gently.
Following part replacement
The same break-in procedures should be
observed if any of the components mentioned above have to be renewed in the course of the
vehicle's operating life.
General driving notes
Closing the luggage compartment lid
Operate the vehicle only when the lug-
gage compartment lid is completely
closed. Otherwise, exhaust fumes could enter
the interior of the vehicle.<
If special circumstances make it absolutely nec-
essary to drive with the luggage compartment
lid open:
1.Close all windows and the glass sunroof.
2.Increase the air flow rate of the automatic
climate control considerably, refer to
page91.
Hot exhaust system
As in all vehicles equipped with a catalytic
converter, extremely high temperatures
are generated in this vehicle. Do not remove the
heat shields installed adjacent to various sec-
tions of the exhaust system, and never apply
undercoating to them. When driving, standing
at idle and while parking, take care to avoid pos-
sible contact between the hot exhaust system
and any highly flammable materials such as hay,
leaves, grass, etc. Such contact could lead to a
fire, with the risk of serious personal injuries and
property damage.<
Portable phone in the vehicle
BMW discourages the use of mobile
communications devices, e.g. portable
phones, inside the vehicle without a direct con-
nection to an outside antenna. Otherwise, the
vehicle electronics and mobile communication
device can influence one another. In addition,
there is no assurance that the radiation which
results from transmission will be dissipated
from the vehicle interior.<
Page 108 of 223
Driving tips
107Reference
At a glance
Controls
Communications
Navigation
Entertainment
Mobility
Interior and exterior mirrors, automatic
dimming feature*
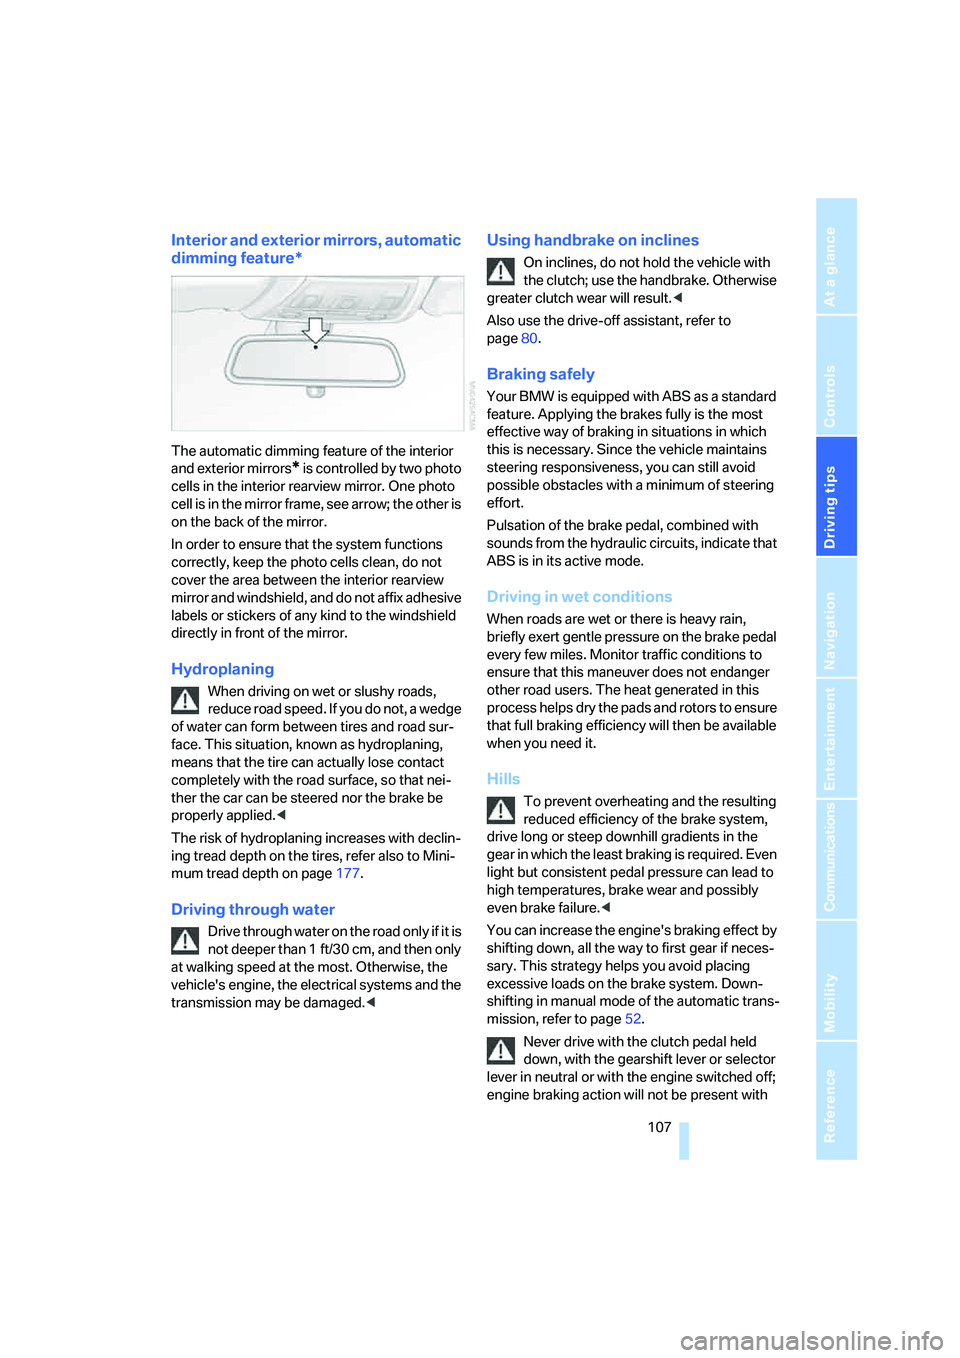
The automatic dimming feature of the interior
and exterior mirrors
* is controlled by two photo
cells in the interior rearview mirror. One photo
cell is in the mirror frame, see arrow; the other is
on the back of the mirror.
In order to ensure that the system functions
correctly, keep the photo cells clean, do not
cover the area between the interior rearview
mirror and windshield, and do not affix adhesive
labels or stickers of any kind to the windshield
directly in front of the mirror.
Hydroplaning
When driving on wet or slushy roads,
reduce road speed. If you do not, a wedge
of water can form between tires and road sur-
face. This situation, known as hydroplaning,
means that the tire can actually lose contact
completely with the road surface, so that nei-
ther the car can be steered nor the brake be
properly applied.<
The risk of hydroplaning increases with declin-
ing tread depth on the tires, refer also to Mini-
mum tread depth on page177.
Driving through water
Drive through water on the road only if it is
not deeper than 1 ft/30 cm, and then only
at walking speed at the most. Otherwise, the
vehicle's engine, the electrical systems and the
transmission may be damaged.<
Using handbrake on inclines
On inclines, do not hold the vehicle with
the clutch; use the handbrake. Otherwise
greater clutch wear will result.<
Also use the drive-off assistant, refer to
page80.
Braking safely
Your BMW is equipped with ABS as a standard
feature. Applying the brakes fully is the most
effective way of braking in situations in which
this is necessary. Since the vehicle maintains
steering responsiveness, you can still avoid
possible obstacles with a minimum of steering
effort.
Pulsation of the brake pedal, combined with
sounds from the hydraulic circuits, indicate that
ABS is in its active mode.
Driving in wet conditions
When roads are wet or there is heavy rain,
briefly exert gentle pressure on the brake pedal
every few miles. Monitor traffic conditions to
ensure that this maneuver does not endanger
other road users. The heat generated in this
process helps dry the pads and rotors to ensure
that full braking efficiency will then be available
when you need it.
Hills
To prevent overheating and the resulting
reduced efficiency of the brake system,
drive long or steep downhill gradients in the
gear in which the least braking is required. Even
light but consistent pedal pressure can lead to
high temperatures, brake wear and possibly
even brake failure.<
You can increase the engine's braking effect by
shifting down, all the way to first gear if neces-
sary. This strategy helps you avoid placing
excessive loads on the brake system. Down-
shifting in manual mode of the automatic trans-
mission, refer to page52.
Never drive with the clutch pedal held
down, with the gearshift lever or selector
lever in neutral or with the engine switched off;
engine braking action will not be present with
Page 109 of 223
Things to remember when driving
108 the transmission in neutral and there will be no
power assistance to the brakes or steering
while the engine is switched off.
Never allow floor mats, carpets or any other
objects to protrude into the area around the
accelerator and brake pedals and obstruct their
movement.<
Corrosion on brake rotors
When the vehicle is driven only occasionally,
during extended periods when the vehicle is not
used at all, and in operating conditions where
brake applications are less frequent, there is an
increased tendency for corrosion to form on
rotors, while contaminants accumulate on the
brake pads. This occurs because the minimum
pressure which must be exerted by the pads
during brake applications to clean the rotors is
not reached.
Should corrosion form on the brake rotors, the
brakes will tend to respond with a pulsating
effect that even extended application will fail to
cure.
When the vehicle is parked
Condensation forms while the automatic cli-
mate control is in operation, and then exits
under the vehicle. Traces of condensed water
under the vehicle are therefore normal.
Before driving into a car wash
For general information about taking care of
your BMW, refer to the Caring for your vehicle
brochure.
Cargo loading
To avoid loading the tires beyond their
approved carrying capacity, never over-
load the vehicle. Overloading can lead to over-
heating and increases the rate at which damage
develops inside the tires. The ultimate result
can assume the form of a sudden blow-out.<
Determining loading limit
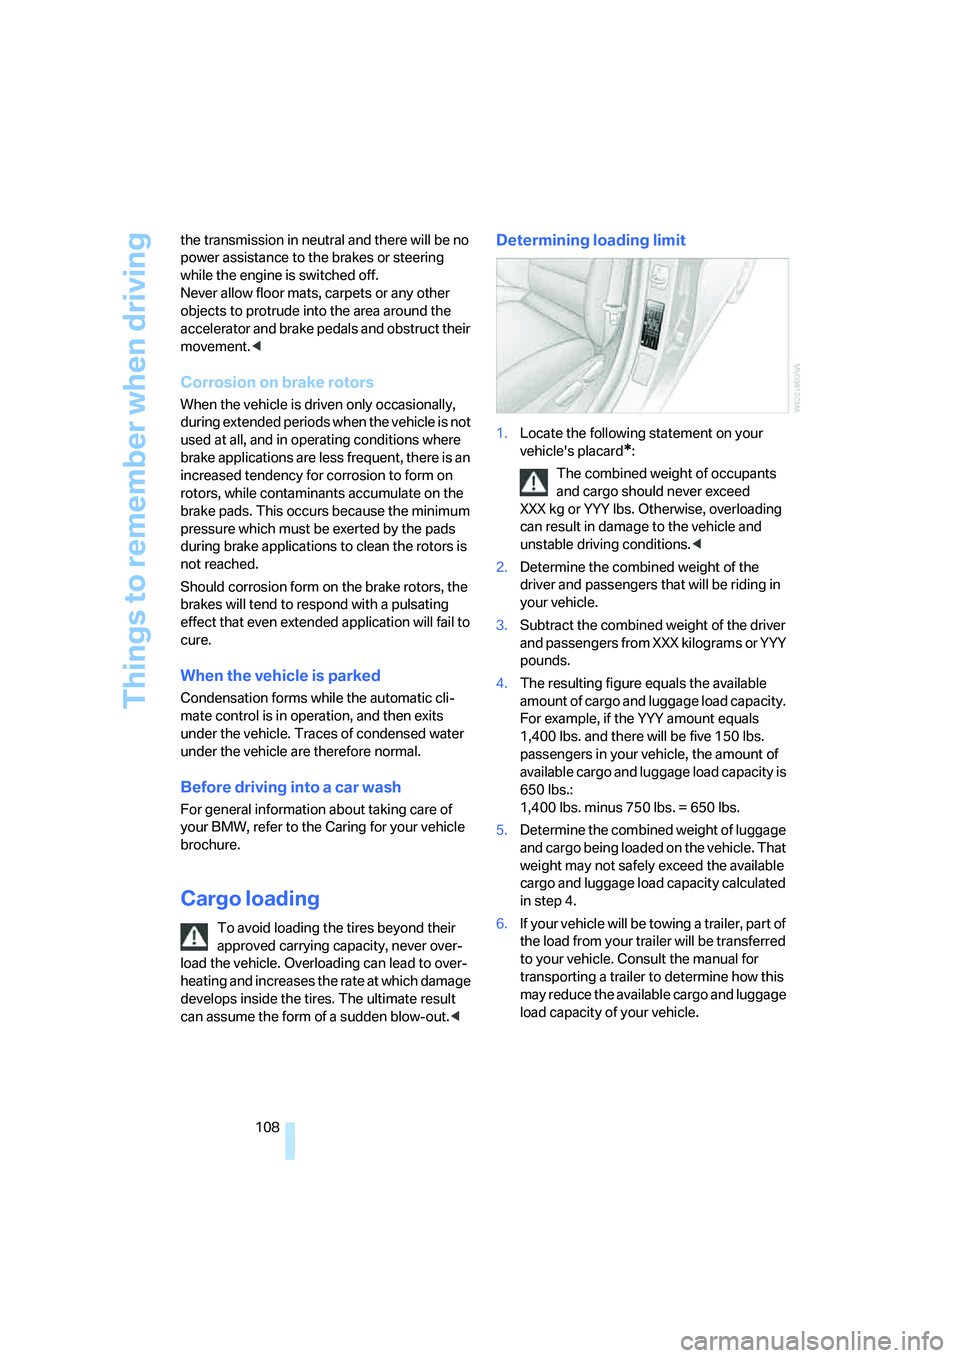
1.Locate the following statement on your
vehicle's placard
*:
The combined weight of occupants
and cargo should never exceed
XXX kg or YYY lbs. Otherwise, overloading
can result in damage to the vehicle and
unstable driving conditions.<
2.Determine the combined weight of the
driver and passengers that will be riding in
your vehicle.
3.Subtract the combined weight of the driver
and passengers from XXX kilograms or YYY
pounds.
4.The resulting figure equals the available
amount of cargo and luggage load capacity.
For example, if the YYY amount equals
1,400 lbs. and there will be five 150 lbs.
passengers in your vehicle, the amount of
available cargo and luggage load capacity is
650 lbs.:
1,400 lbs. minus 750 lbs. = 650 lbs.
5.Determine the combined weight of luggage
and cargo being loaded on the vehicle. That
weight may not safely exceed the available
cargo and luggage load capacity calculated
in step 4.
6.If your vehicle will be towing a trailer, part of
the load from your trailer will be transferred
to your vehicle. Consult the manual for
transporting a trailer to determine how this
may reduce the available cargo and luggage
load capacity of your vehicle.
Page 161 of 223
TeleService, BMW Assist
160
TeleService , BMW Assist
TeleService
TeleService supports you when communicat-
ing with a BMW center. The built-in car phone
can be used to transmit data regarding the ser-
vice status of your vehicle or regarding legally
mandated inspections directly to your BMW
center. This is the same data that is also stored
for CBS Condition Based Service in the master
key. Your BMW center can then contact you,
and you can make an appointment that suits
you while you are still on the road. Your advan-
tage here is that your BMW center can prepare
in advance for the required maintenance work.
The TeleService functions are country-specific:
depending on the country in which you are driv-
ing, data about your vehicle's service status or
regarding legally required inspections are
transmitted to your BMW center either auto-
matically before a service due date or when you
place a call to the BMW center. Your BMW cen-
ter will be glad to provide more detailed infor-
mation.
BMW Assist
BMW Assist provides you with other services in
addition to TeleService. For example, the posi-
tion data of your vehicle can be transferred to
the BMW Assist response center if an emer-
gency call
* has been initiated.
Many functions of BMW Assist depend on the
individually agreed contract. Data transmission,
e.g. of the CBS Condition Based Service, differs
from country to country.
The subscriber agreement must be completed
successfully before using the BMW Assist ser-
vices.
You can also utilize BMW Assist services via the
Internet. The service package is continually
expanded.
Requirements
You can use TeleService or BMW Assist when
the following requirements are met:
>The installed car phone is logged on to a
portable telephone network. This network
must be capable of transmitting the ser-
vices.
>To transmit position data, the vehicle must
be able to determine the current position.
This can be displayed on the Control Dis-
play.
>In order to enable and update TeleService
or BMW Assist, a GPS signal must be
present.
>For BMW Assist: you must have applied for
BMW Assist at your BMW center or BMW
customer service.
Enabling TeleService or BMW Assist
For you to be able to use the services of
TeleService or BMW Assist, these must be
enabled.
Requirements
>Make sure that the vehicle can determine its
current location. As a rule, this is possible
when you are in the open.
>Leave radio readiness switched on while
connecting to the system.
Enabling
iDrive concept, refer to page16.
1.Press the button.
This opens the start menu.
2.Press the controller to open the menu.
3.Select "Communication settings" and
press the controller.
**
Page 196 of 223
Mobility
195Reference
At a glance
Controls
Driving tips
Communications
Navigation
Entertainment
nal of the battery or to the engine or body
ground of the vehicle to be started.
Starting the engine
1.Start the engine of the donor vehicle and
allow it to run for a few minutes at an
increased idle speed.
2.Start the engine on the other vehicle in the
usual way.
If the first start attempt is not successful,
wait a few minutes before another attempt
in order to allow the discharged battery to
recharge.
3.Let the engines run for a few minutes.
4.Disconnect the jumper cables by reversing
the above connecting sequence.
If necessary, have your BMW center check and
recharge the battery.
Never use spray fluids to start the
engine.<
Tow-starting, towing away
Always observe all applicable towing laws
and regulations.<
Never allow passengers to ride in a towed
vehicle for any reason.<
Using a tow fitting
The screw-in tow fitting must always be carried
on the car. It can be screwed in at the front or
rear of the BMW.
It is stored in the onboard tool kit underneath
the cover on the right-hand side of the luggage
compartment, refer to page187.
In order to avoid damaging the tow fitting and
the vehicle, please follow these instructions:
use only the tow fitting provided with the vehi-
cle and screw it all the way in. Use the tow fitting
for towing only on roads. Avoid lateral loading of
the tow fitting, e.g. do not lift the vehicle by the
tow fitting.
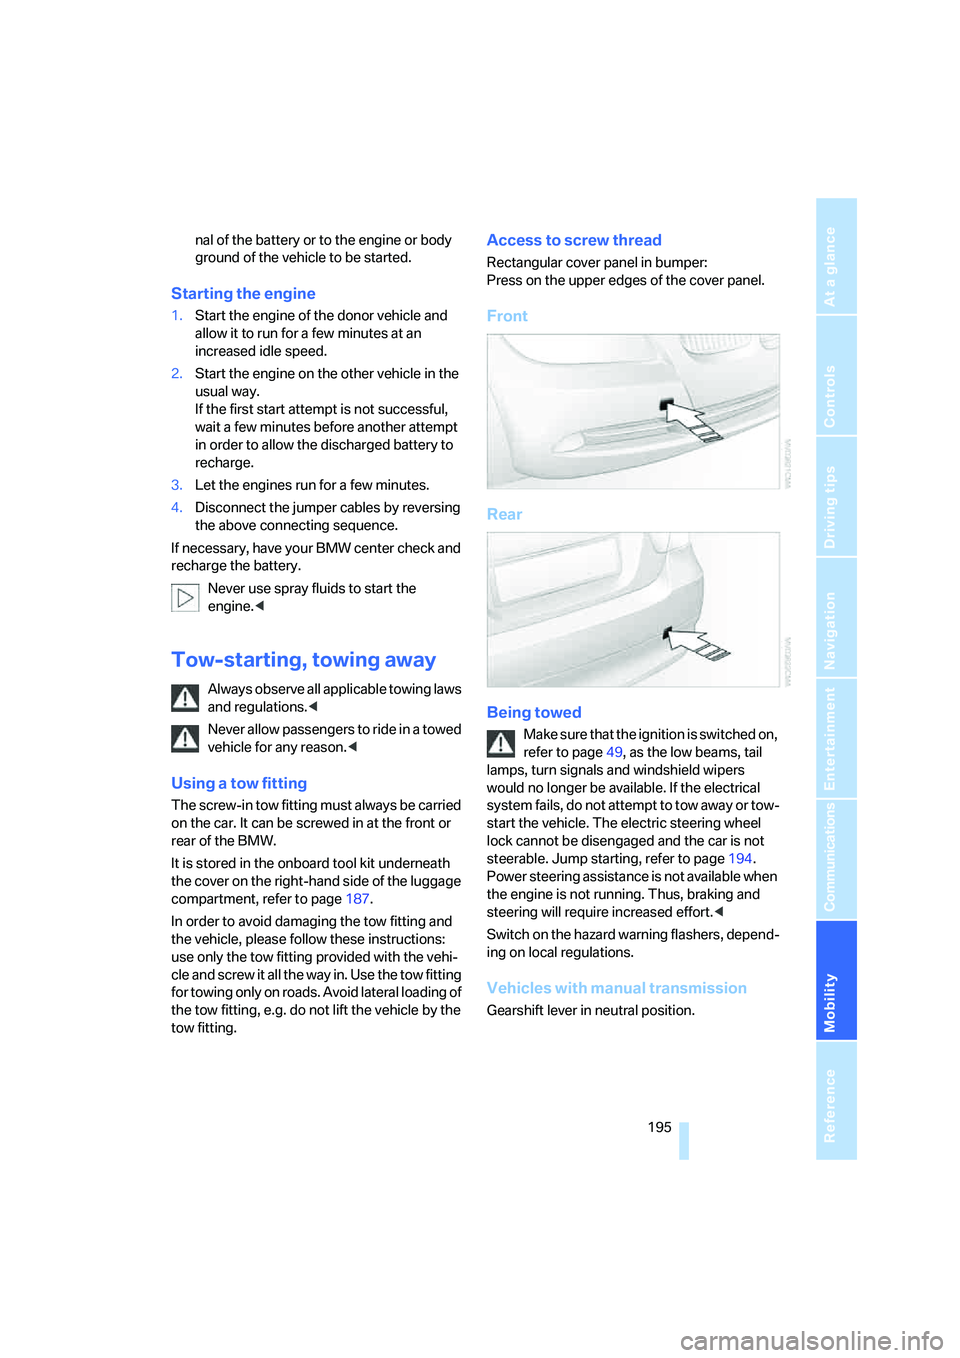
Access to screw thread
Rectangular cover panel in bumper:
Press on the upper edges of the cover panel.
Front
Rear
Being towed
Make sure that the ignition is switched on,
refer to page49, as the low beams, tail
lamps, turn signals and windshield wipers
would no longer be available. If the electrical
system fails, do not attempt to tow away or tow-
start the vehicle. The electric steering wheel
lock cannot be disengaged and the car is not
steerable. Jump starting, refer to page194.
Power steering assistance is not available when
the engine is not running. Thus, braking and
steering will require increased effort.<
Switch on the hazard warning flashers, depend-
ing on local regulations.
Vehicles with manual transmission
Gearshift lever in neutral position.
Page 197 of 223
Giving and receiving assistance
196
Vehicles with automatic transmission
Selector lever in position N.
Changing selector lever positions, refer to
page52.
Do not exceed a towing speed of 45 mph
or 70 km/h and a towing distance of
90 miles/150 km, as otherwise the automatic
transmission may be damaged.<
Towing methods
In some countries, towing with tow bars or
ropes is not permitted in public traffic.
Familiarize yourself with the regulations on tow-
ing in the respective country.
With tow bar
The towing vehicle must not be lighter
than the towed vehicle, otherwise it may
be impossible to maintain control.<
The tow fittings used should be on the same
side on both vehicles. Should it prove impossi-
ble to avoid mounting the tow bar at an angle,
please observe the following:
>Clearance and maneuvering capability will
be sharply limited during cornering.
>The tow bar will generate lateral forces if it is
attached offset.
Secure the tow bar to the tow fitting only.
Otherwise damage to other vehicle parts
could result.<
With tow rope
When starting off in the towing vehicle, make
sure that the tow rope is taut.
To avoid jerking and the associated
stresses on vehicle components when
towing, always use nylon ropes or nylon straps.
Secure the tow rope to the tow fitting only. Oth-
erwise damage to other vehicle parts could
result.<
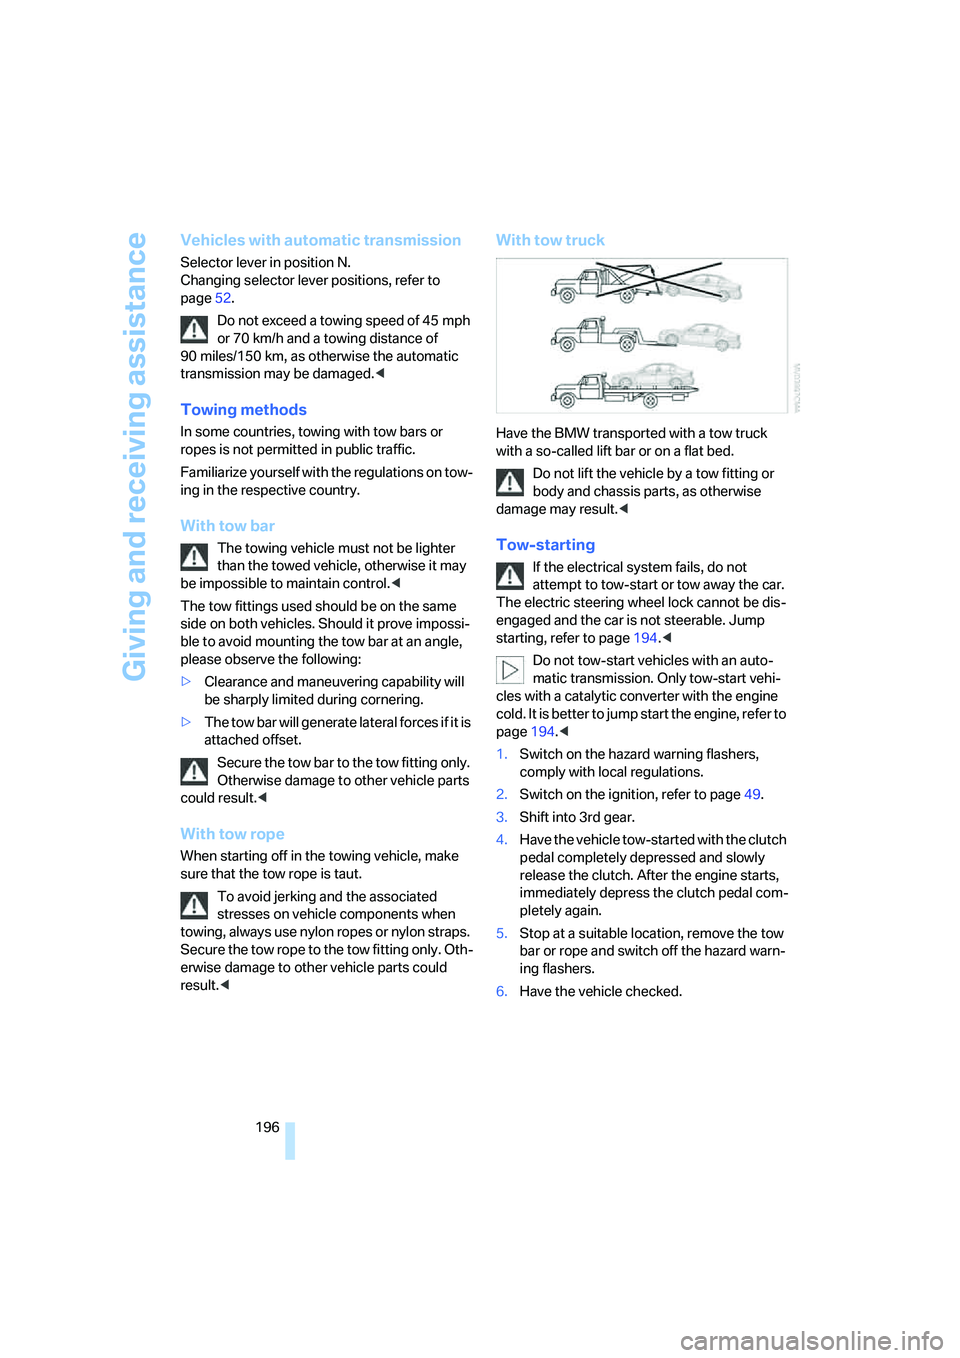
With tow truck
Have the BMW transported with a tow truck
with a so-called lift bar or on a flat bed.
Do not lift the vehicle by a tow fitting or
body and chassis parts, as otherwise
damage may result.<
Tow-starting
If the electrical system fails, do not
attempt to tow-start or tow away the car.
The electric steering wheel lock cannot be dis-
engaged and the car is not steerable. Jump
starting, refer to page194.<
Do not tow-start vehicles with an auto-
matic transmission. Only tow-start vehi-
cles with a catalytic converter with the engine
cold. It is better to jump start the engine, refer to
page194.<
1.Switch on the hazard warning flashers,
comply with local regulations.
2.Switch on the ignition, refer to page49.
3.Shift into 3rd gear.
4.Have the vehicle tow-started with the clutch
pedal completely depressed and slowly
release the clutch. After the engine starts,
immediately depress the clutch pedal com-
pletely again.
5.Stop at a suitable location, remove the tow
bar or rope and switch off the hazard warn-
ing flashers.
6.Have the vehicle checked.