2005 BMW 330I SEDAN light
[x] Cancel search: lightPage 97 of 223
Practical interior accessories
96
Roller sun blind for rear side window
Pull loop of roller sun blind and hook onto
bracket.
Glove compartment
Opening
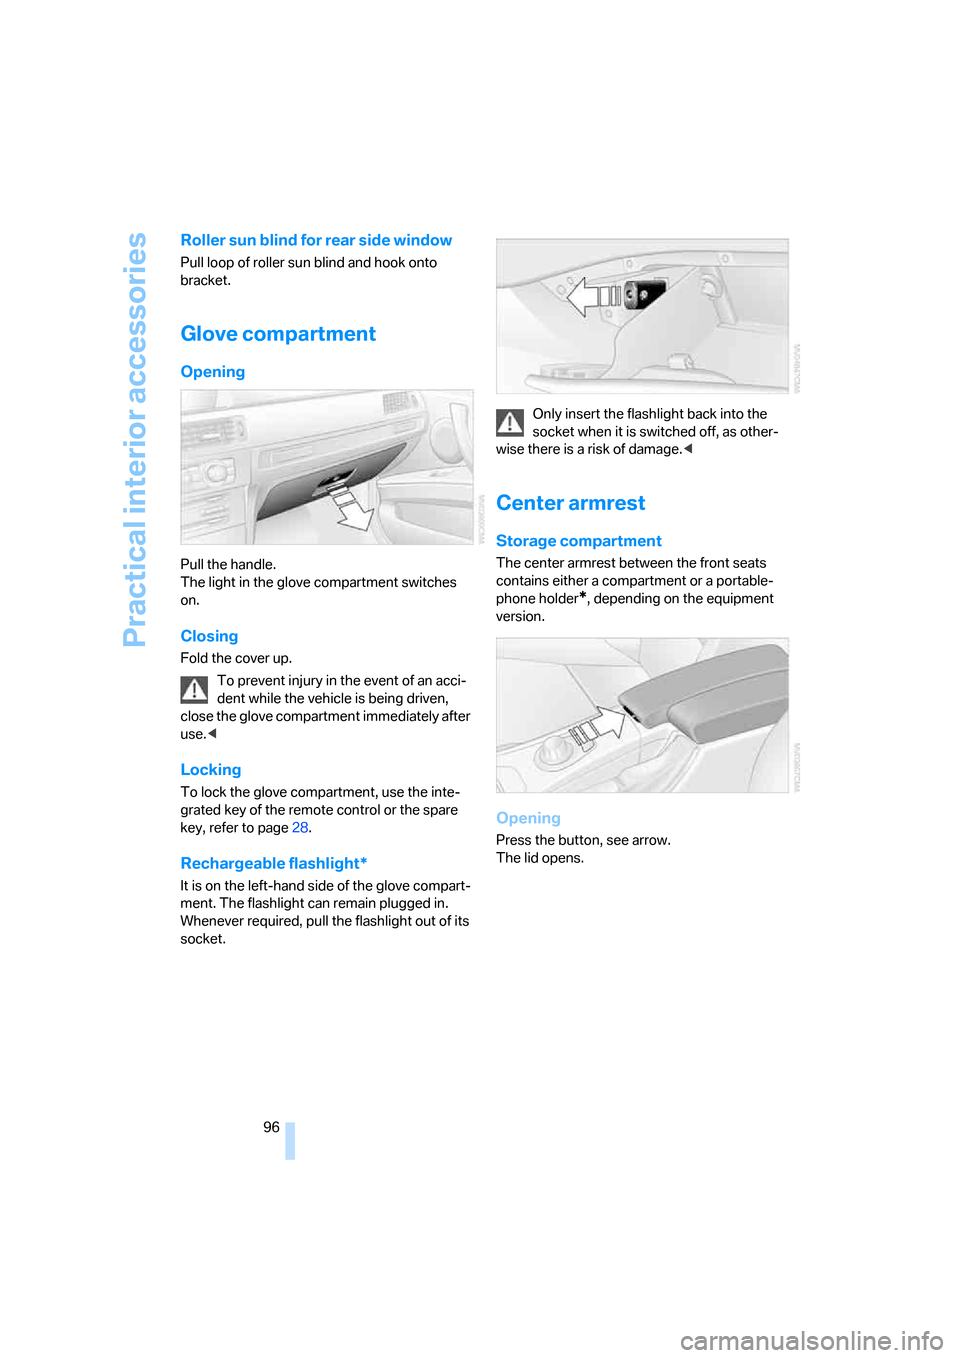
Pull the handle.
The light in the glove compartment switches
on.
Closing
Fold the cover up.
To prevent injury in the event of an acci-
dent while the vehicle is being driven,
close the glove compartment immediately after
use.<
Locking
To lock the glove compartment, use the inte-
grated key of the remote control or the spare
key, refer to page28.
Rechargeable flashlight*
It is on the left-hand side of the glove compart-
ment. The flashlight can remain plugged in.
Whenever required, pull the flashlight out of its
socket.Only insert the flashlight back into the
socket when it is switched off, as other-
wise there is a risk of damage.<
Center armrest
Storage compartment
The center armrest between the front seats
contains either a compartment or a portable-
phone holder
*, depending on the equipment
version.
Opening
Press the button, see arrow.
The lid opens.
Page 100 of 223
Controls
99Reference
At a glance
Driving tips
Communications
Navigation
Entertainment
Mobility
Emptying
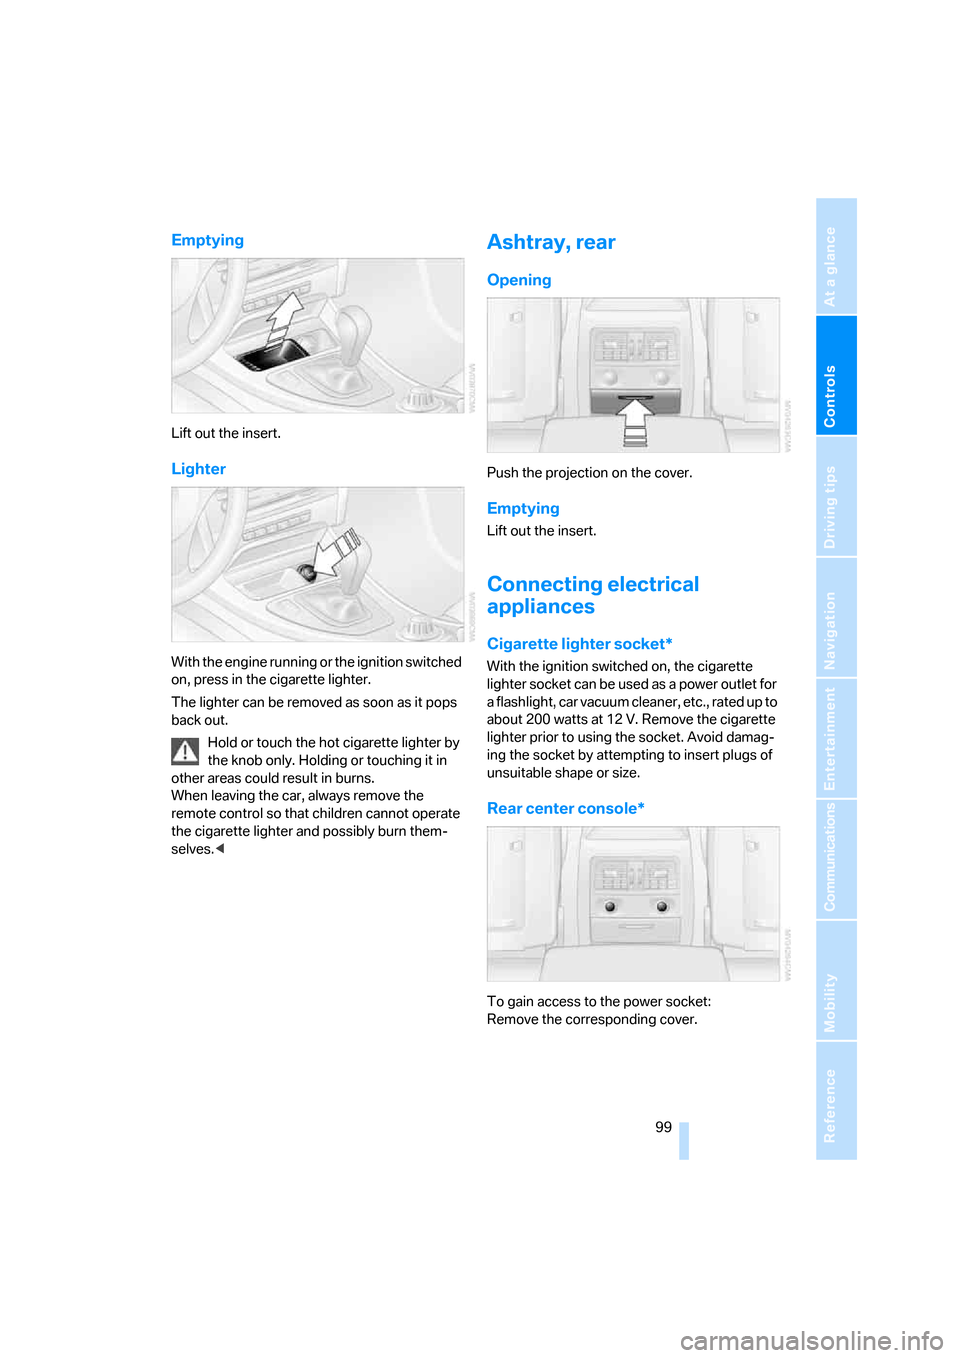
Lift out the insert.
Lighter
With the engine running or the ignition switched
on, press in the cigarette lighter.
The lighter can be removed as soon as it pops
back out.
Hold or touch the hot cigarette lighter by
the knob only. Holding or touching it in
other areas could result in burns.
When leaving the car, always remove the
remote control so that children cannot operate
the cigarette lighter and possibly burn them-
selves.<
Ashtray, rear
Opening
Push the projection on the cover.
Emptying
Lift out the insert.
Connecting electrical
appliances
Cigarette lighter socket*
With the ignition switched on, the cigarette
lighter socket can be used as a power outlet for
a flashlight, car vacuum cleaner, etc., rated up to
about 200 watts at 12 V. Remove the cigarette
lighter prior to using the socket. Avoid damag-
ing the socket by attempting to insert plugs of
unsuitable shape or size.
Rear center console*
To gain access to the power socket:
Remove the corresponding cover.
Page 101 of 223
Practical interior accessories
100
In the luggage compartment*
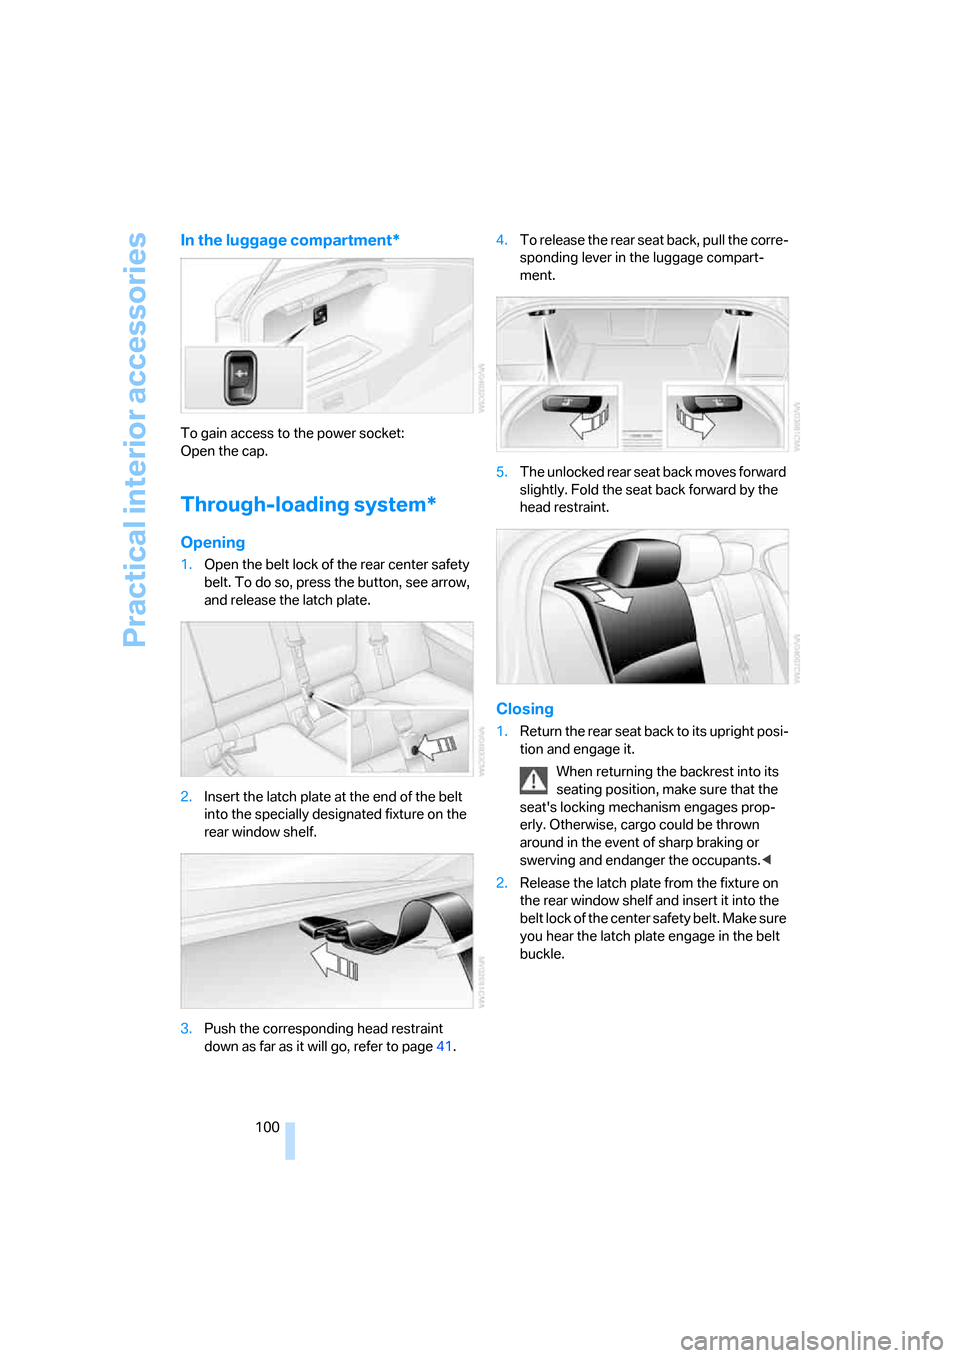
To gain access to the power socket:
Open the cap.
Through-loading system*
Opening
1.Open the belt lock of the rear center safety
belt. To do so, press the button, see arrow,
and release the latch plate.
2.Insert the latch plate at the end of the belt
into the specially designated fixture on the
rear window shelf.
3.Push the corresponding head restraint
down as far as it will go, refer to page41.4.To release the rear seat back, pull the corre-
sponding lever in the luggage compart-
ment.
5.The unlocked rear seat back moves forward
slightly. Fold the seat back forward by the
head restraint.
Closing
1.Return the rear seat back to its upright posi-
tion and engage it.
When returning the backrest into its
seating position, make sure that the
seat's locking mechanism engages prop-
erly. Otherwise, cargo could be thrown
around in the event of sharp braking or
swerving and endanger the occupants.<
2.Release the latch plate from the fixture on
the rear window shelf and insert it into the
belt lock of the center safety belt. Make sure
you hear the latch plate engage in the belt
buckle.
Page 108 of 223

Driving tips
107Reference
At a glance
Controls
Communications
Navigation
Entertainment
Mobility
Interior and exterior mirrors, automatic
dimming feature*
The automatic dimming feature of the interior
and exterior mirrors
* is controlled by two photo
cells in the interior rearview mirror. One photo
cell is in the mirror frame, see arrow; the other is
on the back of the mirror.
In order to ensure that the system functions
correctly, keep the photo cells clean, do not
cover the area between the interior rearview
mirror and windshield, and do not affix adhesive
labels or stickers of any kind to the windshield
directly in front of the mirror.
Hydroplaning
When driving on wet or slushy roads,
reduce road speed. If you do not, a wedge
of water can form between tires and road sur-
face. This situation, known as hydroplaning,
means that the tire can actually lose contact
completely with the road surface, so that nei-
ther the car can be steered nor the brake be
properly applied.<
The risk of hydroplaning increases with declin-
ing tread depth on the tires, refer also to Mini-
mum tread depth on page177.
Driving through water
Drive through water on the road only if it is
not deeper than 1 ft/30 cm, and then only
at walking speed at the most. Otherwise, the
vehicle's engine, the electrical systems and the
transmission may be damaged.<
Using handbrake on inclines
On inclines, do not hold the vehicle with
the clutch; use the handbrake. Otherwise
greater clutch wear will result.<
Also use the drive-off assistant, refer to
page80.
Braking safely
Your BMW is equipped with ABS as a standard
feature. Applying the brakes fully is the most
effective way of braking in situations in which
this is necessary. Since the vehicle maintains
steering responsiveness, you can still avoid
possible obstacles with a minimum of steering
effort.
Pulsation of the brake pedal, combined with
sounds from the hydraulic circuits, indicate that
ABS is in its active mode.
Driving in wet conditions
When roads are wet or there is heavy rain,
briefly exert gentle pressure on the brake pedal
every few miles. Monitor traffic conditions to
ensure that this maneuver does not endanger
other road users. The heat generated in this
process helps dry the pads and rotors to ensure
that full braking efficiency will then be available
when you need it.
Hills
To prevent overheating and the resulting
reduced efficiency of the brake system,
drive long or steep downhill gradients in the
gear in which the least braking is required. Even
light but consistent pedal pressure can lead to
high temperatures, brake wear and possibly
even brake failure.<
You can increase the engine's braking effect by
shifting down, all the way to first gear if neces-
sary. This strategy helps you avoid placing
excessive loads on the brake system. Down-
shifting in manual mode of the automatic trans-
mission, refer to page52.
Never drive with the clutch pedal held
down, with the gearshift lever or selector
lever in neutral or with the engine switched off;
engine braking action will not be present with
Page 110 of 223
Driving tips
109Reference
At a glance
Controls
Communications
Navigation
Entertainment
Mobility
Load
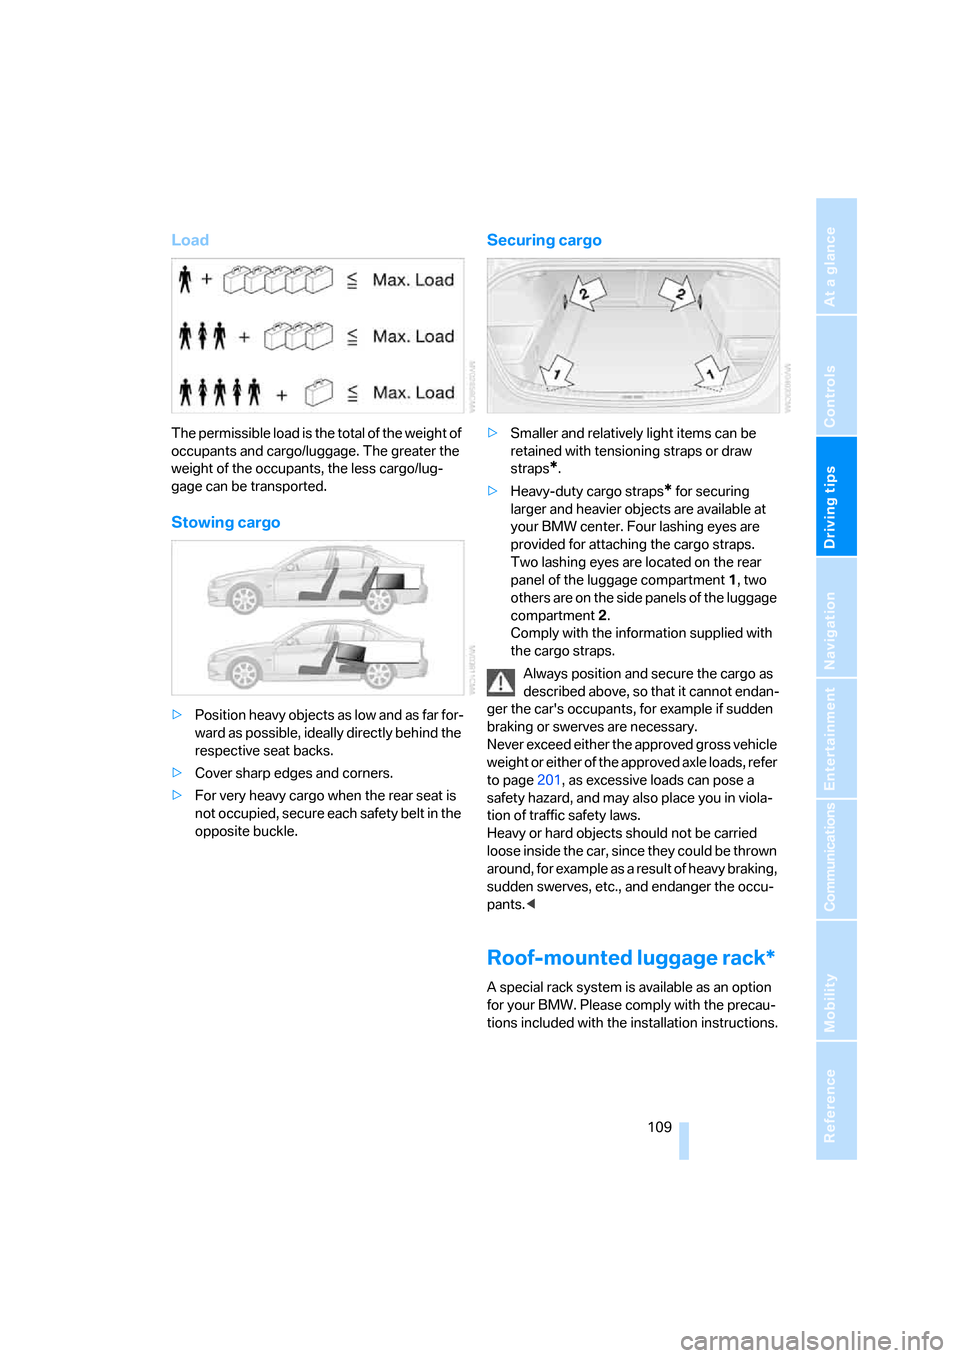
The permissible load is the total of the weight of
occupants and cargo/luggage. The greater the
weight of the occupants, the less cargo/lug-
gage can be transported.
Stowing cargo
>Position heavy objects as low and as far for-
ward as possible, ideally directly behind the
respective seat backs.
>Cover sharp edges and corners.
>For very heavy cargo when the rear seat is
not occupied, secure each safety belt in the
opposite buckle.
Securing cargo
>Smaller and relatively light items can be
retained with tensioning straps or draw
straps
*.
>Heavy-duty cargo straps
* for securing
larger and heavier objects are available at
your BMW center. Four lashing eyes are
provided for attaching the cargo straps.
Two lashing eyes are located on the rear
panel of the luggage compartment 1, two
others are on the side panels of the luggage
compartment 2.
Comply with the information supplied with
the cargo straps.
Always position and secure the cargo as
described above, so that it cannot endan-
ger the car's occupants, for example if sudden
braking or swerves are necessary.
Never exceed either the approved gross vehicle
weight or either of the approved axle loads, refer
to page201, as excessive loads can pose a
safety hazard, and may also place you in viola-
tion of traffic safety laws.
Heavy or hard objects should not be carried
loose inside the car, since they could be thrown
around, for example as a result of heavy braking,
sudden swerves, etc., and endanger the occu-
pants.<
Roof-mounted luggage rack*
A special rack system is available as an option
for your BMW. Please comply with the precau-
tions included with the installation instructions.
Page 115 of 223

Starting the navigation system
114
Starting the navigation system
Your navigation system can use satellites to
ascertain the precise position of your vehicle
and guide you reliably to any destination you
enter.
Navigation DVD
The navigation system requires a special navi-
gation DVD. You can obtain the latest version at
your BMW center.
Inserting navigation DVD
1.Insert the navigation DVD with the labeled
side up.
2.Wait for several seconds to allow the con-
tents of the DVD to be read in.
Removing navigation DVD
1. Press button 1.
The DVD emerges slightly from the drive.
2.Remove the DVD.
If the DVD is not ejected from the drive, it is pos-
sible that it is blocked.
Display in the assistance
window
You can display the route or the current position
in the assistance window. This display remains
visible even if you change to another applica-
tion.1.Move the controller to the right to enter the
assistance window.
2.Press the controller.
Other menu items are displayed.
3.Select the desired route view or "Current
position".
4.Press the controller.
The contents of the assistance window are con-
tinually updated as you drive.
*
Page 117 of 223
Destination entry
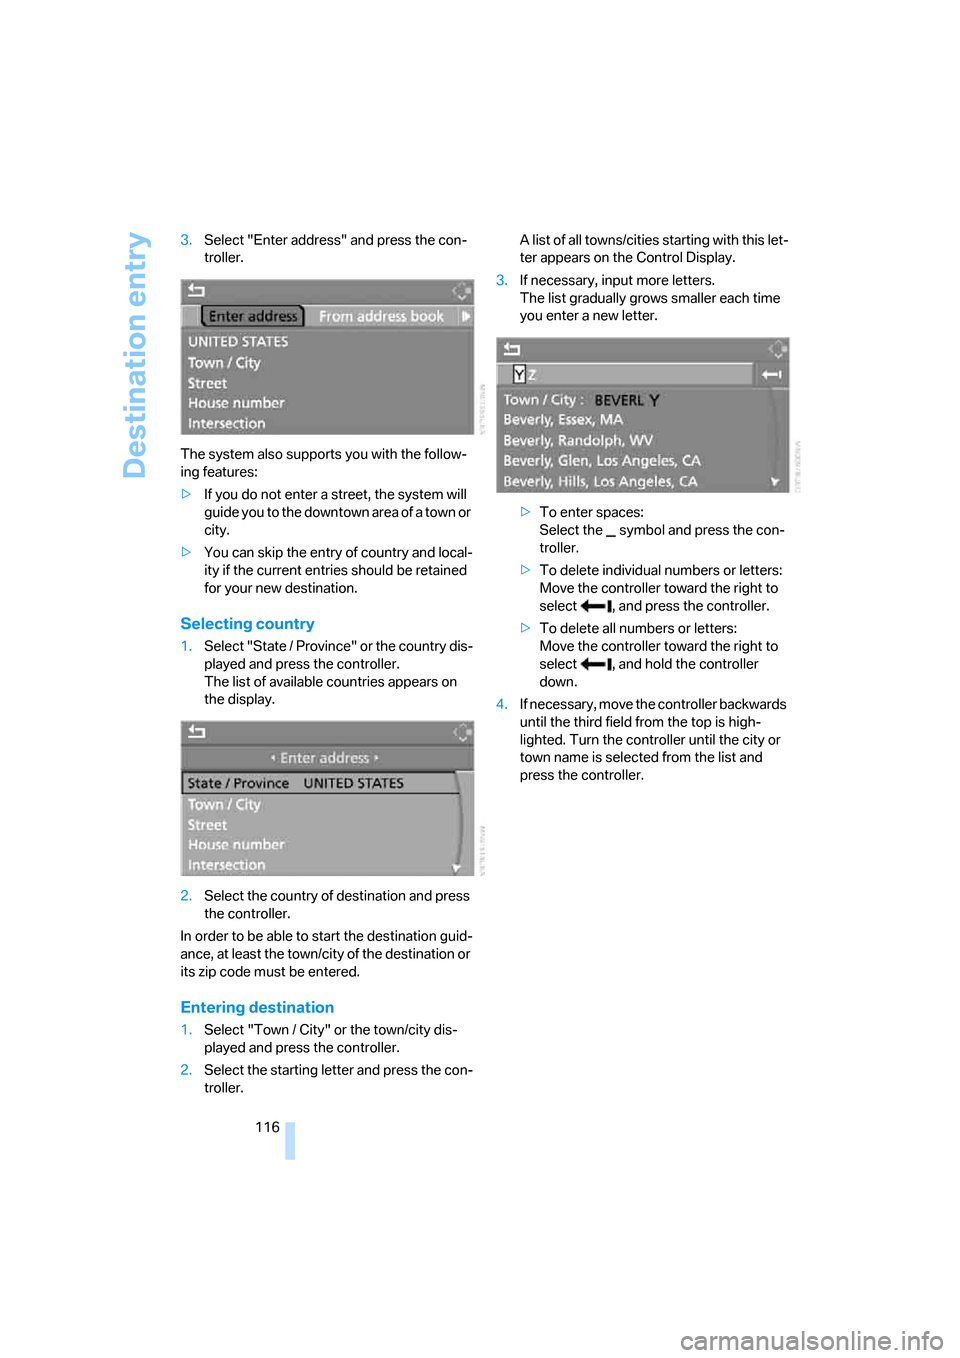
116 3.Select "Enter address" and press the con-
troller.
The system also supports you with the follow-
ing features:
>If you do not enter a street, the system will
guide you to the downtown area of a town or
city.
>You can skip the entry of country and local-
ity if the current entries should be retained
for your new destination.
Selecting country
1.Select "State / Province" or the country dis-
played and press the controller.
The list of available countries appears on
the display.
2.Select the country of destination and press
the controller.
In order to be able to start the destination guid-
ance, at least the town/city of the destination or
its zip code must be entered.
Entering destination
1.Select "Town / City" or the town/city dis-
played and press the controller.
2.Select the starting letter and press the con-
troller.A list of all towns/cities starting with this let-
ter appears on the Control Display.
3.If necessary, input more letters.
The list gradually grows smaller each time
you enter a new letter.
>To enter spaces:
Select the symbol and press the con-
troller.
>To delete individual numbers or letters:
Move the controller toward the right to
select , and press the controller.
>To delete all numbers or letters:
Move the controller toward the right to
select , and hold the controller
down.
4.If necessary, move the controller backwards
until the third field from the top is high-
lighted. Turn the controller until the city or
town name is selected from the list and
press the controller.
Page 118 of 223
Navigation
Driving tips
117Reference
At a glance
Controls
Communications
Entertainment
Mobility
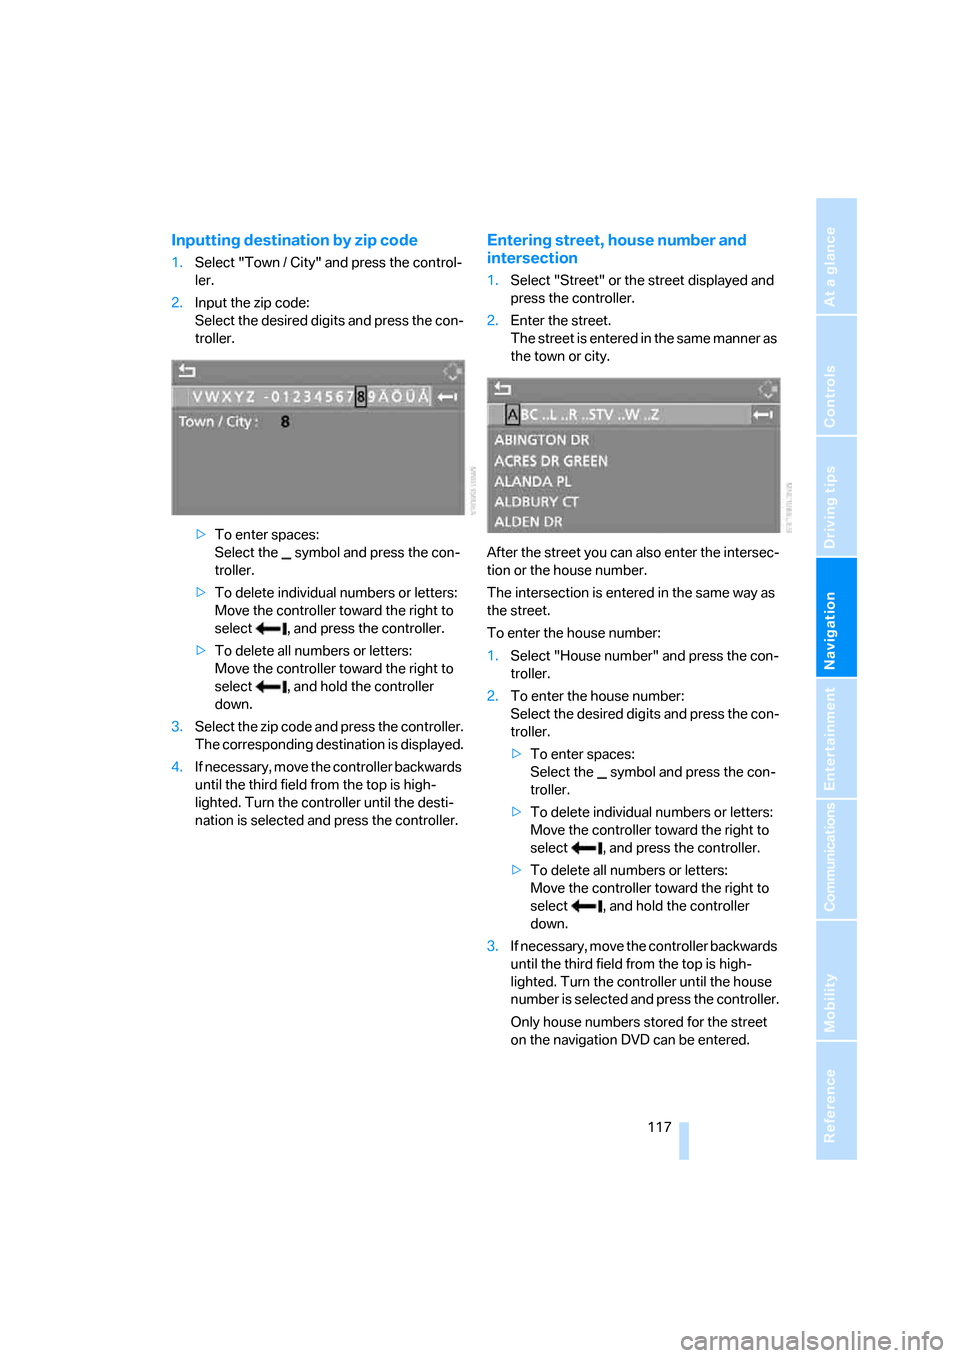
Inputting destination by zip code
1.Select "Town / City" and press the control-
ler.
2.Input the zip code:
Select the desired digits and press the con-
troller.
>To enter spaces:
Select the symbol and press the con-
troller.
>To delete individual numbers or letters:
Move the controller toward the right to
select , and press the controller.
>To delete all numbers or letters:
Move the controller toward the right to
select , and hold the controller
down.
3.Select the zip code and press the controller.
The corresponding destination is displayed.
4.If necessary, move the controller backwards
until the third field from the top is high-
lighted. Turn the controller until the desti-
nation is selected and press the controller.
Entering street, house number and
intersection
1.Select "Street" or the street displayed and
press the controller.
2.Enter the street.
The street is entered in the same manner as
the town or city.
After the street you can also enter the intersec-
tion or the house number.
The intersection is entered in the same way as
the street.
To enter the house number:
1.Select "House number" and press the con-
troller.
2.To enter the house number:
Select the desired digits and press the con-
troller.
>To enter spaces:
Select the symbol and press the con-
troller.
>To delete individual numbers or letters:
Move the controller toward the right to
select , and press the controller.
>To delete all numbers or letters:
Move the controller toward the right to
select , and hold the controller
down.
3.If necessary, move the controller backwards
until the third field from the top is high-
lighted. Turn the controller until the house
number is selected and press the controller.
Only house numbers stored for the street
on the navigation DVD can be entered.