2005 BMW 330I SEDAN door lock
[x] Cancel search: door lockPage 43 of 223

Adjustments
42
Seat and mirror memory*
You can store and call up two different combi-
nations of driver's-seat and exterior-mirror
positions.
Settings for the seat back width and lumbar
support are not stored in memory.
Storing
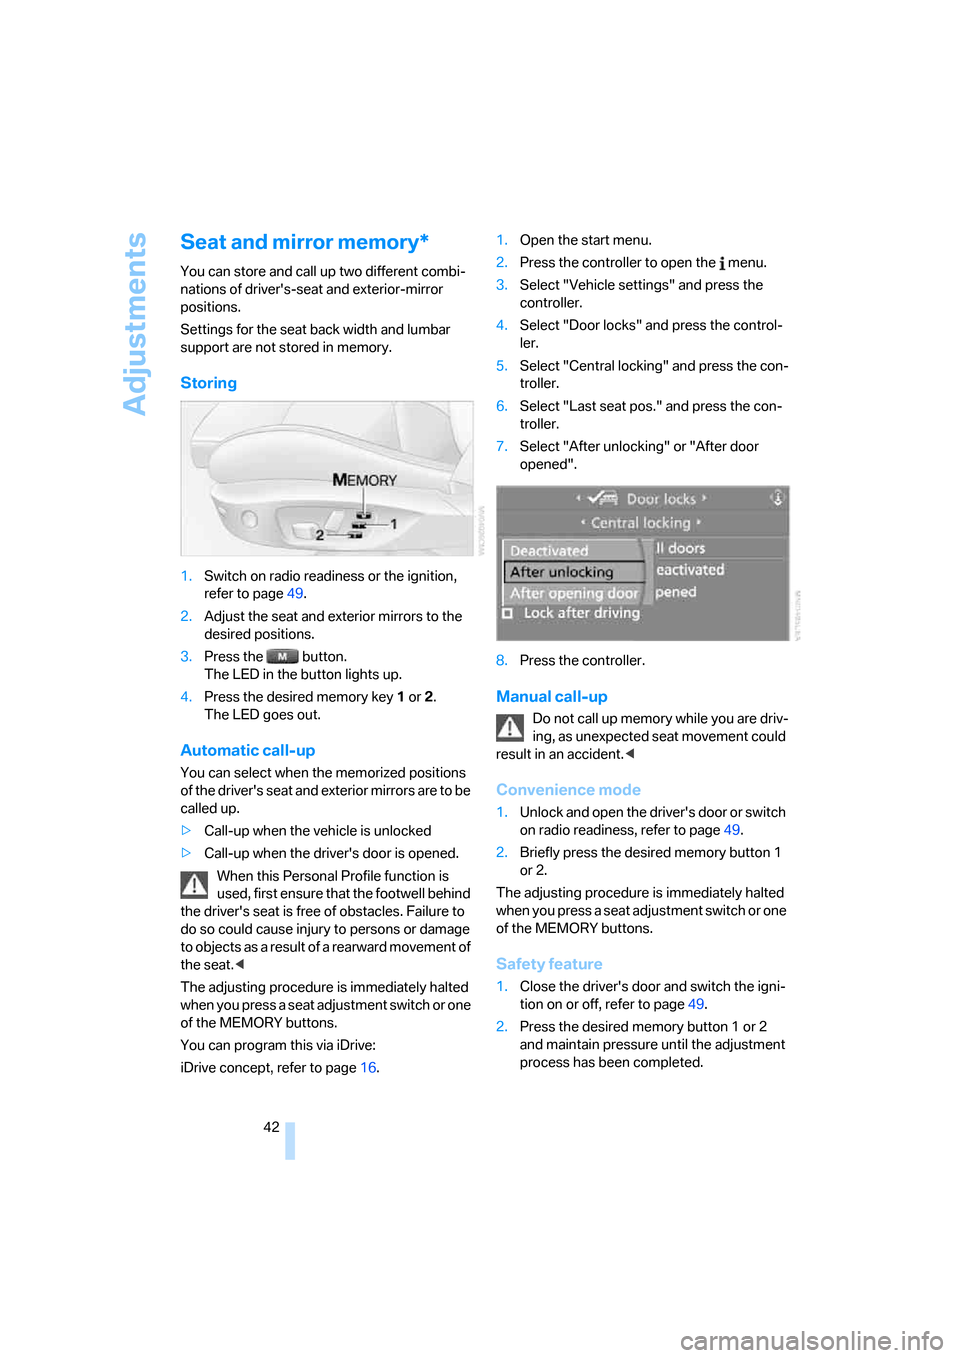
1.Switch on radio readiness or the ignition,
refer to page49.
2.Adjust the seat and exterior mirrors to the
desired positions.
3.Press the button.
The LED in the button lights up.
4.Press the desired memory key 1 or 2.
The LED goes out.
Automatic call-up
You can select when the memorized positions
of the driver's seat and exterior mirrors are to be
called up.
>Call-up when the vehicle is unlocked
>Call-up when the driver's door is opened.
When this Personal Profile function is
used, first ensure that the footwell behind
the driver's seat is free of obstacles. Failure to
do so could cause injury to persons or damage
to objects as a result of a rearward movement of
the seat.<
The adjusting procedure is immediately halted
when you press a seat adjustment switch or one
of the MEMORY buttons.
You can program this via iDrive:
iDrive concept, refer to page16.1.Open the start menu.
2.Press the controller to open the menu.
3.Select "Vehicle settings" and press the
controller.
4.Select "Door locks" and press the control-
ler.
5.Select "Central locking" and press the con-
troller.
6.Select "Last seat pos." and press the con-
troller.
7.Select "After unlocking" or "After door
opened".
8.Press the controller.
Manual call-up
Do not call up memory while you are driv-
ing, as unexpected seat movement could
result in an accident.<
Convenience mode
1.Unlock and open the driver's door or switch
on radio readiness, refer to page49.
2.Briefly press the desired memory button 1
or 2.
The adjusting procedure is immediately halted
when you press a seat adjustment switch or one
of the MEMORY buttons.
Safety feature
1.Close the driver's door and switch the igni-
tion on or off, refer to page49.
2.Press the desired memory button 1 or 2
and maintain pressure until the adjustment
process has been completed.
Page 47 of 223

Transporting children safely
46
Transporting children safely
The right place for children
Do not leave children unattended in the
vehicle, as they could otherwise endan-
ger themselves and/or other persons by open-
ing the doors, for example.<
As a general rule, the front passenger's seat
and outer rear seats are suitable for installing
universal child-restraint systems for all age
groups, provided that they have been approved
for the age group in question.
Children always in the rear
Accident research shows that the safest place
for children in a vehicle is in the rear seat.
Older children should be tightly secured with a
safety belt, after they have outgrown a booster
seat that is appropriate for their age, height and
weight.
If your BMW is equipped with rear side
airbags, do not allow children to lean
towards the door trim, as serious injuries could
occur if the side airbags are deployed and chil-
dren are too close to the airbags.<
Deactivating rear seat side airbags
Labels in the rear door opening should indicate
the status of your rear seat side airbags. If you
are uncertain of their status, or wish to have the
airbags activated or deactivated, please contact
your BMW center.
Child-restraint system in the rear
Children under the age of 13 or smaller
than 5 ft/150 cm may only be transported
in suitable child-restraint systems on one of the
outer rear seats; otherwise, there is an
increased risk of injury in the event of an acci-
dent.<
Younger children should be secured in an
appropriate child-restraint system that has
been first properly secured to the vehicle.All rear seating positions in your vehicle meet
the recommendations of SAE J1819, an indus-
try-recommended practice for securing child-
restraint systems in motor vehicles.
Exception for front passenger seat
Should it be necessary to use a child-
restraint system on the front passenger
seat, the front passenger airbags must be deac-
tivated. Otherwise, a child traveling on that seat
will be at considerable risk of injury if the airbags
are triggered off, even with a child-restraint sys-
tem. Your vehicle is equipped with an airbag
supplemental restraint system for the front pas-
senger. Because the backrest on any rearward-
facing child-restraint system – of the kind
designed for infants under 1 year and 20 Ibs./
9 kg – would be within the airbag's deployment
range, you should never mount such a system
in the front passenger seat, since the impact of
the airbag against the child restraint's backrest
could lead to serious or fatal injuries.<
For more information on automatic deactivation
of the front passenger airbags refer to page83.
Seat height
Before installing a universal child-restraint sys-
tem, move the front passenger's seat up as far
as it will go to ensure that the safety belt will be
ideally positioned. Do not change the seat
height afterward.
Backrest width
The backrest width of the front passen-
ger's seat must be adjusted to its widest
setting.<
1.After unlocking the vehicle, sit down on the
front passenger seat and close the door.
2.Adjust the backrest width to its widest set-
ting, refer to page40.
3.Install the child seat.
Page 49 of 223

Transporting children safely
48 Then push the center head restraint into the
lowest position again.
Adjust the tether strap according to the
child-restraint manufacturer's instruc-
tions.<
LATCH child-restraint fixing system
LATCH: Lower Anchor and Tethers for CHil-
dren.
The rear outer sitting positions are provided
with anchors for a LATCH child-restraint fixing
system.
To attach a child-restraint system with
the LATCH system, follow the operating
and safety instructions of the child-restraint
system manufacturer.<
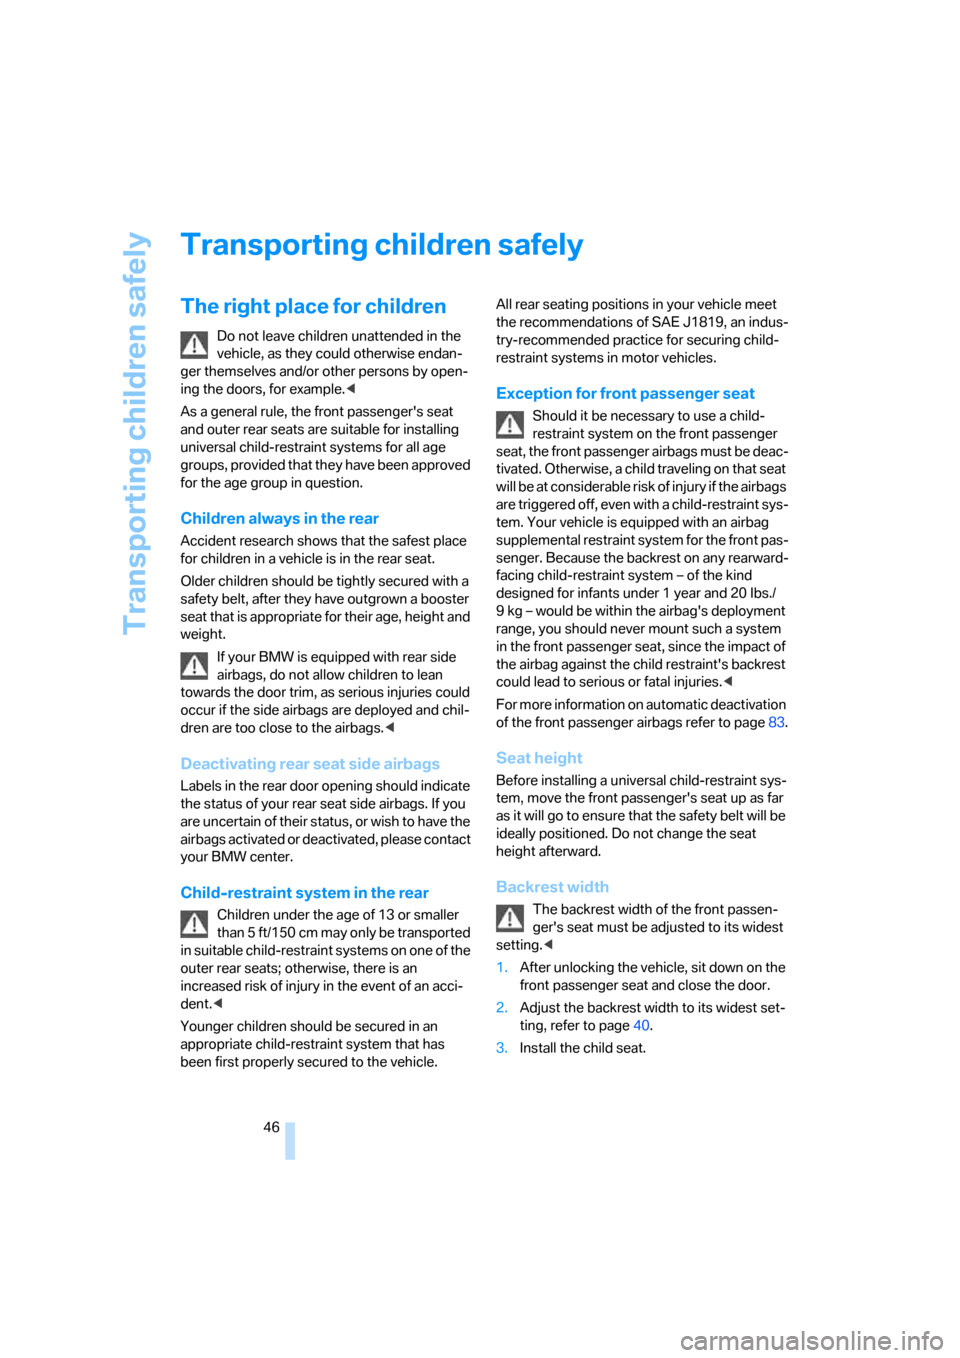
Rear seat anchorages, with through-
loading system equipment
The anchorage points for the LATCH child-
restraint fixing system are located behind the
indicated protective caps. Flip up the corre-
sponding caps.
Before attaching the LATCH child-restraint fix-
ing system, pull the belt out of the area of the
child-restraint fixing system.
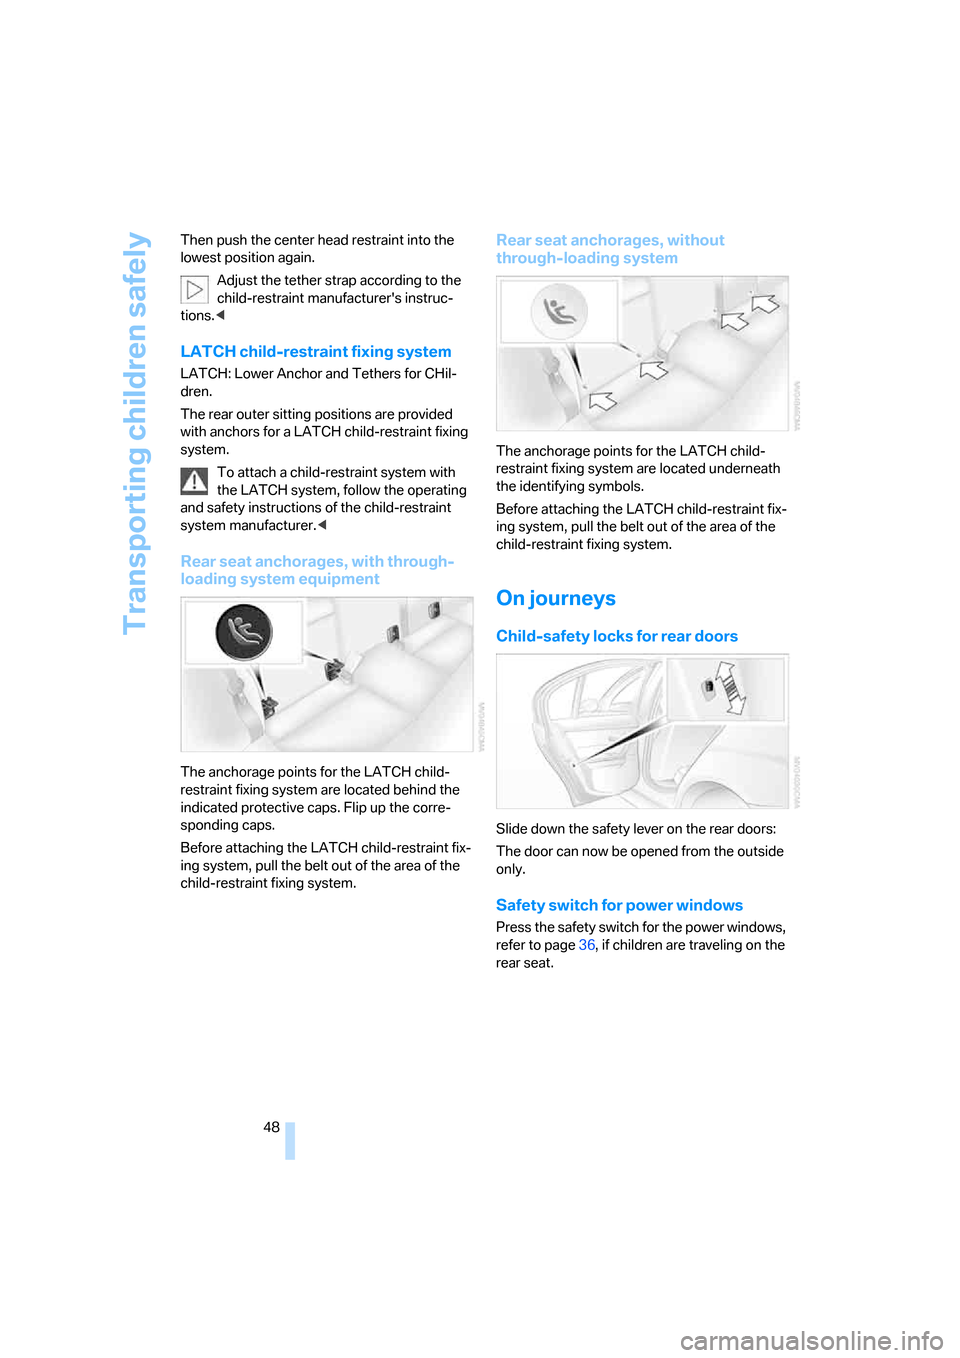
Rear seat anchorages, without
through-loading system
The anchorage points for the LATCH child-
restraint fixing system are located underneath
the identifying symbols.
Before attaching the LATCH child-restraint fix-
ing system, pull the belt out of the area of the
child-restraint fixing system.
On journeys
Child-safety locks for rear doors
Slide down the safety lever on the rear doors:
The door can now be opened from the outside
only.
Safety switch for power windows
Press the safety switch for the power windows,
refer to page36, if children are traveling on the
rear seat.
Page 98 of 223

Controls
97Reference
At a glance
Driving tips
Communications
Navigation
Entertainment
Mobility
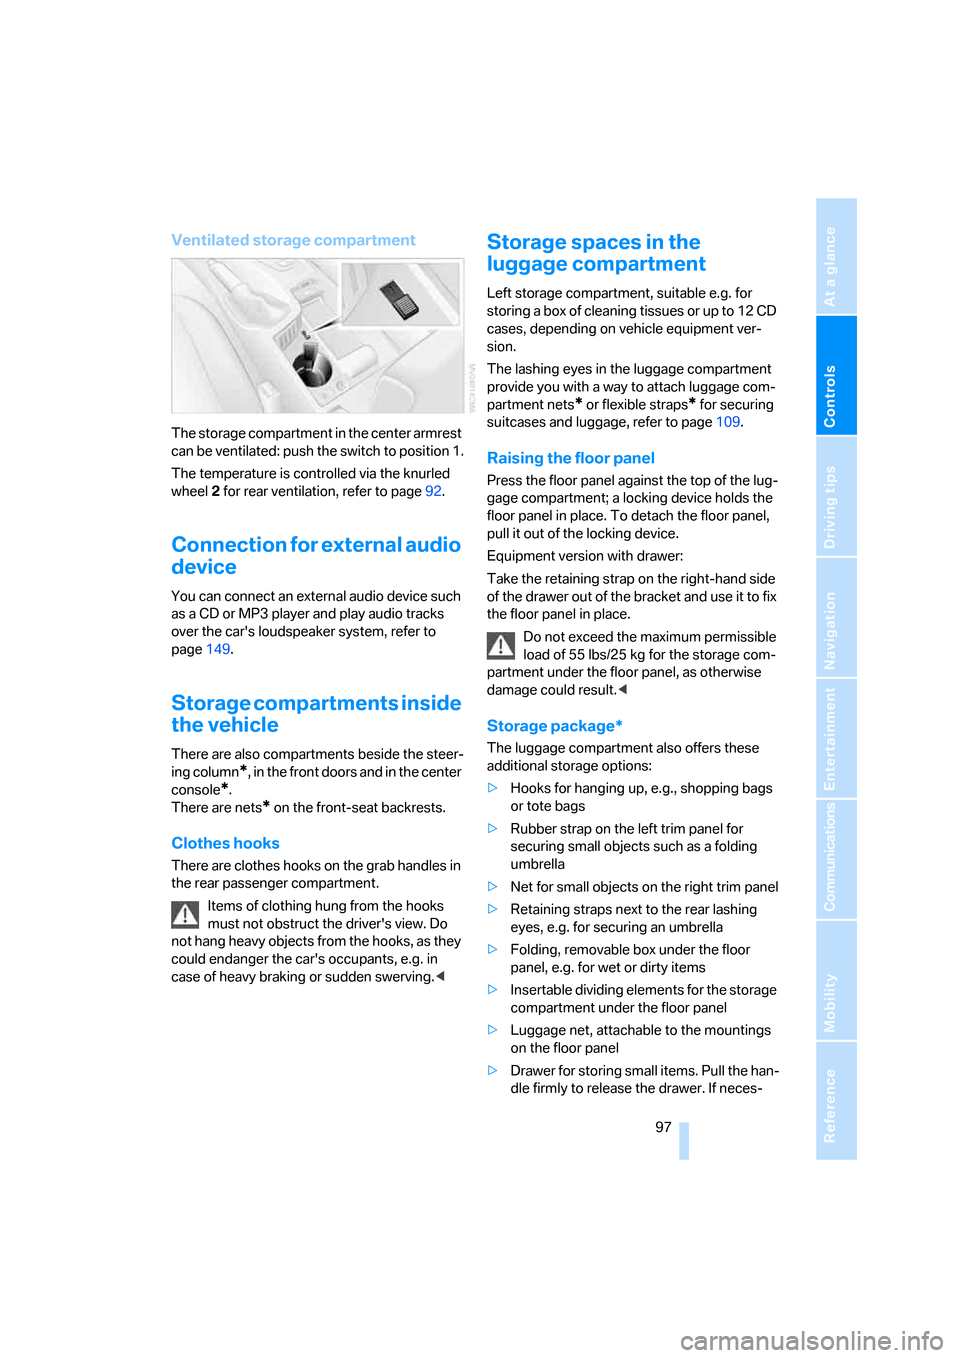
Ventilated storage compartment
The storage compartment in the center armrest
can be ventilated: push the switch to position 1.
The temperature is controlled via the knurled
wheel 2 for rear ventilation, refer to page92.
Connection for external audio
device
You can connect an external audio device such
as a CD or MP3 player and play audio tracks
over the car's loudspeaker system, refer to
page149.
Storage compartments inside
the vehicle
There are also compartments beside the steer-
ing column
*, in the front doors and in the center
console
*.
There are nets
* on the front-seat backrests.
Clothes hooks
There are clothes hooks on the grab handles in
the rear passenger compartment.
Items of clothing hung from the hooks
must not obstruct the driver's view. Do
not hang heavy objects from the hooks, as they
could endanger the car's occupants, e.g. in
case of heavy braking or sudden swerving.<
Storage spaces in the
luggage compartment
Left storage compartment, suitable e.g. for
storing a box of cleaning tissues or up to 12 CD
cases, depending on vehicle equipment ver-
sion.
The lashing eyes in the luggage compartment
provide you with a way to attach luggage com-
partment nets
* or flexible straps* for securing
suitcases and luggage, refer to page109.
Raising the floor panel
Press the floor panel against the top of the lug-
gage compartment; a locking device holds the
floor panel in place. To detach the floor panel,
pull it out of the locking device.
Equipment version with drawer:
Take the retaining strap on the right-hand side
of the drawer out of the bracket and use it to fix
the floor panel in place.
Do not exceed the maximum permissible
load of 55 lbs/25 kg for the storage com-
partment under the floor panel, as otherwise
damage could result.<
Storage package*
The luggage compartment also offers these
additional storage options:
>Hooks for hanging up, e.g., shopping bags
or tote bags
>Rubber strap on the left trim panel for
securing small objects such as a folding
umbrella
>Net for small objects on the right trim panel
>Retaining straps next to the rear lashing
eyes, e.g. for securing an umbrella
>Folding, removable box under the floor
panel, e.g. for wet or dirty items
>Insertable dividing elements for the storage
compartment under the floor panel
>Luggage net, attachable to the mountings
on the floor panel
>Drawer for storing small items. Pull the han-
dle firmly to release the drawer. If neces-
Page 169 of 223

Refueling
168
Refueling
Always switch off the engine before refu-
eling. If you do not, fuel cannot be filled
into the tank and a message will appear on the
Control Display.<
Always observe all applicable precautions
and regulations when handling fuels.
Never carry spare fuel containers in your vehi-
cle. Whether empty or full, these containers can
leak, cause an explosion, or lead to fire in the
event of a collision.<
Gas cap
Opening
1.Open fuel filler door. To do so, lightly press
the rear edge.
2.Turn the gas cap counterclockwise.
3.Place the gas cap in the bracket attached to
the fuel filler door.
Closing
Fit the cap and turn it clockwise until you clearly
hear a click.
Close the gas cap carefully after refueling
until a click is heard. While closing, be
sure not to squeeze the strap which is fastened
to the cap. A loose or missing cap will activate
an indicator lamp and the message Check Gas
Cap
* on the Control Display.<
Manually releasing the fuel filler door
In the event of an electrical malfunction, you can
release the fuel filler door manually:1.Remove the cover from the side panel of the
luggage compartment.
2.Pull the knob with the fuel pump symbol.
The fuel filler door is released.
Observe the following when refueling
When handling fuels always observe any
safety guidelines posted at the service
station.<
When refueling, insert the filler nozzle com-
pletely into the filler pipe. Lifting the filler nozzle
during refueling leads to
>premature pump shutoff
>a reduced efficiency of the fuel-vapor
recovery system.
The fuel tank is full when the filler nozzle clicks
off the first time.
Fuel tank capacity
Approx. 15.9 gallons/60 liters, including the
reserve capacity of 2.1 gallons/8 liters.
Refuel as soon as possible once your
cruising range falls below 30 miles/
50 km, as otherwise engine functions are not
ensured and damage can occur.<
Fuel specifications
The engine uses lead-free gasoline only.
Page 205 of 223

Short commands for the voice command system
204
Climate
menu
To select radio presets138{Preset ...} or
{Choose preset}
To open "Manual"139{FM manual} or
{AM manual}
To open strongest radio station139{AM Autostore}
To call up CD player145{CD menu}
To switch on CD player145{CD}
To call up CD changer145{CD changer menu}
To switch on CD changer145{CD changer}
To select CD145{CD 1...6}
To select CD and music track146{CD 1...6 track ...}
To select track146{Track ...}
To open "Audio Aux"149{Audio Aux menu}
To call up DVD145{DVD player menu}
To switch on DVD145{DVD player}
FunctionCommand
FunctionCommand
To open "Vent settings"90{Vent settings}
To open "Automatic programs"91{Automatic programs}
FunctionCommand
To open "Door locks"30, 32{Door locks}
To open "Steering wheel buttons"45{Steering wheel buttons}
To open "Lighting"53{Lighting}
To open "Communication settings"160{Communication settings}
To open "BMW Service settings"160{BMW Service settings}
To open "BMW Service"162{BMW Service}
To open "Service requirements"70, 161{Service requirements}
To open "Service"70, 161{Service}
To display "Check Control messages"73{Check Control messages}
To open "Display settings"76{Display settings}
To set brightness of Control Display76{Brightness}
To open "Units"64{Units}
To open "Languages"76, 127{Languages}
To open "Time"71{Time}
Page 210 of 223

Reference 209
At a glance
Controls
Driving tips
Communications
Navigation
Entertainment
Mobility
"Concert hall" tone
settings136
Condensation, refer to When
the vehicle is parked108
Configuring settings, refer to
Personal Profile29
Confirmation signals for
locking/unlocking of the
vehicle31
Connecting vacuum cleaner,
refer to Connecting
electrical appliances99
Consumption display
– average consumption66
Consumption indicator
– Energy Control64
"Continue guidance to
destination?"126
Control Center, refer to
iDrive16
Control Display, refer to
iDrive16
Controller, refer to iDrive16
Controls and displays10
Convenience operation
– windows30
Convenience start, refer to
Starting the engine49
Coolant183
– adding183
– checking level183
Cooling, maximum90
Cooling fluid, refer to
Coolant183
Country of destination for
navigation116
Courtesy lamps87
Cruise control55
– active57
– malfunction57
Cruising range65
Cup holders98
Curb weight, refer to
Weights201
Current fuel consumption64
"Current position"129Current position
– displaying129
– entering121
– storing121
"Customer
Relations"162,164
D
Dashboard, refer to
Cockpit10
Dashboard lighting, refer to
Instrument lighting87
Data200
– capacities201
– dimensions200
– engine200
– weights201
"Date"73
Date
– setting72
– setting format73
"Date format"73
Daytime driving lamps86
DBC Dynamic Brake
Control78
Deactivating front passenger
airbags83
Deadlocking, refer to
Locking30
Decommissioning the vehicle
– refer to Caring for your
vehicle brochure
Defect
– fuel filler door168
– glass sunroof37
Defogging windows91
Defroster
– rear window92
Defrosting windows91
Defrosting windows and
removing condensation91
Defrost position, refer to
Defrosting windows91
"Delete address book" in
navigation122
"Delete all numbers" on the
portable phone156"Delete data" in
navigation122
"Delete" for portable
phone156
Destination address
– deleting122
– entering115
Destination for navigation
– entry115
– navigation list120
– selecting from address
book121
– selecting using
information119
– storing121
Destination guidance125
– canceling voice
instructions45
– changing specified
route123
– displaying routes126
– distance and arrival125
– interrupting125
– starting125
– terminating/continuing125
– voice instructions127
– volume of voice
instructions128
Destination list for navigation
system120
Destinations recently driven
to120
"Dial" for portable phone153
"Dial number"154
Digital clock64
Digital compass94
Dimensions200
Directional indicators, refer to
Turn signals53
Direction instructions, refer to
Voice instructions127
Directory, refer to Phone
book154
Directory for navigation, refer
to Address book121
Displacement, refer to Engine
data200
Display, refer to iDrive
controls16
Page 211 of 223

Everything from A - Z
210 Display lighting, refer to
Instrument lighting87
"Display off"21
Displays, refer to Instrument
cluster12
Displays and controls10
"Display settings"72
Disposal
– of coolant183
– vehicle battery191
Distance control, refer to
Active cruise control57
Distance remaining to service,
refer to Service
requirements69
"Distance to dest."66
Distance warning, refer to
PDC Park Distance
Control77
Door key, refer to Integrated
key/remote control28
Door lock31
Door locking, confirmation
signals31
"Door locks"30
Doors, emergency
operation31
DOT Quality Grades176
Draft-free ventilation92
Drinks holders, refer to Cup
holders98
Drive-off assistant80
Driving lamps, refer to Parking
lamps/low beams85
Driving notes106
Driving route, refer to
Displaying route126
Driving stability control
systems78
Driving through water107
Driving tips, refer to Driving
notes106
Dry air, refer to Cooling
function92
DSC Dynamic Stability
Control78
– indicator lamps79DTC Dynamic Traction
Control79
– indicator lamps79
DVD for navigation114
Dynamic Stability Control
DSC
– indicator lamps79
Dynamic Traction Control
DTC
– indicator lamps79
E
EBV Electronic brake-force
distribution78
Eject button, refer to Buttons
on the CD player134
Electrical malfunction
– door lock31
– fuel filler door168
– glass sunroof37
Electric seat adjustment39
Electronic brake-force
distribution78
Electronic oil level check181
Emergency call193
Emergency operation, refer to
Manual operation
– door lock31
– fuel filler door168
– glass sunroof37
– transmission lock, automatic
transmission53
Emergency release of luggage
compartment lid from
luggage compartment's
interior33
Emergency services, refer to
Roadside Assistance193
Emissions test, refer to
Service requirements69
"Enable services"161
"End call"154
Energy-conscious driving,
refer to Energy Control64
Energy Control64Engine
– breaking in106
– data200
– speed200
– starting49
– switching off50
Engine compartment181
Engine coolant, refer to
Coolant183
Engine oil
– adding183
– BMW Maintenance
System185
– checking level181
– intervals between changes,
refer to Service
requirements69
"Engine oil level"182
Engine output, refer to Engine
data200
Engine speed200
Engine starting, refer to
Starting the engine49
"Enter address"116
Entering destination116
Entering the address115
Entering the intersection117
"Entertainment"134
"Entertainment settings"135
Entry map for destination118
"Equalizer", refer to Tone
control136
Error messages, refer to
Check Control73
"ESN"142
ESP Electronic Stability
Program, refer to DSC
Dynamic Stability
Control78
Event data recorders186
Exhaust system, refer to Hot
exhaust system106
Exterior mirrors43
– adjusting43
– automatic dimming
feature107
– automatic heating44
External audio device97,149