2005 BMW 330I SEDAN IDrive
[x] Cancel search: IDrivePage 33 of 223

Opening and closing
32
Opening and closing: from
inside
This button serves to unlock or lock doors and
the luggage compartment lid, but does not acti-
vate the anti-theft system. The fuel filler door
remains unlocked.
You can also set the situations in which the car
locks:
iDrive concept, refer to page16.
1.Press the button.
This opens the start menu.
2.Press the controller to open the menu.
3.Select "Vehicle settings" and press the
controller.
4.Select "Door locks" and press the control-
ler.
5.Select "Central locking" and press the con-
troller.
6.Select a menu item:
>"Relock door if not opened"
The central locking system automati-
cally locks the vehicle after a short time
when no door has been opened.
>"Lock after driving"
The central locking system automati-cally locks the vehicle as soon as you
start to drive.
7.Press the controller.
The setting is selected.
The setting is stored for the remote control cur-
rently in use.
Unlocking and opening doors
>Either unlock the doors together using the
button for the central locking system and
then pull the door handle above the armrest
or
>pull on the door handle of each door twice:
the first time unlocks the door, the second
time opens it.
Locking
>Use the central locking button to lock all of
the doors simultaneously, or
>press down the safety lock button of a door.
To prevent you from being locked out, the
open driver's door cannot be locked using
the lock button.
Because any persons or animals left unat-
tended in a parked vehicle could lock the
doors from the inside, Always take the remote
control with you, so that the car can be opened
from the outside.<
Luggage compartment lid
In order to avoid damage, make sure there
is sufficient clearance in all directions
before opening the luggage compartment lid.<
Page 43 of 223

Adjustments
42
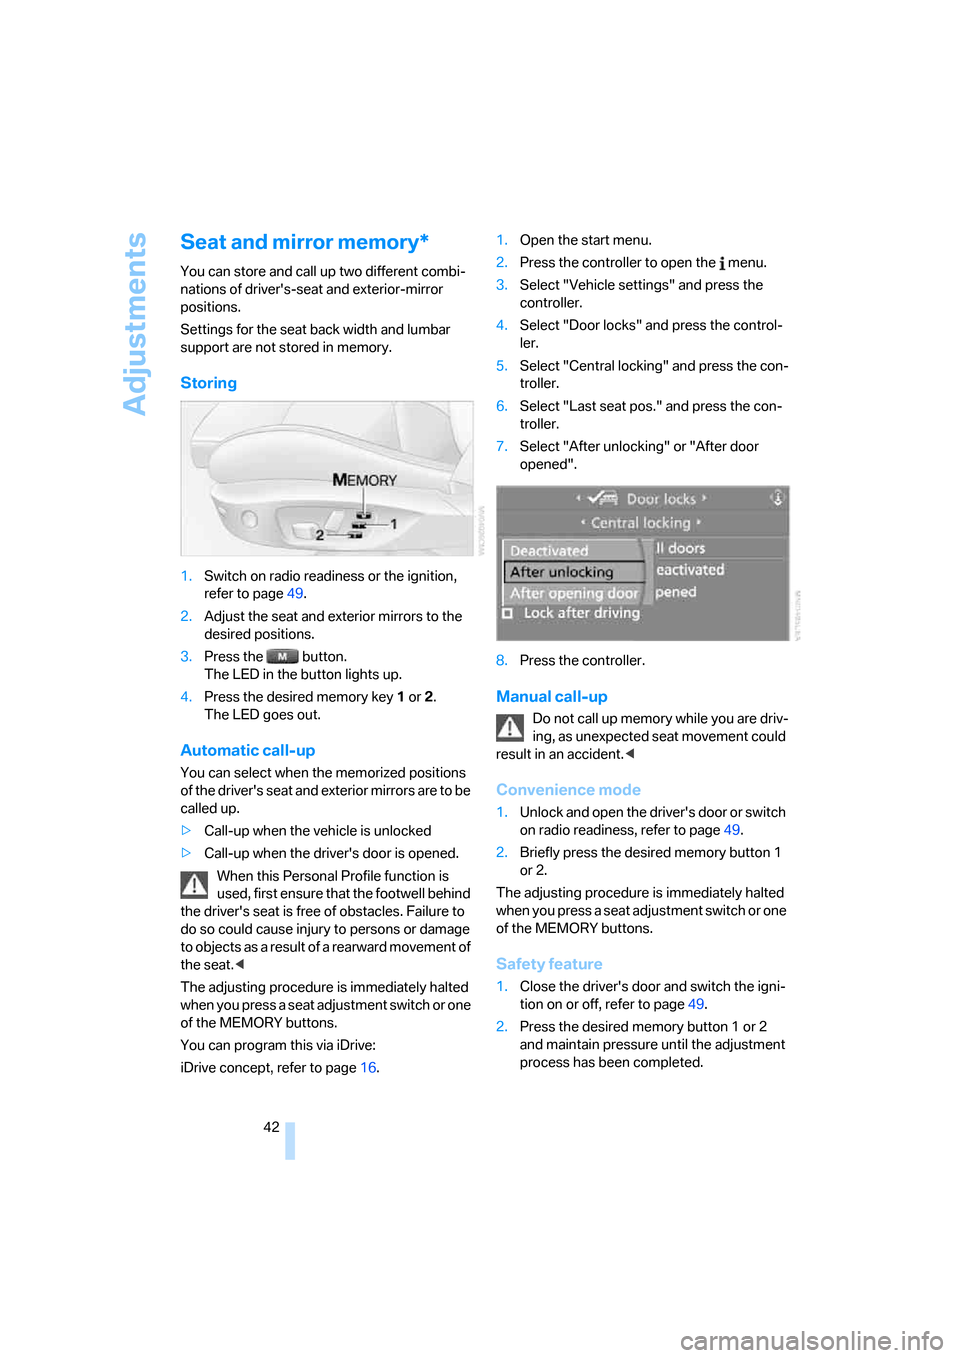
Seat and mirror memory*
You can store and call up two different combi-
nations of driver's-seat and exterior-mirror
positions.
Settings for the seat back width and lumbar
support are not stored in memory.
Storing
1.Switch on radio readiness or the ignition,
refer to page49.
2.Adjust the seat and exterior mirrors to the
desired positions.
3.Press the button.
The LED in the button lights up.
4.Press the desired memory key 1 or 2.
The LED goes out.
Automatic call-up
You can select when the memorized positions
of the driver's seat and exterior mirrors are to be
called up.
>Call-up when the vehicle is unlocked
>Call-up when the driver's door is opened.
When this Personal Profile function is
used, first ensure that the footwell behind
the driver's seat is free of obstacles. Failure to
do so could cause injury to persons or damage
to objects as a result of a rearward movement of
the seat.<
The adjusting procedure is immediately halted
when you press a seat adjustment switch or one
of the MEMORY buttons.
You can program this via iDrive:
iDrive concept, refer to page16.1.Open the start menu.
2.Press the controller to open the menu.
3.Select "Vehicle settings" and press the
controller.
4.Select "Door locks" and press the control-
ler.
5.Select "Central locking" and press the con-
troller.
6.Select "Last seat pos." and press the con-
troller.
7.Select "After unlocking" or "After door
opened".
8.Press the controller.
Manual call-up
Do not call up memory while you are driv-
ing, as unexpected seat movement could
result in an accident.<
Convenience mode
1.Unlock and open the driver's door or switch
on radio readiness, refer to page49.
2.Briefly press the desired memory button 1
or 2.
The adjusting procedure is immediately halted
when you press a seat adjustment switch or one
of the MEMORY buttons.
Safety feature
1.Close the driver's door and switch the igni-
tion on or off, refer to page49.
2.Press the desired memory button 1 or 2
and maintain pressure until the adjustment
process has been completed.
Page 46 of 223

Controls
45Reference
At a glance
Driving tips
Communications
Navigation
Entertainment
Mobility
Programmable buttons on the steering
wheel
You can program the buttons to suit your per-
sonal preferences:
These settings are stored for the remote con-
trol currently in use.
iDrive concept, refer to page16.
1.Press the button.
This opens the start menu.
2.Press the controller to open the menu.
3.Select "Vehicle settings" and press the
controller.
4.Select "Steering wheel buttons" and press
the controller.
A list showing various functions is dis-
played:
>"Navigation voice instructions"
Voice messages from the navigation
system
>"Air recirculation on / off"
Permanent shut-off of outside air, refer to Automatic recirculated-air control
AUC on page91
>"Mute on / off"
To mute the audio sources
>"Monitor on / off"
Switching Control Display on/off
>"Telephone list"
Switch between any menu and tele-
phone
>"Next entertainment source"
To change the audio source
5.Select the desired function and press the
controller.
6.Select a button, if appropriate, and press
the controller.
.
You can operate the selected function using the
corresponding button.
Operating function
Briefly press the appropriate button in the
steering wheel.
Voice instructions of navigation system:
>Switch voice instructions on/off:
Press button for longer
>To repeat the last voice instruction:
Press the button briefly
>To cancel a voice instruction during an
announcement:
Press the button briefly
Page 54 of 223

Controls
53Reference
At a glance
Driving tips
Communications
Navigation
Entertainment
Mobility
To use the automatic function again, move the
selector lever to the right into position D.
Overriding selector lever lock
You can manually override the selector lever
lock in case a defect occurs in which the selec-
tor lever remains in position P although the but-
ton on the selector lever is pressed:
1.Unclip the sleeve of the selector lever.
2.Pull the sleeve up over the selector lever
until the sleeve is inside out.
3.Using the screwdriver from the onboard
tool kit, refer to page187, hold down the red
lever and move the selector lever to the
desired position in the usual way.
Turn signals/
headlamp flasher
1High beams
2Headlamp flasher
3Turn signals
Using turn signals
Press the lever beyond the resistance point.To turn off manually, press the lever to the
resistance point.
Unusually rapid flashing of the indicator
lamp indicates that a turn signal bulb
needs to be replaced.
After switching off the ignition, make sure that
the roadside parking lamps are not switched
on.<
Signaling for a short time
Press and hold the lever as far as the resistance
point for as long as you wish to indicate a turn.
Triple turn signal activation
Press the lever as far as the resistance point.
The turn signals flash three times.
You can activate or deactivate this function.
iDrive concept, refer to page16.
1.Open the start menu.
2.Press the controller to open the menu.
3.Select "Vehicle settings" and press the
controller.
4.Select "Lighting" and press the controller.
5.Select "Triple turn signal activation" and
press the controller.
Triple turn signaling is activated.
Page 67 of 223

Everything under control
66
Average fuel consumption
The average fuel consumption is calculated for
the time during which the engine is running.
With the trip computer, refer to page66, you
can have the average consumption for another
trip displayed.
To reset average fuel consumption: press the
button in the turn indicator stalk for approx.
2seconds.
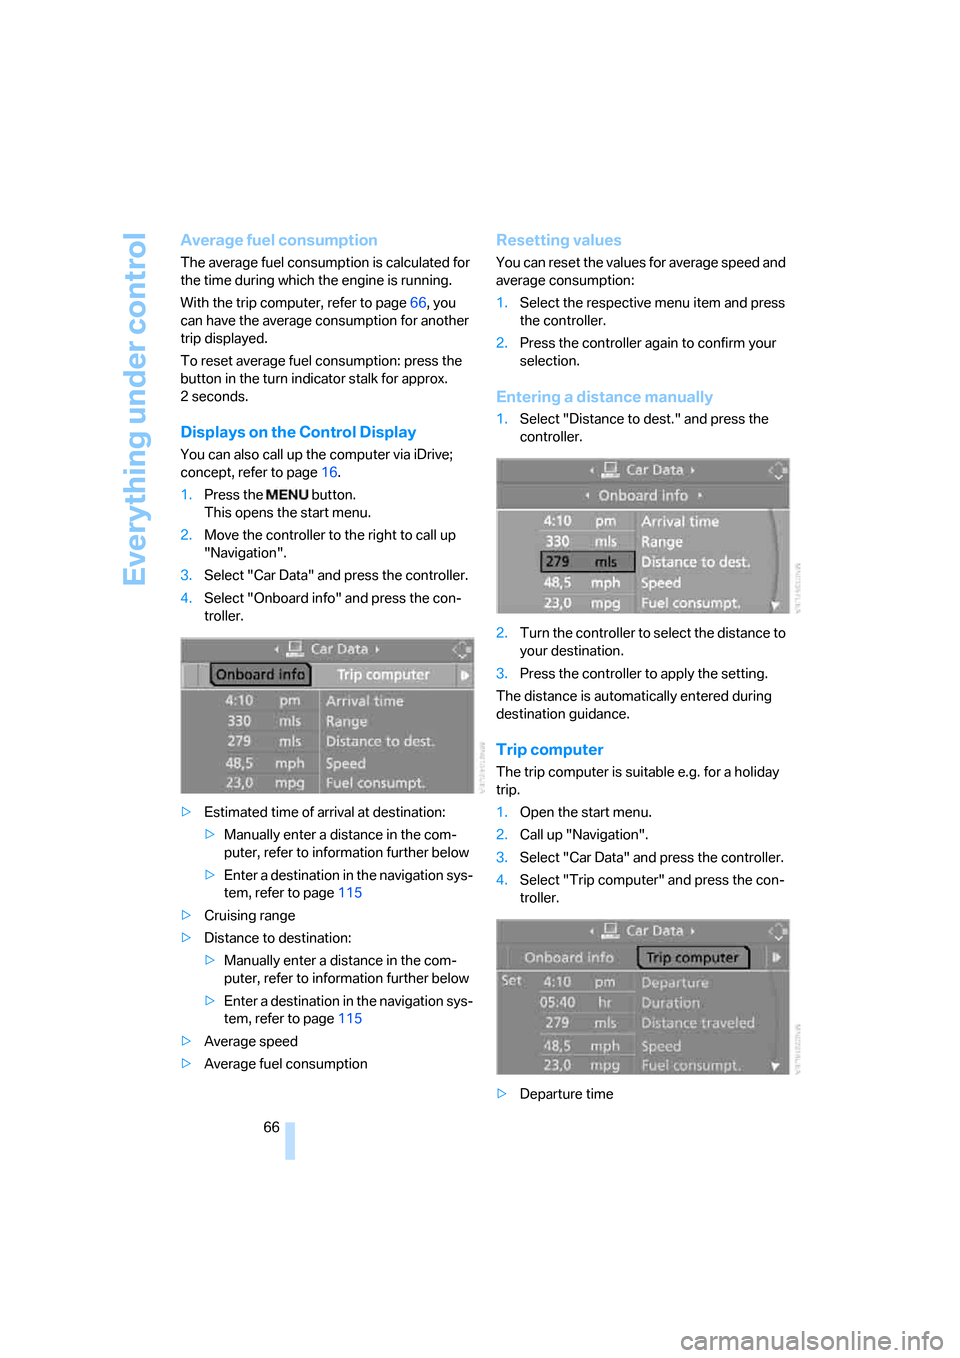
Displays on the Control Display
You can also call up the computer via iDrive;
concept, refer to page16.
1.Press the button.
This opens the start menu.
2.Move the controller to the right to call up
"Navigation".
3.Select "Car Data" and press the controller.
4.Select "Onboard info" and press the con-
troller.
>Estimated time of arrival at destination:
>Manually enter a distance in the com-
puter, refer to information further below
>Enter a destination in the navigation sys-
tem, refer to page115
>Cruising range
>Distance to destination:
>Manually enter a distance in the com-
puter, refer to information further below
>Enter a destination in the navigation sys-
tem, refer to page115
>Average speed
>Average fuel consumption
Resetting values
You can reset the values for average speed and
average consumption:
1.Select the respective menu item and press
the controller.
2.Press the controller again to confirm your
selection.
Entering a distance manually
1.Select "Distance to dest." and press the
controller.
2.Turn the controller to select the distance to
your destination.
3.Press the controller to apply the setting.
The distance is automatically entered during
destination guidance.
Trip computer
The trip computer is suitable e.g. for a holiday
trip.
1.Open the start menu.
2.Call up "Navigation".
3.Select "Car Data" and press the controller.
4.Select "Trip computer" and press the con-
troller.
>Departure time
Page 69 of 223

Everything under control
68
Settings and information
Operating principle
1Button for:
>Selecting display
>Setting values
2Button for:
>Confirming selected display or set val-
ues
>Calling up computer information65
3When the lights are switched on: instrument
lighting brightness87
4Calling up Check Control735Checking oil level181
6Setting the time71
7Date setting72
8Viewing service requirement display69
Exiting displays
The outside-temperature reading and the time
reappear when you press button2 or if you
make no entries within approx. 15 seconds. If
required, complete the current setting first.
Units of measure
You can set units of measure. The settings are
stored for the remote control currently in use,
refer also to Personal Profile on page29.
>Fuel consumption: mpg US, mpg UK,
l/100 km, km/l
>Distance covered: mls, km
>Units of pressure
*: psi, kPa, bar>Temperature: 7, 6
Changing units of measure
iDrive concept, refer to page16.
1.Open the start menu.
2.Press the controller to open the menu.
3.Select "Display settings" and press the
controller.
4.Select "Units" and press the controller.
Page 73 of 223

Everything under control
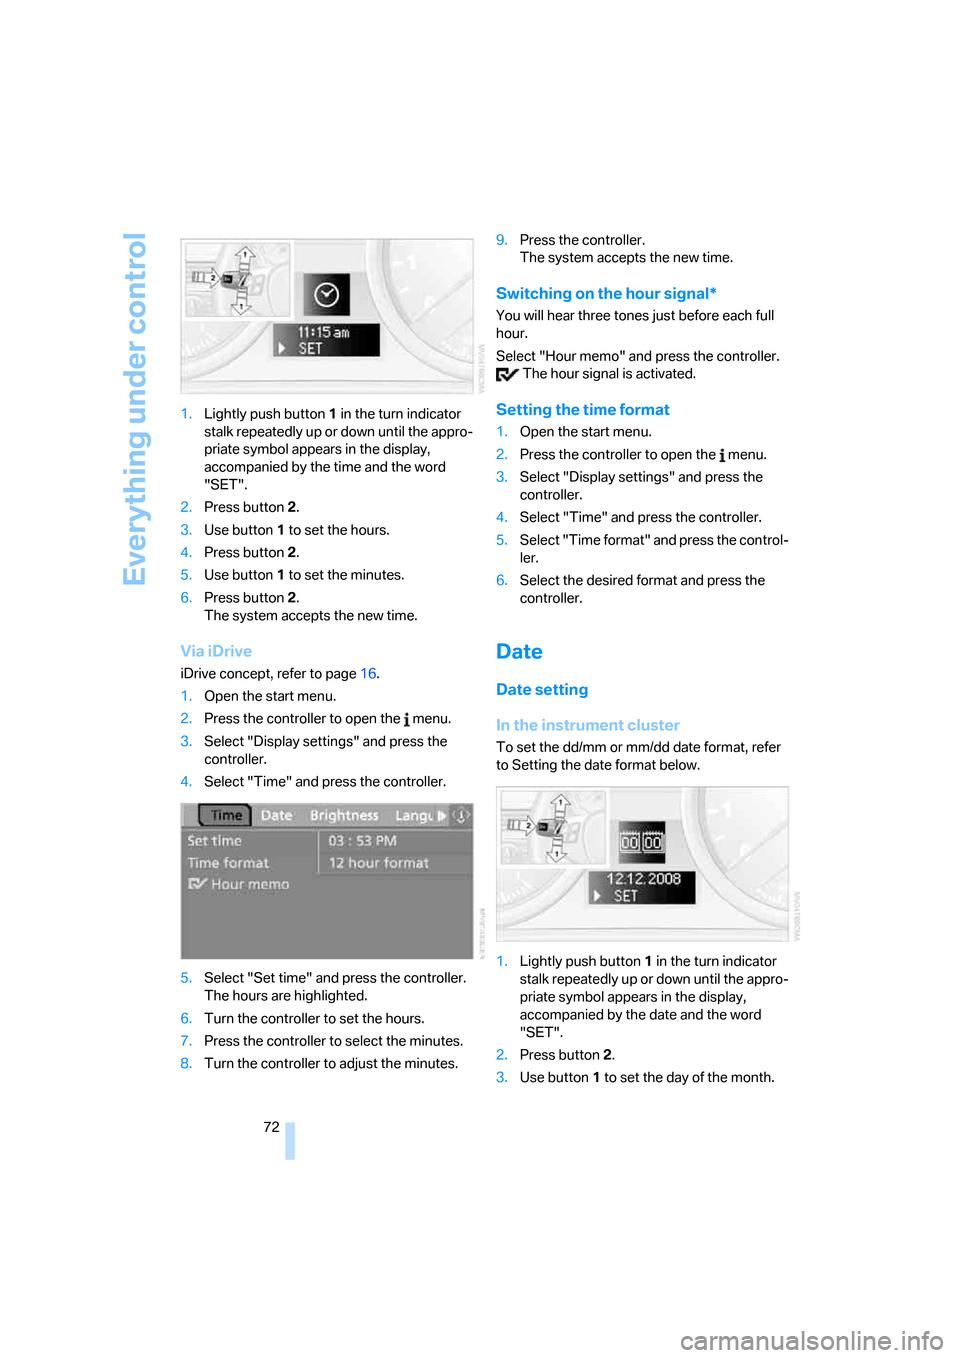
72 1.Lightly push button 1 in the turn indicator
stalk repeatedly up or down until the appro-
priate symbol appears in the display,
accompanied by the time and the word
"SET".
2.Press button 2.
3.Use button 1 to set the hours.
4.Press button 2.
5.Use button 1 to set the minutes.
6.Press button 2.
The system accepts the new time.
Via iDrive
iDrive concept, refer to page16.
1.Open the start menu.
2.Press the controller to open the menu.
3.Select "Display settings" and press the
controller.
4.Select "Time" and press the controller.
5.Select "Set time" and press the controller.
The hours are highlighted.
6.Turn the controller to set the hours.
7.Press the controller to select the minutes.
8.Turn the controller to adjust the minutes.9.Press the controller.
The system accepts the new time.
Switching on the hour signal*
You will hear three tones just before each full
hour.
Select "Hour memo" and press the controller.
The hour signal is activated.
Setting the time format
1.Open the start menu.
2.Press the controller to open the menu.
3.Select "Display settings" and press the
controller.
4.Select "Time" and press the controller.
5.Select "Time format" and press the control-
ler.
6.Select the desired format and press the
controller.
Date
Date setting
In the instrument cluster
To set the dd/mm or mm/dd date format, refer
to Setting the date format below.
1.Lightly push button 1 in the turn indicator
stalk repeatedly up or down until the appro-
priate symbol appears in the display,
accompanied by the date and the word
"SET".
2.Press button 2.
3.Use button 1 to set the day of the month.
Page 74 of 223

Controls
73Reference
At a glance
Driving tips
Communications
Navigation
Entertainment
Mobility
4.Press button 2.
5.Set the month and the yea r i n t h e s a m e w a y .
6.Press button 2.
The system accepts the new date.
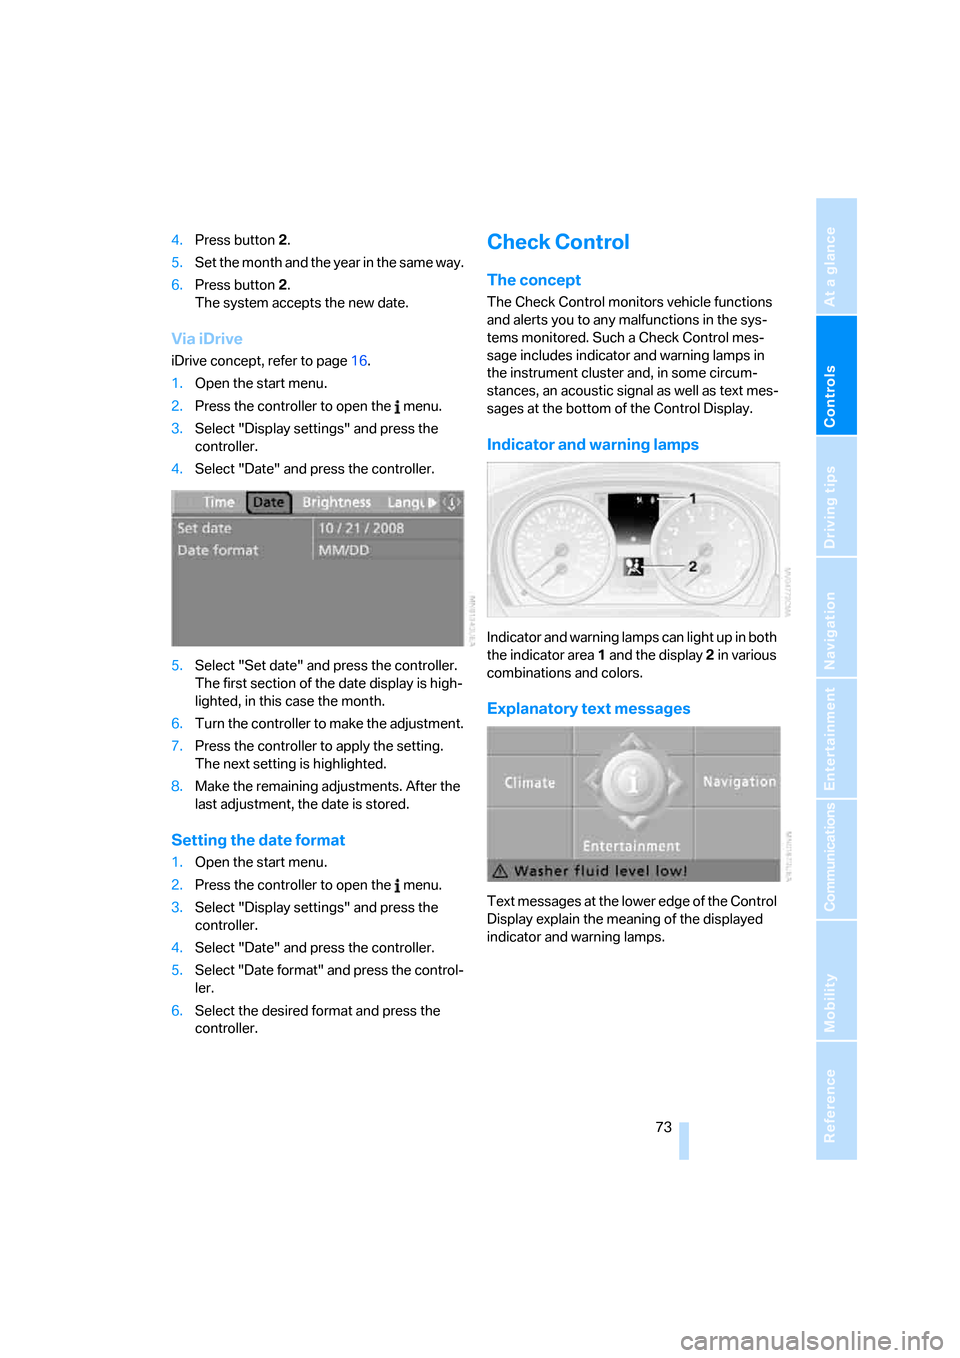
Via iDrive
iDrive concept, refer to page16.
1.Open the start menu.
2.Press the controller to open the menu.
3.Select "Display settings" and press the
controller.
4.Select "Date" and press the controller.
5.Select "Set date" and press the controller.
The first section of the date display is high-
lighted, in this case the month.
6.Turn the controller to make the adjustment.
7.Press the controller to apply the setting.
The next setting is highlighted.
8.Make the remaining adjustments. After the
last adjustment, the date is stored.
Setting the date format
1.Open the start menu.
2.Press the controller to open the menu.
3.Select "Display settings" and press the
controller.
4.Select "Date" and press the controller.
5.Select "Date format" and press the control-
ler.
6.Select the desired format and press the
controller.
Check Control
The concept
The Check Control monitors vehicle functions
and alerts you to any malfunctions in the sys-
tems monitored. Such a Check Control mes-
sage includes indicator and warning lamps in
the instrument cluster and, in some circum-
stances, an acoustic signal as well as text mes-
sages at the bottom of the Control Display.
Indicator and warning lamps
Indicator and warning lamps can light up in both
the indicator area 1 and the display 2 in various
combinations and colors.
Explanatory text messages
Text messages at the lower edge of the Control
Display explain the meaning of the displayed
indicator and warning lamps.