2005 BMW 330I key
[x] Cancel search: keyPage 29 of 223
Opening and closing
28
Opening and closing
Keys/remote controls
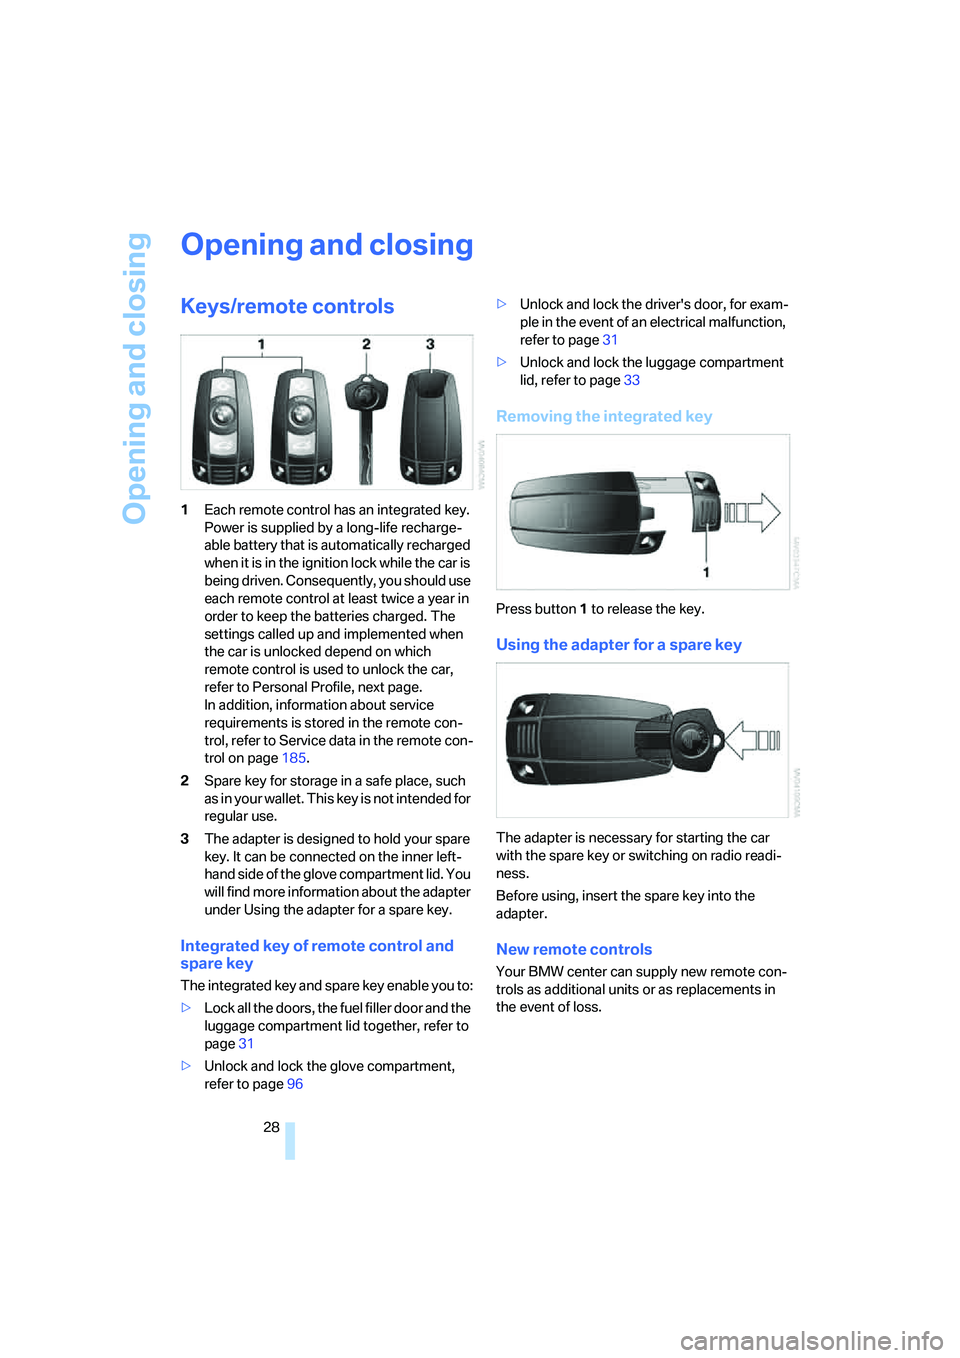
1Each remote control has an integrated key.
Power is supplied by a long-life recharge-
able battery that is automatically recharged
when it is in the ignition lock while the car is
being driven. Consequently, you should use
each remote control at least twice a year in
order to keep the batteries charged. The
settings called up and implemented when
the car is unlocked depend on which
remote control is used to unlock the car,
refer to Personal Profile, next page.
In addition, information about service
requirements is stored in the remote con-
trol, refer to Service data in the remote con-
trol on page185.
2Spare key for storage in a safe place, such
as in your wallet. This key is not intended for
regular use.
3The adapter is designed to hold your spare
key. It can be connected on the inner left-
hand side of the glove compartment lid. You
will find more information about the adapter
under Using the adapter for a spare key.
Integrated key of remote control and
spare key
The integrated key and spare key enable you to:
>Lock all the doors, the fuel filler door and the
luggage compartment lid together, refer to
page31
>Unlock and lock the glove compartment,
refer to page96>Unlock and lock the driver's door, for exam-
ple in the event of an electrical malfunction,
refer to page31
>Unlock and lock the luggage compartment
lid, refer to page33
Removing the integrated key
Press button1 to release the key.
Using the adapter for a spare key
The adapter is necessary for starting the car
with the spare key or switching on radio readi-
ness.
Before using, insert the spare key into the
adapter.
New remote controls
Your BMW center can supply new remote con-
trols as additional units or as replacements in
the event of loss.
Page 31 of 223
Opening and closing
30
Opening and closing: from
outside
Using the remote control
Protect the remote control against unau-
thorized use by handing over only the
spare key, for example when using hotel valet
parking.<
Because any persons or animals left unat-
tended in a parked vehicle could lock the
doors from the inside, Always take the remote
control with you, so that the car can be opened
from the outside.<
Unlocking
Press the button.
You unlock the car in accordance with the set-
ting stored in memory. The setting is stored for
the remote control currently in use.
The interior lamp and the doors' courtesy
lamps
* come on.
You can set the way in which the car unlocks:
iDrive concept, refer to page16.
1.Press the button.
This opens the start menu.
2.Press the controller to open the menu.
3.Select "Vehicle settings" and press the
controller.
4.Select "Door locks" and press the control-
ler.
5.Select "Central locking" and press the con-
troller.
6.Select "Unlock button" and press the con-
troller.
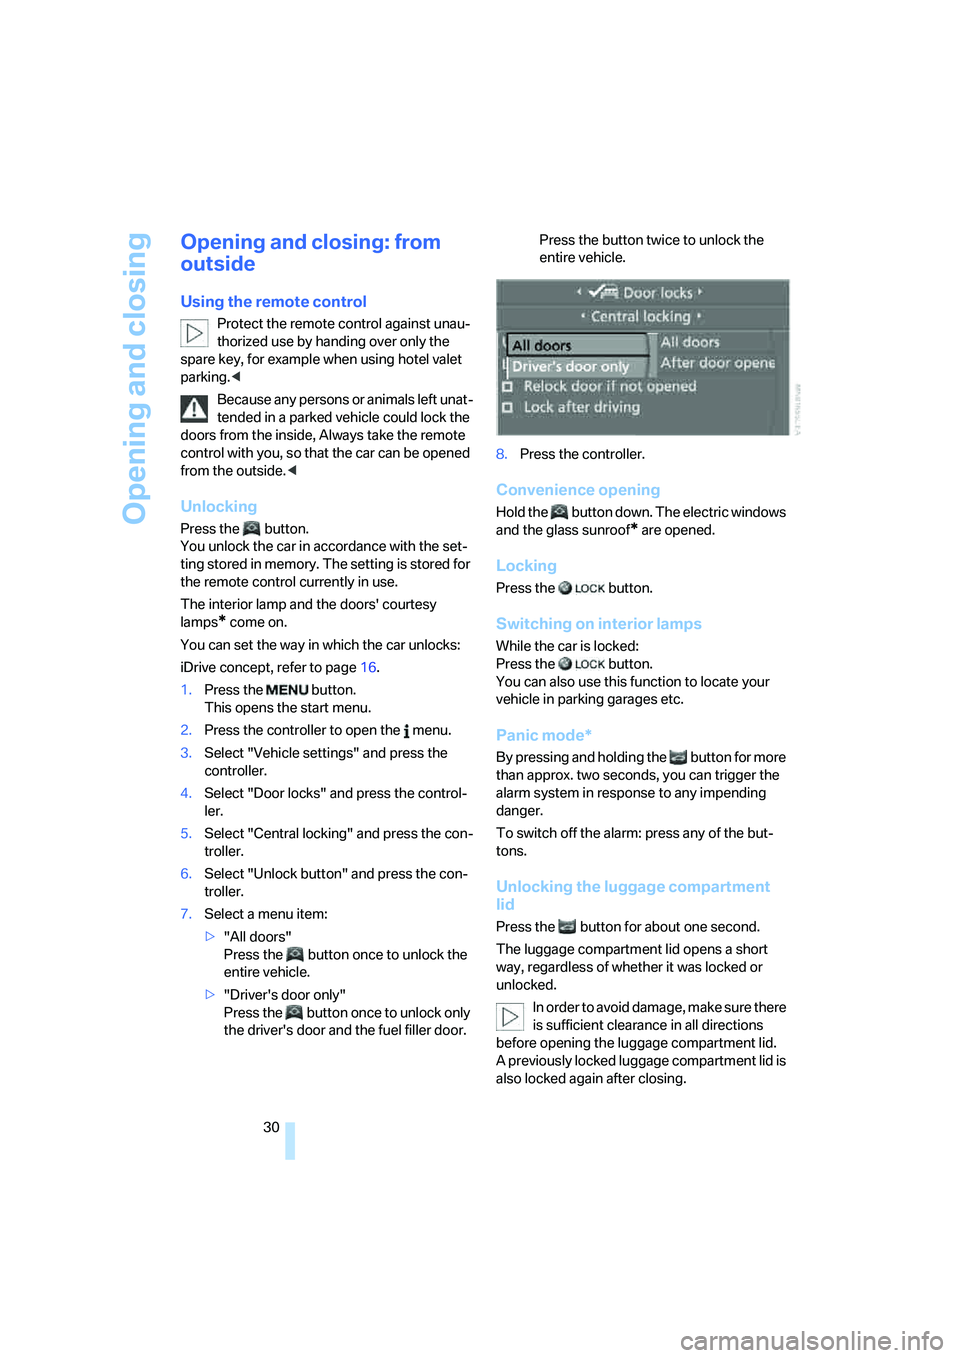
7.Select a menu item:
>"All doors"
Press the button once to unlock the
entire vehicle.
>"Driver's door only"
Press the button once to unlock only
the driver's door and the fuel filler door. Press the button twice to unlock the
entire vehicle.
8.Press the controller.
Convenience opening
Hold the button down. The electric windows
and the glass sunroof* are opened.
Locking
Press the button.
Switching on interior lamps
While the car is locked:
Press the button.
You can also use this function to locate your
vehicle in parking garages etc.
Panic mode*
By pressing and holding the button for more
than approx. two seconds, you can trigger the
alarm system in response to any impending
danger.
To switch off the alarm: press any of the but-
tons.
Unlocking the luggage compartment
lid
Press the button for about one second.
The luggage compartment lid opens a short
way, regardless of whether it was locked or
unlocked.
In order to avoid damage, make sure there
is sufficient clearance in all directions
before opening the luggage compartment lid.
A previously locked luggage compartment lid is
also locked again after closing.
Page 32 of 223
Controls
31Reference
At a glance
Driving tips
Communications
Navigation
Entertainment
Mobility
Before and after each trip, check that the lug-
gage compartment lid has not been inadvert-
ently unlocked.<
Setting confirmation signals
You can program the vehicle to confirm when it
has been locked or unlocked.
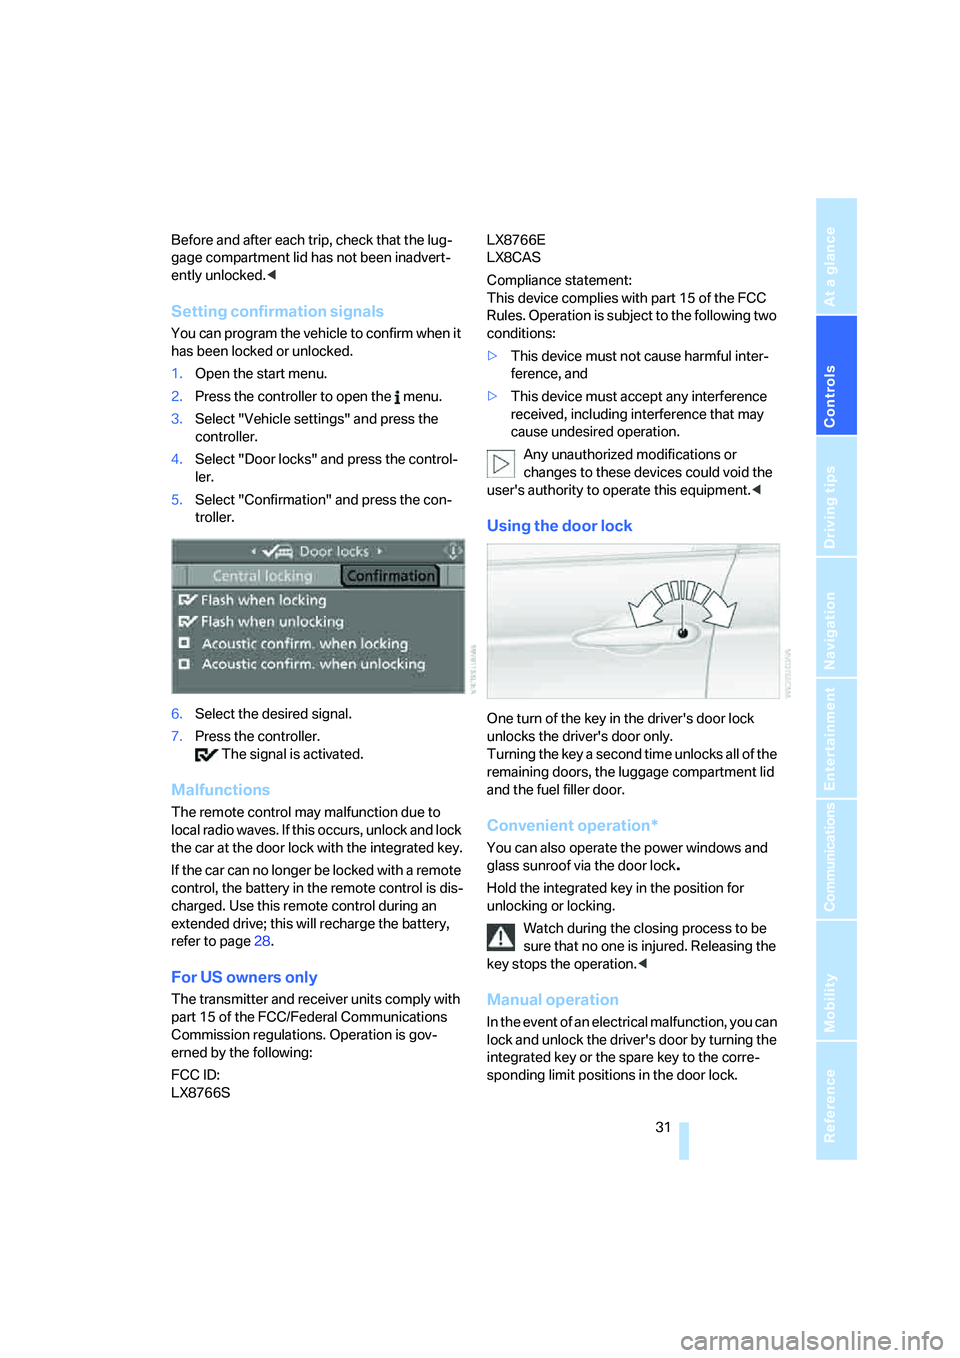
1.Open the start menu.
2.Press the controller to open the menu.
3.Select "Vehicle settings" and press the
controller.
4.Select "Door locks" and press the control-
ler.
5.Select "Confirmation" and press the con-
troller.
6.Select the desired signal.
7.Press the controller.
The signal is activated.
Malfunctions
The remote control may malfunction due to
local radio waves. If this occurs, unlock and lock
the car at the door lock with the integrated key.
If the car can no longer be locked with a remote
control, the battery in the remote control is dis-
charged. Use this remote control during an
extended drive; this will recharge the battery,
refer to page28.
For US owners only
The transmitter and receiver units comply with
part 15 of the FCC/Federal Communications
Commission regulations. Operation is gov-
erned by the following:
FCC ID:
LX8766S LX8766E
LX8CAS
Compliance statement:
This device complies with part 15 of the FCC
Rules. Operation is subject to the following two
conditions:
>This device must not cause harmful inter-
ference, and
>This device must accept any interference
received, including interference that may
cause undesired operation.
Any unauthorized modifications or
changes to these devices could void the
user's authority to operate this equipment.<
Using the door lock
One turn of the key in the driver's door lock
unlocks the driver's door only.
Turning the key a second time unlocks all of the
remaining doors, the luggage compartment lid
and the fuel filler door.
Convenient operation*
You can also operate the power windows and
glass sunroof via the door lock
.
Hold the integrated key in the position for
unlocking or locking.
Watch during the closing process to be
sure that no one is injured. Releasing the
key stops the operation.<
Manual operation
In the event of an electrical malfunction, you can
lock and unlock the driver's door by turning the
integrated key or the spare key to the corre-
sponding limit positions in the door lock.
Page 34 of 223
Controls
33Reference
At a glance
Driving tips
Communications
Navigation
Entertainment
Mobility
Opening from inside
Press the button: the luggage compartment lid
opens unless it has been locked.
Opening from outside
Press the button, see arrow, or press the
button on the remote control for approx. 1 sec-
ond. The luggage compartment lid will open
slightly. It can now be swung upwards.
The integrated key of the remote control and
the reserve key, refer to page28, fit the luggage
compartment lid lock.
Opening manually
Turn the integrated key of the remote control or
the spare key all the way to the left: the luggage
compartment lid opens.If you unlock and open the luggage com-
partment lid with the key while the alarm
system is armed, the alarm will be triggered.
Switching off an alarm, refer to page34.<
Locking or unlocking separately
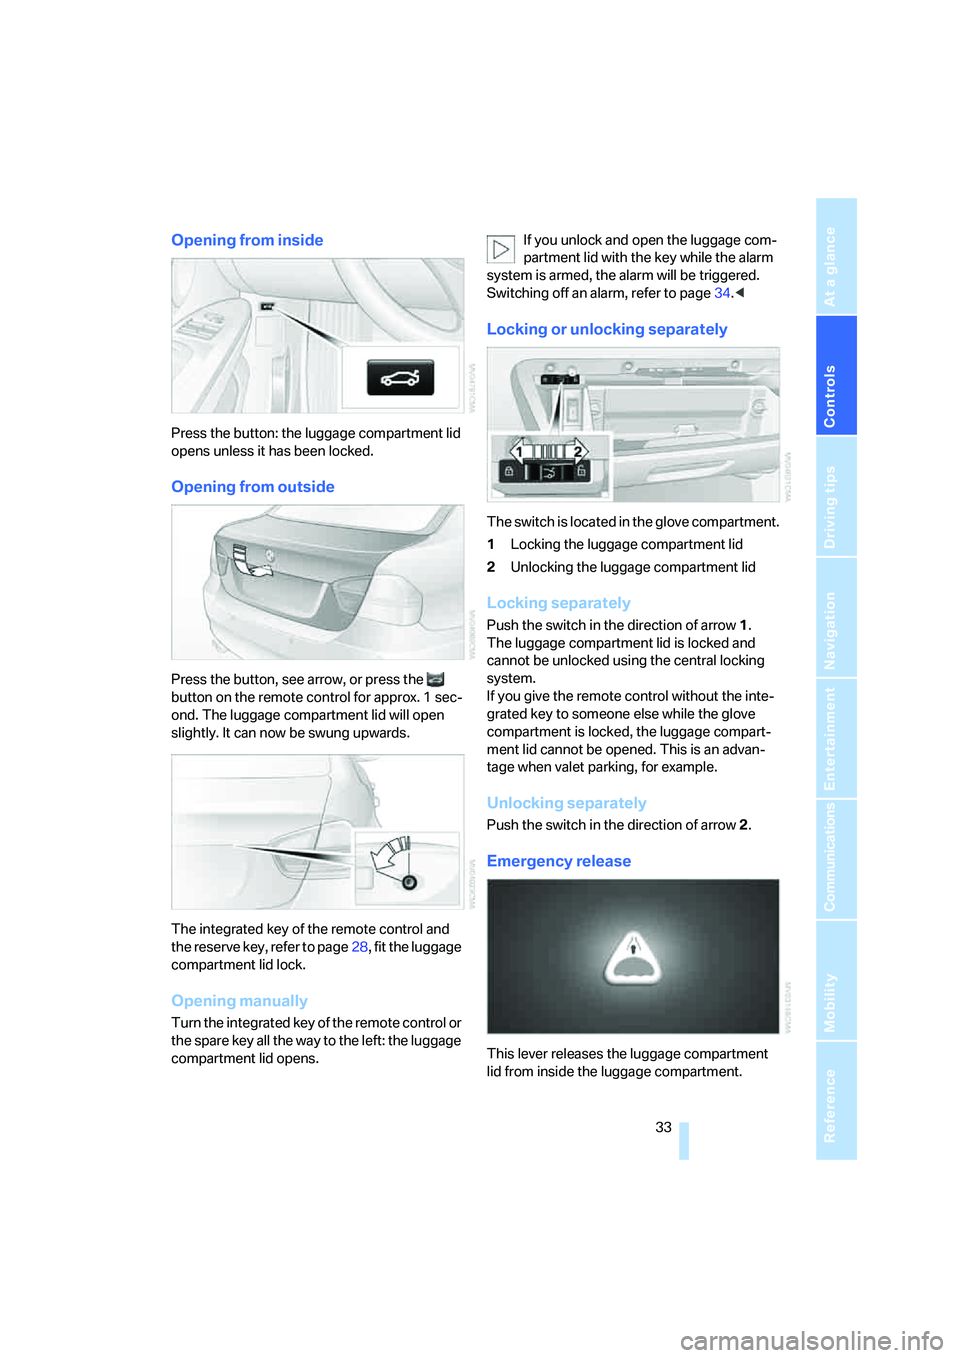
The switch is located in the glove compartment.
1Locking the luggage compartment lid
2Unlocking the luggage compartment lid
Locking separately
Push the switch in the direction of arrow 1.
The luggage compartment lid is locked and
cannot be unlocked using the central locking
system.
If you give the remote control without the inte-
grated key to someone else while the glove
compartment is locked, the luggage compart-
ment lid cannot be opened. This is an advan-
tage when valet parking, for example.
Unlocking separately
Push the switch in the direction of arrow 2.
Emergency release
This lever releases the luggage compartment
lid from inside the luggage compartment.
Page 43 of 223
Adjustments
42
Seat and mirror memory*
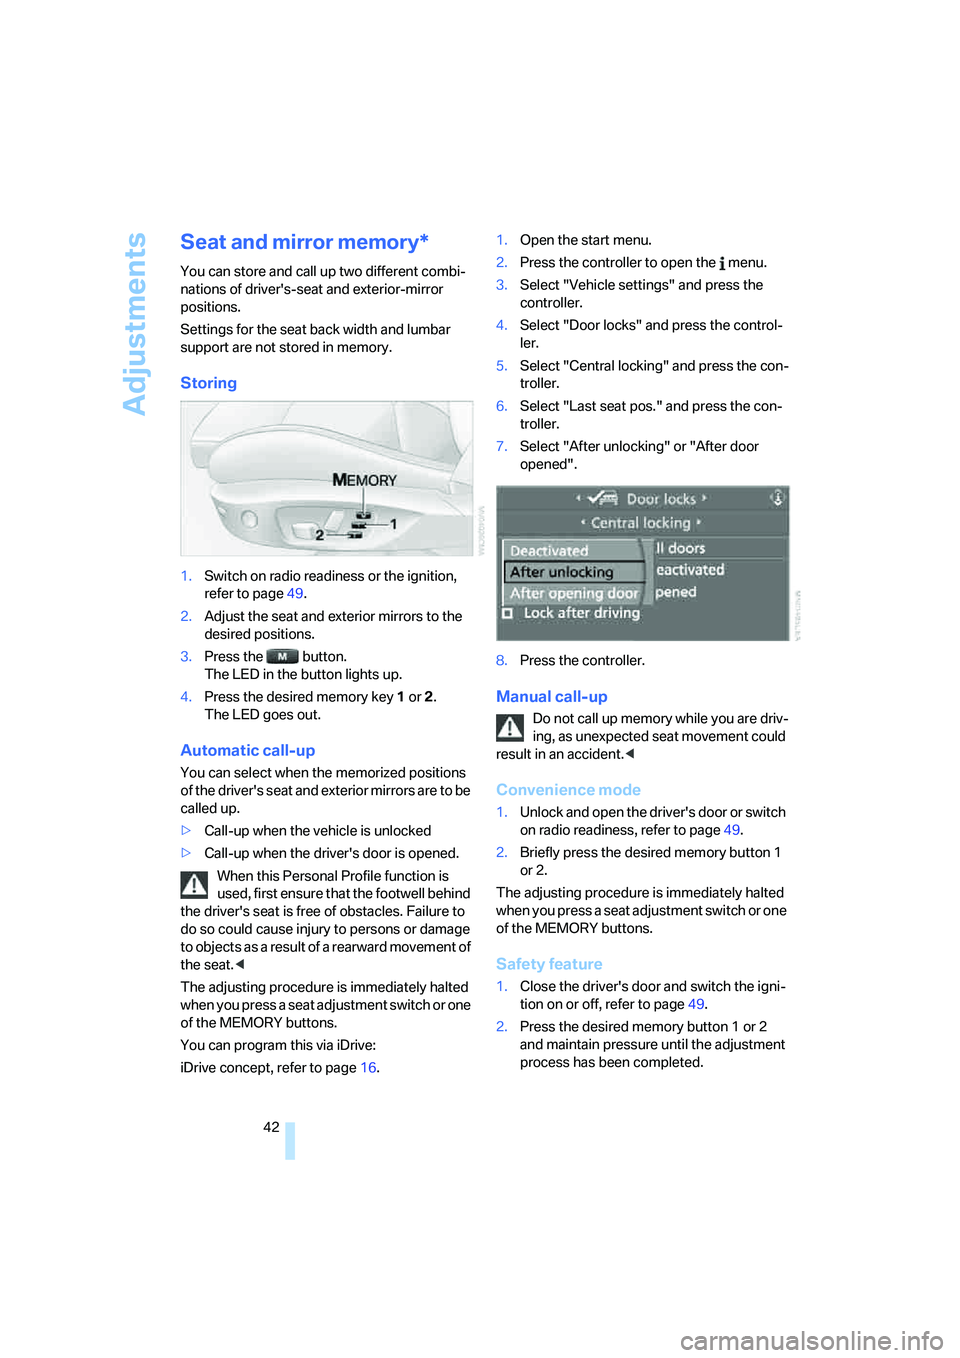
You can store and call up two different combi-
nations of driver's-seat and exterior-mirror
positions.
Settings for the seat back width and lumbar
support are not stored in memory.
Storing
1.Switch on radio readiness or the ignition,
refer to page49.
2.Adjust the seat and exterior mirrors to the
desired positions.
3.Press the button.
The LED in the button lights up.
4.Press the desired memory key 1 or 2.
The LED goes out.
Automatic call-up
You can select when the memorized positions
of the driver's seat and exterior mirrors are to be
called up.
>Call-up when the vehicle is unlocked
>Call-up when the driver's door is opened.
When this Personal Profile function is
used, first ensure that the footwell behind
the driver's seat is free of obstacles. Failure to
do so could cause injury to persons or damage
to objects as a result of a rearward movement of
the seat.<
The adjusting procedure is immediately halted
when you press a seat adjustment switch or one
of the MEMORY buttons.
You can program this via iDrive:
iDrive concept, refer to page16.1.Open the start menu.
2.Press the controller to open the menu.
3.Select "Vehicle settings" and press the
controller.
4.Select "Door locks" and press the control-
ler.
5.Select "Central locking" and press the con-
troller.
6.Select "Last seat pos." and press the con-
troller.
7.Select "After unlocking" or "After door
opened".
8.Press the controller.
Manual call-up
Do not call up memory while you are driv-
ing, as unexpected seat movement could
result in an accident.<
Convenience mode
1.Unlock and open the driver's door or switch
on radio readiness, refer to page49.
2.Briefly press the desired memory button 1
or 2.
The adjusting procedure is immediately halted
when you press a seat adjustment switch or one
of the MEMORY buttons.
Safety feature
1.Close the driver's door and switch the igni-
tion on or off, refer to page49.
2.Press the desired memory button 1 or 2
and maintain pressure until the adjustment
process has been completed.
Page 94 of 223
Controls
93Reference
At a glance
Driving tips
Communications
Navigation
Entertainment
Mobility
Practical interior accessories
Integrated universal remote
control*
The concept
The integrated universal remote control can
replace as many as three hand-held transmit-
ters for various remote-controlled devices,
such as door openers and house alarm sys-
tems. The integrated universal remote control
registers and stores signals from the original
hand-held transmitters.
The signal of an original hand-held transmitter
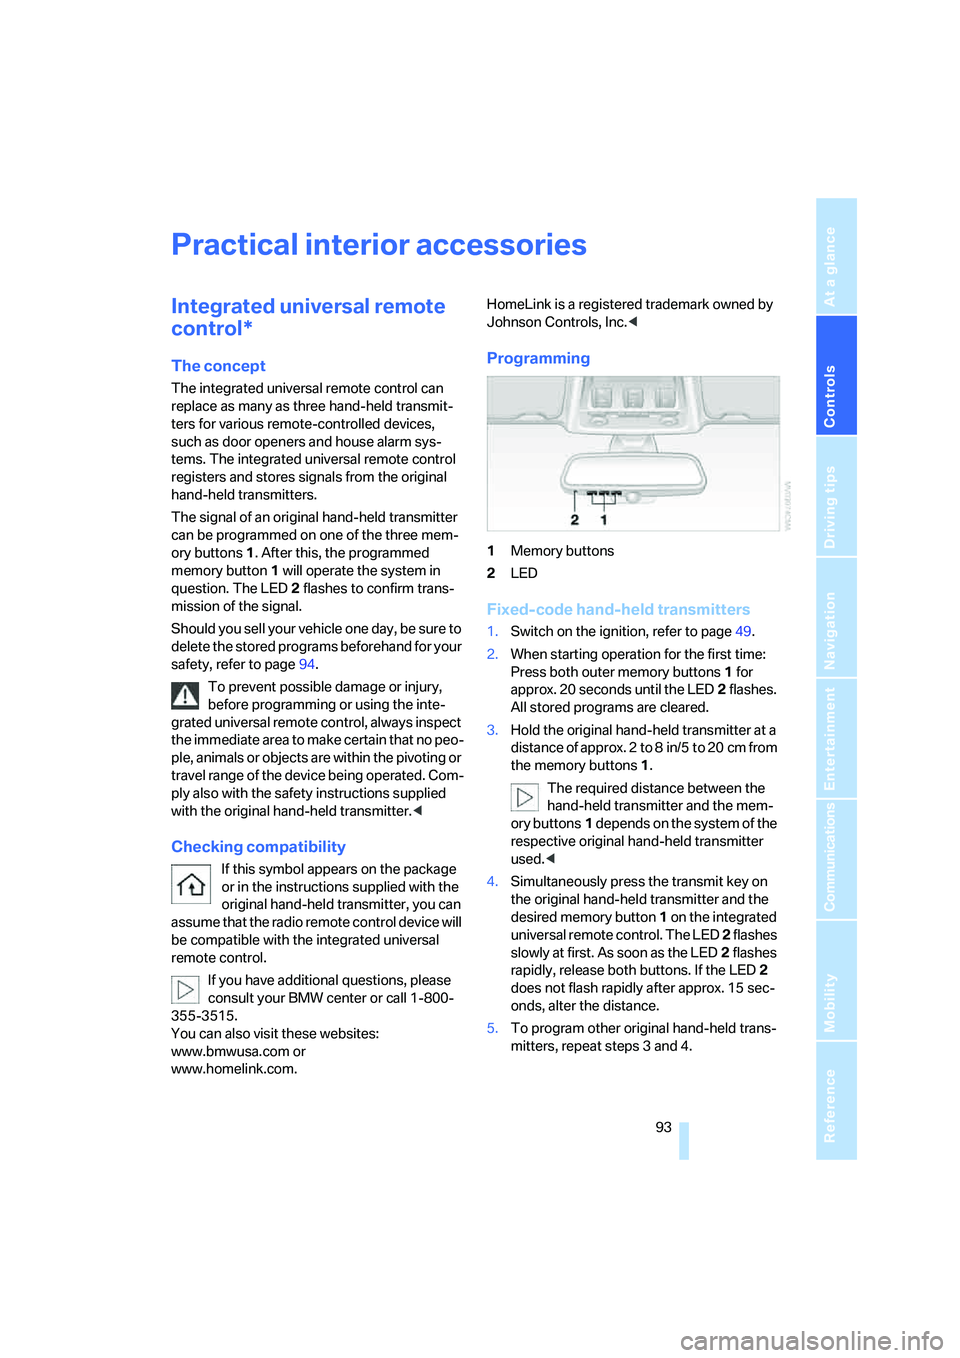
can be programmed on one of the three mem-
ory buttons1. After this, the programmed
memory button1 will operate the system in
question. The LED2 flashes to confirm trans-
mission of the signal.
Should you sell your vehicle one day, be sure to
delete the stored programs beforehand for your
safety, refer to page94.
To prevent possible damage or injury,
before programming or using the inte-
grated universal remote control, always inspect
the immediate area to make certain that no peo-
ple, animals or objects are within the pivoting or
travel range of the device being operated. Com-
ply also with the safety instructions supplied
with the original hand-held transmitter.<
Checking compatibility
If this symbol appears on the package
or in the instructions supplied with the
original hand-held transmitter, you can
assume that the radio remote control device will
be compatible with the integrated universal
remote control.
If you have additional questions, please
consult your BMW center or call 1-800-
355-3515.
You can also visit these websites:
www.bmwusa.com or
www.homelink.com. HomeLink is a registered trademark owned by
Johnson Controls, Inc.<
Programming
1Memory buttons
2LED
Fixed-code hand-held transmitters
1.Switch on the ignition, refer to page49.
2.When starting operation for the first time:
Press both outer memory buttons1 for
approx. 20 seconds until the LED2 flashes.
All stored programs are cleared.
3.Hold the original hand-held transmitter at a
distance of approx. 2 to 8 in/5 to 20 cm from
the memory buttons1.
The required distance between the
hand-held transmitter and the mem-
ory buttons1 depends on the system of the
respective original hand-held transmitter
used.<
4.Simultaneously press the transmit key on
the original hand-held transmitter and the
desired memory button 1 on the integrated
universal remote control. The LED 2 flashes
slowly at first. As soon as the LED2 flashes
rapidly, release both buttons. If the LED2
does not flash rapidly after approx. 15 sec-
onds, alter the distance.
5.To program other original hand-held trans-
mitters, repeat steps 3 and 4.
Page 97 of 223
Practical interior accessories
96
Roller sun blind for rear side window
Pull loop of roller sun blind and hook onto
bracket.
Glove compartment
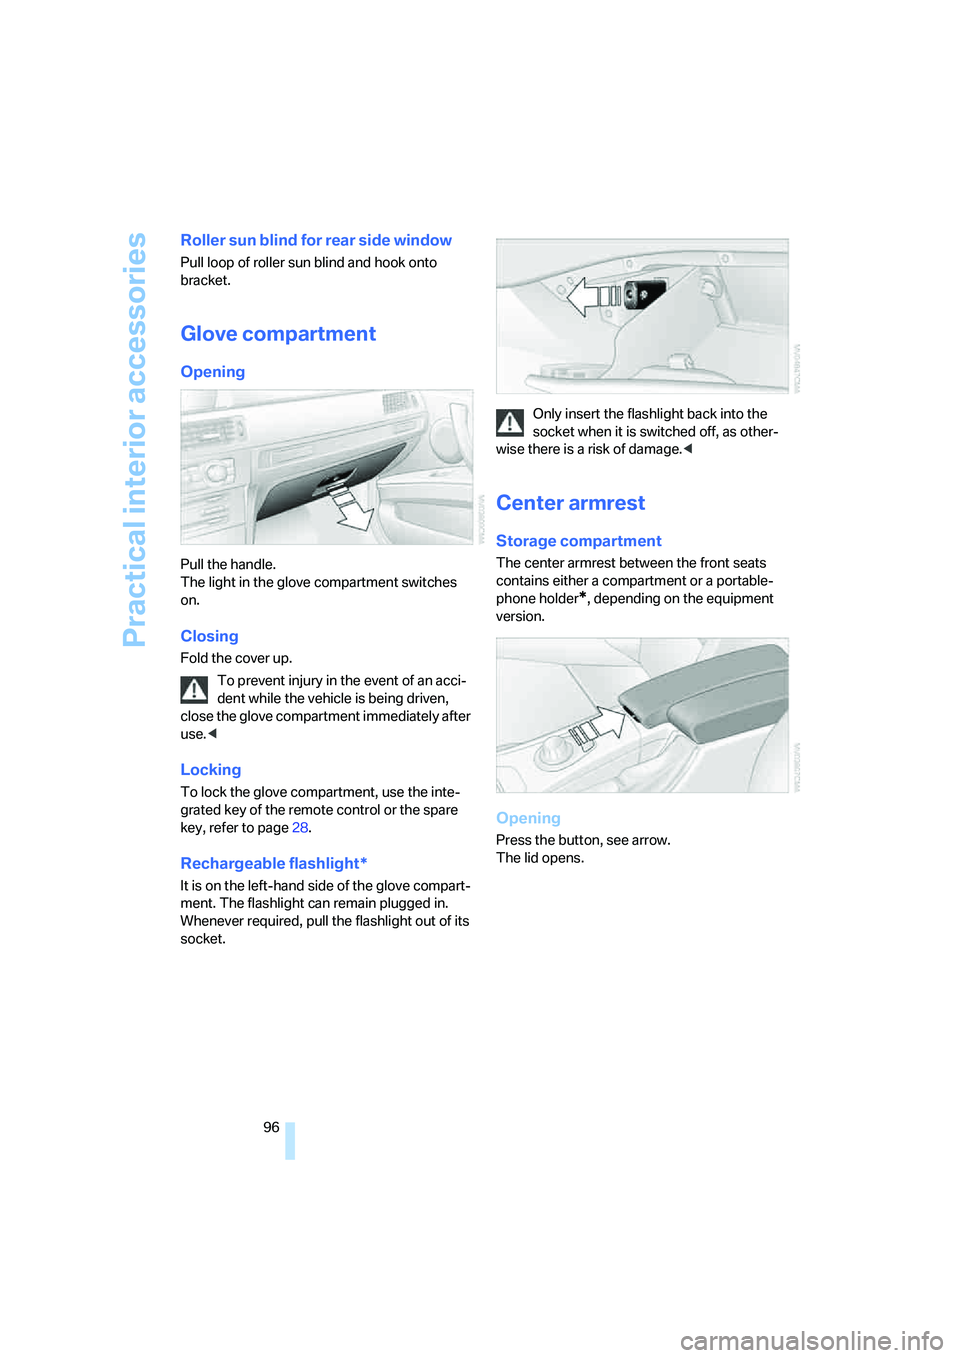
Opening
Pull the handle.
The light in the glove compartment switches
on.
Closing
Fold the cover up.
To prevent injury in the event of an acci-
dent while the vehicle is being driven,
close the glove compartment immediately after
use.<
Locking
To lock the glove compartment, use the inte-
grated key of the remote control or the spare
key, refer to page28.
Rechargeable flashlight*
It is on the left-hand side of the glove compart-
ment. The flashlight can remain plugged in.
Whenever required, pull the flashlight out of its
socket.Only insert the flashlight back into the
socket when it is switched off, as other-
wise there is a risk of damage.<
Center armrest
Storage compartment
The center armrest between the front seats
contains either a compartment or a portable-
phone holder
*, depending on the equipment
version.
Opening
Press the button, see arrow.
The lid opens.
Page 154 of 223
153
Entertainment
Reference
At a glance
Controls
Driving tips Communications
Navigation
Mobility
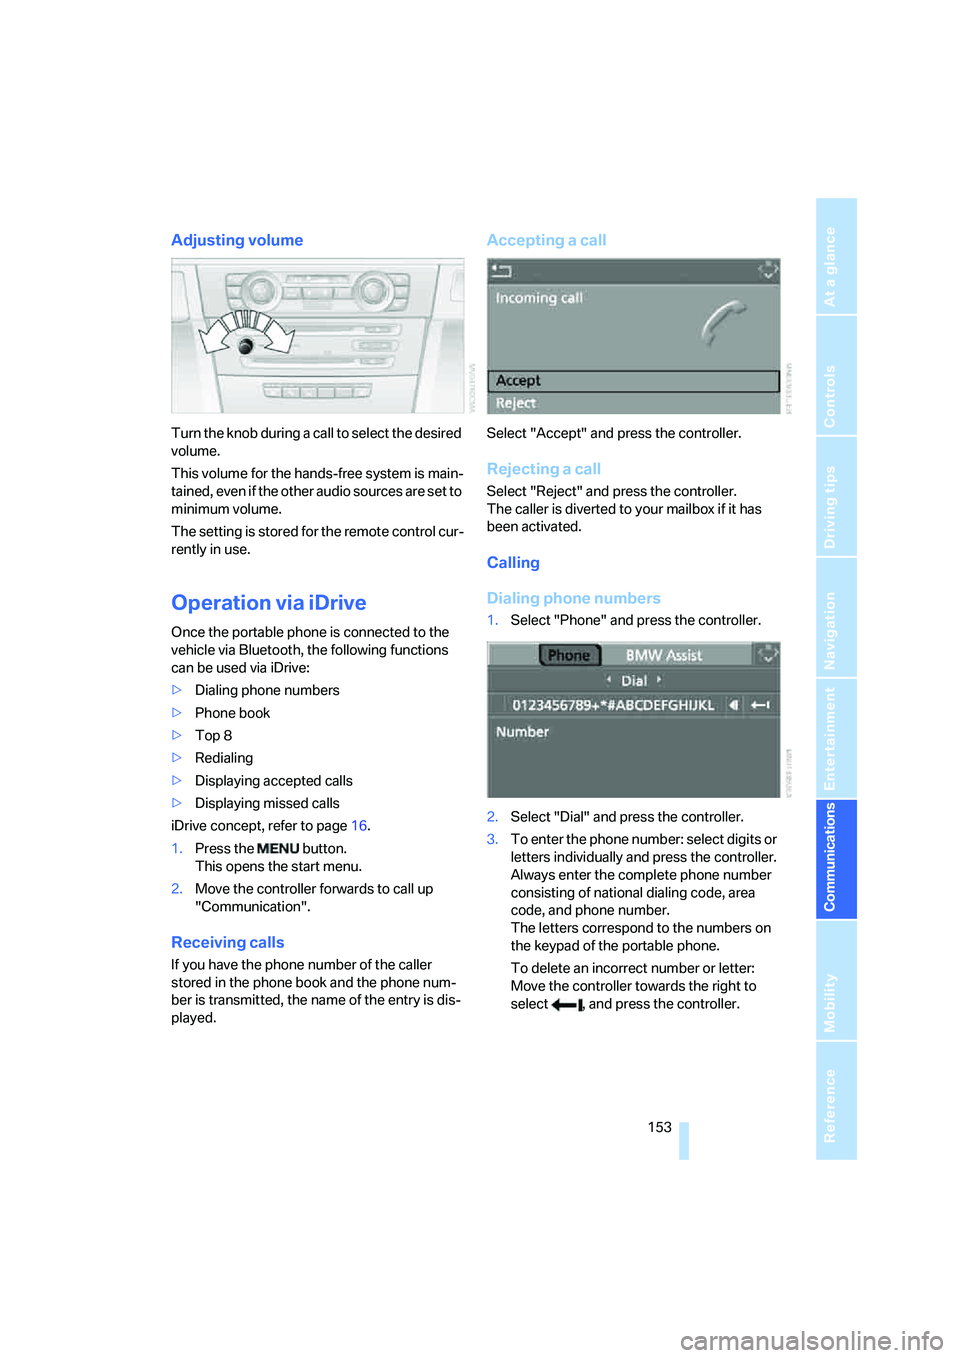
Adjusting volume
Turn the knob during a call to select the desired
volume.
This volume for the hands-free system is main-
tained, even if the other audio sources are set to
minimum volume.
The setting is stored for the remote control cur-
rently in use.
Operation via iDrive
Once the portable phone is connected to the
vehicle via Bluetooth, the following functions
can be used via iDrive:
>Dialing phone numbers
>Phone book
>Top 8
>Redialing
>Displaying accepted calls
>Displaying missed calls
iDrive concept, refer to page16.
1.Press the button.
This opens the start menu.
2.Move the controller forwards to call up
"Communication".
Receiving calls
If you have the phone number of the caller
stored in the phone book and the phone num-
ber is transmitted, the name of the entry is dis-
played.
Accepting a call
Select "Accept" and press the controller.
Rejecting a call
Select "Reject" and press the controller.
The caller is diverted to your mailbox if it has
been activated.
Calling
Dialing phone numbers
1.Select "Phone" and press the controller.
2.Select "Dial" and press the controller.
3.To enter the phone number: select digits or
letters individually and press the controller.
Always enter the complete phone number
consisting of national dialing code, area
code, and phone number.
The letters correspond to the numbers on
the keypad of the portable phone.
To delete an incorrect number or letter:
Move the controller towards the right to
select , and press the controller.