2005 BMW 330I alarm
[x] Cancel search: alarmPage 7 of 223
Notes
6 BMW warrants these parts to be free from
defects in material and workmanship.
BMW will not accept any liability for damage
resulting from installation of parts and accesso-
ries not approved by BMW.
BMW cannot test every product made by other
manufacturers to verify if it can be used on a
BMW safely and without risk to either the vehi-
cle, its operation, or its occupants.
Original BMW Parts, BMW Accessories and
other products approved by BMW, together
with professional advice on using these items,
are available from all BMW centers.
Installation and operation of non-BMW
approved accessories such as alarms, radios,
amplifiers, radar detectors, wheels, suspension
components, brake dust shields, telephones,
including operation of any portable phone from
within the vehicle without using an externally
mounted antenna, or transceiver equipment, for
instance, CBs, walkie-talkies, ham radio or sim-
ilar accessories, may cause extensive damage
to the vehicle, compromise its safety, interfere
with the vehicle's electrical system or affect the
validity of the BMW Limited Warranty. See your
BMW center for additional information.<
Maintenance, replacement, or repair of
the emission control devices and sys-
tems may be performed by any automotive
repair establishment or individual using any cer-
tified automotive part.<
Service and warranty
We recommend that you read this publication
thoroughly.
Your BMW is covered by the following warran-
ties:
>New Vehicle Limited Warranty
>Rust Perforation Limited Warranty
>Federal Emissions System Defect Warranty
>Federal Emissions Performance Warranty
>California Emission Control System Limited
Warranty
Detailed information about these warranties is
listed in the Service and Warranty Information
Booklet for US models or in the Warranty and
Service Guide Booklet for Canadian models.
Page 30 of 223
Controls
29Reference
At a glance
Driving tips
Communications
Navigation
Entertainment
Mobility
Personal Profile
You can set many of your BMW's functions to
suit your personal needs and preferences.
Without any action on your part, Personal Pro-
file ensures that most of these settings are
stored for the remote control currently in use.
When you unlock the car, the remote control
used for the purpose is recognized and the set-
tings stored for it are called up and imple-
mented.
This means that your personal settings are
active when you return to your BMW, even if the
car was used in the meantime by someone else
with a remote control of their own and the set-
tings were changed accordingly.
You can configure a maximum of three remote
controls for three different people. The prereq-
uisite for this is that each person has his or her
own remote control.
Personal Profile settings
For more information on specific settings, refer
to the specified pages.
>Response of the central locking system
when the car is unlocked, refer to page30
>Automatic locking of the vehicle, refer to
page32
>Automatic adjustment of the driver's seat
and the exterior mirrors after unlocking
*,
refer to page43
>Functions assigned to the programmable
buttons
* on the steering wheel, refer to
page45
>12h/24h mode of the clock, refer to page72
>Date format, refer to page73
>Brightness of the Control Display, refer to
page76
>Language on the Control Display, refer to
page76
>Units of measure for fuel consumption, dis-
tance covered/remaining distances, and
temperature, refer to page68
>Show visual warning for Park Distance Con-
trol PDC
*, refer to page77>Automatic climate control: AUTO program,
activating/deactivating cooling function and
automatic recirculated-air control, setting
temperature, air flow rate and distribution,
refer to page90 ff
>Audio volume, refer to page135
>Tone control, refer to page135
>Speed-dependent volume control, refer to
page135
Central locking system
The concept
The central locking system is ready for opera-
tion whenever the driver's door is closed.
The system simultaneously engages and
releases the locks on the following:
>Doors
>Luggage compartment lid
>Fuel filler door
Operation of the central locking system
from outside
>Via the remote control
>Via the door lock
The anti-theft system is automatically activated
whenever you operate the central locking sys-
tem from outside the vehicle. It prevents the
doors from being unlocked using the lock but-
tons or door handles. The interior lamp and the
courtesy lamps
* are also switched on or off
with the remote control. The alarm system
* is
also armed or disarmed.
For further details of the alarm system,
refer to
page34.
Operation of the central locking system
from inside
By means of the button for central locking, refer
to page32.
In the event of a sufficiently severe accident, the
central locking system unlocks automatically. In
addition, the hazard warning flashers and inte-
rior lamps come on.
Page 31 of 223
Opening and closing
30
Opening and closing: from
outside
Using the remote control
Protect the remote control against unau-
thorized use by handing over only the
spare key, for example when using hotel valet
parking.<
Because any persons or animals left unat-
tended in a parked vehicle could lock the
doors from the inside, Always take the remote
control with you, so that the car can be opened
from the outside.<
Unlocking
Press the button.
You unlock the car in accordance with the set-
ting stored in memory. The setting is stored for
the remote control currently in use.
The interior lamp and the doors' courtesy
lamps
* come on.
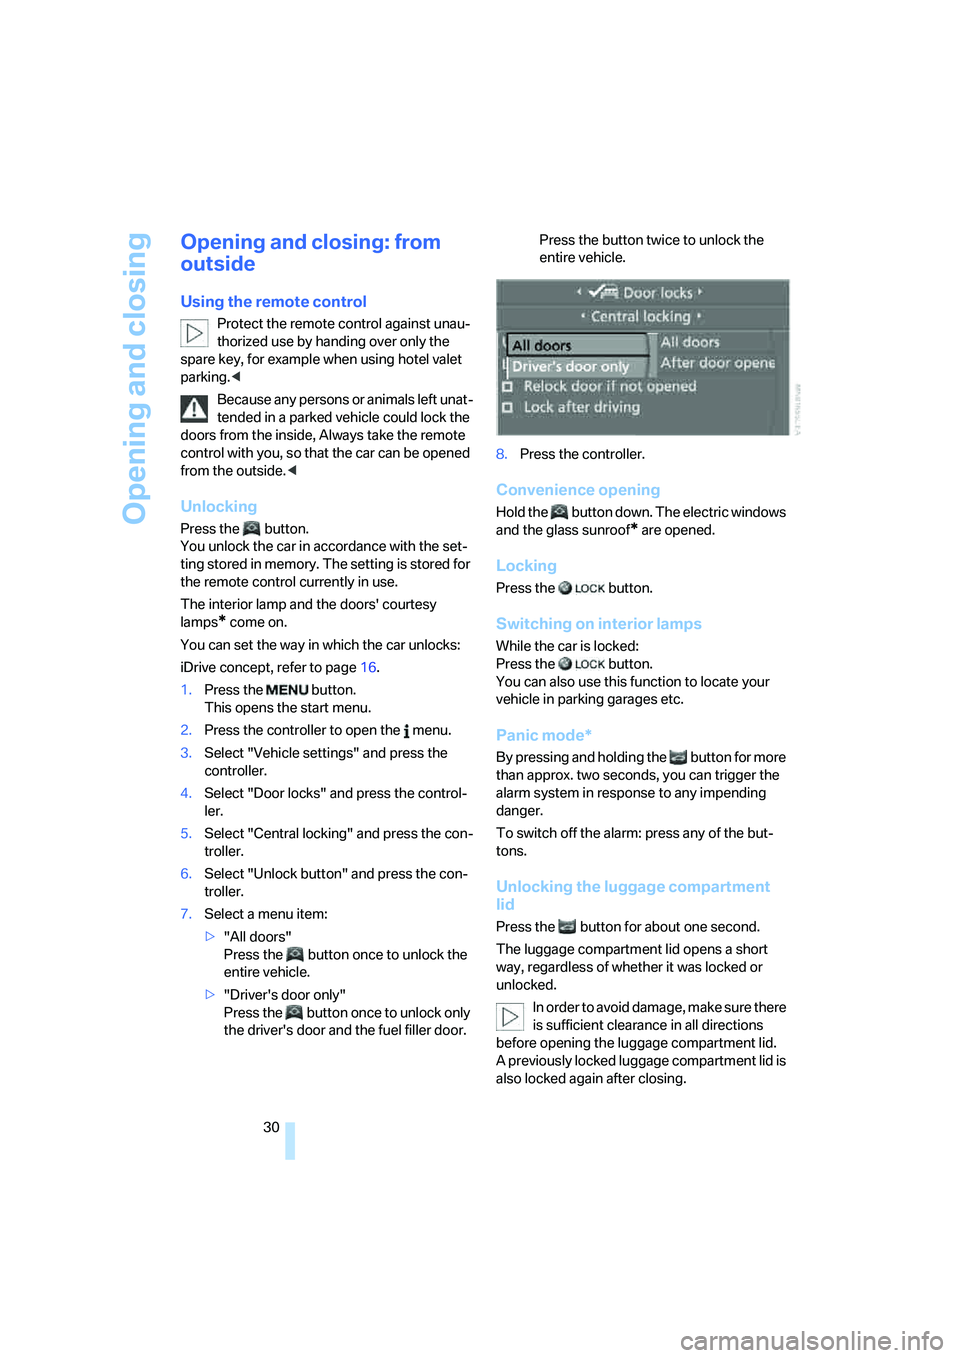
You can set the way in which the car unlocks:
iDrive concept, refer to page16.
1.Press the button.
This opens the start menu.
2.Press the controller to open the menu.
3.Select "Vehicle settings" and press the
controller.
4.Select "Door locks" and press the control-
ler.
5.Select "Central locking" and press the con-
troller.
6.Select "Unlock button" and press the con-
troller.
7.Select a menu item:
>"All doors"
Press the button once to unlock the
entire vehicle.
>"Driver's door only"
Press the button once to unlock only
the driver's door and the fuel filler door. Press the button twice to unlock the
entire vehicle.
8.Press the controller.
Convenience opening
Hold the button down. The electric windows
and the glass sunroof* are opened.
Locking
Press the button.
Switching on interior lamps
While the car is locked:
Press the button.
You can also use this function to locate your
vehicle in parking garages etc.
Panic mode*
By pressing and holding the button for more
than approx. two seconds, you can trigger the
alarm system in response to any impending
danger.
To switch off the alarm: press any of the but-
tons.
Unlocking the luggage compartment
lid
Press the button for about one second.
The luggage compartment lid opens a short
way, regardless of whether it was locked or
unlocked.
In order to avoid damage, make sure there
is sufficient clearance in all directions
before opening the luggage compartment lid.
A previously locked luggage compartment lid is
also locked again after closing.
Page 34 of 223
Controls
33Reference
At a glance
Driving tips
Communications
Navigation
Entertainment
Mobility
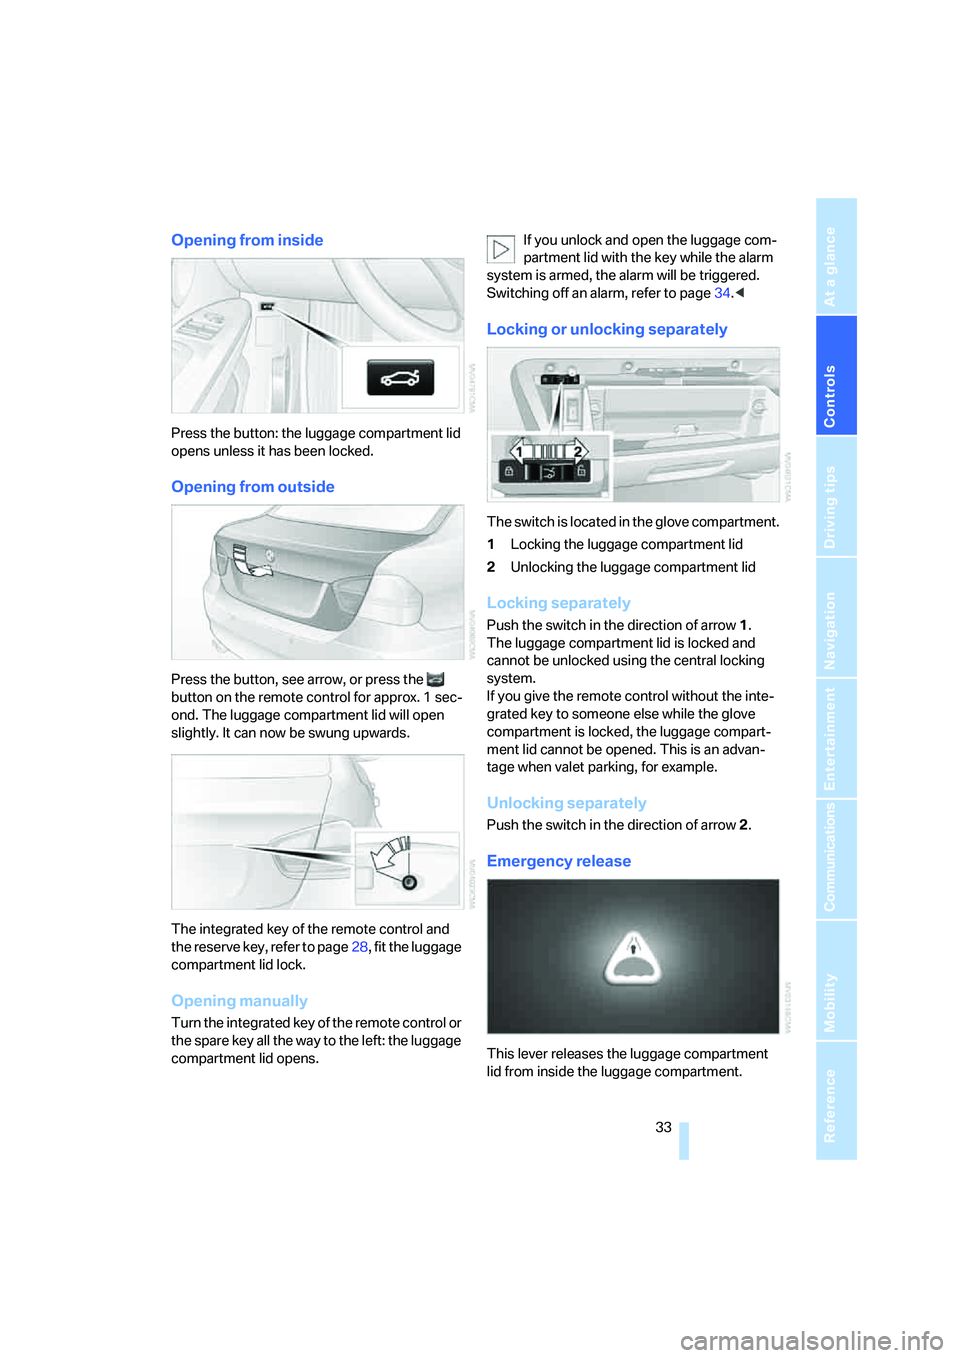
Opening from inside
Press the button: the luggage compartment lid
opens unless it has been locked.
Opening from outside
Press the button, see arrow, or press the
button on the remote control for approx. 1 sec-
ond. The luggage compartment lid will open
slightly. It can now be swung upwards.
The integrated key of the remote control and
the reserve key, refer to page28, fit the luggage
compartment lid lock.
Opening manually
Turn the integrated key of the remote control or
the spare key all the way to the left: the luggage
compartment lid opens.If you unlock and open the luggage com-
partment lid with the key while the alarm
system is armed, the alarm will be triggered.
Switching off an alarm, refer to page34.<
Locking or unlocking separately
The switch is located in the glove compartment.
1Locking the luggage compartment lid
2Unlocking the luggage compartment lid
Locking separately
Push the switch in the direction of arrow 1.
The luggage compartment lid is locked and
cannot be unlocked using the central locking
system.
If you give the remote control without the inte-
grated key to someone else while the glove
compartment is locked, the luggage compart-
ment lid cannot be opened. This is an advan-
tage when valet parking, for example.
Unlocking separately
Push the switch in the direction of arrow 2.
Emergency release
This lever releases the luggage compartment
lid from inside the luggage compartment.
Page 35 of 223
Opening and closing
34
Closing
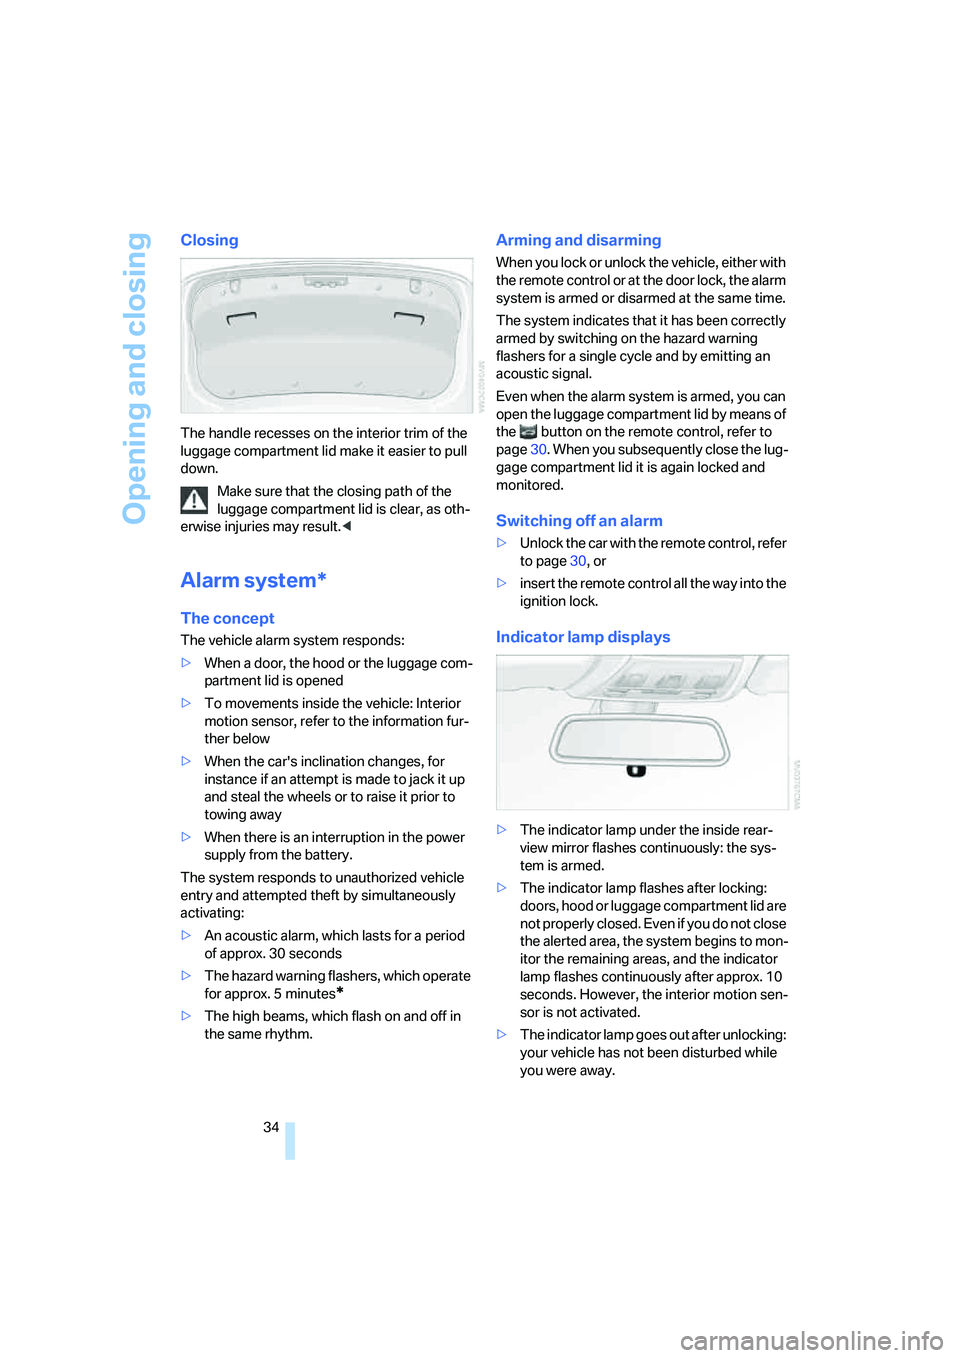
The handle recesses on the interior trim of the
luggage compartment lid make it easier to pull
down.
Make sure that the closing path of the
luggage compartment lid is clear, as oth-
erwise injuries may result.<
Alarm system*
The concept
The vehicle alarm system responds:
>When a door, the hood or the luggage com-
partment lid is opened
>To movements inside the vehicle: Interior
motion sensor, refer to the information fur-
ther below
>When the car's inclination changes, for
instance if an attempt is made to jack it up
and steal the wheels or to raise it prior to
towing away
>When there is an interruption in the power
supply from the battery.
The system responds to unauthorized vehicle
entry and attempted theft by simultaneously
activating:
>An acoustic alarm, which lasts for a period
of approx. 30 seconds
>The hazard warning flashers, which operate
for approx. 5 minutes
*
>The high beams, which flash on and off in
the same rhythm.
Arming and disarming
When you lock or unlock the vehicle, either with
the remote control or at the door lock, the alarm
system is armed or disarmed at the same time.
The system indicates that it has been correctly
armed by switching on the hazard warning
flashers for a single cycle and by emitting an
acoustic signal.
Even when the alarm system is armed, you can
open the luggage compartment lid by means of
the button on the remote control, refer to
page30. When you subsequently close the lug-
gage compartment lid it is again locked and
monitored.
Switching off an alarm
>Unlock the car with the remote control, refer
to page30, or
>insert the remote control all the way into the
ignition lock.
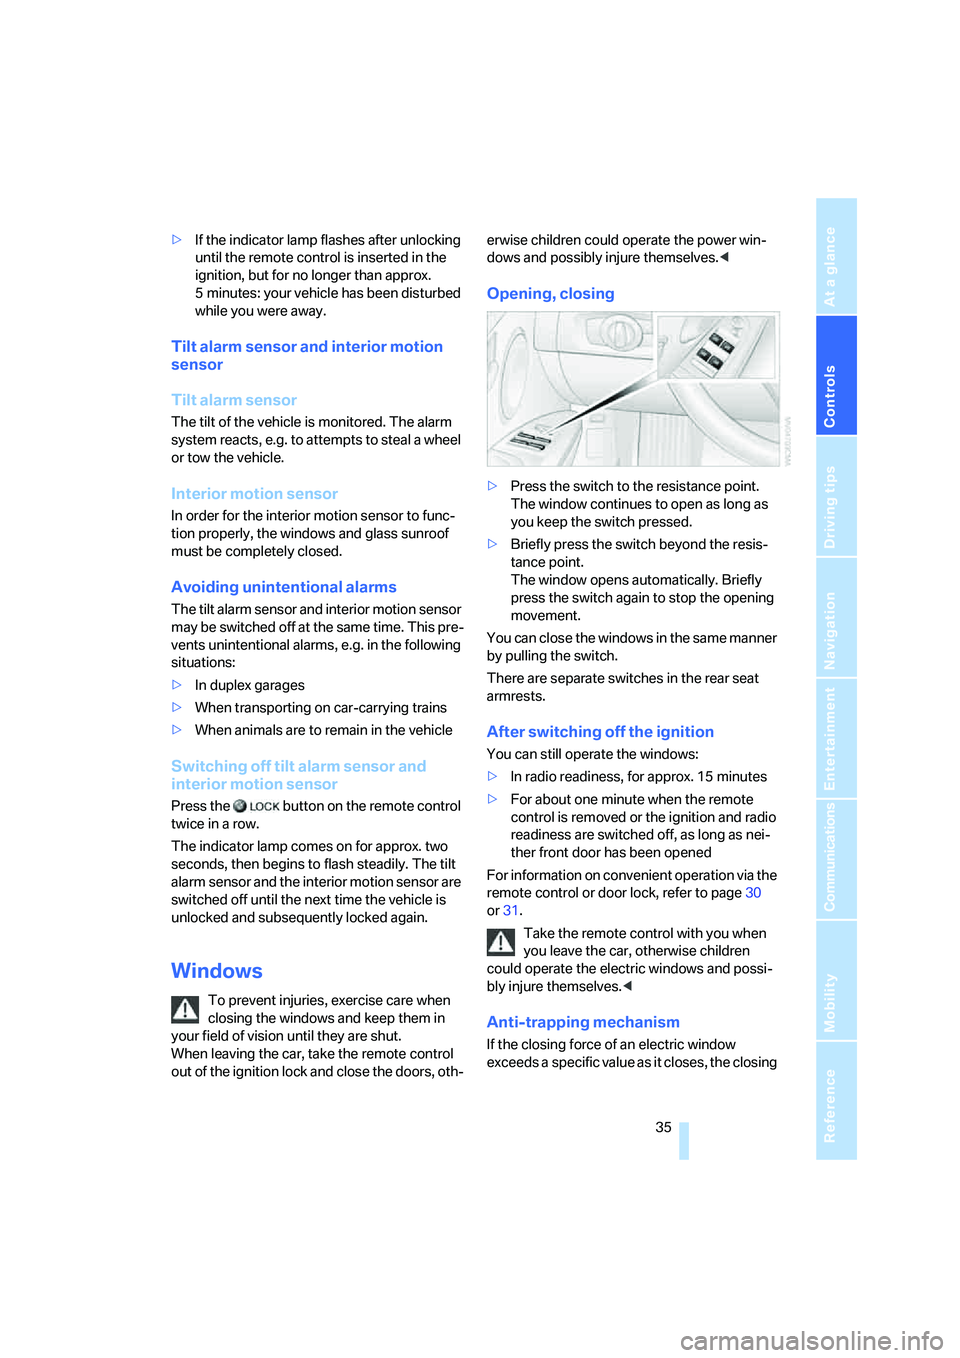
Indicator lamp displays
>The indicator lamp under the inside rear-
view mirror flashes continuously: the sys-
tem is armed.
>The indicator lamp flashes after locking:
doors, hood or luggage compartment lid are
not properly closed. Even if you do not close
the alerted area, the system begins to mon-
itor the remaining areas, and the indicator
lamp flashes continuously after approx. 10
seconds. However, the interior motion sen-
sor is not activated.
>The indicator lamp goes out after unlocking:
your vehicle has not been disturbed while
you were away.
Page 36 of 223
Controls
35Reference
At a glance
Driving tips
Communications
Navigation
Entertainment
Mobility
>If the indicator lamp flashes after unlocking
until the remote control is inserted in the
ignition, but for no longer than approx.
5 minutes: your vehicle has been disturbed
while you were away.
Tilt alarm sensor and interior motion
sensor
Tilt alarm sensor
The tilt of the vehicle is monitored. The alarm
system reacts, e.g. to attempts to steal a wheel
or tow the vehicle.
Interior motion sensor
In order for the interior motion sensor to func-
tion properly, the windows and glass sunroof
must be completely closed.
Avoiding unintentional alarms
The tilt alarm sensor and interior motion sensor
may be switched off at the same time. This pre-
vents unintentional alarms, e.g. in the following
situations:
>In duplex garages
>When transporting on car-carrying trains
>When animals are to remain in the vehicle
Switching off tilt alarm sensor and
interior motion sensor
Press the button on the remote control
twice in a row.
The indicator lamp comes on for approx. two
seconds, then begins to flash steadily. The tilt
alarm sensor and the interior motion sensor are
switched off until the next time the vehicle is
unlocked and subsequently locked again.
Windows
To prevent injuries, exercise care when
closing the windows and keep them in
your field of vision until they are shut.
When leaving the car, take the remote control
out of the ignition lock and close the doors, oth-erwise children could operate the power win-
dows and possibly injure themselves.<
Opening, closing
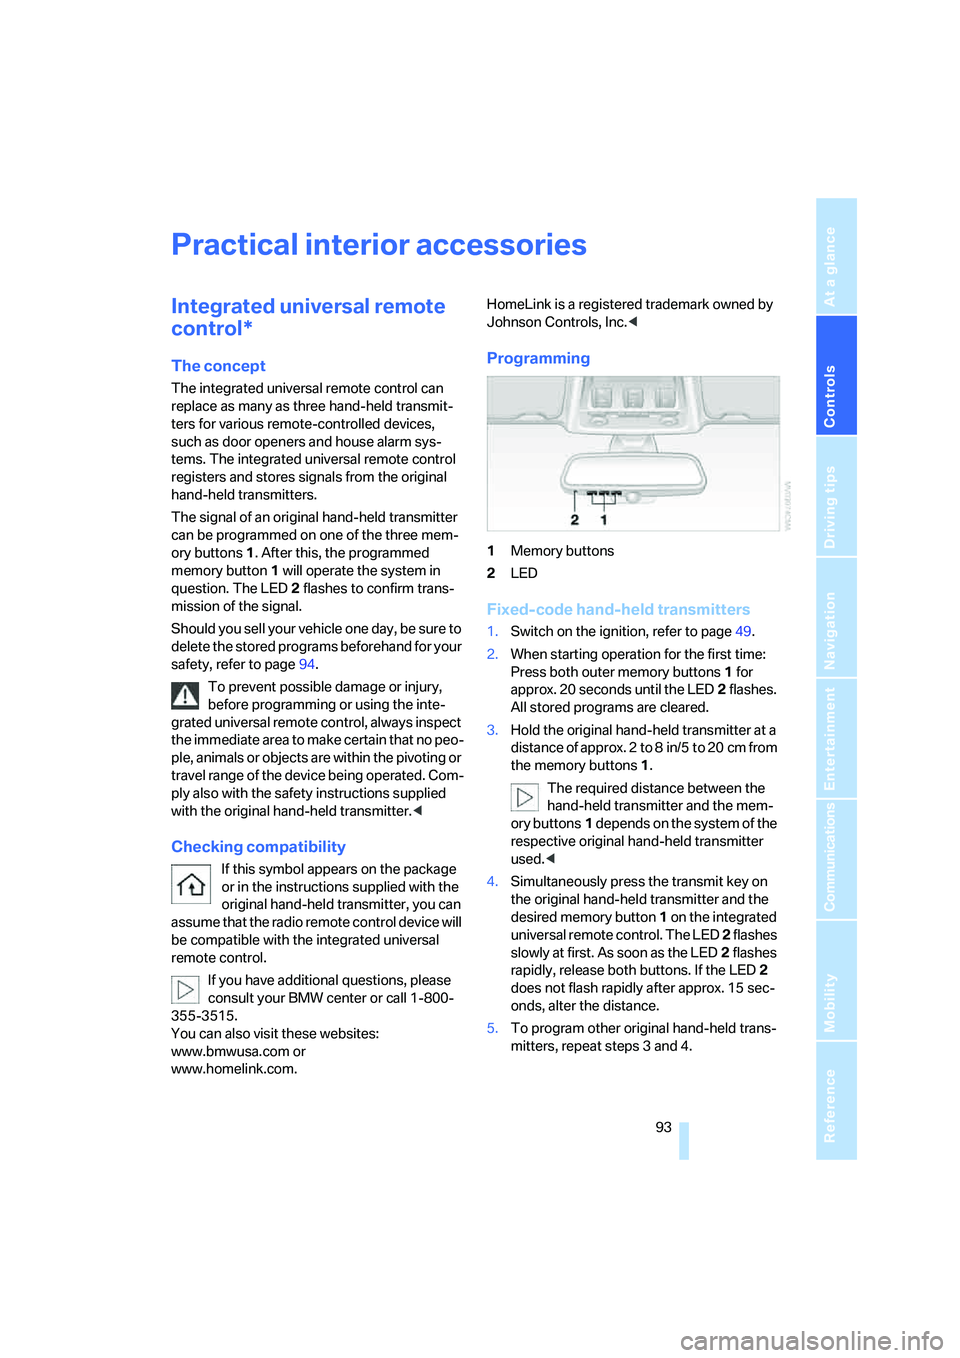
>Press the switch to the resistance point.
The window continues to open as long as
you keep the switch pressed.
>Briefly press the switch beyond the resis-
tance point.
The window opens automatically. Briefly
press the switch again to stop the opening
movement.
You can close the windows in the same manner
by pulling the switch.
There are separate switches in the rear seat
armrests.
After switching off the ignition
You can still operate the windows:
>In radio readiness, for approx. 15 minutes
>For about one minute when the remote
control is removed or the ignition and radio
readiness are switched off, as long as nei-
ther front door has been opened
For information on convenient operation via the
remote control or door lock, refer to page30
or31.
Take the remote control with you when
you leave the car, otherwise children
could operate the electric windows and possi-
bly injure themselves.<
Anti-trapping mechanism
If the closing force of an electric window
exceeds a specific value as it closes, the closing
Page 94 of 223
Controls
93Reference
At a glance
Driving tips
Communications
Navigation
Entertainment
Mobility
Practical interior accessories
Integrated universal remote
control*
The concept
The integrated universal remote control can
replace as many as three hand-held transmit-
ters for various remote-controlled devices,
such as door openers and house alarm sys-
tems. The integrated universal remote control
registers and stores signals from the original
hand-held transmitters.
The signal of an original hand-held transmitter
can be programmed on one of the three mem-
ory buttons1. After this, the programmed
memory button1 will operate the system in
question. The LED2 flashes to confirm trans-
mission of the signal.
Should you sell your vehicle one day, be sure to
delete the stored programs beforehand for your
safety, refer to page94.
To prevent possible damage or injury,
before programming or using the inte-
grated universal remote control, always inspect
the immediate area to make certain that no peo-
ple, animals or objects are within the pivoting or
travel range of the device being operated. Com-
ply also with the safety instructions supplied
with the original hand-held transmitter.<
Checking compatibility
If this symbol appears on the package
or in the instructions supplied with the
original hand-held transmitter, you can
assume that the radio remote control device will
be compatible with the integrated universal
remote control.
If you have additional questions, please
consult your BMW center or call 1-800-
355-3515.
You can also visit these websites:
www.bmwusa.com or
www.homelink.com. HomeLink is a registered trademark owned by
Johnson Controls, Inc.<
Programming
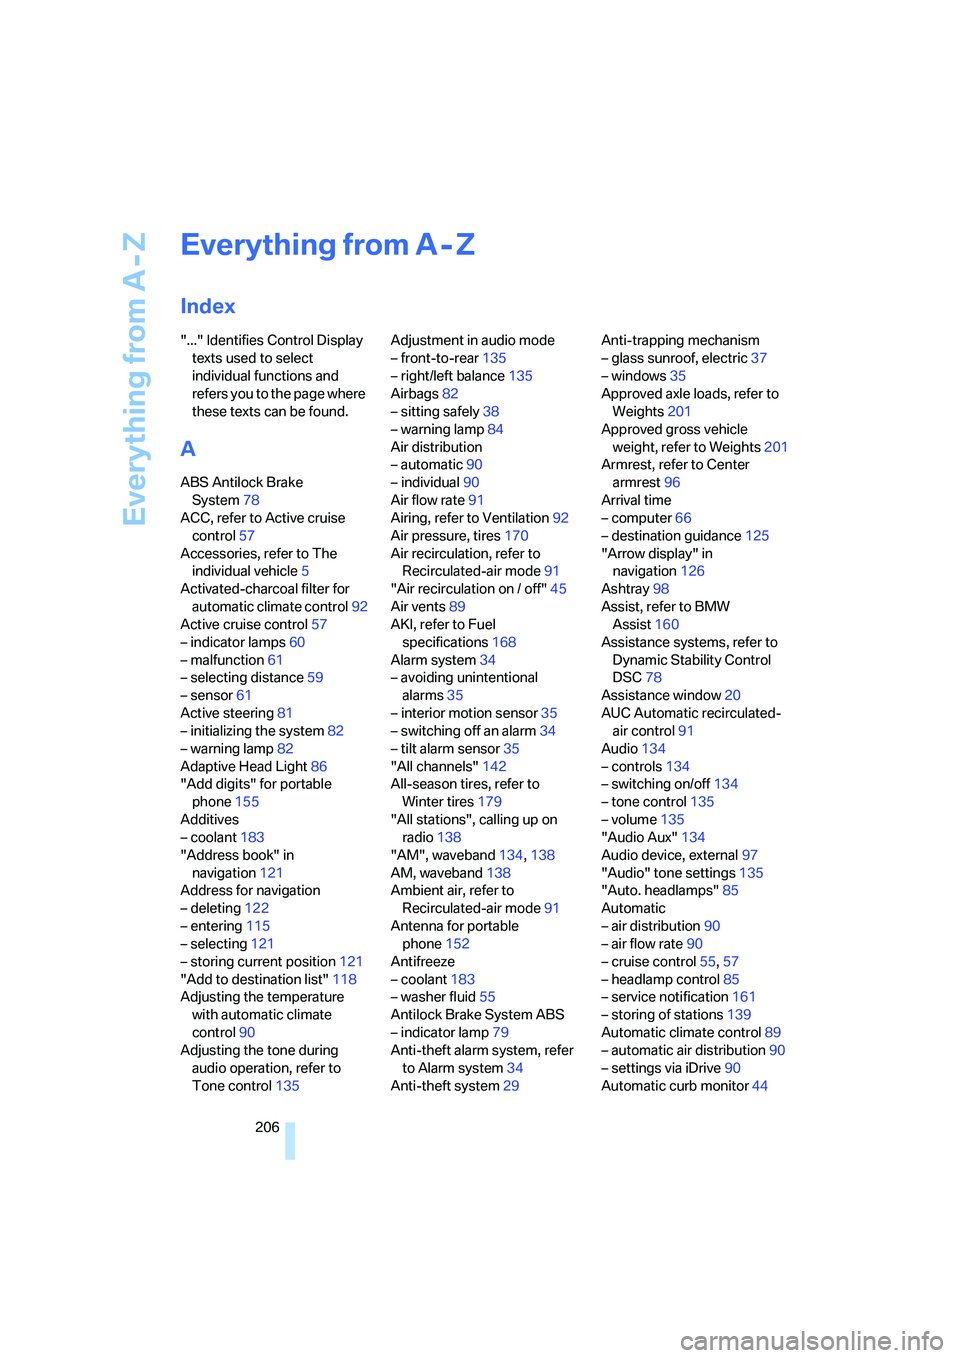
1Memory buttons
2LED
Fixed-code hand-held transmitters
1.Switch on the ignition, refer to page49.
2.When starting operation for the first time:
Press both outer memory buttons1 for
approx. 20 seconds until the LED2 flashes.
All stored programs are cleared.
3.Hold the original hand-held transmitter at a
distance of approx. 2 to 8 in/5 to 20 cm from
the memory buttons1.
The required distance between the
hand-held transmitter and the mem-
ory buttons1 depends on the system of the
respective original hand-held transmitter
used.<
4.Simultaneously press the transmit key on
the original hand-held transmitter and the
desired memory button 1 on the integrated
universal remote control. The LED 2 flashes
slowly at first. As soon as the LED2 flashes
rapidly, release both buttons. If the LED2
does not flash rapidly after approx. 15 sec-
onds, alter the distance.
5.To program other original hand-held trans-
mitters, repeat steps 3 and 4.
Page 207 of 223
Everything from A - Z
206
Everything from A - Z
Index
"..." Identifies Control Display
texts used to select
individual functions and
refers you to the page where
these texts can be found.
A
ABS Antilock Brake
System78
ACC, refer to Active cruise
control57
Accessories, refer to The
individual vehicle5
Activated-charcoal filter for
automatic climate control92
Active cruise control57
– indicator lamps60
– malfunction61
– selecting distance59
– sensor61
Active steering81
– initializing the system82
– warning lamp82
Adaptive Head Light86
"Add digits" for portable
phone155
Additives
– coolant183
"Address book" in
navigation121
Address for navigation
– deleting122
– entering115
– selecting121
– storing current position121
"Add to destination list"118
Adjusting the temperature
with automatic climate
control90
Adjusting the tone during
audio operation, refer to
Tone control135Adjustment in audio mode
– front-to-rear135
– right/left balance135
Airbags82
– sitting safely38
– warning lamp84
Air distribution
– automatic90
– individual90
Air flow rate91
Airing, refer to Ventilation92
Air pressure, tires170
Air recirculation, refer to
Recirculated-air mode91
"Air recirculation on / off"45
Air vents89
AKI, refer to Fuel
specifications168
Alarm system34
– avoiding unintentional
alarms35
– interior motion sensor35
– switching off an alarm34
– tilt alarm sensor35
"All channels"
142
All-season tires, refer to
Winter tires179
"All stations", calling up on
radio138
"AM", waveband134,138
AM, waveband138
Ambient air, refer to
Recirculated-air mode91
Antenna for portable
phone152
Antifreeze
– coolant183
– washer fluid55
Antilock Brake System ABS
– indicator lamp79
Anti-theft alarm system, refer
to Alarm system34
Anti-theft system29Anti-trapping mechanism
– glass sunroof, electric37
– windows35
Approved axle loads, refer to
Weights201
Approved gross vehicle
weight, refer to Weights201
Armrest, refer to Center
armrest96
Arrival time
– computer66
– destination guidance125
"Arrow display" in
navigation126
Ashtray98
Assist, refer to BMW
Assist160
Assistance systems, refer to
Dynamic Stability Control
DSC78
Assistance window20
AUC Automatic recirculated-
air control91
Audio134
– controls134
– switching on/off134
– tone control135
– volume135
"Audio Aux"134
Audio device, external97
"Audio" tone settings135
"Auto. headlamps"85
Automatic
– air distribution90
– air flow rate90
– cruise control55,57
– headlamp control85
– service notification161
– storing of stations139
Automatic climate control89
– automatic air distribution90
– settings via iDrive90
Automatic curb monitor44