2005 BMW 325XI TOURING door lock
[x] Cancel search: door lockPage 6 of 178

6
Notes
Maintenance and repair
Advanced technology, e.g. the
use of modern materials and high-
performance electronics, requires spe-
cially adapted maintenance and repair
methods. Therefore, only have corre-
sponding work on your BMW carried
out by a BMW center or a workshop
that works according to BMW repair
procedures with correspondingly
trained personnel. If work is carried out
improperly there is a danger of conse-
quential damage and the related safety
risks.
<
Parts and accessories
Important safety information!
For your own safety, use genuine
parts and accessories approved by
BMW.
When you purchase accessories tested
and approved by BMW and Original
BMW Parts, you simultaneously acquire
the assurance that they have been thor-
oughly tested by BMW to ensure opti-
mum performance when installed on
your vehicle.
BMW warrants these parts to be free
from defects in material and workman-
ship.
BMW will not accept any liability for
damage resulting from installation of
parts and accessories not approved by
BMW.
BMW cannot test every product made
by other manufacturers to ascertain
whether it can be used on a BMW
safely and without risk to either the
vehicle, its operation, or its occupants.
Original BMW Parts, BMW Accessories
and other products approved by BMW,
together with professional advice on
using these items, are available from all
BMW centers.
Installation and operation of non-BMW
approved accessories such as alarms,
radios, amplifiers, radar detectors,
wheels, suspension components, brake
dust shields, telephones – including
operation of any portable cellular phone
from within the vehicle without using an
externally mounted antenna – or trans-
ceiver equipment such as a CB, walkie-
talkie, ham radio or similar, may cause
extensive damage to the vehicle, com-
promise its safety, interfere with the
vehicle's electrical system or affect the
validity of the BMW Limited Warranty.
See your BMW center for additional
information.
Do not use key or remote control to
lock doors or cargo area with anyone
inside the vehicle. Refer to the Owner's
Manual for more details.
<
Maintenance, replacement, or
repair of the emission control
devices and systems may be performed
by any automotive repair establishment
or individual using any certified auto-
motive part.
<
Symbol on vehicle parts
Indicates that you should consult
the relevant section of this
Owner's Manual for information on a
particular part or assembly.
Page 8 of 178

Contents
Notes
About this Owner's Manual4
Additional sources of
information4
Symbols used4
Your individual vehicle5
Status at time of printing5
For your own safety5
Symbol on vehicle parts6
Service and warranty7
Reporting safety defects7
Overview
Cockpit14
Instrument cluster16
Indicator and warning lamps18
Buttons in steering wheel*22
Hazard warning triangle*23
First-aid kit*23
Refueling24
Fuel specifications25
Tire inflation pressure25
Controls and features
Opening and closing:
Keys30
Central locking system30
Opening and closing – via the
remote control31
Opening and closing – via the
door lock34
Opening and closing – from the
inside35
Tailgate35
Rear window36
Cargo area37
Alarm system*38
Electric power windows40
Glass sunroof, electric*41
To adjust:
Safe seating position44
Seats45
Manual seat adjustment45
Power seat adjustment*47
Lumbar support*47
Head restraints48
Safety belts48
Seat and mirror memory*50
Seat heating*51
Steering wheel52
Mirrors52
Page 24 of 178

24
RefuelingFuel filler door
Always switch off the engine
before refueling, as it is not possi-
ble to add fuel with the engine running,
and attempts may also trigger the
SERVICE ENGINE SOON lamp.<
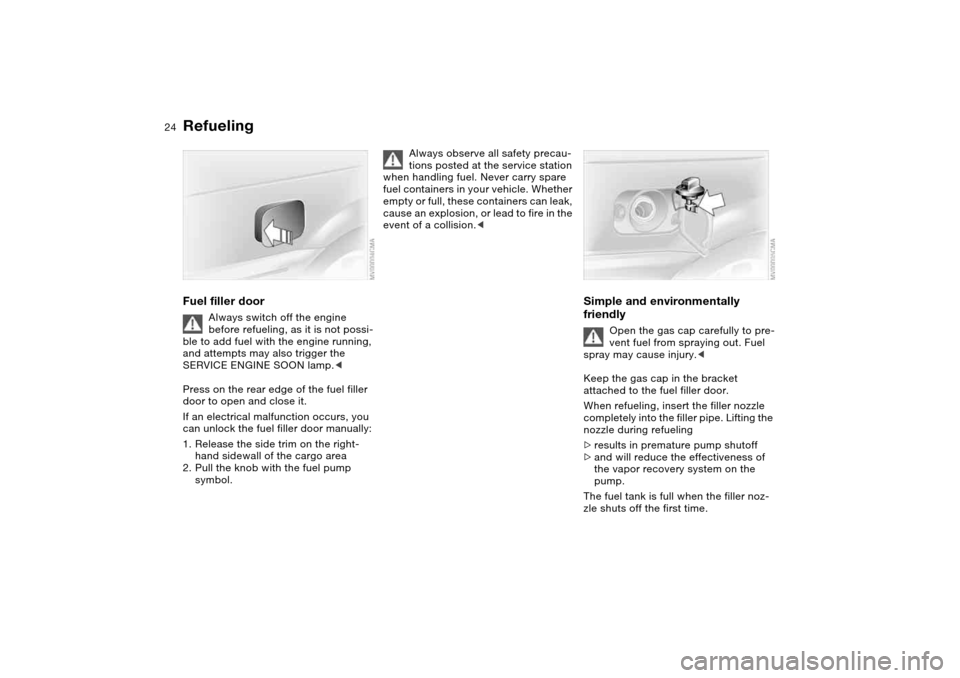
Press on the rear edge of the fuel filler
door to open and close it.
If an electrical malfunction occurs, you
can unlock the fuel filler door manually:
1. Release the side trim on the right-
hand sidewall of the cargo area
2. Pull the knob with the fuel pump
symbol.
Always observe all safety precau-
tions posted at the service station
when handling fuel. Never carry spare
fuel containers in your vehicle. Whether
empty or full, these containers can leak,
cause an explosion, or lead to fire in the
event of a collision.<
Simple and environmentally
friendly
Open the gas cap carefully to pre-
vent fuel from spraying out. Fuel
spray may cause injury.<
Keep the gas cap in the bracket
attached to the fuel filler door.
When refueling, insert the filler nozzle
completely into the filler pipe. Lifting the
nozzle during refueling
>results in premature pump shutoff
>and will reduce the effectiveness of
the vapor recovery system on the
pump.
The fuel tank is full when the filler noz-
zle shuts off the first time.
Page 30 of 178

30Opening and closing
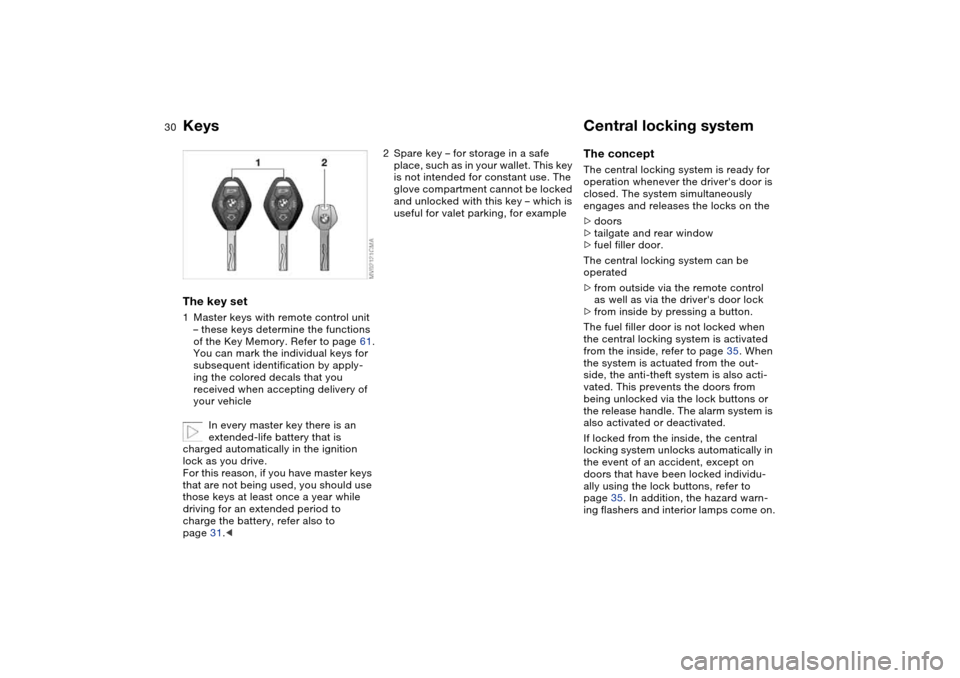
KeysThe key set1Master keys with remote control unit
– these keys determine the functions
of the Key Memory. Refer to page 61.
You can mark the individual keys for
subsequent identification by apply-
ing the colored decals that you
received when accepting delivery of
your vehicle
In every master key there is an
extended-life battery that is
charged automatically in the ignition
lock as you drive.
For this reason, if you have master keys
that are not being used, you should use
those keys at least once a year while
driving for an extended period to
charge the battery, refer also to
page 31.<
2Spare key – for storage in a safe
place, such as in your wallet. This key
is not intended for constant use. The
glove compartment cannot be locked
and unlocked with this key – which is
useful for valet parking, for example
Central locking systemThe conceptThe central locking system is ready for
operation whenever the driver's door is
closed. The system simultaneously
engages and releases the locks on the
>doors
>tailgate and rear window
>fuel filler door.
The central locking system can be
operated
>from outside via the remote control
as well as via the driver's door lock
>from inside by pressing a button.
The fuel filler door is not locked when
the central locking system is activated
from the inside, refer to page 35. When
the system is actuated from the out-
side, the anti-theft system is also acti-
vated. This prevents the doors from
being unlocked via the lock buttons or
the release handle. The alarm system is
also activated or deactivated.
If locked from the inside, the central
locking system unlocks automatically in
the event of an accident, except on
doors that have been locked individu-
ally using the lock buttons, refer to
page 35. In addition, the hazard warn-
ing flashers and interior lamps come on.
Page 31 of 178

31
Opening and closing – via the remote controlThe conceptThe remote control also provides two
additional functions beyond the central
locking feature:
>To switch on interior lamps, refer to
page 32.
With this function you can also
search for the vehicle when parked in
an underground garage, for instance
>Opening the rear window, refer to
page 32.
The rear window will open slightly,
regardless of whether it was previ-
ously locked or unlocked.
Whenever you unlock or lock the vehi-
cle, you simultaneously deactivate/acti-
vate the anti-theft system, disarm/arm
the alarm system and switch the interior
lamps on/off.
You can have a signal set to con-
firm that the vehicle's locks have
engaged securely.
vehicle may be able to lock the
doors from the inside. For this reason,
always take the vehicle keys with you
so that the vehicle can be opened again
from the outside at any time.<
If it is no longer possible to lock
the vehicle via the remote control,
the battery is discharged. Use this key
while driving for an extended period in
order to recharge the battery. To pre-
vent unauthorized use of the remote
control, surrender only the spare key
when leaving the vehicle for valet park-
ing, for example.
In the event of a system malfunction,
please contact your BMW center. You
can also obtain replacement keys
there.<
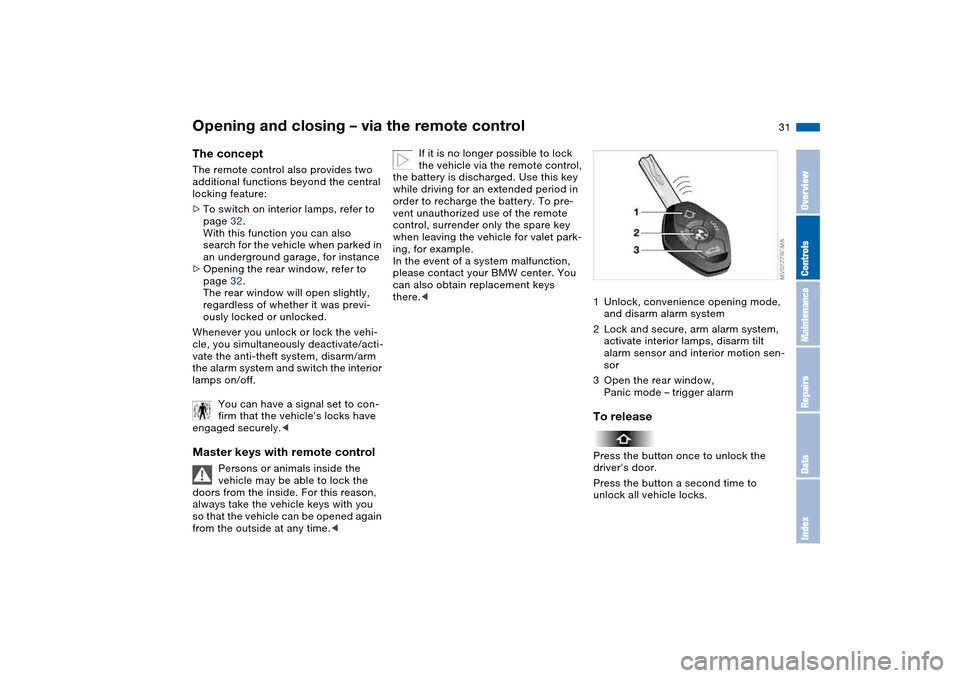
1Unlock, convenience opening mode,
and disarm alarm system
2Lock and secure, arm alarm system,
activate interior lamps, disarm tilt
alarm sensor and interior motion sen-
sor
3Open the rear window,
Panic mode – trigger alarmTo releasePress the button once to unlock the
driver's door.
Press the button a second time to
unlock all vehicle locks.
OverviewControlsMaintenanceRepairsDataIndex
Page 32 of 178

32
Convenience opening modePress and hold button: to open the
electric power windows and glass sun-
roof.To lock and securePress button.To switch on the interior lampsAfter locking the vehicle, press button
again.To deactivate the tilt alarm* and
interior motion sensors*Press button a second time immedi-
ately after locking.
For additional information, refer to
page 39.
To open the rear windowPress button.
the rear window opens slightly. It can
now be tilted up.
If the vehicle is locked, the rear
window will be locked again after
it is closed.
Before and after a trip, be sure that the
rear window has not been opened unin-
tentionally.<
If you prefer, the tailgate will open
instead of the rear window.
triggered in the event of danger, if it is
armed.
To switch of the alarm:
Press button.
External systemsThe remote control system's operation
may be affected by other units or
equipment operating in the immediate
vicinity of your vehicle.
If this should occur, you can still open
and close the vehicle using the master
key in the door lock.For US owners onlyThe transmitter and receiver units com-
ply with part 15 of the FCC/Federal
Communications Commission regula-
tions. Operation is governed by the fol-
lowing:
FCC ID:
>LX8EWS
>LX8FZVS
>LX8FZVE.
Compliance statement:
This device complies with part 15 of the
FCC Rules. Operation is subject to the
following two conditions:
>This device may not cause harmful
interference, and
>this device must accept any interfer-
ence received, including interference
that may cause undesired operation.
Opening and closing – via the remote control
Page 34 of 178

34
Opening and closing – via the door lockOne turn of the key in the driver's door
lock unlocks the driver's door only.
Turning the key a second time unlocks
all of the remaining doors, the tailgate
and the fuel filler door.
You can have a signal set to con-
firm that the vehicle's locks have
engaged securely.
lock.
>To open: with the door closed, hold
the key in the Unlock position
>To close: with the door closed, hold
the key in the Lock position.
Whenever closing the windows or
sliding/tilt sunroof you should
always monitor their path and progress
to ensure that no one is injured. Releas-
ing the key stops the operation.<
Manual operationIn the event of electrical malfunction
Turn the key all the way to the left or
right to unlock or lock the driver's door.
Page 35 of 178

35
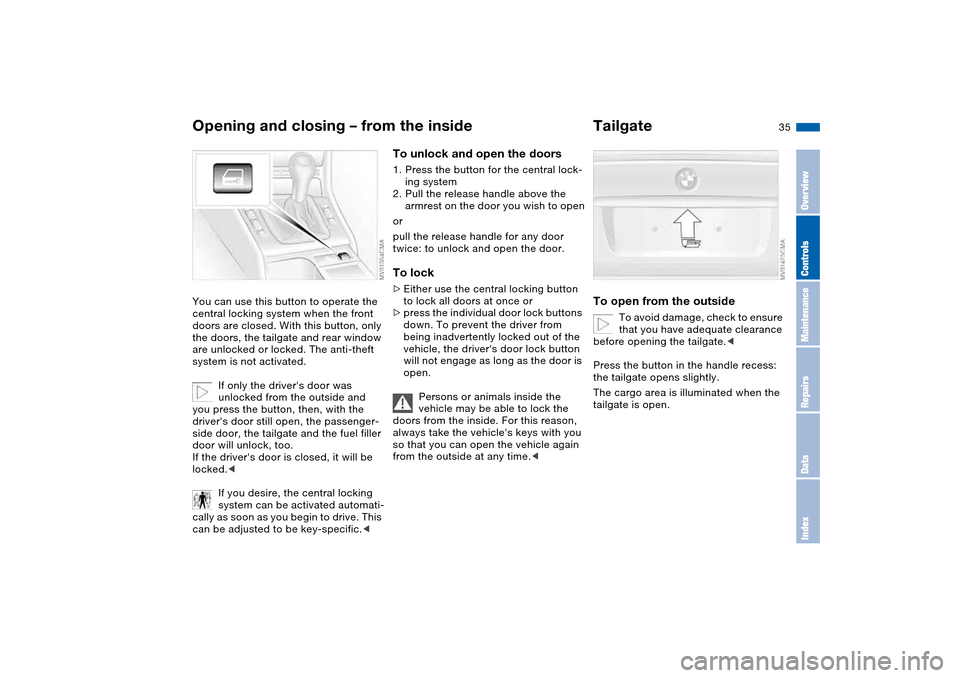
Opening and closing – from the insideYou can use this button to operate the
central locking system when the front
doors are closed. With this button, only
the doors, the tailgate and rear window
are unlocked or locked. The anti-theft
system is not activated.
If only the driver's door was
unlocked from the outside and
you press the button, then, with the
driver's door still open, the passenger-
side door, the tailgate and the fuel filler
door will unlock, too.
If the driver's door is closed, it will be
locked.<
If you desire, the central locking
system can be activated automati-
cally as soon as you begin to drive. This
can be adjusted to be key-specific.<
To unlock and open the doors1. Press the button for the central lock-
ing system
2. Pull the release handle above the
armrest on the door you wish to open
or
pull the release handle for any door
twice: to unlock and open the door.To lock>Either use the central locking button
to lock all doors at once or
>press the individual door lock buttons
down. To prevent the driver from
being inadvertently locked out of the
vehicle, the driver's door lock button
will not engage as long as the door is
open.
Persons or animals inside the
vehicle may be able to lock the
doors from the inside. For this reason,
always take the vehicle's keys with you
so that you can open the vehicle again
from the outside at any time.<
TailgateTo open from the outside
To avoid damage, check to ensure
that you have adequate clearance
before opening the tailgate.<
Press the button in the handle recess:
the tailgate opens slightly.
The cargo area is illuminated when the
tailgate is open.
OverviewControlsMaintenanceRepairsDataIndex