Page 6 of 178

6
Notes
Maintenance and repair
Advanced technology, e.g. the
use of modern materials and high-
performance electronics, requires spe-
cially adapted maintenance and repair
methods. Therefore, only have corre-
sponding work on your BMW carried
out by a BMW center or a workshop
that works according to BMW repair
procedures with correspondingly
trained personnel. If work is carried out
improperly there is a danger of conse-
quential damage and the related safety
risks.
<
Parts and accessories
Important safety information!
For your own safety, use genuine
parts and accessories approved by
BMW.
When you purchase accessories tested
and approved by BMW and Original
BMW Parts, you simultaneously acquire
the assurance that they have been thor-
oughly tested by BMW to ensure opti-
mum performance when installed on
your vehicle.
BMW warrants these parts to be free
from defects in material and workman-
ship.
BMW will not accept any liability for
damage resulting from installation of
parts and accessories not approved by
BMW.
BMW cannot test every product made
by other manufacturers to ascertain
whether it can be used on a BMW
safely and without risk to either the
vehicle, its operation, or its occupants.
Original BMW Parts, BMW Accessories
and other products approved by BMW,
together with professional advice on
using these items, are available from all
BMW centers.
Installation and operation of non-BMW
approved accessories such as alarms,
radios, amplifiers, radar detectors,
wheels, suspension components, brake
dust shields, telephones – including
operation of any portable cellular phone
from within the vehicle without using an
externally mounted antenna – or trans-
ceiver equipment such as a CB, walkie-
talkie, ham radio or similar, may cause
extensive damage to the vehicle, com-
promise its safety, interfere with the
vehicle's electrical system or affect the
validity of the BMW Limited Warranty.
See your BMW center for additional
information.
Do not use key or remote control to
lock doors or cargo area with anyone
inside the vehicle. Refer to the Owner's
Manual for more details.
<
Maintenance, replacement, or
repair of the emission control
devices and systems may be performed
by any automotive repair establishment
or individual using any certified auto-
motive part.
<
Symbol on vehicle parts
Indicates that you should consult
the relevant section of this
Owner's Manual for information on a
particular part or assembly.
Page 8 of 178
Contents
Notes
About this Owner's Manual4
Additional sources of
information4
Symbols used4
Your individual vehicle5
Status at time of printing5
For your own safety5
Symbol on vehicle parts6
Service and warranty7
Reporting safety defects7
Overview
Cockpit14
Instrument cluster16
Indicator and warning lamps18
Buttons in steering wheel*22
Hazard warning triangle*23
First-aid kit*23
Refueling24
Fuel specifications25
Tire inflation pressure25
Controls and features
Opening and closing:
Keys30
Central locking system30
Opening and closing – via the
remote control31
Opening and closing – via the
door lock34
Opening and closing – from the
inside35
Tailgate35
Rear window36
Cargo area37
Alarm system*38
Electric power windows40
Glass sunroof, electric*41
To adjust:
Safe seating position44
Seats45
Manual seat adjustment45
Power seat adjustment*47
Lumbar support*47
Head restraints48
Safety belts48
Seat and mirror memory*50
Seat heating*51
Steering wheel52
Mirrors52
Page 9 of 178

Contents
9
Passenger safety systems:
Airbags54
Transporting children safely57
Vehicle Memory, Key
Memory61
Driving:
Ignition lock63
Starting the engine63
Switching off the engine65
Parking brake65
Manual transmission66
Sequential manual gearbox
SMG*67
Automatic transmission with
Steptronic*71
Turn signal indicator/Headlamp
flasher74
Washer/wiper system/Rain
sensor*75
Cruise control*77
Everything under control:
Odometer79
Tachometer79
Energy control79
Fuel gauge80
Engine coolant temperature
gauge80
Service interval display81
Check Control81
Clock82
Computer*83
Technology for safety and
driving convenience:
Park Distance Control (PDC)*85
Dynamic Stability Control
(DSC)86
Dynamic Stability Control (DSC) –
325xi88
Hill Descent Control (HDC)*90
Flat Tire Monitor*91
Brake force display92
Lamps:
Parking lamps/Low beams93
Instrument lighting94
High beams/Standing lamps94
Fog lamps*95
Interior lamps95
Controlling the climate for
pleasant driving:
Air conditioning96
Automatic climate control*100
Interior conveniences:
Premium sound system*105
Glove compartment105
Storage compartments106
Cellular phone*107
Ashtray, front*108
Ashtray, rear*108
Socket109
Loading and transporting:
Ski bag*110
Cargo area111
Cargo loading113
Roof-mounted luggage
rack*116
Controls and features
Page 10 of 178
Contents
Operation, maintenance
Special operating instructions:
Break-in procedures120
General driving notes121
Antilock Brake System
(ABS)121
Brake system122
Wheels and tires:
Tire inflation pressure124
Tire condition124
Tire replacement125
Wheel and tire
combinations127
Winter tires127
In the engine compartment:
Hood129
Engine compartment
essentials130
Washer fluids132
Engine oil132
Coolant134
Brake fluid135
Maintenance:
The BMW Maintenance
System136
Laws and regulations:
California Proposition 65
warning138
OBD interface socket138
Owner service procedures
Replacement procedures:
Onboard tool kit142
Windshield wiper blades142
Lamps and bulbs143
Changing a wheel147
Run Flat tires*150
Battery151
Fuses151
Giving and receiving
assistance: Receiving assistance152
Jump-starting153
Towing the vehicle154
Technical data
Engine data160
Dimensions161
Weights162
Capacities163
Page 15 of 178
15
1Parking lamps/Low beams93
2
>
Turn signal indicators74
>
Standing lamps94
>
High beams94
>
Headlamp flasher74
>
Computer83
3Washer/wiper system/Rain
sensor75
4Hazard warning flashers
5Central locking system30
6
>
Initiating an emergency call152
>
Mobile Service152
7Rear window defroster98, 103
8Horn: the entire surface
9Adjusting the steering wheel52
10 Fog lamps95
Cockpit
OverviewControlsMaintenanceRepairsDataIndex
Page 17 of 178
17
1Fuel gauge80
2Indicator lamp for turn signals20
3Speedometer
4Indicator and warning lamps18
to 21
5Tachometer and Energy Control 79,
79
6Engine coolant temperature
gauge80
7Indicator and warning lamps18
to 21
8Control button for
>
Time82
>
Service interval display81
>
Outside temperature display83
9Selector lever and program display
for automatic transmission/sequen-
tial manual gearbox19, 67, 73
10 Display for
>
Trip odometer/Odometer79
>
Clock82
>
Service interval81
>
Computer82
11 Check Control81
12 Trip odometer, reset to zero79
13 Indicator and warning lamps18
to 21
Instrument cluster
OverviewControlsMaintenanceRepairsDataIndex
Page 24 of 178

24
RefuelingFuel filler door
Always switch off the engine
before refueling, as it is not possi-
ble to add fuel with the engine running,
and attempts may also trigger the
SERVICE ENGINE SOON lamp.<
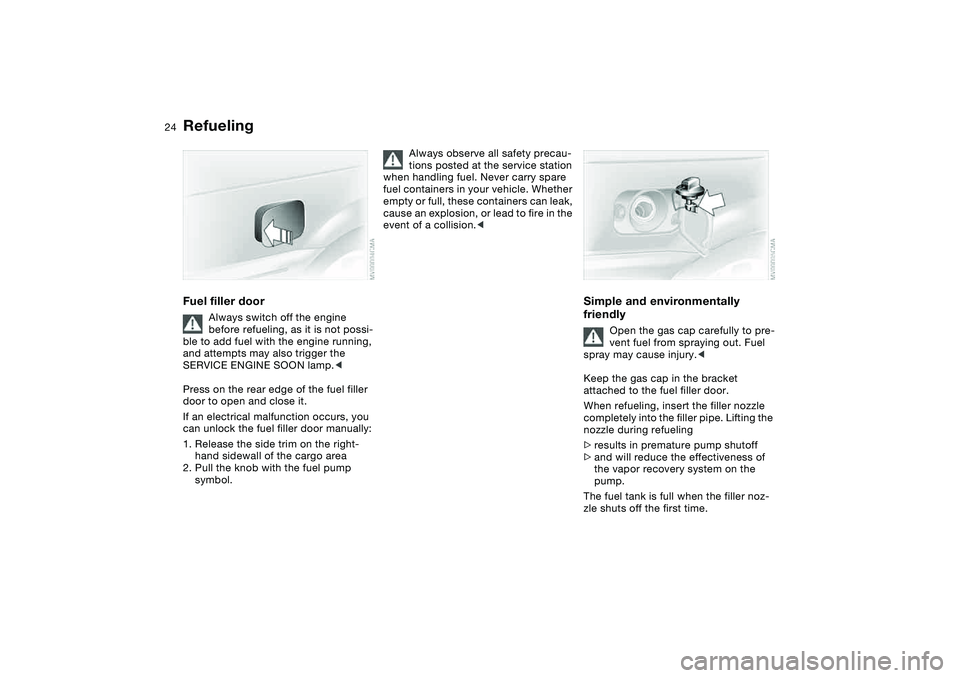
Press on the rear edge of the fuel filler
door to open and close it.
If an electrical malfunction occurs, you
can unlock the fuel filler door manually:
1. Release the side trim on the right-
hand sidewall of the cargo area
2. Pull the knob with the fuel pump
symbol.
Always observe all safety precau-
tions posted at the service station
when handling fuel. Never carry spare
fuel containers in your vehicle. Whether
empty or full, these containers can leak,
cause an explosion, or lead to fire in the
event of a collision.<
Simple and environmentally
friendly
Open the gas cap carefully to pre-
vent fuel from spraying out. Fuel
spray may cause injury.<
Keep the gas cap in the bracket
attached to the fuel filler door.
When refueling, insert the filler nozzle
completely into the filler pipe. Lifting the
nozzle during refueling
>results in premature pump shutoff
>and will reduce the effectiveness of
the vapor recovery system on the
pump.
The fuel tank is full when the filler noz-
zle shuts off the first time.
Page 30 of 178

30Opening and closing
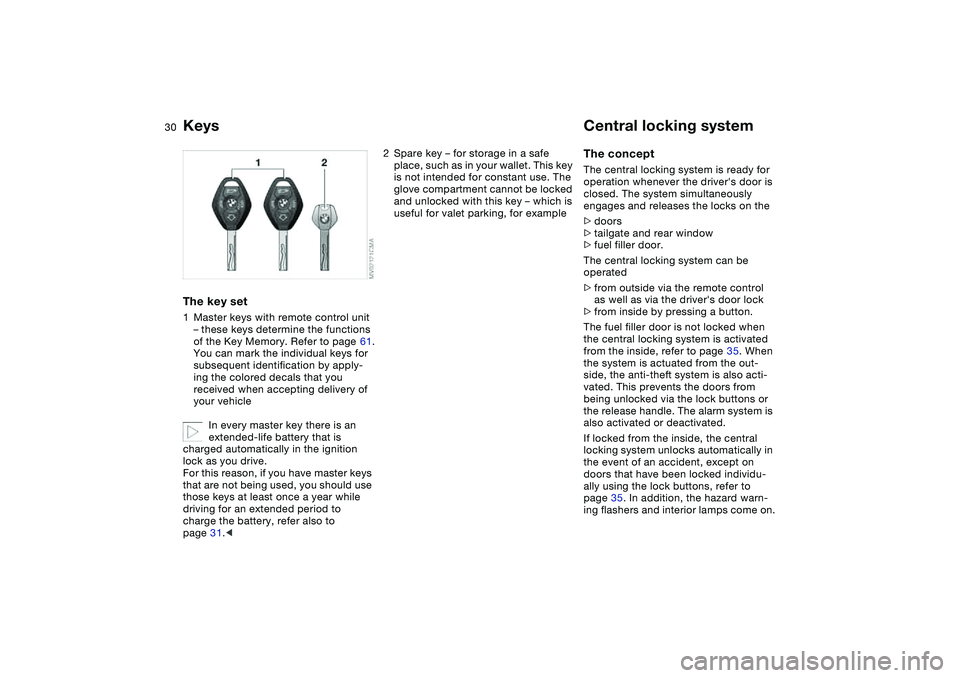
KeysThe key set1Master keys with remote control unit
– these keys determine the functions
of the Key Memory. Refer to page 61.
You can mark the individual keys for
subsequent identification by apply-
ing the colored decals that you
received when accepting delivery of
your vehicle
In every master key there is an
extended-life battery that is
charged automatically in the ignition
lock as you drive.
For this reason, if you have master keys
that are not being used, you should use
those keys at least once a year while
driving for an extended period to
charge the battery, refer also to
page 31.<
2Spare key – for storage in a safe
place, such as in your wallet. This key
is not intended for constant use. The
glove compartment cannot be locked
and unlocked with this key – which is
useful for valet parking, for example
Central locking systemThe conceptThe central locking system is ready for
operation whenever the driver's door is
closed. The system simultaneously
engages and releases the locks on the
>doors
>tailgate and rear window
>fuel filler door.
The central locking system can be
operated
>from outside via the remote control
as well as via the driver's door lock
>from inside by pressing a button.
The fuel filler door is not locked when
the central locking system is activated
from the inside, refer to page 35. When
the system is actuated from the out-
side, the anti-theft system is also acti-
vated. This prevents the doors from
being unlocked via the lock buttons or
the release handle. The alarm system is
also activated or deactivated.
If locked from the inside, the central
locking system unlocks automatically in
the event of an accident, except on
doors that have been locked individu-
ally using the lock buttons, refer to
page 35. In addition, the hazard warn-
ing flashers and interior lamps come on.