2005 BMW 325I SEDAN center console
[x] Cancel search: center consolePage 15 of 223

Cockpit
14
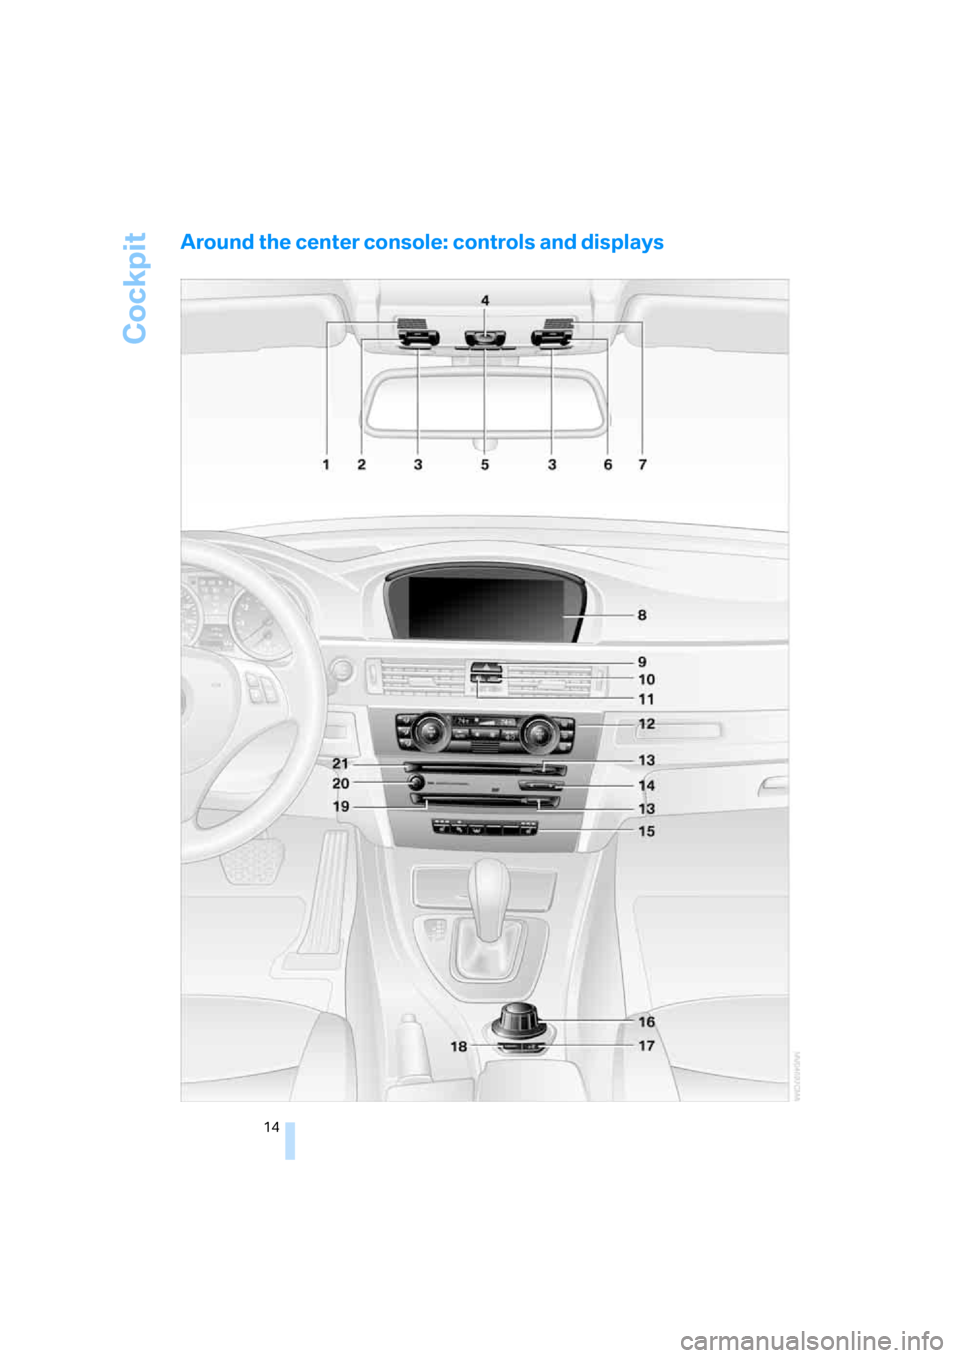
Around the center console: controls and displays
Page 23 of 223

Voice command system
22
Voice command system
The concept
The voice command system allows you to con-
trol operation of various vehicle systems with-
out removing your hands from the steering
wheel.
Individual menu items on the Control Display
can be spoken as commands. It is not neces-
sary to use the controller.
The voice command system transforms your
oral commands into control signals for the
selected systems and provides support in the
form of instructions or questions.
The voice command system uses a special
microphone located in the area of the interior
rearview mirror, refer to page14.
Precondition
Via iDrive, select the language in which the
voice command system is operating, so that the
spoken commands can be identified. Selecting
the language for iDrive, refer to page76.
Symbol in the Owner's Manual
Saying commands
Activating voice command system
1.Press the button on the steering wheel
or in the center console.
This symbol on the Control Display and
an acoustic signal indicate that the voice
command system is ready to receive spo-
ken commands.
2.Say the command.
The text or numbers that the voice com-
mand system has registered will appear on
the Control Display.
*
{...} Say the specified commands word for
word.
{{...}} Indicates responses of the voice
command system.
Page 24 of 223

At a glance
23Reference
Controls
Driving tips
Communications
Navigation
Entertainment
Mobility
This symbol appears on the Control Display
when you can input additional voice com-
mands.
If no further spoken commands are possible,
continue by operating the item of equipment via
iDrive.
Terminating or canceling voice
command system
Press the button on the steering wheel or in
the center console
or
Voice commands
Having the possible voice commands
read aloud
You can have the system read aloud the possi-
ble voice commands related to the selected
menu item on the Control Display.
To have the possible voice commands read out
to you:
For instance, if you have selected "CD", the
spoken commands available for operating the
CD player and CD changer are read out.
Opening help
Using alternative voice commands
There are often a number of commands to run a
function, e.g.:
Calling up functions immediately via
short commands
Short commands enable you to perform certain
functions immediately, irrespective of which
menu item is selected, refer to page202.
Opening the start menu
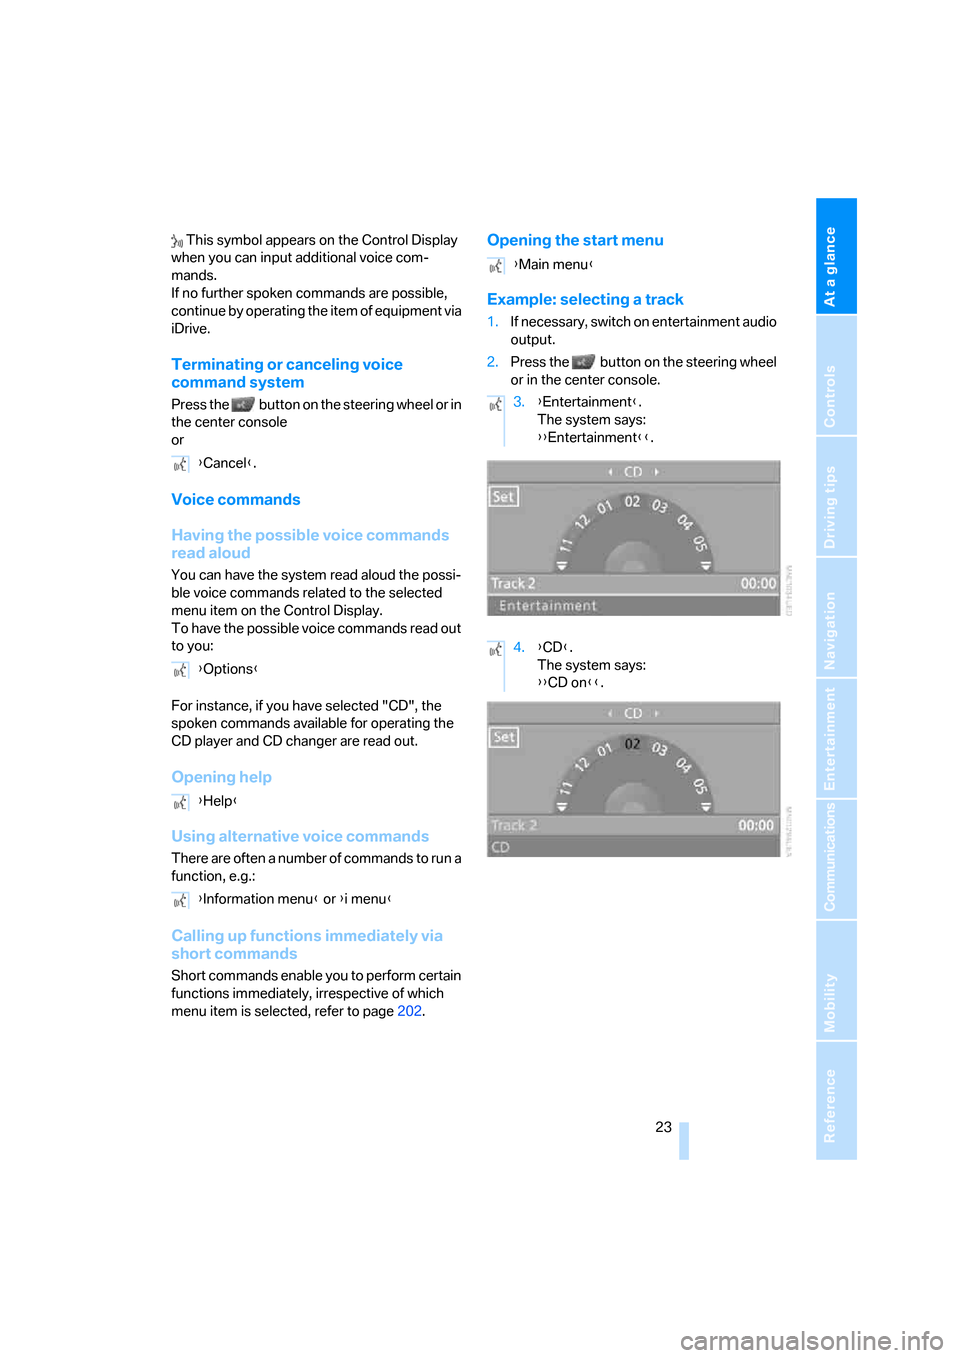
Example: selecting a track
1.If necessary, switch on entertainment audio
output.
2.Press the button on the steering wheel
or in the center console.
{Cancel}.
{Options}
{Help}
{Information menu} or {i menu}
{Main menu}
3.{Entertainment}.
The system says:
{{Entertainment}}.
4.{CD}.
The system says:
{{CD on}}.
Page 25 of 223

Voice command system
24 5.Press the button on the steering wheel
or in the center console.
{
Notes
For information on voice control of the
telephone, refer also to the separate
Owner's Manual.<
For voice commands, bear in mind the follow-
ing:
>Issue the commands smoothly and at nor-
mal volume, avoiding excessive emphasis
and pauses.
>Always speak the commands in the lan-
guage of the voice command system.
>When selecting a radio station, use the
standard pronunciation of the station name.
>For entries in the voice-activated phone
book, only use names in the language of the
voice command system and no abbrevia-
tions
>Keep the doors, windows and glass sunroof
closed to prevent interference from ambi-
ent noise.
>Avoid making other noise in the vehicle
while speaking.6.Select a track, e.g.:
{Track 1}.
The system says:
{{Track 1}}.
Page 96 of 223

Controls
95Reference
At a glance
Driving tips
Communications
Navigation
Entertainment
Mobility
To set a compass zone, press the adjustment
button on the bottom of the interior rearview
mirror with a pointed object, such as a pen, for
approx. 3-4 seconds. The number of the com-
pass zone set is shown in the display.
To change the zone setting, press the adjust-
ment button repeatedly until the display shows
the number of the compass zone in which you
are currently driving:
The compass is operational again after approx.
10 seconds.
For information on the automatic dimming fea-
ture, refer to Interior and exterior mirrors, auto-
matic dimming feature, page107.
Calibrating the digital compass
The digital compass must be calibrated in the
following situations:
>C or CAL is displayed.
>The compass shows the wrong cardinal
direction.
>The cardinal direction shown does not
change although the direction of travel
does.
>Not all cardinal directions are shown.
Procedure
1.Make sure that no large metal objects or
overhead power lines are in the vicinity of
your vehicle and that you have enough
space to drive in a circle.
2.Set the currently valid compass zone.
3.Press the adjustment button to call up C or
CAL. Then drive in one full circle at a speed
of no more than 4 mph or 7 km/h.
If calibration is successful, the C or CAL dis-
play is replaced by the cardinal directions.
Roller sun blinds*
Rear window blind
Tap the button in the center console to raise or
lower the roller sun blind.
Page 98 of 223

Controls
97Reference
At a glance
Driving tips
Communications
Navigation
Entertainment
Mobility
Ventilated storage compartment
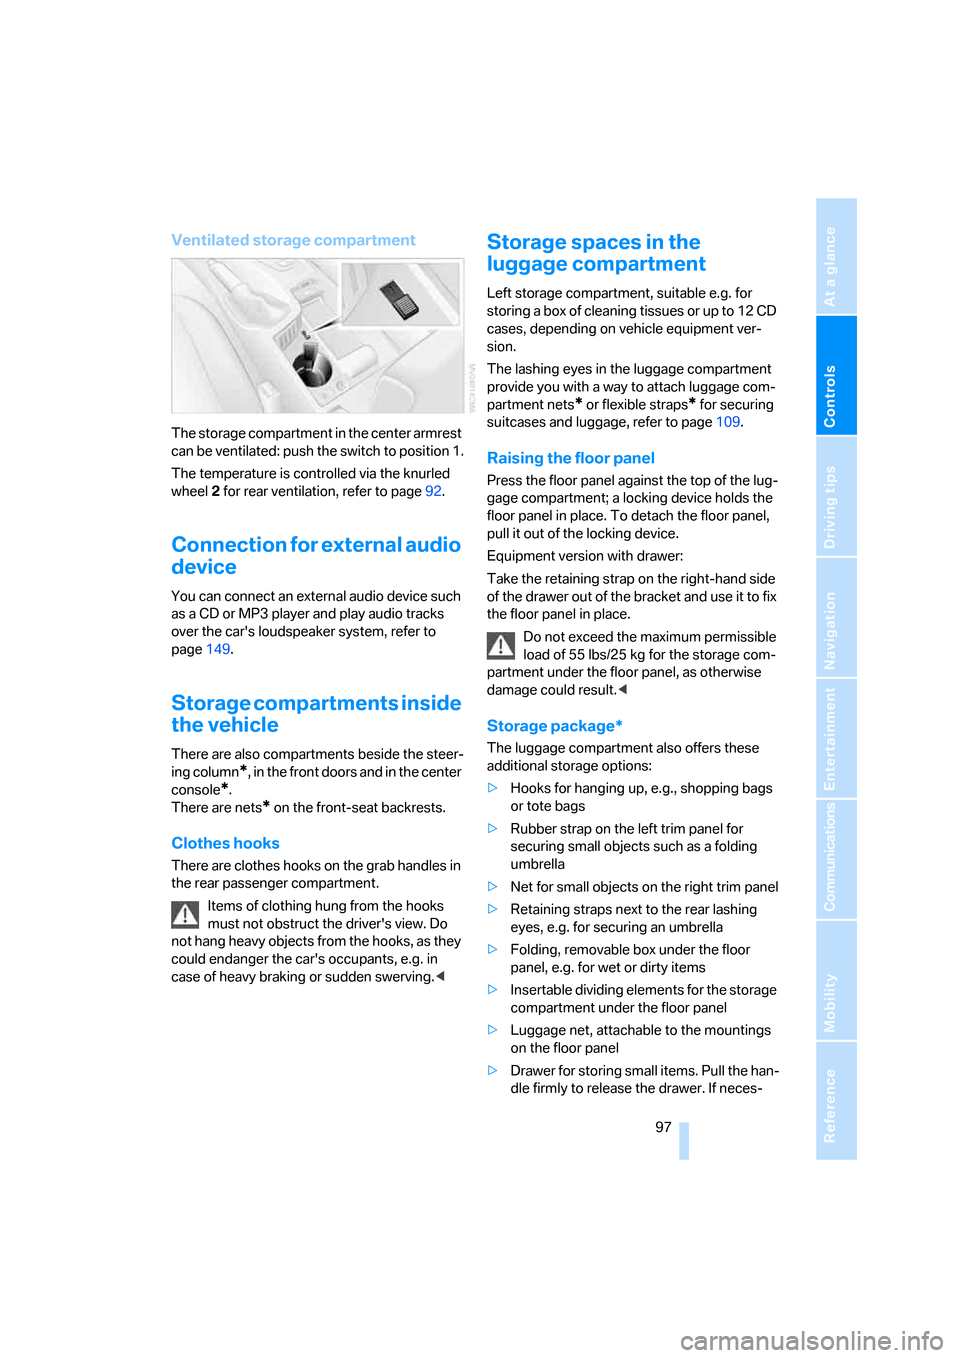
The storage compartment in the center armrest
can be ventilated: push the switch to position 1.
The temperature is controlled via the knurled
wheel 2 for rear ventilation, refer to page92.
Connection for external audio
device
You can connect an external audio device such
as a CD or MP3 player and play audio tracks
over the car's loudspeaker system, refer to
page149.
Storage compartments inside
the vehicle
There are also compartments beside the steer-
ing column
*, in the front doors and in the center
console
*.
There are nets
* on the front-seat backrests.
Clothes hooks
There are clothes hooks on the grab handles in
the rear passenger compartment.
Items of clothing hung from the hooks
must not obstruct the driver's view. Do
not hang heavy objects from the hooks, as they
could endanger the car's occupants, e.g. in
case of heavy braking or sudden swerving.<
Storage spaces in the
luggage compartment
Left storage compartment, suitable e.g. for
storing a box of cleaning tissues or up to 12 CD
cases, depending on vehicle equipment ver-
sion.
The lashing eyes in the luggage compartment
provide you with a way to attach luggage com-
partment nets
* or flexible straps* for securing
suitcases and luggage, refer to page109.
Raising the floor panel
Press the floor panel against the top of the lug-
gage compartment; a locking device holds the
floor panel in place. To detach the floor panel,
pull it out of the locking device.
Equipment version with drawer:
Take the retaining strap on the right-hand side
of the drawer out of the bracket and use it to fix
the floor panel in place.
Do not exceed the maximum permissible
load of 55 lbs/25 kg for the storage com-
partment under the floor panel, as otherwise
damage could result.<
Storage package*
The luggage compartment also offers these
additional storage options:
>Hooks for hanging up, e.g., shopping bags
or tote bags
>Rubber strap on the left trim panel for
securing small objects such as a folding
umbrella
>Net for small objects on the right trim panel
>Retaining straps next to the rear lashing
eyes, e.g. for securing an umbrella
>Folding, removable box under the floor
panel, e.g. for wet or dirty items
>Insertable dividing elements for the storage
compartment under the floor panel
>Luggage net, attachable to the mountings
on the floor panel
>Drawer for storing small items. Pull the han-
dle firmly to release the drawer. If neces-
Page 100 of 223

Controls
99Reference
At a glance
Driving tips
Communications
Navigation
Entertainment
Mobility
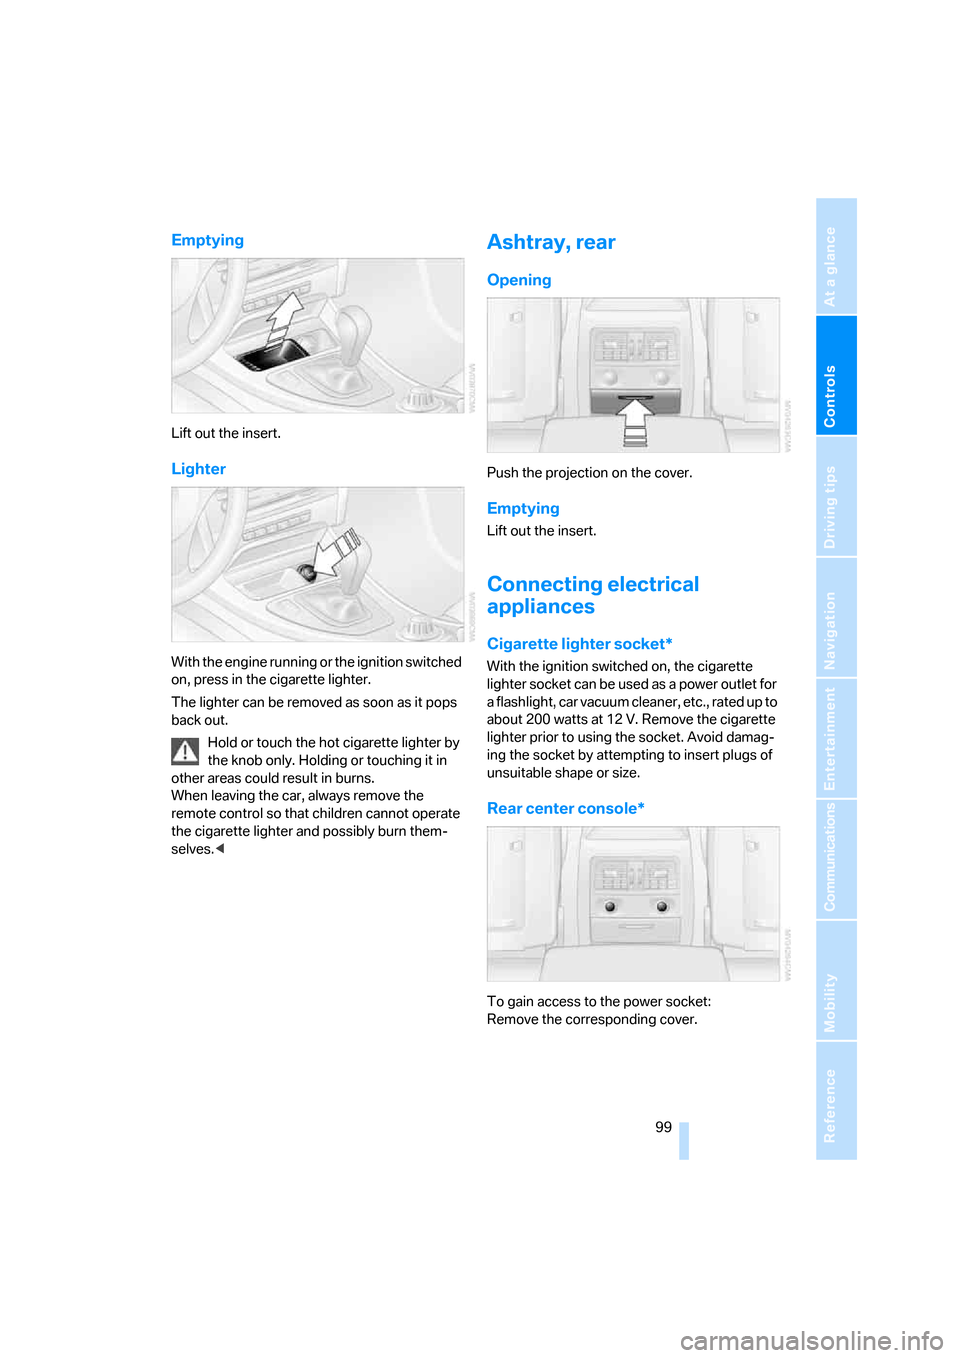
Emptying
Lift out the insert.
Lighter
With the engine running or the ignition switched
on, press in the cigarette lighter.
The lighter can be removed as soon as it pops
back out.
Hold or touch the hot cigarette lighter by
the knob only. Holding or touching it in
other areas could result in burns.
When leaving the car, always remove the
remote control so that children cannot operate
the cigarette lighter and possibly burn them-
selves.<
Ashtray, rear
Opening
Push the projection on the cover.
Emptying
Lift out the insert.
Connecting electrical
appliances
Cigarette lighter socket*
With the ignition switched on, the cigarette
lighter socket can be used as a power outlet for
a flashlight, car vacuum cleaner, etc., rated up to
about 200 watts at 12 V. Remove the cigarette
lighter prior to using the socket. Avoid damag-
ing the socket by attempting to insert plugs of
unsuitable shape or size.
Rear center console*
To gain access to the power socket:
Remove the corresponding cover.
Page 209 of 223

Everything from A - Z
208 Car battery, refer to Vehicle
battery191
Car care, refer to Caring for
your vehicle brochure
Car-care products, refer to
Caring for your vehicle
brochure
"Car Data"66
Care, refer to Caring for your
vehicle brochure
Cargo, securing109
Cargo loading
– stowing cargo109
– vehicle108
Caring for artificial leather,
refer to Caring for your
vehicle brochure
Caring for leather, refer to
Caring for your vehicle
brochure
Caring for light-alloy wheels,
refer to Caring for your
vehicle brochure
Caring for plastic, refer to
Caring for your vehicle
brochure
Caring for the carpet, refer to
Caring for your vehicle
brochure
Caring for the vehicle finish,
refer to Caring for your
vehicle brochure
Car jack
– jacking points191
Car key, refer to Integrated
key/remote control28
Car phone152
– installation location, refer to
Center armrest96
– refer to Portable phone152
– refer to separate Owner's
Manual
Car radio, refer to Radio138
Car wash108
– also refer to Caring for your
vehicle brochure
Catalytic converter, refer to
Hot exhaust system106
"Categories"142CBS Condition Based
Service185
"CD"134,145
CD changer145
– controls134
– fast forward/reverse147
– installation location147
– playing a track146
– random order147
– repeating a track146
– selecting a CD145
– selecting a track146
– switching on/off134
– tone control135
– volume135
CD player145
– controls134
– fast forward/reverse147
– playing a track
146
– random order147
– repeating a track146
– selecting a track146
– switching on/off134
– tone control135
– volume135
Center armrest96
Center brake lamp
– replacing bulbs190
Center console, refer to
Around the center
console14
"Central locking"30
Central locking
– from inside32
– from outside29
Central locking system29
Changing bulbs187
Changing the language on the
Control Display76
Changing the measurement
units on the Control
Display68
Changing wheels191
Chassis number, refer to
Engine compartment181
Check Control73
"Check Control
messages"75
Check Gas Cap168Checking the air pressure,
refer to Tire inflation
pressure170
Child-restraint fixing system
LATCH48
Child-restraint systems46
Child-safety lock48
Child seats46
Chrome parts, care, refer to
Caring for your vehicle
brochure
Cigarette lighter99
– socket99
Cleaning, refer to Caring for
your vehicle brochure
Cleaning headlamps54
– washer fluid55
"Climate"90
Clock64
– 12h/24h mode72
– setting time71
Closing
– from inside32
– from outside30
Clothes hooks97
Cold start, refer to Starting the
engine49
Combined instrument, refer to
Instrument cluster12
Comfort area, refer to Around
the center console14
"Communication"153
"Communication
settings"160
Compact disc, refer to
– CD changer145
– CD player145
Compact wheel
– inflation pressure
172,173,174,175
Compartment for remote
control, refer to Ignition
lock49
Compass94
Computer65
– displays on Control
Display66
– hour signal72
Computer, refer to iDrive16