2005 BMW 325I SEDAN window
[x] Cancel search: windowPage 37 of 223
Opening and closing
36 action is interrupted immediately and the win-
dow reopens slightly.
Despite the anti-trapping mechanism
inspect the window's travel path prior to
closing it, as the safety system might fail to
detect certain kinds of obstructions, such as
thin objects, and the window would continue
closing.
Pulling the switch beyond the resistance point
and holding it limits the response of the anti-
trapping mechanism. In this case, if the closing
force exceeds a defined threshold, the window
will only open a few fractions of an inch/a few
millimeters.
If the switch is pulled past the resistance point
again within approx. 4 seconds, the anti-trap-
ping mechanism will be deactivated.<
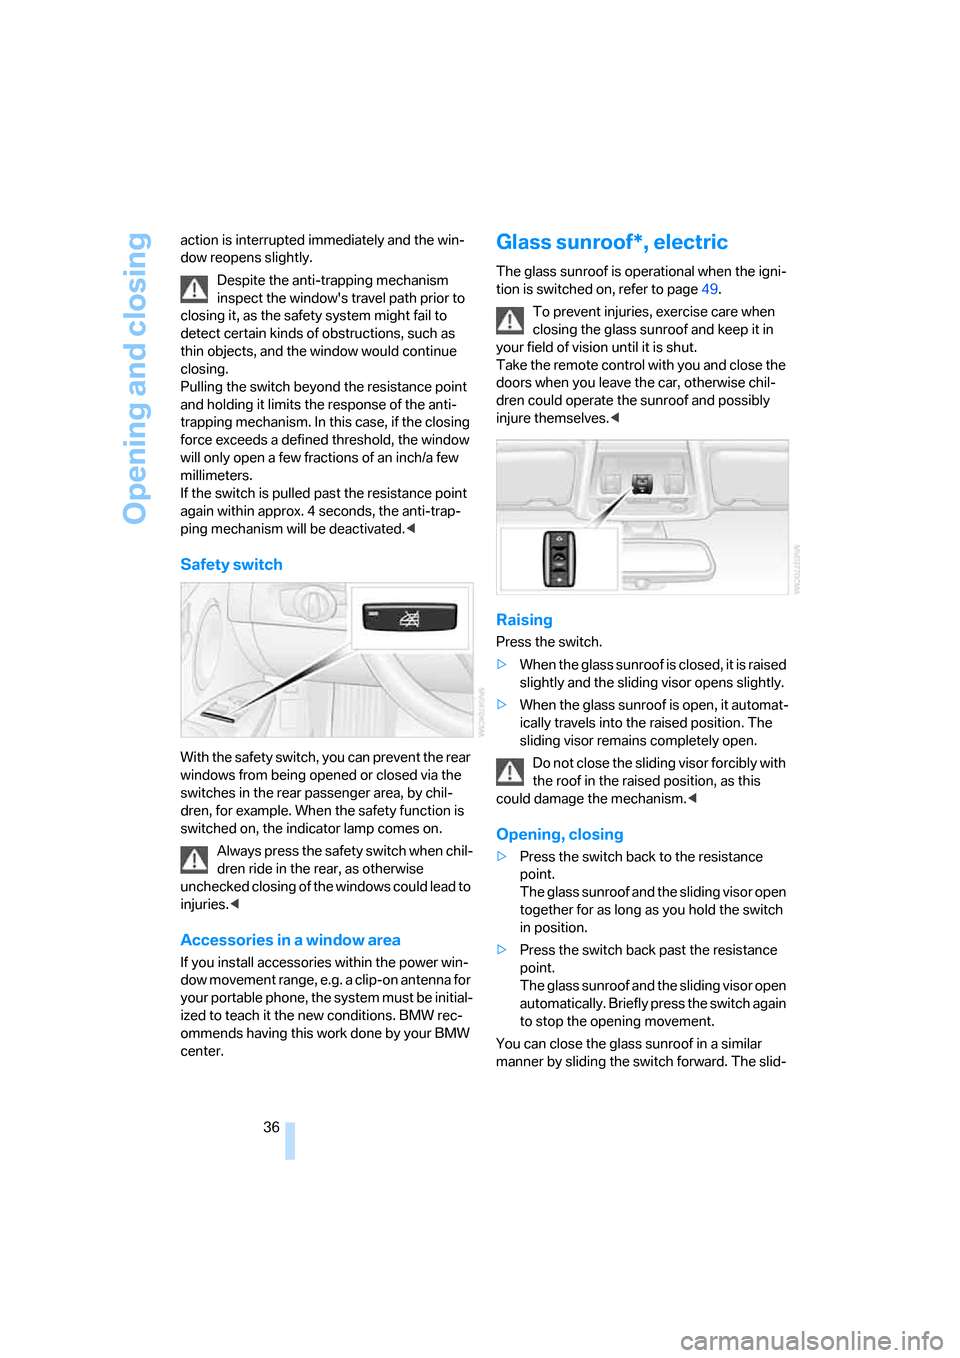
Safety switch
With the safety switch, you can prevent the rear
windows from being opened or closed via the
switches in the rear passenger area, by chil-
dren, for example. When the safety function is
switched on, the indicator lamp comes on.
Always press the safety switch when chil-
dren ride in the rear, as otherwise
unchecked closing of the windows could lead to
injuries.<
Accessories in a window area
If you install accessories within the power win-
dow movement range, e.g. a clip-on antenna for
your portable phone, the system must be initial-
ized to teach it the new conditions. BMW rec-
ommends having this work done by your BMW
center.
Glass sunroof*, electric
The glass sunroof is operational when the igni-
tion is switched on, refer to page49.
To prevent injuries, exercise care when
closing the glass sunroof and keep it in
your field of vision until it is shut.
Take the remote control with you and close the
doors when you leave the car, otherwise chil-
dren could operate the sunroof and possibly
injure themselves.<
Raising
Press the switch.
>When the glass sunroof is closed, it is raised
slightly and the sliding visor opens slightly.
>When the glass sunroof is open, it automat-
ically travels into the raised position. The
sliding visor remains completely open.
Do not close the sliding visor forcibly with
the roof in the raised position, as this
could damage the mechanism.<
Opening, closing
>Press the switch back to the resistance
point.
The glass sunroof and the sliding visor open
together for as long as you hold the switch
in position.
>Press the switch back past the resistance
point.
The glass sunroof and the sliding visor open
automatically. Briefly press the switch again
to stop the opening movement.
You can close the glass sunroof in a similar
manner by sliding the switch forward. The slid-
Page 49 of 223
Transporting children safely
48 Then push the center head restraint into the
lowest position again.
Adjust the tether strap according to the
child-restraint manufacturer's instruc-
tions.<
LATCH child-restraint fixing system
LATCH: Lower Anchor and Tethers for CHil-
dren.
The rear outer sitting positions are provided
with anchors for a LATCH child-restraint fixing
system.
To attach a child-restraint system with
the LATCH system, follow the operating
and safety instructions of the child-restraint
system manufacturer.<
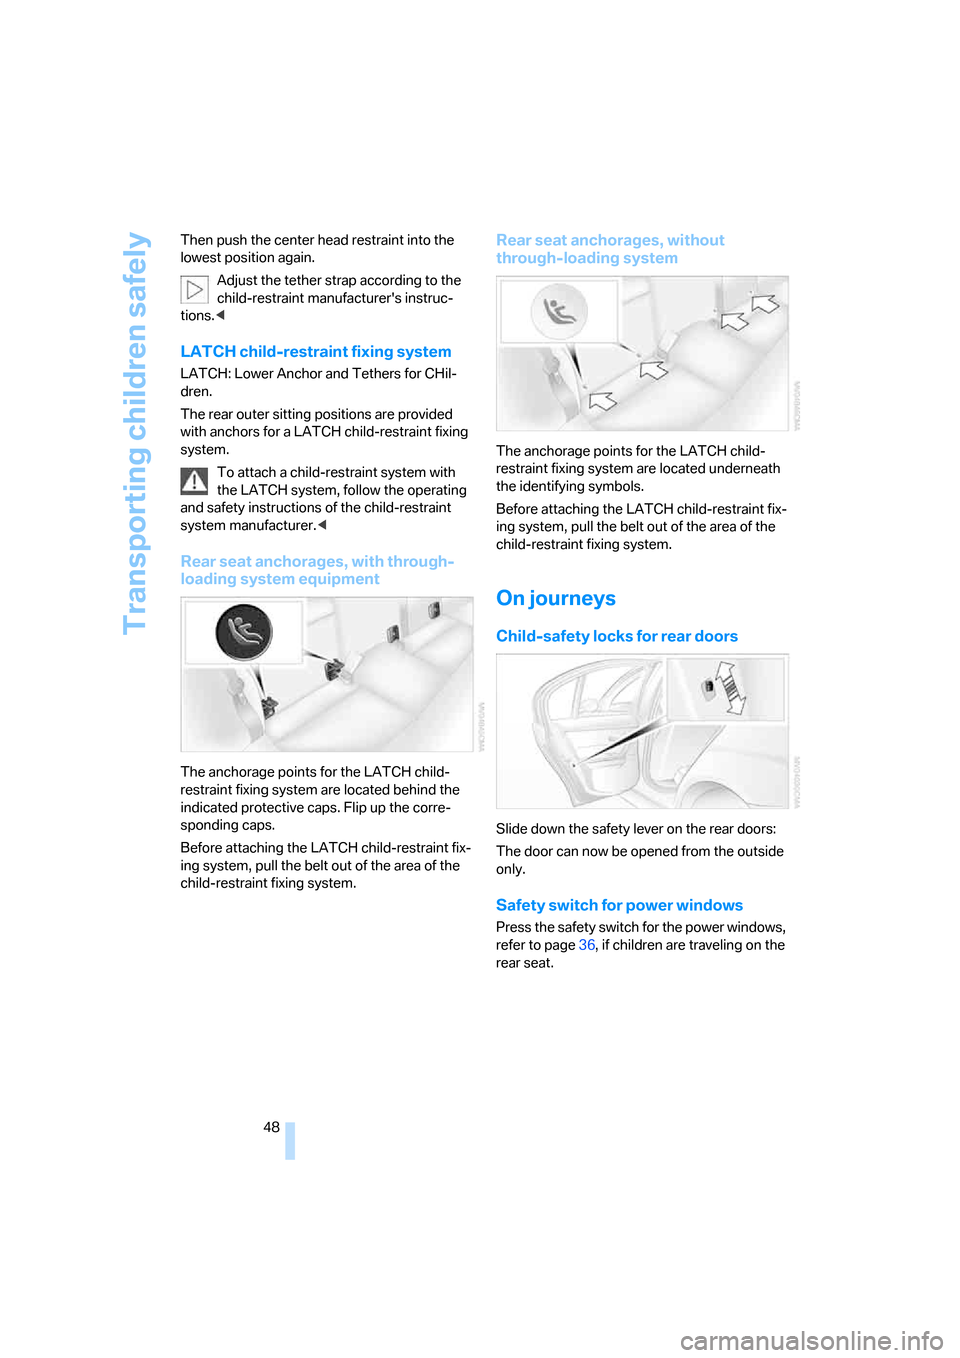
Rear seat anchorages, with through-
loading system equipment
The anchorage points for the LATCH child-
restraint fixing system are located behind the
indicated protective caps. Flip up the corre-
sponding caps.
Before attaching the LATCH child-restraint fix-
ing system, pull the belt out of the area of the
child-restraint fixing system.
Rear seat anchorages, without
through-loading system
The anchorage points for the LATCH child-
restraint fixing system are located underneath
the identifying symbols.
Before attaching the LATCH child-restraint fix-
ing system, pull the belt out of the area of the
child-restraint fixing system.
On journeys
Child-safety locks for rear doors
Slide down the safety lever on the rear doors:
The door can now be opened from the outside
only.
Safety switch for power windows
Press the safety switch for the power windows,
refer to page36, if children are traveling on the
rear seat.
Page 68 of 223
Controls
67Reference
At a glance
Driving tips
Communications
Navigation
Entertainment
Mobility
>Driving time
>Distance traveled
>Average speed
>Average fuel consumption
Switching trip computer on/off and resetting all
values to zero:
1.Select "Set" and press the controller.
2.Select the desired menu item and press the
controller.
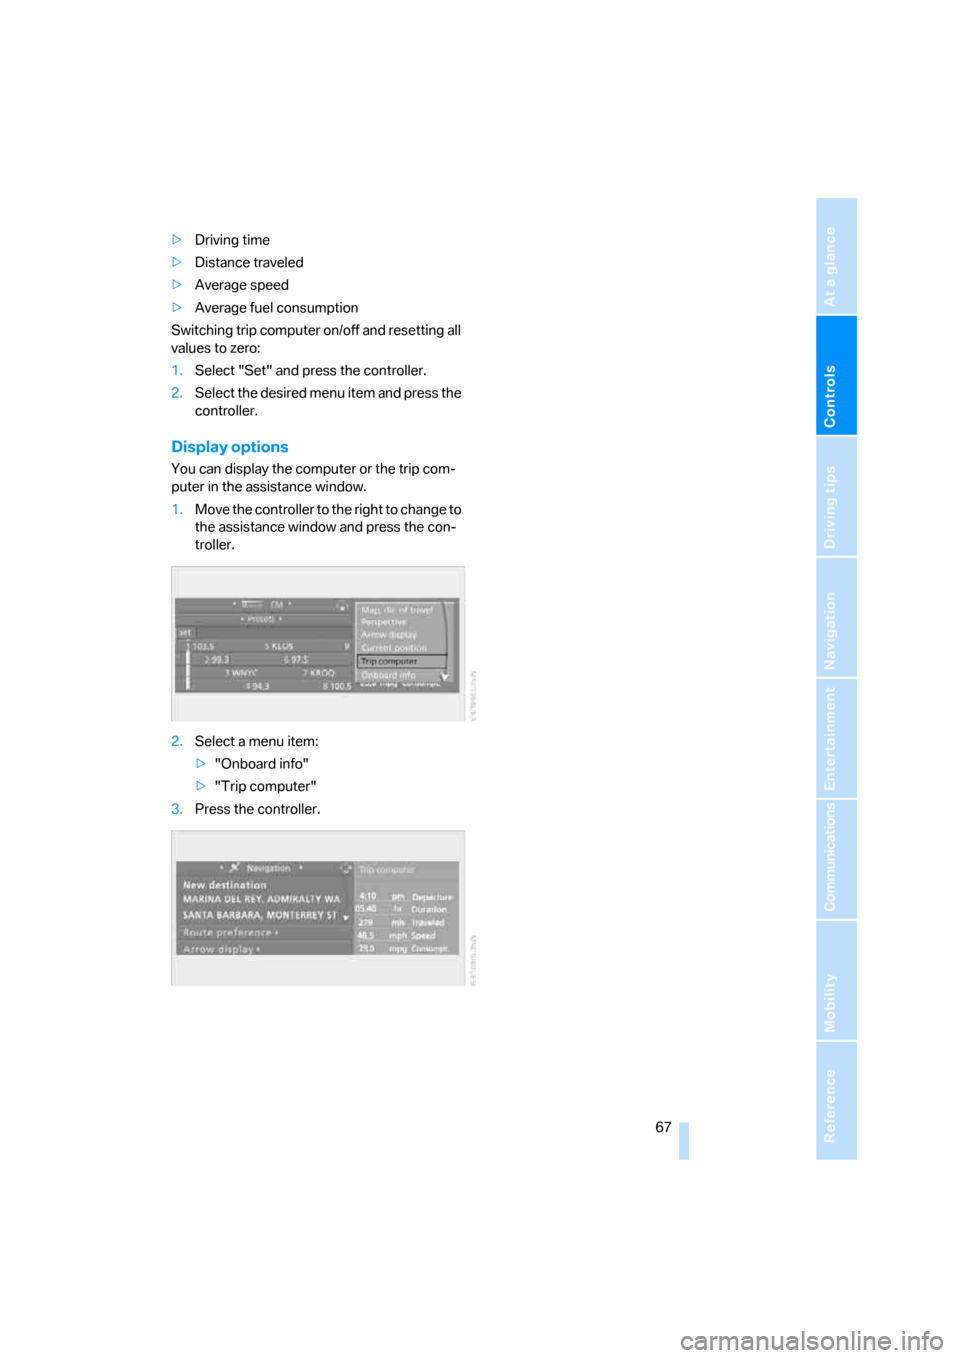
Display options
You can display the computer or the trip com-
puter in the assistance window.
1.Move the controller to the right to change to
the assistance window and press the con-
troller.
2.Select a menu item:
>"Onboard info"
>"Trip computer"
3.Press the controller.
Page 90 of 223

Controls
89Reference
At a glance
Driving tips
Communications
Navigation
Entertainment
Mobility
Controlling the climate for pleasant driving
1Airflow directed toward the windshield and
side windows
2Air to the upper body area
Draft-free ventilation92
3Air to the footwell
4Air distribution, manual
5Temperature adjustment, left-hand side of
passenger compartment
6Maximum cooling
7AUTO program
8Air flow rate, manual
9AUC Automatic recirculated-air control/
Recirculated-air mode10Temperature adjustment, right-hand side
of passenger compartment
11Residual heat
12Defrosting windows and removing conden-
sation
13Switching cooling function on/off manually
14Rear window defroster
15Air grill for interior temperature sensor –
please keep clear and unobstructed
The current setting for the air distribution is dis-
played on the Control Display, refer to page90.
Page 91 of 223
Controlling the climate for pleasant driving
90
Automatic climate control
Comfortable interior climate
AUTO program7 offers the ideal air distribution
and air flow rate for practically all conditions,
refer to AUTO program below. All you need to
do is select an interior temperature which is
comfortable for you.
The following sections inform you in detail
about how to adjust the settings.
Most settings are stored for the remote control
currently in use, refer also to Personal Profile
settings on page29.
Adjusting air distribution manually
Direct the flow of air to the win-
dows, to the upper body area or to
the footwell.
You can switch the automatic air
distribution back on by pressing the AUTO but-
ton.
Manual fine adjustments in air
distribution
You can set the rate of incoming airflow for
manual air distribution.
iDrive concept, refer to page16.
1.Press the button.
This opens the start menu.
2.Move the controller to the left to call up "Cli-
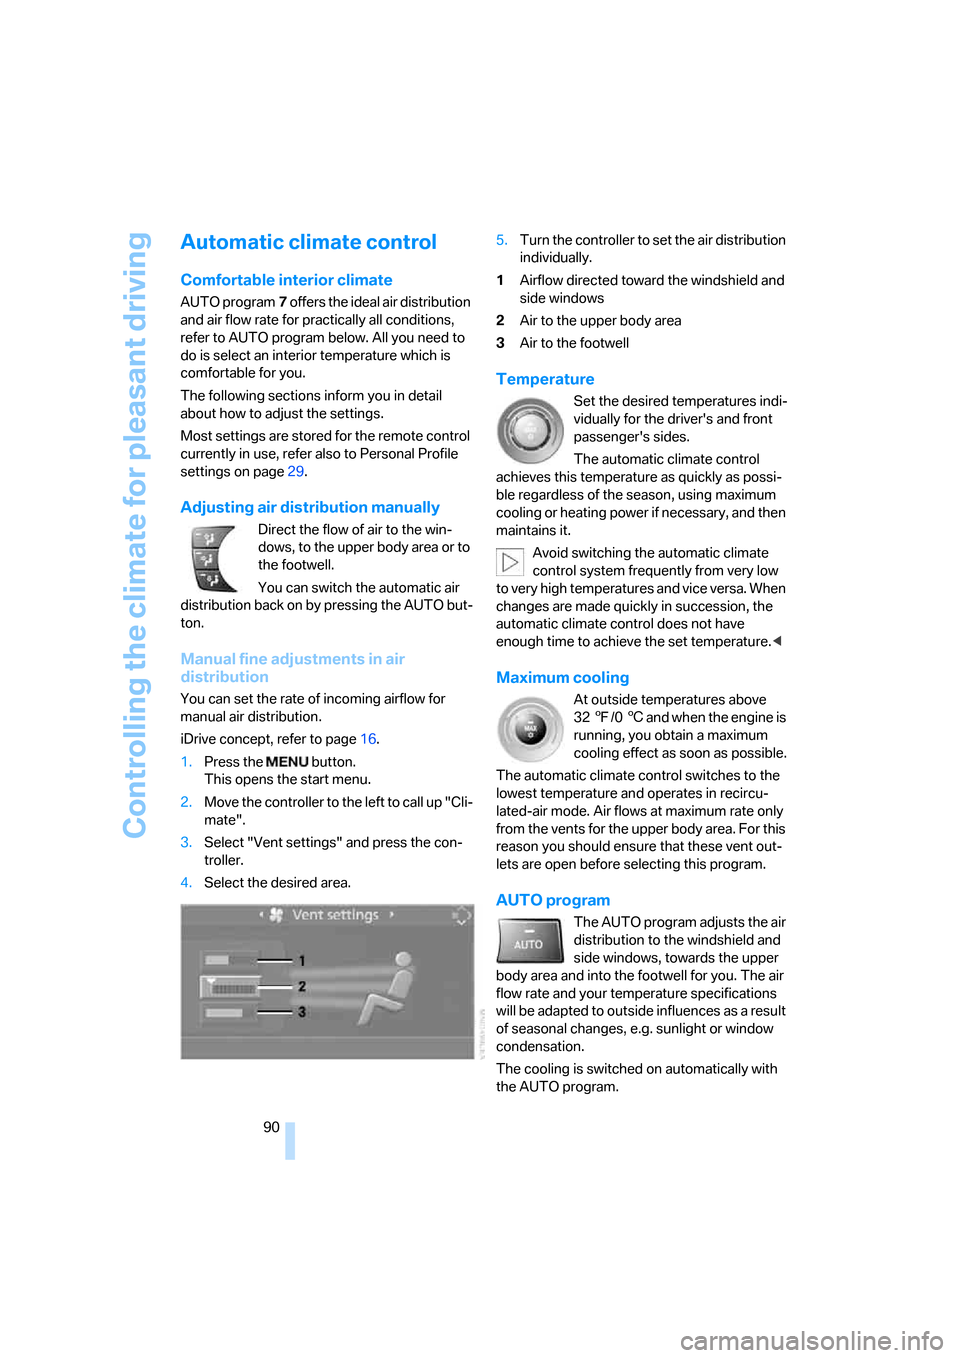
mate".
3.Select "Vent settings" and press the con-
troller.
4.Select the desired area.5.Turn the controller to set the air distribution
individually.
1Airflow directed toward the windshield and
side windows
2Air to the upper body area
3Air to the footwell
Temperature
Set the desired temperatures indi-
vidually for the driver's and front
passenger's sides.
The automatic climate control
achieves this temperature as quickly as possi-
ble regardless of the season, using maximum
cooling or heating power if necessary, and then
maintains it.
Avoid switching the automatic climate
control system frequently from very low
to very high temperatures and vice versa. When
changes are made quickly in succession, the
automatic climate control does not have
enough time to achieve the set temperature.<
Maximum cooling
At outside temperatures above
327/06 and when the engine is
running, you obtain a maximum
cooling effect as soon as possible.
The automatic climate control switches to the
lowest temperature and operates in recircu-
lated-air mode. Air flows at maximum rate only
from the vents for the upper body area. For this
reason you should ensure that these vent out-
lets are open before selecting this program.
AUTO program
The AUTO program adjusts the air
distribution to the windshield and
side windows, towards the upper
body area and into the footwell for you. The air
flow rate and your temperature specifications
will be adapted to outside influences as a result
of seasonal changes, e.g. sunlight or window
condensation.
The cooling is switched on automatically with
the AUTO program.
Page 92 of 223

Controls
91Reference
At a glance
Driving tips
Communications
Navigation
Entertainment
Mobility
Intensity of the AUTO program
You can set the intensity of the air supply in the
AUTO program. This changes the duration of
time during which the vehicle interior is heated
or cooled.
1.Open the start menu.
2.Call up "Climate".
3.Select "Automatic programs" and press the
controller.
4.Select the desired area.
5.Press the controller to set the desired inten-
sity.
The selected intensity level of the auto-
matic program is switched on.
Adjusting air flow rate manually
Press the left side of the button to
reduce airflow. Press the right side
of the button to increase it. You can
reactivate the automatic mode for the air flow
rate with the AUTO button.
Switching the system on/off
With the blower at its lowest setting, press the
left side of the button to switch off the auto-
matic climate control. All indicators go out.
Press any button except REST to reactivate the
automatic climate control.
AUC Automatic recirculated-air
control/Recirculated-air mode
Set the desired operating mode by
pressing this button repeatedly:
>LEDs off: outside air flows in
continuously.>Left-hand LED on, AUC mode: a sensor
detects pollutants in the outside air. If nec-
essary, the system blocks the supply of out-
side air and recirculates the inside air. As
soon as the concentration of pollutants in
the outside air has decreased sufficiently,
the system automatically switches back to
outside air supply.
>Right-hand LED on, recirculated-air mode:
the supply of outside air is permanently
shut off. The system then recirculates the
air currently within the vehicle.
You can activate/deactivate the recirculated-air
mode by means of a freely programmable but-
ton
* in the steering wheel, refer to page11.
If condensation starts to form on the
inside window surfaces during operation
in the recirculated-air mode, you should switch
it off while also increasing the air flow rate as
required.
The recirculated-air mode should not be used
over an extended period of time, as otherwise
the air quality inside the car will deteriorate con-
tinuously.<
Using residual heat
The heat stored in the engine is
used to heat the passenger com-
partment, e.g. while stopped at a
school to pick up a child.
You can use this function for up to 15 minutes
after switching off the engine if it is warm and
the battery is sufficiently well charged. The out-
side temperature must be below 777/256.
The LED in the button comes on if these condi-
tions are met and the function is activated.
Defrosting windows and removing
condensation
This program quickly removes ice
and condensation from the wind-
shield and front side windows.
When the program is switched on, the LED
comes on.
Page 93 of 223
Controlling the climate for pleasant driving
92
Switching the cooling function on and
off
The cooling function cools and
dehumidifies the incoming air
before also reheating it as
required, according to the temperature setting.
Depending on the weather, the windshield may
fog over briefly when the engine is started.
The cooling function is only available when the
engine is running and is switched on automati-
cally with the AUTO program.
Rear window defroster
When the rear window defroster is
switched on, the LED comes on.
The defroster switches off auto-
matically after a certain time.
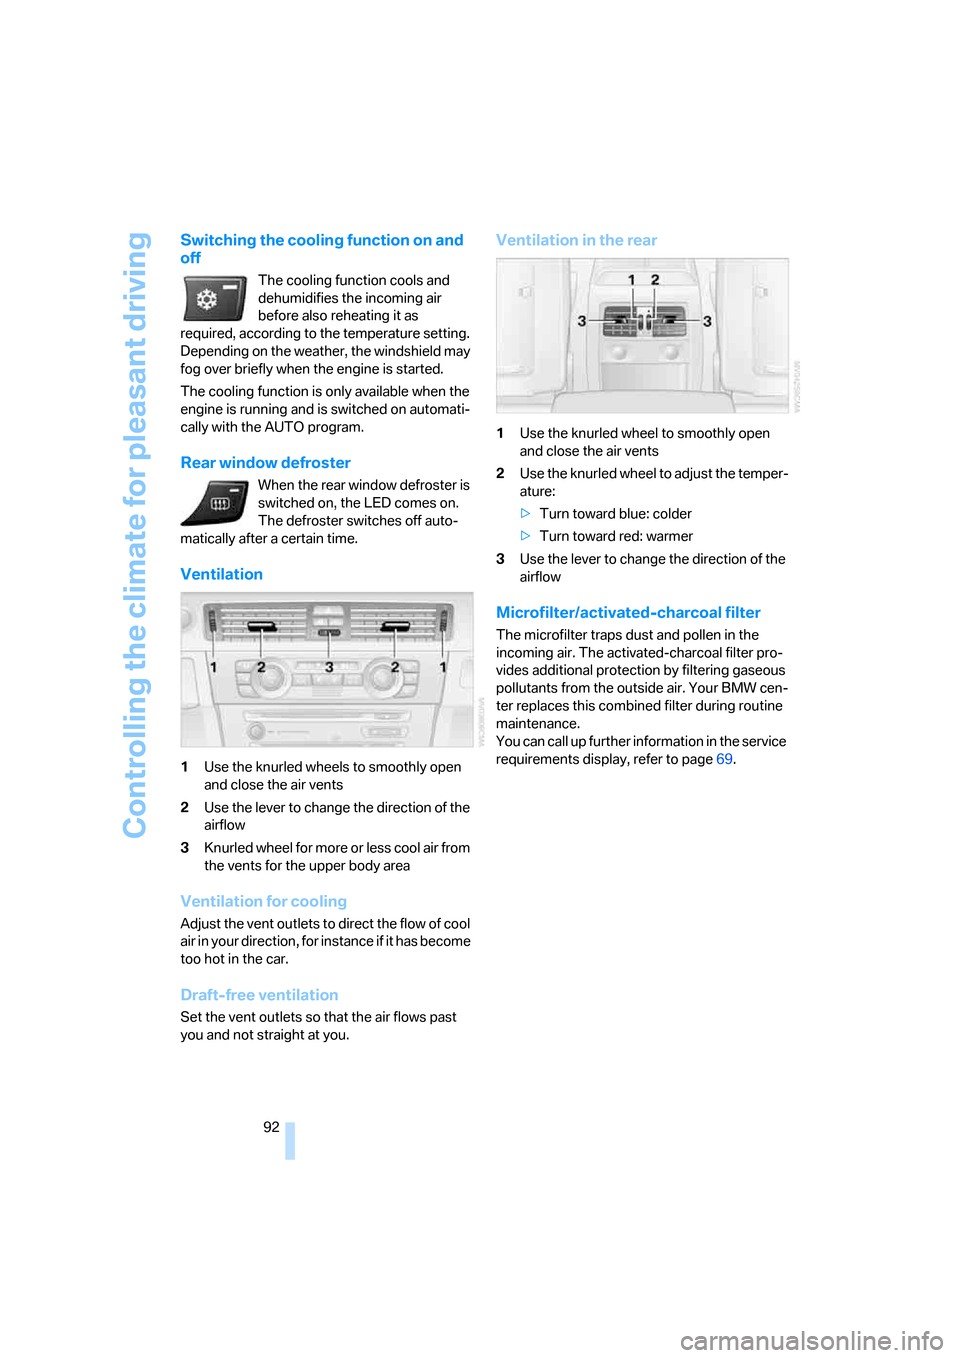
Ventilation
1Use the knurled wheels to smoothly open
and close the air vents
2Use the lever to change the direction of the
airflow
3Knurled wheel for more or less cool air from
the vents for the upper body area
Ventilation for cooling
Adjust the vent outlets to direct the flow of cool
air in your direction, for instance if it has become
too hot in the car.
Draft-free ventilation
Set the vent outlets so that the air flows past
you and not straight at you.
Ventilation in the rear
1Use the knurled wheel to smoothly open
and close the air vents
2Use the knurled wheel to adjust the temper-
ature:
>Turn toward blue: colder
>Turn toward red: warmer
3Use the lever to change the direction of the
airflow
Microfilter/activated-charcoal filter
The microfilter traps dust and pollen in the
incoming air. The activated-charcoal filter pro-
vides additional protection by filtering gaseous
pollutants from the outside air. Your BMW cen-
ter replaces this combined filter during routine
maintenance.
You can call up further information in the service
requirements display, refer to page69.
Page 96 of 223

Controls
95Reference
At a glance
Driving tips
Communications
Navigation
Entertainment
Mobility
To set a compass zone, press the adjustment
button on the bottom of the interior rearview
mirror with a pointed object, such as a pen, for
approx. 3-4 seconds. The number of the com-
pass zone set is shown in the display.
To change the zone setting, press the adjust-
ment button repeatedly until the display shows
the number of the compass zone in which you
are currently driving:
The compass is operational again after approx.
10 seconds.
For information on the automatic dimming fea-
ture, refer to Interior and exterior mirrors, auto-
matic dimming feature, page107.
Calibrating the digital compass
The digital compass must be calibrated in the
following situations:
>C or CAL is displayed.
>The compass shows the wrong cardinal
direction.
>The cardinal direction shown does not
change although the direction of travel
does.
>Not all cardinal directions are shown.
Procedure
1.Make sure that no large metal objects or
overhead power lines are in the vicinity of
your vehicle and that you have enough
space to drive in a circle.
2.Set the currently valid compass zone.
3.Press the adjustment button to call up C or
CAL. Then drive in one full circle at a speed
of no more than 4 mph or 7 km/h.
If calibration is successful, the C or CAL dis-
play is replaced by the cardinal directions.
Roller sun blinds*
Rear window blind
Tap the button in the center console to raise or
lower the roller sun blind.