2005 BMW 325I park assist
[x] Cancel search: park assistPage 49 of 166
Reference
At a glance
Controls
Driving tips
Mobility
47
Acceleration assistant
The acceleration assistant provides for optimal,
racing-style acceleration when starting off on a
non-slippery surface.
Do not use the acceleration assistant too
frequently, otherwise components could
wear prematurely.<
1.Activate Dynamic Driving Control.
2.Deactivate DSC, refer to page68.
3.Quickly depress the accelerator pedal all
the way: kick-down. The optimal engine
speed for pulling away is achieved.
To maintain driving stability, reactivate
DSC afterward.<
Automatic transmission with
Steptronic*
In addition to fully automatic operation, you can
also manually shift with the Steptronic, refer to
page48.
Vehicle parking
To prevent the vehicle from rolling,
always select position P and apply the
handbrake before leaving the vehicle with the
engine running.<
Disengaging the remote control
In order to remove the remote control from the
ignition lock, you must first move the selector
lever to position P and switch off the engine:
interlock.
Selector lever positions
P R N D M/S + –
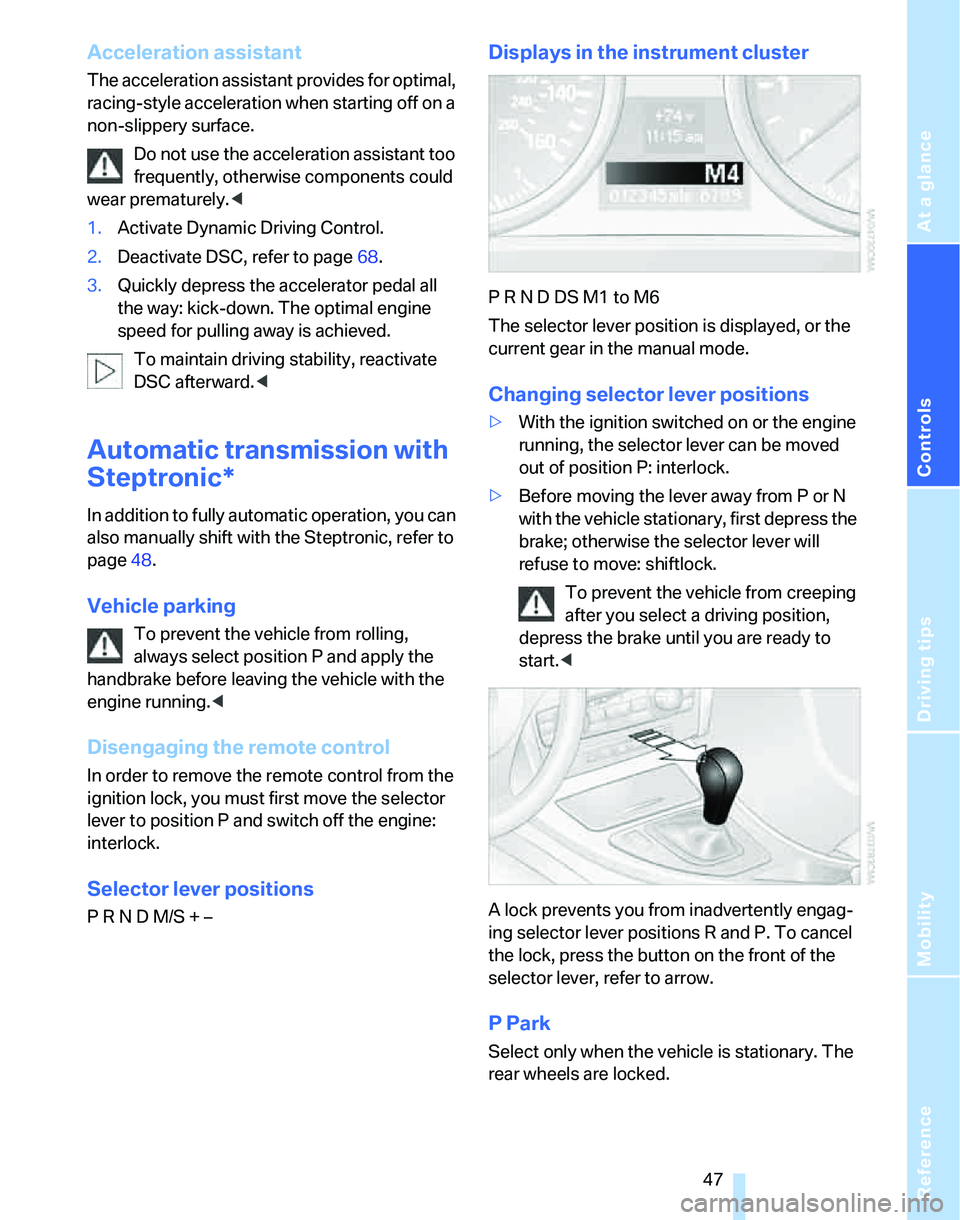
Displays in the instrument cluster
P R N D DS M1 to M6
The selector lever position is displayed, or the
current gear in the manual mode.
Changing selector lever positions
>With the ignition switched on or the engine
running, the selector lever can be moved
out of position P: interlock.
>Before moving the lever away from P or N
with the vehicle stationary, first depress the
brake; otherwise the selector lever will
refuse to move: shiftlock.
To prevent the vehicle from creeping
after you select a driving position,
depress the brake until you are ready to
start.<
A lock prevents you from inadvertently engag-
ing selector lever positions R and P. To cancel
the lock, press the button on the front of the
selector lever, refer to arrow.
P Park
Select only when the vehicle is stationary. The
rear wheels are locked.
Page 69 of 166

Reference
At a glance
Controls
Driving tips
Mobility
67
Technology for driving comfort and safety
PDC Park Distance Control*
The concept
The PDC assists you with maneuvering in tight
parking spaces. Acoustic signals warn you of
the presence of an object in front of
* or behind
your car. To measure the distance, there are
four ultrasonic sensors in each bumper.
An acoustic warning sounds once an object is
closer than approx. 2 ft/60 cm to the front sen-
sors
* or both rear corner sensors, or closer than
approx. 5 ft/1.50 m to the rear center sensors.
PDC is a parking aid that can indicate
objects when they are approached
slowly, as is usually the case when parking.
Avoid approaching an object at high speed, oth-
erwise physical circumstances may lead to the
system warning being issued too late.<
Automatic mode
With the engine running or the ignition switched
on, the system is activated automatically after
approx. 1 second when you engage reverse
gear or move the automatic transmission selec-
tor lever to position R. Wait this short period
before driving.
Switching on manually
Press the button, the LED lights up.
Switching off manually
Press the button again; the LED goes out.The system is automatically deactivated once
the vehicle travels approx. 165 ft/50 m or
exceeds a speed of approx. 20 mph or 30 km/h;
the LED goes out. You can reactivate the sys-
tem as needed.
Signal tones
When nearing an object, its position is indicated
correspondingly by an interval tone. For exam-
ple, the tone sounds at the rear if the system
detects an object behind the car. As the dis-
tance between vehicle and object decreases,
the intervals between the tones become
shorter. If the distance to the nearest object
falls to below roughly 1 ft/30 cm, then a contin-
uous tone sounds.
The warning signal is canceled after approx.
3 seconds, if you are moving parallel to a wall.
Malfunction
The indicator lamp in the instrument
cluster comes on. PDC is malfunc-
tioning. Have the system checked.
To avoid this problem, keep the sensors clean
and free of ice or snow in order to ensure that
they will continue to operate effectively. When
using a high-pressure cleaner, do not spray the
sensors for extended periods of time and only
from a distance of at least 4 in/10 cm.
Manual mode
The LED above the button flashes in addition.
System limitations
Even with PDC, final responsibility for
estimating the distance between the
vehicle and any obstructions always remains
with the driver. Even when sensors are pro-
vided, there is a blind spot in which objects can
no longer be detected. The system is also sub-
ject to the physical limits that apply to all forms
of ultrasonic measurement, such as those
encountered with trailer towbars and couplings,
Page 100 of 166
Things to remember when driving
98
Things to remember when driving
Break-in period
Moving parts need breaking-in time to adjust to
each other. Please follow the instructions below
in order to achieve the optimal service life and
economy of operation for your vehicle.
Engine and differential
Always obey all official speed limits.
Up to 1,200 miles/2,000 km
Attempt to vary both engine and vehicle
speeds, but refrain from exceeding an engine
speed of 4,500 rpm or a driving speed of
100mphor 160km/h.
Avoid full-throttle operation and use of the
transmission's kick-down mode.
After 1,200 miles/2,000 km
Engine and vehicle speeds can be gradually
increased.
Sequential manual gearbox SMG
Do not use the acceleration assistant during the
break-in period, page47.
Tires
Due to technical factors associated with their
manufacture, tires do not achieve their full trac-
tion potential until after an initial break-in
period. Therefore, drive cautiously during the
first 200 miles/300 km.
Brake system
Brakes require an initial break-in period of
approx. 300 miles/500 km to achieve optimized
contact and wear patterns between brake pads
and rotors. Drive cautiously during this break-in
period.
Clutch
The function of the clutch reaches its optimal
level only after a distance driven of approx. 300 miles/500 km. During this break-in period,
engage the clutch gently.
Following part replacement
The same break-in procedures should be
observed if any of the components mentioned
above have to be renewed in the course of the
vehicle's operating life.
General driving notes
Close the luggage compartment lid
Operate the vehicle only when the lug-
gage compartment lid is closed. Other-
wise, exhaust fumes could enter the interior of
the vehicle.<
If special circumstances make it absolutely nec-
essary to drive with the luggage compartment
lid open:
1.Close all windows and the glass sunroof.
2.Increase the air flow rate of the air condi-
tioner or automatic climate control consid-
erably, refer to page81 or84.
Hot exhaust system
In all vehicles, extremely high tempera-
tures are generated in the exhaust sys-
tem. Do not remove the heat shields installed
adjacent to various sections of the exhaust sys-
tem, and never apply undercoating to them.
When driving, standing at idle and while park-
ing, take care to avoid possible contact
between the hot exhaust system and any highly
flammable materials such as hay, leaves, grass,
etc. Such contact could lead to a fire, with the
risk of serious personal injuries and property
damage.<
Mobile phone in the vehicle
BMW discourages the use of mobile
communications devices, e.g. mobile
phones, inside the vehicle without a direct con-
Page 102 of 166
Things to remember when driving
100 You can increase the engine's braking effect by
shifting down, all the way to first gear if neces-
sary. This strategy helps you avoid placing
excessive loads on the brake system. Down-
shifting in manual mode of the automatic trans-
mission, refer to page48.
Never drive with the clutch held down,
with the transmission in idle or with the
engine switched off; otherwise, engine braking
action will not be present or there will be no
power assistance to the brakes or steering.
Never allow floor mats, carpets or any other
objects to protrude into the area around the
pedals, otherwise pedal function could be
impaired.<
Corrosion on brake rotors
When the vehicle is driven only occasionally,
during extended periods when the vehicle is not
used at all, and in operating conditions where
brake applications are less frequent, there is an
increased tendency for corrosion to form on
rotors, while contaminants accumulate on the
brake pads. This occurs because the minimum
pressure which must be exerted by the pads
during brake applications to clean the rotors is
not reached.
Should corrosion form on the brake rotors, the
brakes will tend to respond with a pulsating
effect that even extended application will fail to
cure.
When the vehicle is parked
Condensation forms while the automatic cli-
mate control is in operation, and then exits
under the vehicle. Traces of condensed water
under the vehicle are therefore normal.
Before driving into a car wash
For general information about taking care of
your BMW, refer to the Caring for your vehicle
brochure.
With convenient access and automatic
transmission
Insert the remote control into the ignition
switch.The engine can be switched off when the selec-
tor lever is in position N. Refer also to page27.
Cargo loading
To avoid loading the tires beyond their
approved carrying capacity, never over-
load the vehicle. Overloading can lead to over-
heating and increases the rate at which damage
develops inside the tires. The ultimate result
can assume the form of a sudden blow-out.<
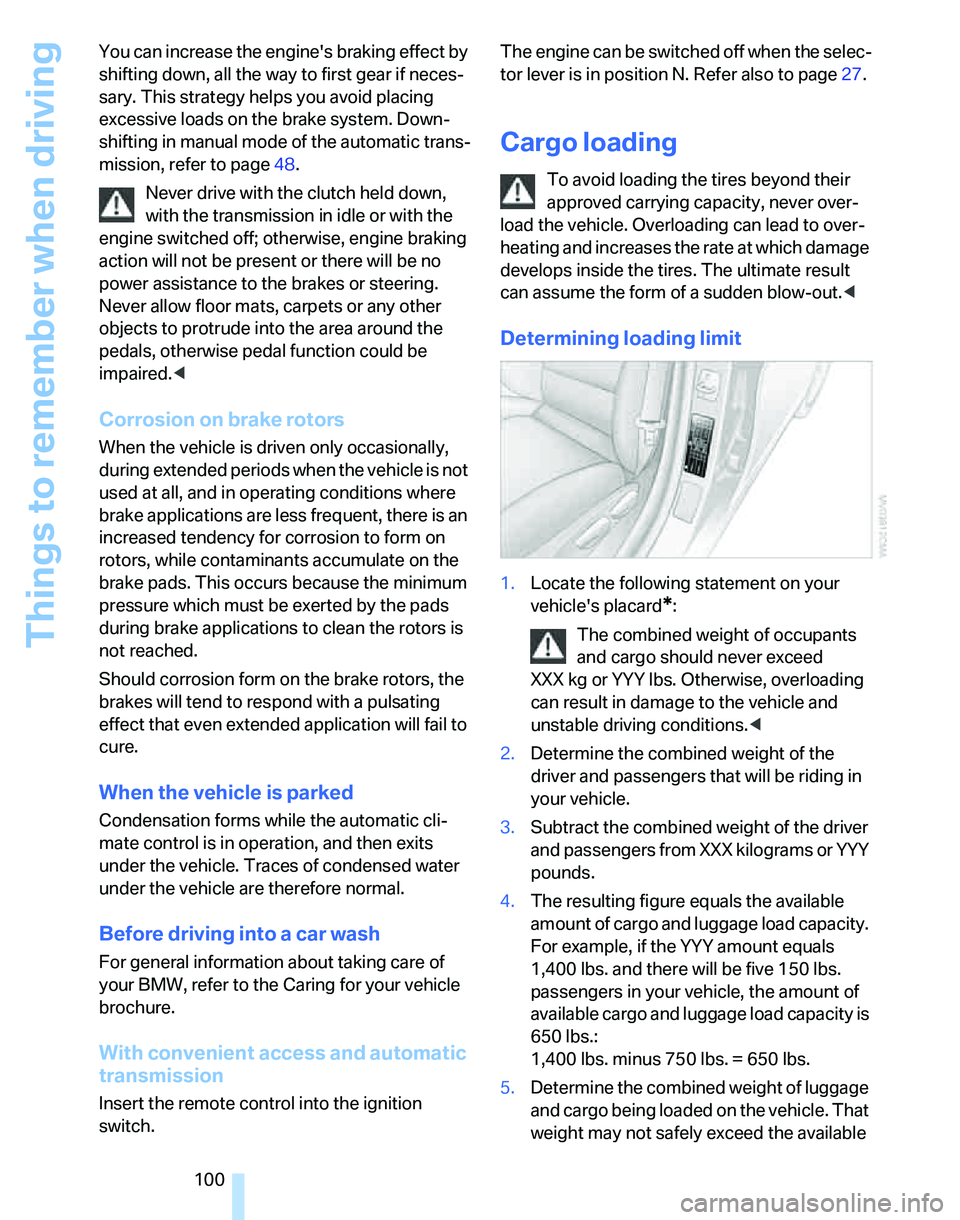
Determining loading limit
1.Locate the following statement on your
vehicle's placard
*:
The combined weight of occupants
and cargo should never exceed
XXX kg or YYY lbs. Otherwise, overloading
can result in damage to the vehicle and
unstable driving conditions.<
2.Determine the combined weight of the
driver and passengers that will be riding in
your vehicle.
3.Subtract the combined weight of the driver
and passengers from XXX kilograms or YYY
pounds.
4.The resulting figure equals the available
amount of cargo and luggage load capacity.
For example, if the YYY amount equals
1,400 lbs. and there will be five 150 lbs.
passengers in your vehicle, the amount of
available cargo and luggage load capacity is
650 lbs.:
1,400 lbs. minus 750 lbs. = 650 lbs.
5.Determine the combined weight of luggage
and cargo being loaded on the vehicle. That
weight may not safely exceed the available
Page 134 of 166
Giving and receiving assistance
132 Some of the articles contained in the first aid
pouch have a limited service life. Therefore,
check the expiration dates of the contents reg-
ularly and replace any items in good time, if nec-
essary.
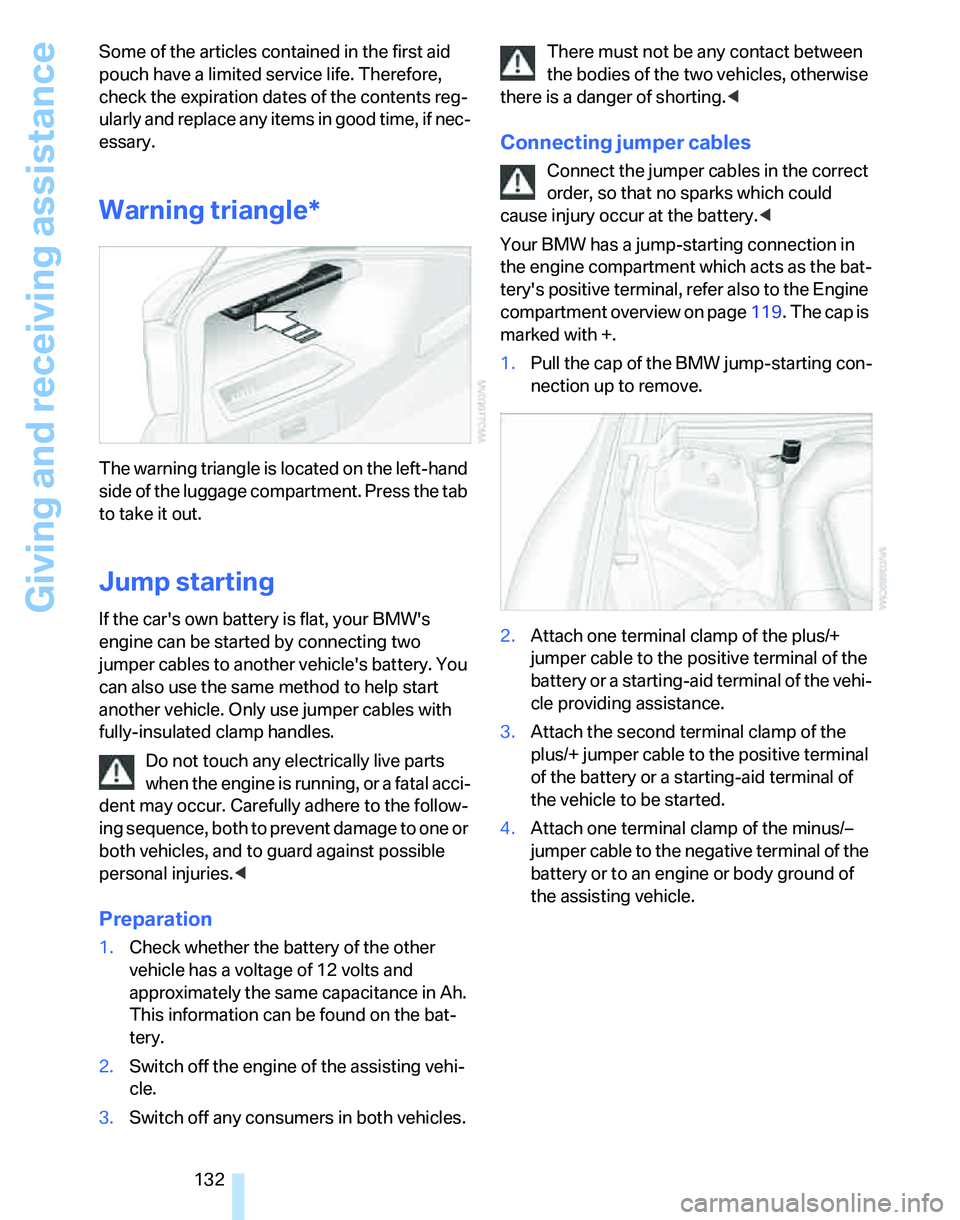
Warning triangle*
The warning triangle is located on the left-hand
side of the luggage compartment. Press the tab
to take it out.
Jump starting
If the car's own battery is flat, your BMW's
engine can be started by connecting two
jumper cables to another vehicle's battery. You
can also use the same method to help start
another vehicle. Only use jumper cables with
fully-insulated clamp handles.
Do not touch any electrically live parts
when the engine is running, or a fatal acci-
dent may occur. Carefully adhere to the follow-
ing sequence, both to prevent damage to one or
both vehicles, and to guard against possible
personal injuries.<
Preparation
1.Check whether the battery of the other
vehicle has a voltage of 12 volts and
approximately the same capacitance in Ah.
This information can be found on the bat-
tery.
2.Switch off the engine of the assisting vehi-
cle.
3.Switch off any consumers in both vehicles.There must not be any contact between
the bodies of the two vehicles, otherwise
there is a danger of shorting.<
Connecting jumper cables
Connect the jumper cables in the correct
order, so that no sparks which could
cause injury occur at the battery.<
Your BMW has a jump-starting connection in
the engine compartment which acts as the bat-
tery's positive terminal, refer also to the Engine
compartment overview on page119. The cap is
marked with +.
1.Pull the cap of the BMW jump-starting con-
nection up to remove.
2.Attach one terminal clamp of the plus/+
jumper cable to the positive terminal of the
battery or a starting-aid terminal of the vehi-
cle providing assistance.
3.Attach the second terminal clamp of the
plus/+ jumper cable to the positive terminal
of the battery or a starting-aid terminal of
the vehicle to be started.
4.Attach one terminal clamp of the minus/–
jumper cable to the negative terminal of the
battery or to an engine or body ground of
the assisting vehicle.
Page 157 of 166

Reference
At a glance
Controls
Driving tips
Mobility
155
Directional indicators, refer to
Turn signals48
Displacement, refer to Engine
data148
Display lighting, refer to
Instrument lighting78
Displays
– instrument cluster12
Displays and controls10
Disposal
– coolant121
– remote control battery27
– vehicle battery129
Distance control, refer to
Active cruise control53
Distance remaining to service,
refer to Service
requirements63
Distance warning, refer to
PDC Park Distance
Control67
Door key, refer to Integrated
key/remote control18
Door lock22
Door locking, confirmation
signals21
Doors, emergency
operation22
DOT Quality Grades114
Draft-free ventilation82,85
Drinks holders, refer to Cup
holders90
Drive mode46
Drive-off assistant71
Driving lamps, refer to Parking
lamps/low beams76
Driving notes98
Driving stability control
systems68
Driving through water99
Driving tips, refer to Driving
notes98
Dry air, refer to Cooling
function85
DSC Dynamic Stability
Control68
DTC Dynamic Traction
Control68
– indicator lamps68Dynamic Driving Control46
Dynamic Traction Control
DTC
– indicator lamps69
E
EBV Electronic brake-force
distribution68
Electrical malfunction
– door lock22
– fuel filler door106
– glass sunroof29
– panorama glass roof29
Electric seat adjustment32
Electronic brake-force
distribution68
Electronic oil level check119
Emergency call131
Emergency operation, refer to
Closing manually
– glass sunroof29
– panorama glass roof29
Emergency operation, refer to
Manual operation
– door lock22
– fuel filler door106
– transmission lock, automatic
transmission48
Emergency release
– luggage compartment lid
from inside24
Emergency services, refer to
Roadside Assistance131
Emissions test, refer to
Service requirements63
Energy-conscious driving,
refer to Energy Control60
Energy Control60
Engine
– breaking in98
– data148
– overheated, refer to Coolant
temperature59
– speed148
– starting43
– starting, convenient
access25
– switching off43Engine compartment119
Engine coolant, refer to
Coolant121
Engine oil
– adding120
– BMW Maintenance
System123
– checking level119
– intervals between changes,
refer to Service
requirements63
Engine output, refer to Engine
data148
Engine speed148
Engine starting, refer to
Starting the engine43
Environmentally friendly
driving, refer to Energy
Control60
Error messages, refer to
Check Control65
ESP Electronic Stability
Program, refer to DSC
Dynamic Stability
Control68
Event data recorders124
Exhaust system, refer to Hot
exhaust system98
Exterior mirrors37
– adjusting37
– automatic dimming
feature99
– automatic heating37
External audio device90
Eyes
– for tow-starting and towing
away133
– for tying down loads101
F
Failure messages, refer to
Check Control65
Failure of an electrical
consumer129
False alarm, refer to Avoiding
unintentional alarms25
Fastening safety belts, refer to
Safety belts36
Page 159 of 166

Reference
At a glance
Controls
Driving tips
Mobility
157
Homepage4
Hood118
Horn10
Hot exhaust system98
Hydraulic brake assist, refer to
Dynamic Brake Control68
Hydroplaning99
I
Ice warning59
Ignition42
– switched off42
– switched on42
Ignition key, refer to
Integrated key/remote
control18
Ignition key position 1, refer to
Radio readiness42
Ignition key position 2, refer to
Ignition on42
Ignition lock42
Indicator and warning
lamps13,136
Individual air distribution81
Individual settings, refer to
Personal Profile19
Initializing
– compass, refer to
Calibrating88
– Flat Tire Monitor FTM72
– glass sunroof29
Instrument cluster12
Instrument lighting78
Instrument panel, refer to
Cockpit10
Integrated key18
Integrated universal remote
control86
Interior lamps79
– remote control20
Interior motion sensor25
Interior rearview mirror37
– automatic dimming
feature99
Interior rearview mirror with
digital compass87
Interlock47Intermittent mode of the
wipers50
J
Jacking points129
Jumpering, refer to Jump
starting132
Jump starting132
K
Key, refer to Integrated key/
remote control18
Keyless Go, refer to
Convenient access25
Keyless opening and closing,
refer to Convenient
access25
Key Memory, refer to Personal
Profile19
Kick-down48
– automatic transmission with
Steptronic48
– sequential manual gearbox
SMG46
Knock control106
L
Lamps, refer to Parking lamps/
low beams76
Lamps and bulbs, replacing
bulbs125
Lap-and-shoulder safety
belt36
Lashing eyes, refer to
Securing cargo101
LATCH child-restraint fixing
system40
LEDs light-emitting
diodes125
Length, refer to
Dimensions149
License plate lamp, replacing
bulbs128
Light-emitting diodes
LEDs125
Lighter91Lighting
– instruments78
– lamps and bulbs125
– of the vehicle, refer to
Lamps76
Light switch76
Limit145
Loading
– securing cargo101
Load securing equipment,
refer to Securing cargo101
Lock buttons in the doors,
refer to Locking23
Locking
– adjusting confirmation
signal21
– from inside23
– from outside20
– without remote control, refer
to Convenient access25
Locking and unlocking doors
– from inside22
– from outside20
Low beams76
– automatic76
– replacing bulbs126
Lower back support, refer to
Lumbar support32
Luggage compartment
– capacity150
– convenient access26
– folding up the floor panel93
– lamp79
– opening from inside23
– opening from outside23
Luggage compartment lid23
– convenient access26
– unlocking with remote
control21
Luggage compartment lid,
refer to Tailgate23
Luggage compartment net,
refer to Securing cargo101
Luggage rack, refer to Roof-
mounted luggage rack101
Lumbar support32
Page 161 of 166
Reference
At a glance
Controls
Driving tips
Mobility
159
Parts and accessories, refer to
The individual vehicle5
Passenger-side mirror tilt
function37
Pathway lighting76
PDC Park Distance Control67
Personal Profile19
Placing a call, refer to
telephone owner's manual
Pollen
– refer to Microfilter/activated-
charcoal filter for automatic
climate control85
– refer to Microfilter for air
conditioner82
Power failure129
Power windows28
– safety switch28
Power windows, refer to
Windows27
Pressure, tires108
Pressure monitoring, tires71
– Flat Tire Monitor71
Protection function, refer to
Anti-trapping mechanism
– glass sunroof, electric29
– windows28
Providing medical assistance,
refer to First add pouch131
Puncture
– Flat Tire Monitor71
R
Radio key, refer to Integrated
key/Remote control18
Radio position, refer to Radio
readiness42
Radio readiness42
– switched off42
– switched on42
Rain sensor50
Reading lamps79
Rear lamps, refer to Tail
lamps127
– replacing bulbs128Rear seats
– adjusting head restraints34
– folding head restraint down
and up34
Rear turn signals
– replacing bulbs128
Rear ventilation85
Rearview mirror, refer to
Mirrors37
Rear window defroster81,85
Rear window roller blind, refer
to Roller sun blinds89
Rear window safety switch28
Rechargeable flashlight89
Recirculated-air mode81,84
Recirculation of air, refer to
Recirculated-air
mode81,84
Reclining seat, refer to
Backrest32
Refueling106
Releasing
– hood118
Remaining distance, refer to
Cruising range60
Remote control18
– battery renewal27
– convenient access25
– garage door opener86
– luggage compartment lid21
– malfunctions21,27
– service data123
Replacement remote
control18
Replacing bulbs, refer to
Lamps and bulbs125
Replacing tires, refer to New
wheels and tires116
Reporting an accident, refer to
Initiating an emergency
call131
Reporting safety defects6
Reserve warning, refer to Fuel
gauge60
Reservoir for washer
systems
50
Residual heat mode84Restraint systems
– for children39
– refer to Safety belts36
Reverse gear
– automatic transmission with
Steptronic48
– manual transmission45
– sequential manual gearbox
SMG45
Roadside Assistance131
Roadside parking lamps78
– replacing bulbs127
Roadworthiness test, refer to
Service requirements63
Roller blind
– sun blinds89
Roof load capacity150
Roof-mounted luggage
rack101
Rope, refer to Tow-starting,
towing away134
RSC Runflat System
Component, refer to Run-
Flat Tires116
Runflat System Component
RSC, refer to Run-Flat
Tires116
Run-Flat Tires116
– continuing driving with a
damaged tire72
– flat tire72
– new tires116
– replacing tires116
– tire pressures108
– winter tires117
Runflat Tyres, refer to Run-
Flat Tires116
S
Safety-belt height
adjustment36
Safety belts36
– damage36
– indicator lamp36
– reminder36
– sitting safely31