Page 174 of 394

�µ
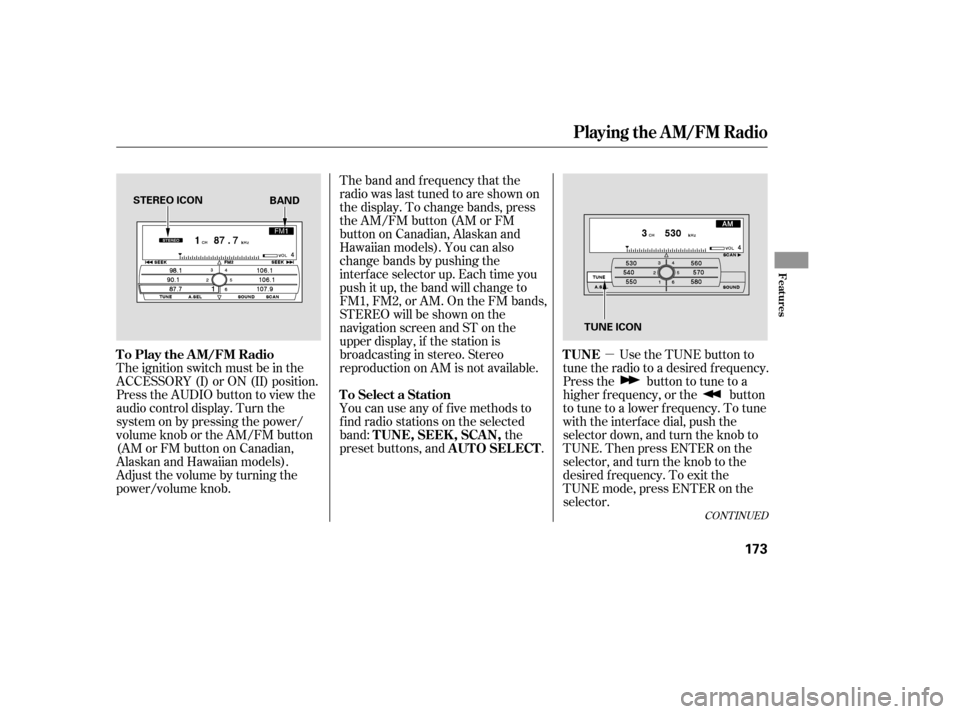
The band and f requency that the
radio was last tuned to are shown on
the display. To change bands, press
the AM/FM button (AM or FM
button on Canadian, Alaskan and
Hawaiian models). You can also
change bands by pushing the
interf ace selector up. Each time you
push it up, the band will change to
FM1, FM2, or AM. On the FM bands,
STEREO will be shown on the
navigation screen and ST on the
upper display, if the station is
broadcasting in stereo. Stereo
reproduction on AM is not available.
Use the TUNE button to
tune the radio to a desired f requency.
Press the button to tune to a
higher f requency, or the button
to tune to a lower f requency. To tune
with the interf ace dial, push the
selector down, and turn the knob to
TUNE. Then press ENTER on the
selector, and turn the knob to the
desired f requency. To exit the
TUNE mode, press ENTER on the
selector.
You can use any of f ive methods to
f ind radio stations on the selected
band:
the
preset buttons, and .
The ignition switch must be in the
ACCESSORY (I) or ON (II) position.
Press the AUDIO button to view the
audio control display. Turn the
system on by pressing the power/
volume knob or the AM/FM button
(AMorFMbuttononCanadian,
AlaskanandHawaiianmodels).
Adjust the volume by turning the
power/volume knob.
CONT INUED
TUNE
To Play the AM/FM Radio
To Select a StationTUNE,SEEK,SCAN, AUTO SELECT
Playing the AM/FM Radio
Features
173
STEREO ICON
TUNE ICON
BAND
Page 175 of 394

�µ�µ �µ
The SEEK f unction
searches up and down f rom the
current f requency to f ind a station
with a strong signal. To activate it,
press the or SEEK button,
then release it. You can also activate
SEEK by pushing the interf ace
selector to the right or lef t.
The SCAN f unction
samples all stations with strong
signals on the selected band. To
activate it, press the SCAN button,
then release it. To scan with the interf ace dial, push
the selector down, and then push it
to the right. You will see SCAN
f lashing on the screen.
Each preset button or
preset icon can store one f requency
onAMandtwofrequenciesonFM.
Repeat steps 1 through 3 to store a
total of six stations on AM and
twelve stations on FM.
The system will scan f or a station
with a strong signal. When it f inds
one, it will stop and play that station
f or about 10 seconds. If you do
nothing, the system will then scan
f or the next strong station and play it
f or 10 seconds. When it plays a
station that you want to listen to,
press the scan button again, or push
the interface selector to the right
again.
Press the preset button, and hold
it until you hear a beep. You can
also store f requencies with the
interf ace dial. Select the preset
icon you want to store the
f requency on, then press ENTER
on the interf ace selector, and hold
it f or more than 2 seconds. UsetheTUNE,SEEK,orSCAN
function to tune the radio to a
desired station. Select the desired band, AM or
FM. FM1 and FM2 let you store
two f requencies with each preset
button (icon).
4. 1.
2.
3.
To store a preset memory location:
SEEK
SCAN Preset
Playing the AM/FM Radio
174
SCAN ICON
Page 176 of 394

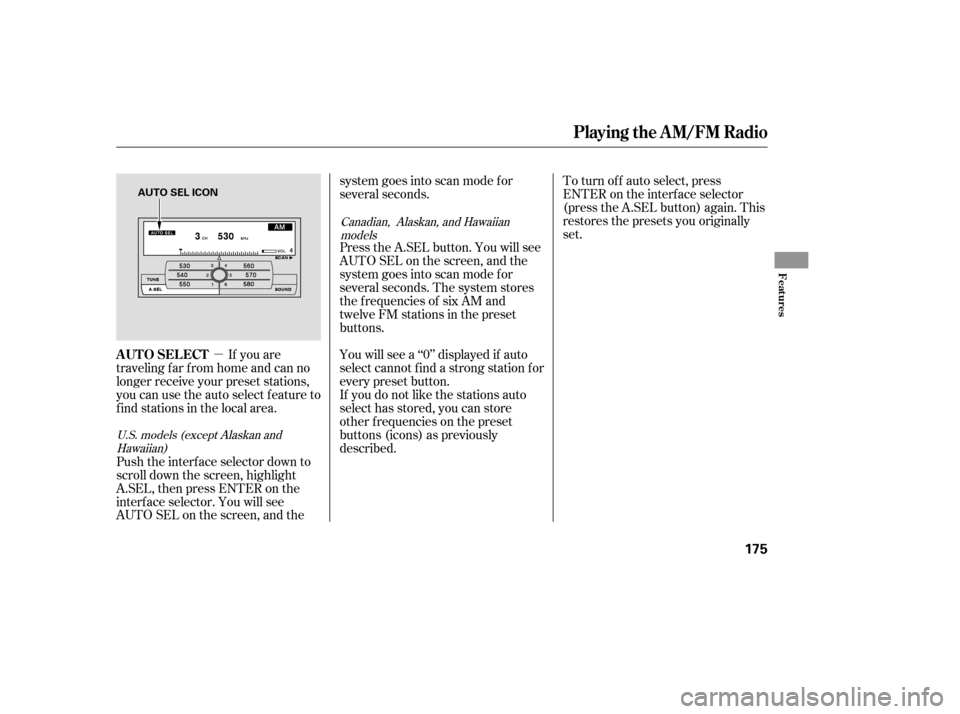
�µIf you are
traveling far from home and can no
longer receive your preset stations,
you can use the auto select feature to
find stations in the local area.
Push the interf ace selector down to
scroll down the screen, highlight
A.SEL, then press ENTER on the
interf ace selector. You will see
AUTO SEL on the screen, and the system goes into scan mode f or
several seconds.
Press the A.SEL button. You will see
AUTO SEL on the screen, and the
system goes into scan mode f or
several seconds. The system stores
the f requencies of six AM and
twelve FM stations in the preset
buttons.
You will see a ‘‘0’’ displayed if auto
select cannot f ind a strong station f or
every preset button.
If you do not like the stations auto
select has stored, you can store
other f requencies on the preset
buttons (icons) as previously
described.
To turn of f auto select, press
ENTER on the interf ace selector
(press the A.SEL button) again. This
restores the presets you originally
set.
U.S. models (except Alaskan and
Hawaiian) Canadian, Alaskan, and Hawaiian
models
AUTO SELECT
Playing the AM/FM Radio
Features
175
AUTO SEL ICON
Page 182 of 394
Playing t he XMSatellite Radio
Features
181
PRESET BUTTON
SCAN
BUTTON
DISPLAY/
MODE
BUTTON
SATELLITE RADIO BUTTON
AUDIO
DISPLAY
BUTTON
UPPER DISPLAY
INTERFACE DIAL
U.S. models (except Alaskan and Hawaiian)
POWER/
VOLUME
KNOBCATEGORY
BUTTONS TUNE
BUTTONS
Page 185 of 394
�µYoucanstoreupto12
preset channels using the six preset
buttons. Each button stores one
channel f rom the XM1 band and one
channel f rom the XM2 band.
To store a channel: Press the button or scroll
up by pushing the interf ace
selector up. Either XM1 or XM2
will be shown on the display. Use the TUNE or SCAN f unction
to tune to a desired channel.
In the category mode, only channels
within that category can be selected.
In the channel mode, all channels
can be selected. Pick the preset button you want
f or that channel. Press and hold
the button until you hear a beep.
Press the button or scroll
up again. The other XM band will
be shown. Store the next six
channels using steps 2 and 3.
Once a channel is stored, press and
release the proper preset button to
tune to it. Repeat steps 2 and 3 to store the
f irst six channels.
1. 2.
3.
4.
5.
Preset
Playing t he XMSatellite Radio
184
XM
BAND
MODE INDICATION
Page 191 of 394

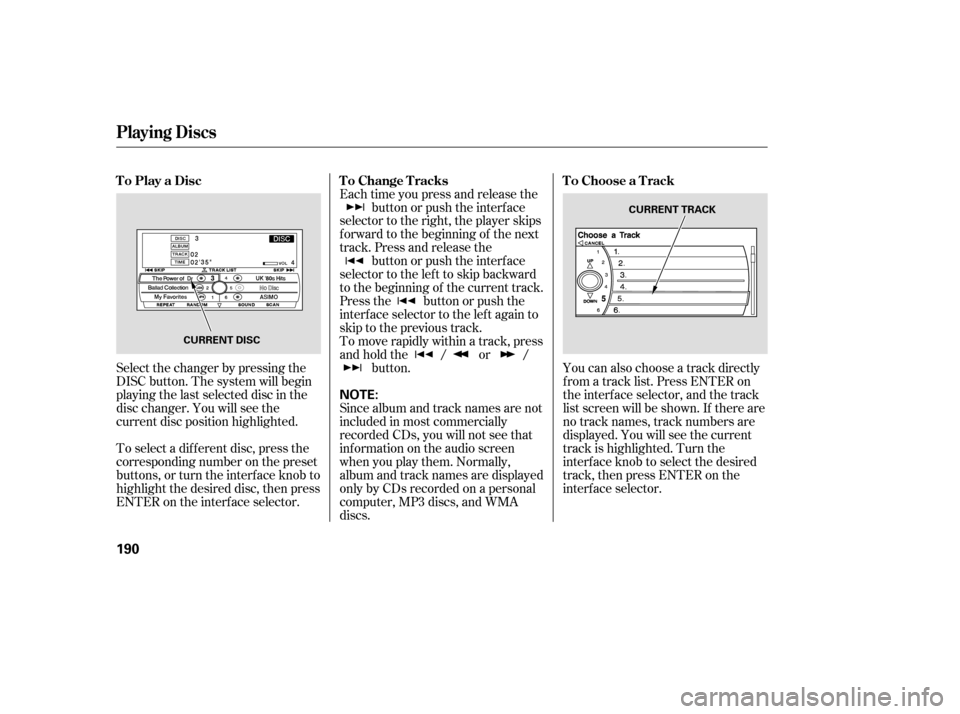
Select the changer by pressing the
DISC button. The system will begin
playing the last selected disc in the
disc changer. You will see the
current disc position highlighted.
To select a dif f erent disc, press the
corresponding number on the preset
buttons, or turn the interf ace knob to
highlight the desired disc, then press
ENTER on the interf ace selector.Each time you press and release the
button or push the interface
selector to the right, the player skips
f orward to the beginning of the next
track. Press and release the button or push the interface
selector to the left to skip backward
to the beginning of the current track.
Press the button or push the
interface selector to the left again to
skip to the previous track.
To move rapidly within a track, press
andholdthe / or / button. You can also choose a track directly
f rom a track list. Press ENTER on
the interf ace selector, and the track
list screen will be shown. If there are
no track names, track numbers are
displayed. You will see the current
track is highlighted. Turn the
interf ace knob to select the desired
track, then press ENTER on the
interf ace selector.
Since album and track names are not
included in most commercially
recorded CDs, you will not see that
inf ormation on the audio screen
when you play them. Normally,
album and track names are displayed
only by CDs recorded on a personal
computer, MP3 discs, and WMA
discs.
ToPlayaDisc
ToChangeTracksToChooseaTrack
Playing Discs
190
NOTE:
CURRENT DISC CURRENT TRACK
Page 196 of 394

To remove a different disc from the
changer,firstselectitbypressing
the corresponding number on the
preset button or turning the
interf ace knob, and pressing ENTER
on the interf ace selector. When that
disc begins playing, press the eject
button.
To eject all discs, press and hold the
eject button. To eject one disc, press and release
the eject button. You can also eject discs when the
ignition switch is of f : When you press the eject button
while listening to the radio, or with
the audio system turned of f , the disc
that was last selected is ejected.
Af ter that disc is ejected, pressing
the eject button again will eject the
next disc in numerical order. By
doing this six times, you can remove
all the discs f rom the changer.
To remove the disc that is currently
playing, press the eject button. You
will see ‘‘EJECT’’ in the upper display.
When you remove the disc f rom the
slot, the system automatically enters
the previous mode [AM, FM1, FM2,
or XM Satellite Radio (U.S. models
except Alaskan and Hawaiian)]. The
system also begins the load
sequence so you can load another
disc. If you do not load another disc,
the load sequence is cancelled, and
the system continues playing in the
previous mode.
If you do not remove the disc f rom
the slot, the system will reload the
disc af ter 15 seconds and put the
disc changer in pause mode. To
begin playing the disc, press the disc
button. Removing Discs f rom the
Changer
Playing Discs
Features
195
Page 199 of 394

�Û�Ý�´
�µ �´
�µ
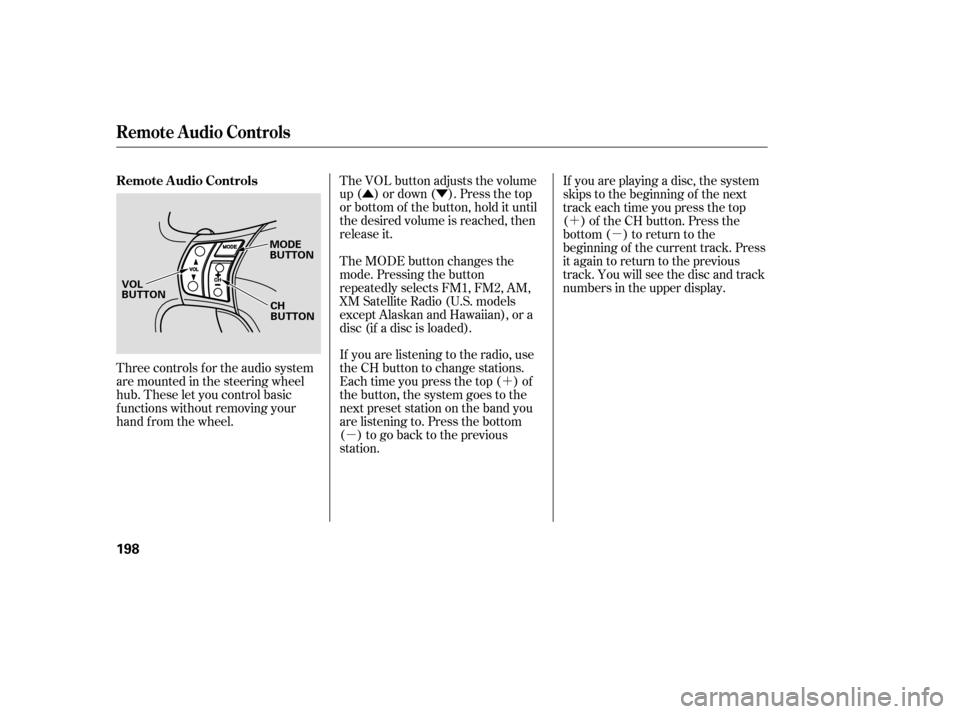
Three controls f or the audio system
are mounted in the steering wheel
hub. These let you control basic
f unctions without removing your
hand f rom the wheel. The VOL button adjusts the volume
up ( ) or down ( ). Press the top
or bottom of the button, hold it until
the desired volume is reached, then
release it.
If you are listening to the radio, use
the CH button to change stations.
Each time you press the top ( ) of
the button, the system goes to the
next preset station on the band you
are listening to. Press the bottom
( ) to go back to the previous
station.If you are playing a disc, the system
skips to the beginning of the next
track each time you press the top
( ) of the CH button. Press the
bottom ( ) to return to the
beginning of the current track. Press
it again to return to the previous
track. You will see the disc and track
numbers in the upper display.
The MODE button changes the
mode. Pressing the button
repeatedly selects FM1, FM2, AM,
XM Satellite Radio (U.S. models
except Alaskan and Hawaiian), or a
disc (if a disc is loaded).
Remote Audio Controls
Remote Audio Controls
198
MODE
BUTTON
CH
BUTTON
VOL
BUTTON