Page 109 of 343

’04 Solara_U (L/O 0402)
101
2004 SOLARA from Feb. ’04 Prod. (OM33640U)
For owners in Canada
The symbol on a child restraint system
indicates the presence of a lower connec-
tor system.
CHILD RESTRAINT SYSTEM
INSTALLATION
Ty p e A —
1. Widen the clearance between the
seat cushion and seatback a little
and confirm the position of the low-
er anchorages near the button on
the seatback.
2. Latch the hooks of lower straps onto
the anchorages and tighten the lower
straps.
Ty p e B —
1. Widen the clearance between the
seat cushion and seatback a little
and confirm the position of the low-
er anchorages near the button on
the seatback.
2. Latch the buckles onto the anchor-
ages.
If your child restraint system has a top
strap, it should be anchored. (For the
installation of the top strap, see “—Using
a top strap” on page 96 in this Section.)For installation details, refer to the instruc-
tion manual equipped with each product.
CAUTION
�When using the lower anchorages
for the child restraint system, be
sure that there are no irregular ob-
jects around the anchorages or that
the seat belt is not caught.
�Push and pull the child restraint
system in different directions to be
sure it is secure. Follow all the
installation instructions provided by
its manufacturer.
�Do not install a child restraint sys-
tem on the rear seat if it interferes
with the lock mechanism of the
front seats. Otherwise, the child or
front seat occupant(s) may be killed
or seriously injured in case of sud-
den braking or a collision.
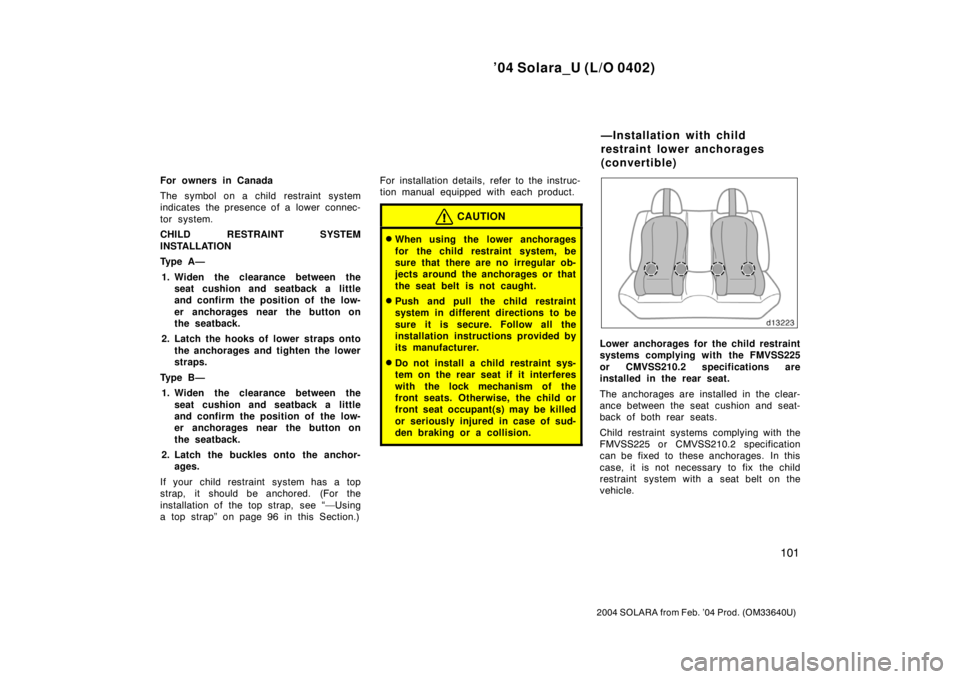
Lower anchorages for the child restraint
systems complying with the FMVSS225
or CMVSS210.2 specifications are
installed in the rear seat.
The anchorages are installed in the clear-
ance between the seat cushion and seat-
back of both rear seats.
Child restraint systems complying with the
FMVSS225 or CMVSS210.2 specification
can be fixed to these anchorages. In this
case, it is not necessary to fix the child
restraint system with a seat belt on the
vehicle.
—Installation with child
restraint lower anchorages
(convertible)
Page 110 of 343
’04 Solara_U (L/O 0402)
102
2004 SOLARA from Feb. ’04 Prod. (OM33640U)
Canada only
Ty p e ACanada only
Ty p e B
For owners in Canada
The symbol on a child restraint system
indicates the presence of a lower connec-
tor system.
CHILD RESTRAINT SYSTEM
INSTALLATION
Ty p e A —
1. Widen the clearance between the
seat cushion and seatback a little
and confirm the position of the low-
er anchorages near the button on
the seatback.
2. Latch the hooks of lower straps onto
the anchorages and tighten the lower
straps.
Ty p e B —
1. Widen the clearance between the
seat cushion and seatback a little
and confirm the position of the low-
er anchorages near the button on
the seatback.
2. Latch the buckles onto the anchor-
ages.
If your child restraint system has a top
strap, it should be anchored. (For the
installation of the top strap, see “—Using
a top strap” on page 98 in this Section.)
Page 111 of 343
’04 Solara_U (L/O 0402)
103
2004 SOLARA from Feb. ’04 Prod. (OM33640U)
For installation details, refer to the instruc-
tion manual equipped with each product.
CAUTION
�When using the lower anchorages
for the child restraint system, be
sure that there are no irregular ob-
jects around the anchorages or that
the seat belt is not caught.
�Push and pull the child restraint
system in different directions to be
sure it is secure. Follow all the
installation instructions provided by
its manufacturer.
�Do not install a child restraint sys-
tem on the rear seat if it interferes
with the lock mechanism of the
front seats. Otherwise, the child or
front seat occupant(s) may be killed
or seriously injured in case of sud-
den braking or a collision.