Page 172 of 342

164
2004 L/C100 from Aug ’03 Prod. (OM60A04U)
SCAN button
Radio
You can either scan all the frequencies on
a band or scan only the preset stations
for that band.
To scan the preset stations:
Push and hold “SCAN” until you hear a
beep. The radio will tune in the next pres-
et station up the band, stay there for 5
seconds, and then move to the next pre-
set station. To select a station, push
“SCAN” again.
To scan all the frequencies:
Quickly push and release “SCAN”. If you
hear a beep, you held the button too long,
and the radio will scan the preset sta-
tions. The radio will find the next station
up the station band, stay there for 5 se-
conds, and then scan again. To select a
station, push “SCAN” again.
Compact Disc Player
There are two scan features—you can ei-
ther scan the tracks on a specific disc or
scan the first tracks of all the discs in the
player.Scanning the tracks on a disc:
Quickly push and release “SCAN”. “SCAN”
will appear on the display and the player
will scan all the tracks on the disc you
are listening to. If you hear a beep, you
held the button too long, and the player
will scan the first track of all the discs in
the player. To select a track, push “SCAN”
again. If the player scanned all the tracks
on the disc, it will stop scanning.
Scanning the first track of all the discs in
the player:
Push “SCAN” until you hear a beep.
“
·SCAN” will appear on the display
and the player will perform the first track
of the next disc. To select a disc, push
the “SCAN” again. If the player has
scanned all the di scs, it will stop scan-
ning.
SEEK TRACK button
Radio
In the seek mode, the radio finds and
plays the next station up or down the
station band.
To seek a station, quickly push and re-
lease the “ �” or “ �”. Do this again to
find another station. Cassette Player
By using this button, you can skip up or
down to a different track.
You can skip up to nine tracks at a time.
Push the right or left side of the button.
“FF 1” or “REW 1” will appear on the
display.
Next, push either side of the “SEEK
TRACK” button until the number on the
display reaches the number of tracks you
want to skip. If you push the button ten
times, the skip feature will be turned off.
When counting the number of tracks you
want to rewind, remember to count the
current track as well. For example, if you
want to rewind to a song that is two be-
fore the song you are listening to, push
on the left side of the button until “REW
3” appears on the display.
If you have pushed the track button more
than you wanted to, push the other side
of the button. The track number will be
reduced.
The track number you select is not valid
if it is higher than the number of tracks
remaining on the current cassette side.
�After the beginning of the tape is
reached, the player will automatically
start playing the same side.
Page 178 of 342

170
2004 L/C100 from Aug ’03 Prod. (OM60A04U)
Rear seat audio system
17c529
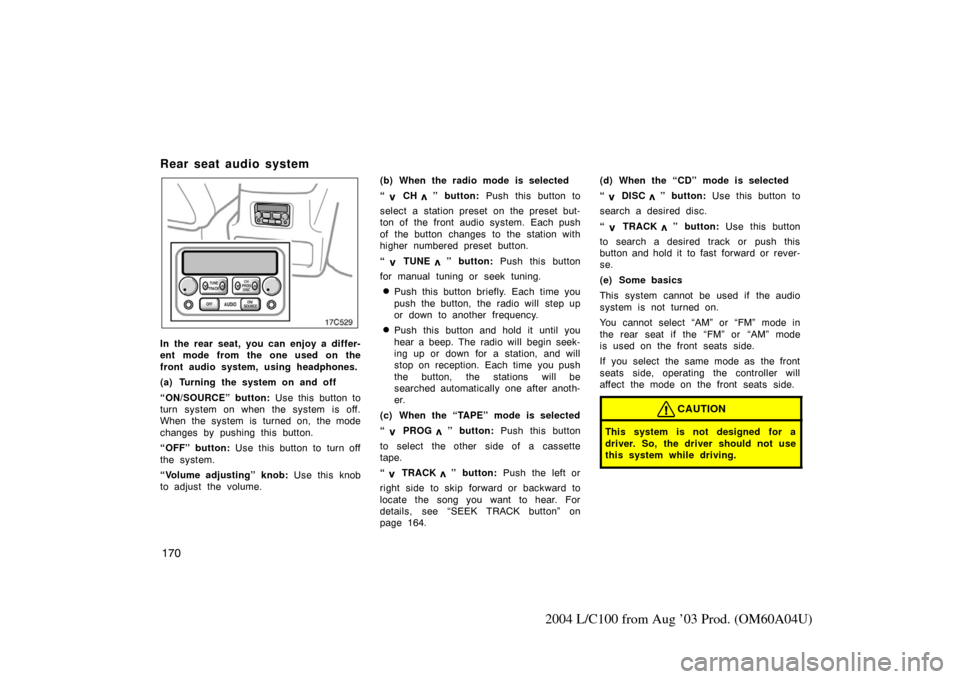
In the rear seat, you can enjoy a differ-
ent mode from the one used on the
front audio system, using headphones.
(a) Turning the system on and off
“ON/SOURCE” button: Use this button to
turn system on when the system is off.
When the system is turned on, the mode
changes by pushing this button.
“OFF” button: Use this button to turn off
the system.
“Volume adjusting” knob: Use this knob
to adjust the volume. (b) When the radio mode is selected
“
CH ” button:
Push this button to
select a station preset on the preset but-
ton of the front audio system. Each push
of the button changes to the station with
higher numbered preset button.
“
TUNE ” button: Push this button
for manual tuning or seek tuning.
�Push this button briefly. Each time you
push the button, the radio will step up
or down to another frequency.
�Push this button and hold it until you
hear a beep. The radio will begin seek-
ing up or down for a station, and will
stop on reception. Each time you push
the button, the stations will be
searched automatically one after anoth-
er.
(c) When the “TAPE” mode is selected
“
PROG ” button: Push this button
to select the other side of a cassette
tape.
“
TRACK ” button: Push the left or
right side to skip forward or backward to
locate the song you want to hear. For
details, see “SEEK TRACK button” on
page 164. (d) When the “CD” mode is selected
“
DISC ” button:
Use this button to
search a desired disc.
“
TRACK ” button: Use this button
to search a desired track or push this
button and hold it to fast forward or rever-
se.
(e) Some basics
This system cannot be used if the audio
system is not turned on.
You cannot select “AM” or “FM” mode in
the rear seat if the “FM” or “AM” mode
is used on the front seats side.
If you select the same mode as the front
seats side, operating the controller will
affect the mode on the front seats side.
CAUTION
This system is not designed for a
driver. So, the driver should not use
this system while driving.
Page 179 of 342

171
2004 L/C100 from Aug ’03 Prod. (OM60A04U)
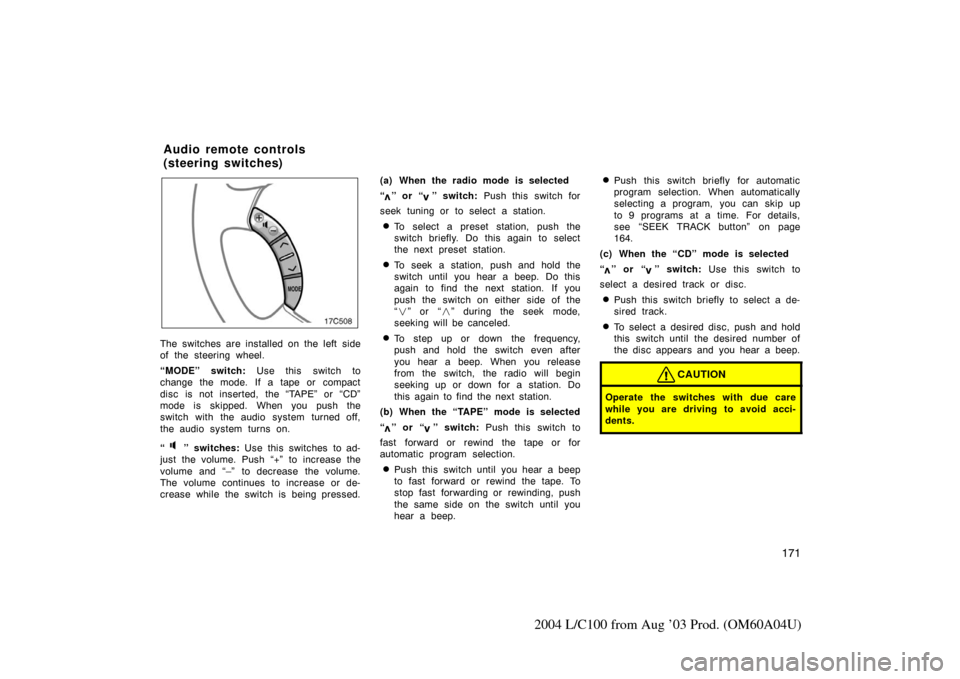
The switches are installed on the left side
of the steering wheel.
“MODE” switch: Use this switch to
change the mode. If a tape or compact
disc is not inserted, the “TAPE” or “CD”
mode is skipped. When you push the
switch with the audio system turned off,
the audio system turns on.
“
” switches: Use this switches to ad-
just the volume. Push “+” to increase the
volume and “–” to decrease the volume.
The volume continues to increase or de-
crease while the switch is being pressed. (a) When the radio mode is selected
“
” or “” switch:
Push this switch for
seek tuning or to select a station.
�To select a preset station, push the
switch briefly. Do this again to select
the next preset station.
�To seek a station, push and hold the
switch until you hear a beep. Do this
again to find the next station. If you
push the switch on either side of the
“ � ” or “ �” during the seek mode,
seeking will be canceled.
�To step up or down the frequency,
push and hold the switch even after
you hear a beep. When you release
from the switch, the radio will begin
seeking up or down for a station. Do
this again to find the next station.
(b) When the “TAPE” mode is selected
“
” or “” switch: Push this switch to
fast forward or rewind the tape or for
automatic program selection.
�Push this switch until you hear a beep
to fast forward or rewind the tape. To
stop fast forwarding or rewinding, push
the same side on the switch until you
hear a beep.
�Push this switch briefly for automatic
program selection. When automatically
selecting a program, you can skip up
to 9 programs at a time. For details,
see “SEEK TRACK button” on page
164.
(c) When the “CD” mode is selected
“
” or “” switch: Use this switch to
select a desired track or disc.
�Push this switch briefly to select a de-
sired track.
�To select a desired disc, push and hold
this switch until the desired number of
the disc appears and you hear a beep.
CAUTION
Operate the switches with due care
while you are driving to avoid acci-
dents.
Audio remote controls
(steering switches)
Page 194 of 342
186
2004 L/C100 from Aug ’03 Prod. (OM60A04U)
Clock
The digital clock indicates the time.
The key must be in the “ACC” or “ON”
position.
To reset the hour: Push the “H” button.
To reset the minutes: Push the “M” button.
If quick adjustment to a full hour is de-
sired, push the “:00” button.For example, if the “:00” button is de-
pressed when the time is between
1:01—1:29, the time will change to 1:00.
If the time is between 1:30—1:59, the
time will change to 2:00.
If the electrical power source has been
disconnected from the clock, the time dis-
play will automatically be set to 1:00 (one
o’clock).
When the instrument panel lights are
turned on, the brightness of the time in-
dication will be reduced.
Outside temperature display
The outside temperature display indi-
cates the outside air temperature.
The key must be in the “ON” position.
The display indicates between the range
of –22
°F and 122 °F.