2004 SUBARU IMPREZA WRX Switch
[x] Cancel search: SwitchPage 42 of 491
1-15
Seat, seatbelt and SRS airbags
– CONTINUED –
!Automatic/Emergency Locking Retrac- tor (A/ELR)
Each passenger’s seatbelt has an Automatic/Emer-
gency Locking Retractor (A/ELR). The Automatic/
Emergency Locking Retractor normally functions as
an Emergency Locking Retractor (ELR). The A/ELR
has an additional locking mode “Automatic Locking
Retractor (ALR) mode” intended to secure a child re-
straint system. When the seatbelt is once drawn out
completely and is then retracted even slightly, the re-
tractor locks the seatbelt in that position and the seat-
belt cannot be extended. As the belt is rewinding,
clicks will be heard which indicate the retractor func-
tions as an ALR. When the seatbelt is retracted fully,
the ALR mode is released.
When securing a child restraint system on the rear
seats by the use of the seatbelt, the seatbelt must be
changed over to the Automatic Locking Retractor (ALR) mode.
When the child restraint system is removed, make
sure that the seatbelt retracts fully and the retractor re-
turned to the Emergency Locking Retractor (ELR)
mode.
For instructions on how to convert the retractor to the
ALR mode and restore it to the ELR mode, see the
“Child restraint systems” section in this chapter. !
Seatbelt warning light and chime
Your vehicle is equipped with a seatbelt warning de-
vice at the driver’s seat, as required by current safety
standards.
This device causes the seatbelt warning light on the
instrument panel to light up for about six seconds
when the ignition switch is turned to “ON” to remind the
driver to wear the seatbelt. If the driver’s seatbelt is not
fastened, a warning chime sounds at the same time. ! Fastening the seatbelt
"Never use a belt that is twisted or reversed. In
an accident, this can increase the risk or sever-
ity of injury. " Keep the lap belt as low as possible on your
hips. In a collision, this spreads the force of the
lap belt over stronger hip bones instead of
across the weaker abdomen. " Seatbelts provide maximum restraint when
the occupant sits well back and upright in the
seat. To reduce the risk of sliding under the
seatbelt in a collision, the front seatbacks
should be always used in the upright position
while the vehicle is running. If the front seat-
Page 56 of 491
1-29
Seat, seatbelt and SRS airbags
– CONTINUED –
your SUBARU dealer.
! System monitors
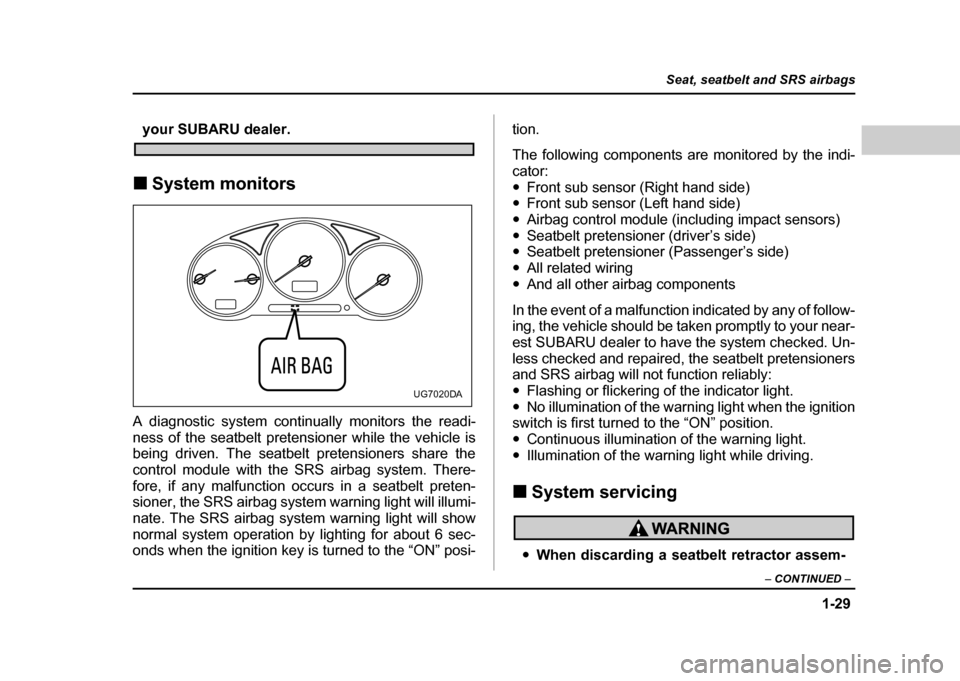
A diagnostic system continually monitors the readi-
ness of the seatbelt pretensioner while the vehicle is
being driven. The seatbelt pretensioners share the
control module with the SRS airbag system. There-
fore, if any malfunction occurs in a seatbelt preten-
sioner, the SRS airbag system warning light will illumi-
nate. The SRS airbag system warning light will show
normal system operation by lighting for about 6 sec-
onds when the ignition key is turned to the “ON” posi- tion.
The following components are monitored by the indi- cator:"
Front sub sensor (Right hand side)
" Front sub sensor (Left hand side)
" Airbag control module (including impact sensors)
" Seatbelt pretensioner (driver’s side)
" Seatbelt pretensioner (Passenger’s side)
" All related wiring
" And all other airbag components
In the event of a malfunction indicated by any of follow-
ing, the vehicle should be taken promptly to your near-
est SUBARU dealer to have the system checked. Un-
less checked and repaired, the seatbelt pretensioners
and SRS airbag will not function reliably: " Flashing or flickering of the indicator light.
" No illumination of the warning light when the ignition
switch is first turned to the “ON” position." Continuous illumination of the warning light.
" Illumination of the warning light while driving.
! System servicing
"When discarding a seatbelt retractor assem-
UG7020DA
Page 87 of 491
1-60
Seat, seatbelt and SRS airbags
The SRS airbag can function only when the ignition
switch is in the “ON” position.
If the front sub sensors inside the both front fenders
and the impact sensors in the airbag control module
detect a certain predetermined amount of force during
a frontal collision, the control module sends signals to
the frontal airbag modules instructing them to inflate
the SRS frontal airbags. Then both airbag modules
produce gas, which instantly inflates driver’s and pas-
senger’s SRS frontal airbags. After the deployment,
the SRS airbags immediately start to deflate so that
the driver’s vision is not obstructed. The time required
from detecting impact to the deflation of the SRS air-
bag after deployment is shorter than the blink of an eye.
The front passenger’s SRS frontal airbag deploys to-
gether with driver’s SRS frontal airbag even when no
one occupies the front passenger’s seat.
Although it is highly unlikely that the SRS airbag would
activate in a non-accident situation, should it occur,
the SRS airbag will deflate quickly, not obscuring vi-
sion and will not interfere with the driver’s ability to
maintain control of the vehicle.
When the SRS airbag deploys, a sudden, fairly loud
inflation noise will be heard and some smoke will be
released. These occurrences are normal result of the
deployment. This smoke does not indicate a fire in the vehicle.
Do not touch the SRS airbag system compo-
nents around the steering wheel and dash-
board with bare hands right after deployment.
Doing so can cause burns because the compo-
nents can be very hot as a result of deployment.
The SRS frontal airbag is designed to deploy in the
event of an accident involving a moderate to severe
frontal collision. It is basically not designed to deploy
in lesser frontal impacts because the necessary pro-
tection can be achieved by the seatbelt alone. Also, it
is basically not designed to deploy in side or rear im-
pacts or in roll-over accidents because deployment of
the SRS frontal airbag would not help the occupant in
those situations. The SRS airbag is designed to func-
tion on a one-time-only basis.
SRS airbag deployment depends on the level of force
experienced in the passenger compartment during a
collision. That level differs from one type of collision to
another, and it may have no bearing on the visible
Page 95 of 491
1-68
Seat, seatbelt and SRS airbags
C) After deployment, SRS side airbag starts to deflate im-
mediately.
The SRS side airbag can function only when the igni-
tion switch is in the “ON” position.
The driver’s and front passenger’s SRS side airbags
deploy independently of each other since each has its
own impact sensor. Also, the SRS side airbag deploys
independently of the frontal airbags in the steering
wheel and instrument panel.
An impact sensor is incorporated into each of the ve-
hicle’s center pillars. If either sensor detects a certain
predetermined amount of force during a side impact
collision, the control module sends a signal to the side
airbag module on the impacted side of the vehicle, in-
structing it to inflate the SRS side airbag. Then the
side airbag module produces gas, which instantly in-
flates the SRS side airbag. After the deployment, the
SRS side airbag immediately starts to deflate. The
time required from detecting impact to the deflation of
the SRS side airbag after deployment is shorter than
the blink of an eye.
The SRS side airbag deploys even when no one occu-
pies the seat on the side on which an impact is ap-
plied. When the SRS side airbag deploys, a sudden, fairly
loud inflation noise will be heard and some smoke will
be released. These occurrences are normal result of
the deployment. This smoke does not indicate a fire in
the vehicle.
Do not touch the SRS side airbag system com-
ponents around the front seatback with bare
hands right after deployment. Doing so can
cause burns because the components can be
very hot as a result of deployment.
The SRS side airbag is designed to deploy in the event
of an accident involving a moderate to severe side im-
pact collision. It is basically not designed to deploy in
lesser side impact. Also, it is basically not designed to
deploy in frontal or rear impacts because SRS side air-
bag deployment would not help the occupant in those
situations.
Each SRS side airbag is designed to function on a one-time-only basis.
SRS side airbag deployment depends on the level of
force experienced in the passenger compartment dur-
ing a side impact collision. That level differs from one
Page 100 of 491
1-73
Seat, seatbelt and SRS airbags
– CONTINUED –
"Airbag control module (including impact sensors)
" Frontal airbag module (Driver’s side)
" Frontal airbag module (Passenger’s side)
" Side airbag sensor (Driver’s side — if equipped)
" Side airbag sensor (Passenger’s side — if
equipped) " Side airbag module (Driver’s side — if equipped)
" Side airbag module (Passenger’s side — if
equipped)" Seatbelt pretensioner (Driver’s side)
" Seatbelt pretensioner (Passenger’s side)
" All related wiring
In the event of a malfunction indicated by any of follow-
ing, the vehicle should be taken promptly to your near-
est SUBARU dealer to have the system checked. Un-
less checked and repaired, the SRS airbags will not
function reliably: " Flashing or flickering of the indicator light.
" No illumination of the warning light when the ignition
switch is first turned to the “ON” position." Continuous illumination of the warning light.
" Illumination of the warning light while driving. !
SRS airbag system servicing
"When discarding an airbag module or scrap-
ping the entire car damaged by a collision, con-
sult your SUBARU dealer." The SRS airbag has no user-serviceable
parts. Do not use electrical test equipment on
any circuit related to the SRS airbag system.
For required servicing of the SRS airbag, see
your nearest SUBARU dealer. Tampering with
or disconnecting the system’s wiring could re-
sult in accidental inflation of the SRS airbag or
could make the system inoperative, which may
result in serious injury. The wiring harnesses of
the SRS airbag system are covered with yellow
insulation and system connectors are yellow
for easy identification.
If you need service or repair in areas listed be-
low, we recommend that you have an autho-
rized SUBARU dealer perform the work. The
SRS airbag control module, impact sensors
and airbag modules are stored in these areas.
Page 104 of 491

2-1
2
Keys and doors
Keys ............................................................... 2-2 Key number ....................................................... 2-3
Door locks ..................................................... 2-3 Locking and unlocking from the outside ........ 2-3
Locking and unlocking from the inside .......... 2-4
Power door locking switches ...................... 2-5
Remote keyless entry system ..................... 2-6 Locking the doors ............................................. 2-7
Unlocking the doors ......................................... 2-8
Illuminated entry ............................................... 2-8
Vehicle finder function ..................................... 2-8
Sounding a panic alarm ................................... 2-9
Selecting audible signal operation .................. 2-9
Replacing the battery ....................................... 2-9
Replacing lost transmitters .............................. 2-10
Security system (if equipped) ..................... 2-14 System operation .............................................. 2-14
Arming the system ............................................ 2-15
Disarming the system ....................................... 2-17
Valet mode ......................................................... 2-17
Passive arming .................................................. 2-18
Child safety locks ......................................... 2-21
Windows ........................................................ 2-22 Power windows ................................................. 2-22
Trunk lid (Sedan) .......................................... 2-25 To open and close the trunk lid from outside 2-25
To open the trunk lid from inside .................... 2-26
To cancel the trunk lid release ........................ 2-26
Internal trunk lid release handle ...................... 2-26
Rear gate (Wagon) ........................................ 2-29 Moonroof (if equipped) ................................. 2-31
Tilt function ....................................................... 2-31
Sliding function ................................................. 2-31
Sun shades ........................................................ 2-33
Page 105 of 491
2-2
Keys and doors
Keys and doorsKeys
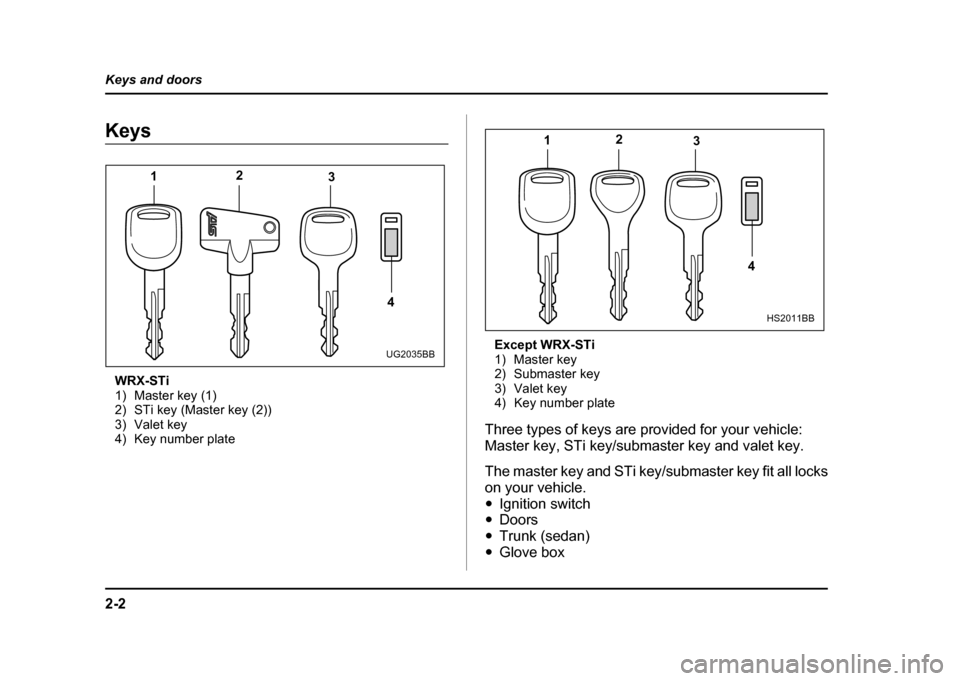
WRX-STi
1) Master key (1)
2) STi key (Master key (2))
3) Valet key
4) Key number plate Except WRX-STi
1) Master key
2) Submaster key
3) Valet key
4) Key number plate
Three types of keys are provided for your vehicle:
Master key, STi key/submaster key and valet key.
The master key and STi key/submaster key fit all locks
on your vehicle." Ignition switch
" Doors
" Trunk (sedan)
" Glove box
1 2
3
4
UG2035BB
1 2
3
4
HS2011BB
Page 106 of 491
2-3
Keys and doors
– CONTINUED –
The valet key fits only the ignition switch and driver’s
door lock. You can keep the trunk and glove box
locked when you leave your vehicle and valet key at a
parking facility.
Do not attach a large key holder or key case to
either key. If it banged against your knees while
you were driving, it could turn the ignition switch from the ON position to the ACC or OFF
position, thereby stopping the engine.
! Key number
The key number is stamped on the metal plate at-
tached to the key set. Write down the key number and
keep it in another safe place, not in the vehicle. This
number is needed to make a replacement key if you
lose your key or lock it inside the vehicle.
Door locks ! Locking and unlocking from the out-
side
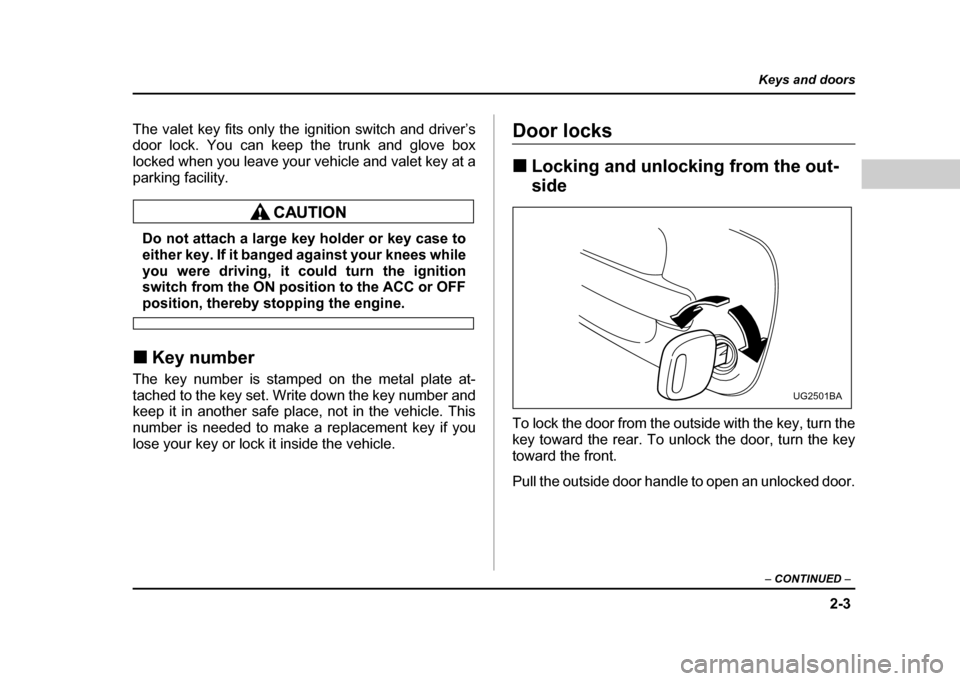
To lock the door from the outside with the key, turn the
key toward the rear. To unlock the door, turn the key
toward the front.
Pull the outside door handle to open an unlocked door.
UG2501BA