Page 363 of 491

9-12
In case of emergency
surface of the wheel and hub with a cloth.
12.Put on the spare tire. Replace the wheel nuts.
Tighten them by hand.
Do not use oil or grease on the wheel studs or
nuts when the spare tire is installed. This could
cause the nuts to become loose and lead to an
accident.
13.Turn the jack handle counterclockwise to lower the
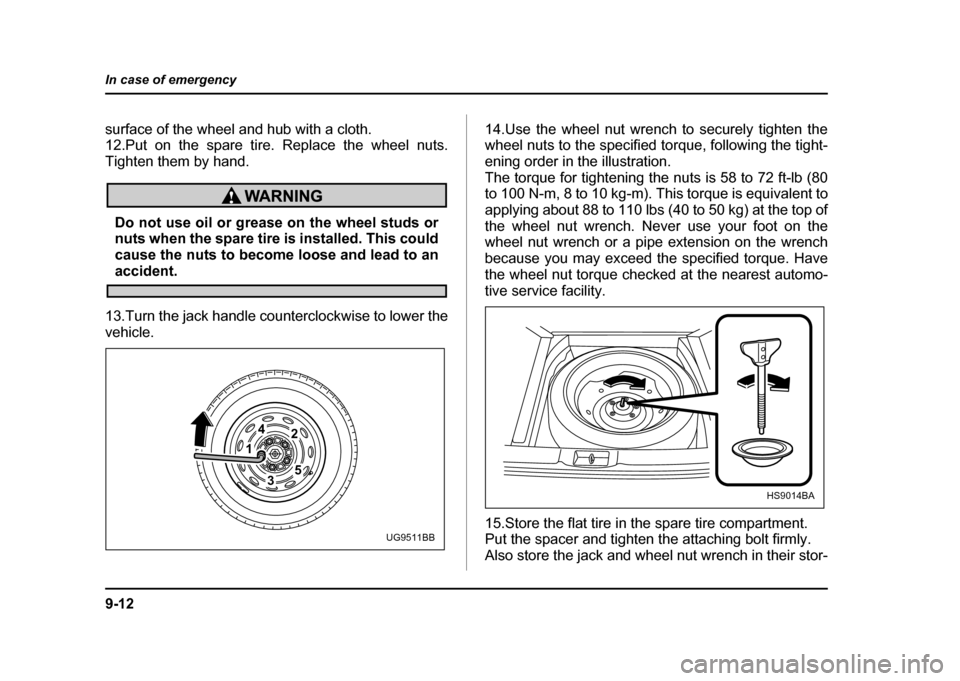
vehicle. 14.Use the wheel nut wrench to securely tighten the
wheel nuts to the specified torque, following the tight-
ening order in the illustration.
The torque for tightening the nuts is 58 to 72 ft-lb (80
to 100 N-m, 8 to 10 kg-m). This torque is equivalent to
applying about 88 to 110 lbs (40 to 50 kg) at the top of
the wheel nut wrench. Never use your foot on the
wheel nut wrench or a pipe extension on the wrench
because you may exceed the specified torque. Have
the wheel nut torque checked at the nearest automo-
tive service facility.
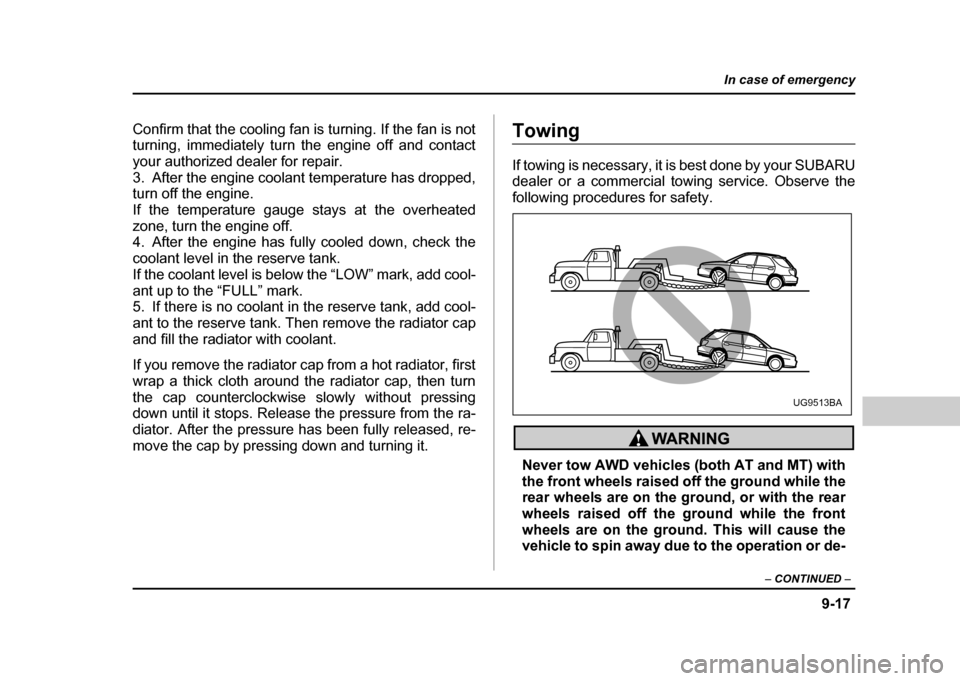
15.Store the flat tire in the spare tire compartment.
Put the spacer and tighten the attaching bolt firmly.
Also store the jack and wheel nut wrench in their stor-
1
42
53
UG9511BB
HS9014BA
Page 364 of 491
9-13
In case of emergency
– CONTINUED –
age locations.
After placing the jack in its storage location, turn the
jackscrew clockwise by hand until it becomes too hard
to turn. Then, tighten it by an additional 1/4 – 1/3 of a
turn using a screwdriver or the jack handle. Unless the
jack is properly secured, it may rattle while the vehicle is moving.
Never place a tire or tire changing tools in the
passenger compartment after changing
wheels. In a sudden stop or collisions, loose
equipment could strike occupants and cause injury. Store the tire and all tools in the proper
place.
HG9019BA
Page 368 of 491

9-17
In case of emergency
– CONTINUED –
Confirm that the cooling fan is turning. If the fan is not
turning, immediately turn the engine off and contact
your authorized dealer for repair.
3. After the engine coolant temperature has dropped, turn off the engine.
If the temperature gauge stays at the overheated
zone, turn the engine off.
4. After the engine has fully cooled down, check the
coolant level in the reserve tank.
If the coolant level is below the “LOW” mark, add cool-
ant up to the “FULL” mark.
5. If there is no coolant in the reserve tank, add cool-
ant to the reserve tank. Then remove the radiator cap
and fill the radiator with coolant.
If you remove the radiator cap from a hot radiator, first
wrap a thick cloth around the radiator cap, then turn
the cap counterclockwise slowly without pressing
down until it stops. Release the pressure from the ra-
diator. After the pressure has been fully released, re-
move the cap by pressing down and turning it.Towing
If towing is necessary, it is best done by your SUBARU
dealer or a commercial towing service. Observe the
following procedures for safety.
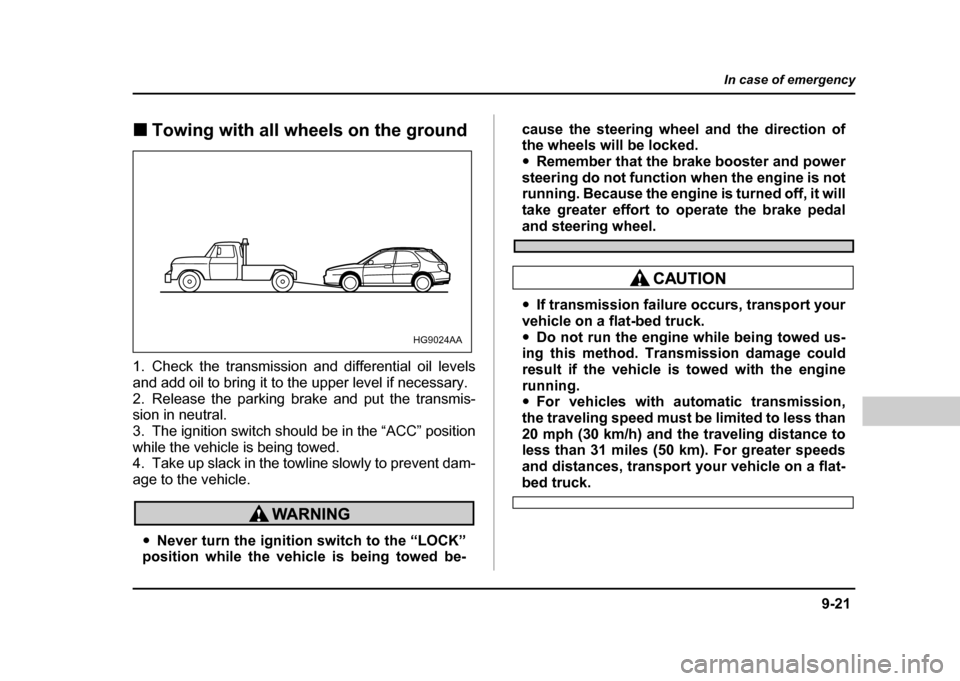
Never tow AWD vehicles (both AT and MT) with
the front wheels raised off the ground while the
rear wheels are on the ground, or with the rear
wheels raised off the ground while the front
wheels are on the ground. This will cause the
vehicle to spin away due to the operation or de-
UG9513BA
Page 369 of 491
9-18
In case of emergency
terioration of the center differential.
! Towing and tie-down hooks
The towing hooks should be used only in an emergen-
cy (e.g., to free a stuck vehicle from mud, sand or
snow).
Front towing hook:
1. Take out the towing hook, screwdriver and wheel
nut wrench from the on board tool bag.
2. Insert a flat-head screwdriver into the slot at point A
on the front passenger side fog light cover, then use it
to pry the cover upward. The tabs at point A on the fog light cover will come free of the bumper.
3. Pull the entire fog light cover toward you.
4. Screw the towing hook into the threaded hole until
its thread becomes invisible.
5. Tighten the towing hook securely using the wheel
nut wrench.
After towing, remove the towing hook from the vehicle
and stow it in the tool bag.
Fit the fog light cover on the bumper.
"
Do not use the towing hook except when tow-
ing your vehicle.
A
UG9030BB
UG9526BA
Page 372 of 491

9-21
In case of emergency
– CONTINUED –
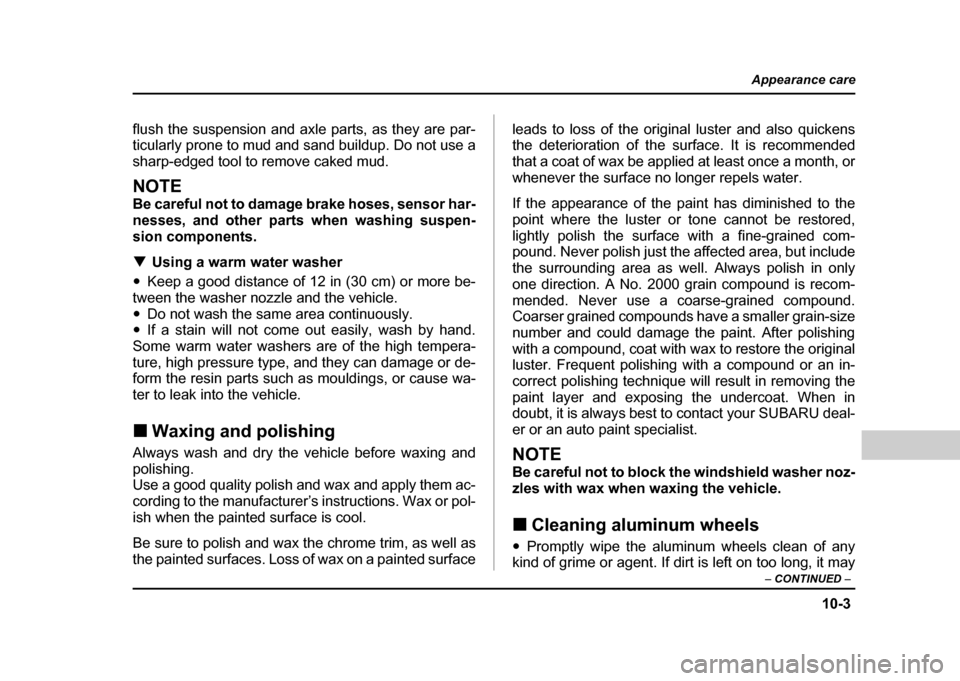
!Towing with all wheels on the ground
1. Check the transmission and differential oil levels
and add oil to bring it to the upper level if necessary.
2. Release the parking brake and put the transmis-
sion in neutral.
3. The ignition switch should be in the “ACC” position
while the vehicle is being towed.
4. Take up slack in the towline slowly to prevent dam-
age to the vehicle.
" Never turn the ignition switch to the “LOCK”
position while the vehicle is being towed be- cause the steering wheel and the direction of
the wheels will be locked. "
Remember that the brake booster and power
steering do not function when the engine is not
running. Because the engine is turned off, it will
take greater effort to operate the brake pedal
and steering wheel.
" If transmission failure occurs, transport your
vehicle on a flat-bed truck. " Do not run the engine while being towed us-
ing this method. Transmission damage could
result if the vehicle is towed with the engine
running. " For vehicles with automatic transmission,
the traveling speed must be limited to less than
20 mph (30 km/h) and the traveling distance to
less than 31 miles (50 km). For greater speeds
and distances, transport your vehicle on a flat-
bed truck.
HG9024AA
Page 375 of 491
9-24
In case of emergency
Maintenance tools
Your vehicle is equipped with the following mainte-
nance tools:
Wheel cover remover (vehicles with wheel covers)
Screwdriver
Towing hook (eye bolt)
Wheel nut wrench
Hex-headed wrench (vehicles with moonroof) !
Jack and jack handle
The jack is stored on the left side of the trunk or cargo
area.
To take out the jack, turn the jackscrew counterclock-
UG9521AA
UG9505BA
Page 378 of 491
10-1
10
Appearance care
Exterior care .................................................. 10-2 Washing ............................................................. 10-2
Waxing and polishing ....................................... 10-3
Cleaning aluminum wheels .............................. 10-3
Corrosion protection .................................... 10-4 Most common causes of corrosion ................ 10-4
To help prevent corrosion ............................... 10-5
Cleaning the interior ..................................... 10-6 Seat fabric ......................................................... 10-6
Leather seat materials ...................................... 10-6
Synthetic leather upholstery ........................... 10-6
Climate control panel, audio panel, instrument panel, console panel, and switches ............. 10-7
Page 380 of 491

10-3
Appearance care
– CONTINUED –
flush the suspension and axle parts, as they are par-
ticularly prone to mud and sand buildup. Do not use a
sharp-edged tool to remove caked mud.
NOTE
Be careful not to damage brake hoses, sensor har-
nesses, and other parts when washing suspen-
sion components. !Using a warm water washer
" Keep a good distance of 12 in (30 cm) or more be-
tween the washer nozzle and the vehicle. " Do not wash the same area continuously.
" If a stain will not come out easily, wash by hand.
Some warm water washers are of the high tempera-
ture, high pressure type, and they can damage or de-
form the resin parts such as mouldings, or cause wa-
ter to leak into the vehicle. ! Waxing and polishing
Always wash and dry the vehicle before waxing and
polishing.
Use a good quality polish and wax and apply them ac-
cording to the manufacturer’s instructions. Wax or pol-
ish when the painted surface is cool.
Be sure to polish and wax the chrome trim, as well as
the painted surfaces. Loss of wax on a painted surface leads to loss of the original luster and also quickens
the deterioration of the surface. It is recommended
that a coat of wax be applied at least once a month, or
whenever the surface no longer repels water.
If the appearance of the paint has diminished to the
point where the luster or tone cannot be restored,
lightly polish the surface with a fine-grained com-
pound. Never polish just the affected area, but include
the surrounding area as well. Always polish in only
one direction. A No. 2000 grain compound is recom-
mended. Never use a coarse-grained compound.
Coarser grained compounds have a smaller grain-size
number and could damage the paint. After polishing
with a compound, coat with wax to restore the original
luster. Frequent polishing with a compound or an in-
correct polishing technique will result in removing the
paint layer and exposing the undercoat. When in
doubt, it is always best to contact your SUBARU deal-
er or an auto paint specialist.
NOTE
Be careful not to block the windshield washer noz-
zles with wax when waxing the vehicle. !
Cleaning aluminum wheels
" Promptly wipe the aluminum wheels clean of any
kind of grime or agent. If dirt is left on too long, it may