2004 SUBARU IMPREZA engine
[x] Cancel search: enginePage 106 of 491
2-3
Keys and doors
– CONTINUED –
The valet key fits only the ignition switch and driver’s
door lock. You can keep the trunk and glove box
locked when you leave your vehicle and valet key at a
parking facility.
Do not attach a large key holder or key case to
either key. If it banged against your knees while
you were driving, it could turn the ignition switch from the ON position to the ACC or OFF
position, thereby stopping the engine.
! Key number
The key number is stamped on the metal plate at-
tached to the key set. Write down the key number and
keep it in another safe place, not in the vehicle. This
number is needed to make a replacement key if you
lose your key or lock it inside the vehicle.
Door locks ! Locking and unlocking from the out-
side
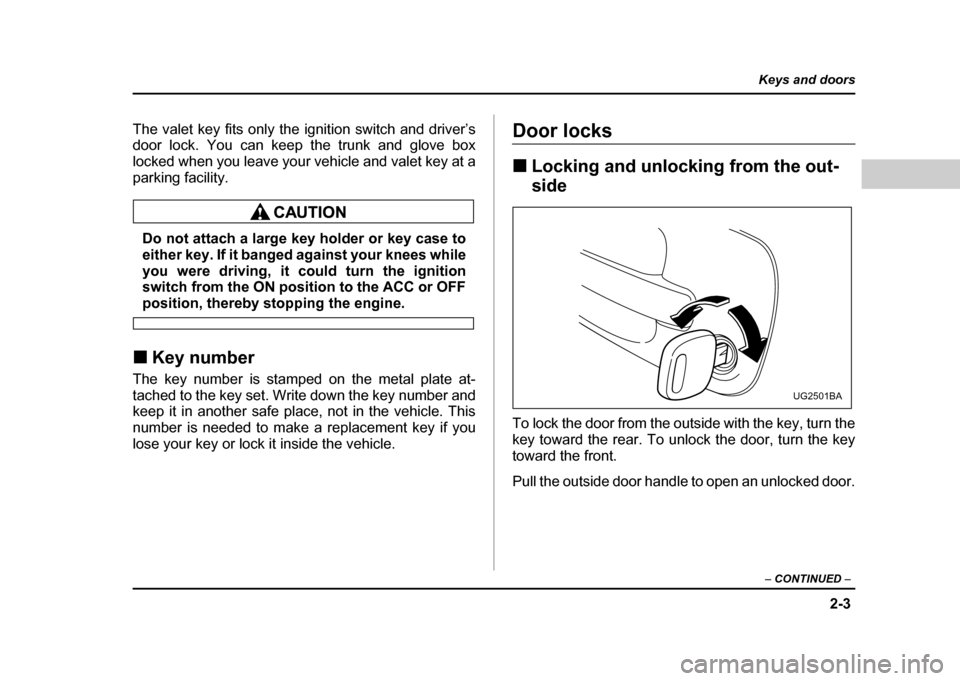
To lock the door from the outside with the key, turn the
key toward the rear. To unlock the door, turn the key
toward the front.
Pull the outside door handle to open an unlocked door.
UG2501BA
Page 118 of 491
2-15
Keys and doors
– CONTINUED –
breaking glass or forced entry). Note that there are two
alarm levels for shock: warning and alarm. In warning
mode, the alarm detects lower level vibrations and
triggers 2 warning chirps on the horn and two flashes
on the lights as a deterrent to would be vandals. In
alarm mode, higher levels of shock are detected and
the system will go into full alarm. "Ignition switch being turned on while in armed state.
NOTE
With the valet mode selected, the security system
does not operate when the remote transmitter is
used for locking and unlocking. The security sys-
tem indicator light in the combination meter flash-
es twice per second to show that the valet mode is
selected. For details, refer to “Valet mode” in this
section. ! Arming the system
! To arm the system using remote transmitter
1. Close all windows.
2. Remove the key from the ignition switch.
3. Open the doors and get out of the vehicle.
4. Make sure that the engine hood (and the trunk lid)
are locked.
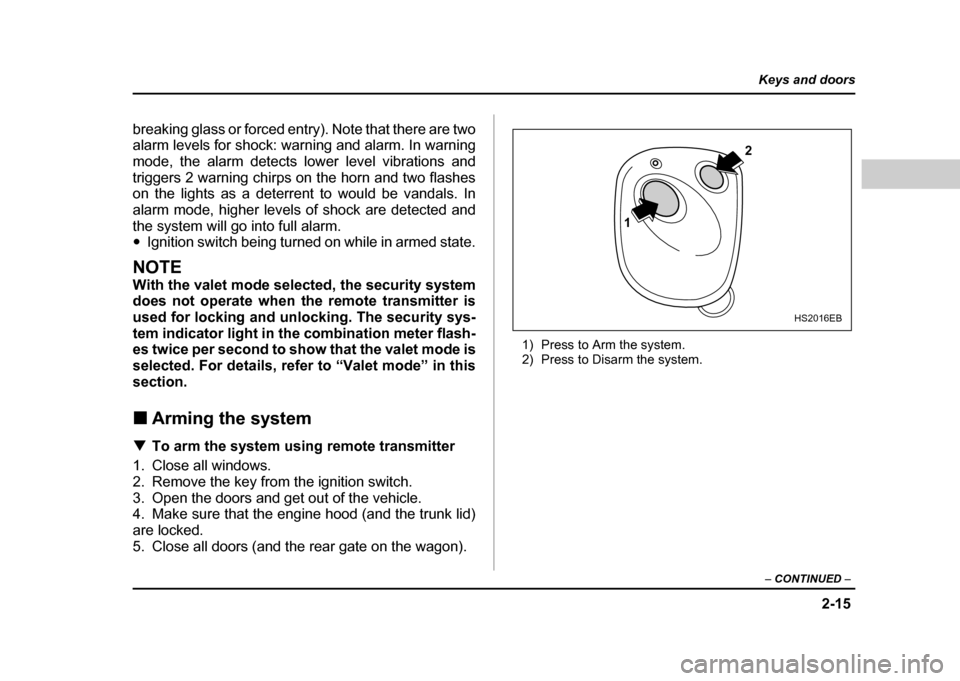
5. Close all doors (and the rear gate on the wagon). 1) Press to Arm the system.
2) Press to Disarm the system.
1
2
HS2016EB
Page 119 of 491
2-16
Keys and doors
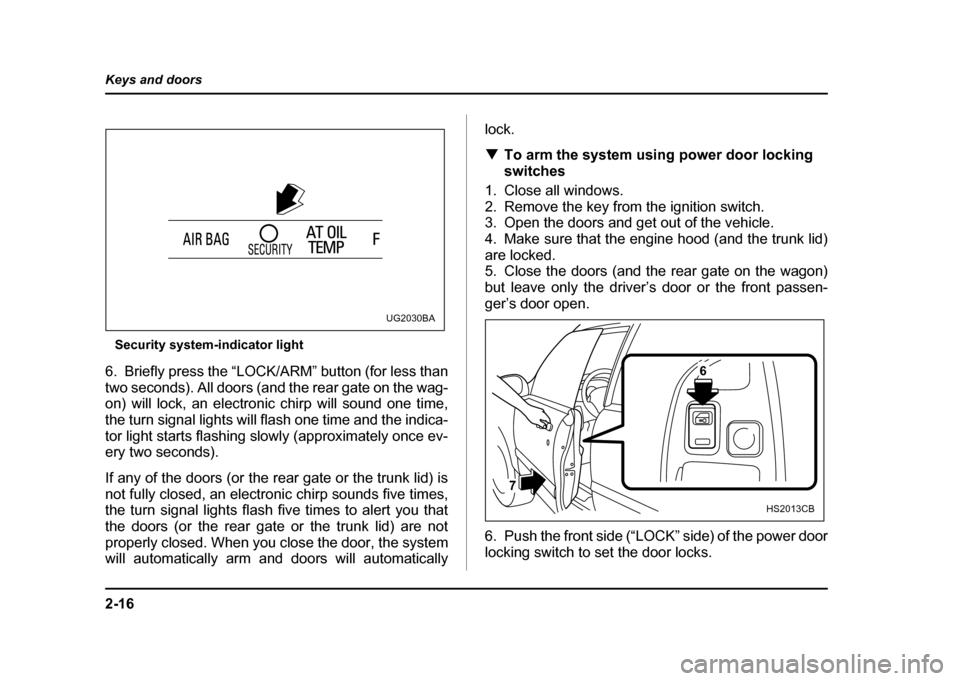
Security system-indicator light
6. Briefly press the “LOCK/ARM” button (for less than
two seconds). All doors (and the rear gate on the wag-
on) will lock, an electronic chirp will sound one time,
the turn signal lights will flash one time and the indica-
tor light starts flashing slowly (approximately once ev-
ery two seconds).
If any of the doors (or the rear gate or the trunk lid) is
not fully closed, an electronic chirp sounds five times,
the turn signal lights flash five times to alert you that
the doors (or the rear gate or the trunk lid) are not
properly closed. When you close the door, the system
will automatically arm and doors will automatically lock. !
To arm the system using power door locking
switches
1. Close all windows.
2. Remove the key from the ignition switch.
3. Open the doors and get out of the vehicle.
4. Make sure that the engine hood (and the trunk lid)
are locked.
5. Close the doors (and the rear gate on the wagon)
but leave only the driver’s door or the front passen-
ger’s door open.
6. Push the front side (“LOCK” side) of the power door
locking switch to set the door locks.
UG2030BA
6
7
HS2013CB
Page 120 of 491

2-17
Keys and doors
– CONTINUED –
7. Close the door. An electronic chirp will sound one
time, the turn signal lights will flash one time and the
indicator light will start flashing slowly (approximately
once every two seconds) to inform you that the system
has armed.
NOTE
The system can be armed even if the engine hood
and/or the windows are opened. Always make
sure that they are fully closed before arming the
system. !Disarming the system
Briefly press the “UNLOCK/DISARM” button (for less
than two seconds) on the remote transmitter. The driv-
er’s door will unlock, an electronic chirp will sound two
times, the turn signal lights will flash two times and the
indicator light will go off.
To unlock all other doors (and the rear gate on the
wagon), briefly press the “UNLOCK/DISARM” button a
second time. ! Emergency disarming
If you cannot disarm the system using the transmitter
(i.e. the transmitter is lost, broken or the transmitter
battery is too weak), you can disarm the system with-
out using the transmitter. To disarm the system:
1. Unlock the door with the key and then open the
door.
2. The alarm will sound.
3. Insert the key into the ignition switch and cycle it
from the “LOCK” to the “ON” position three (3) times
within 5 seconds
.
! Valet mode
When you choose the valet mode, the security system
does not operate. In valet mode, the remote transmit-
ter is used only for locking and unlocking the doors
(and rear gate on the wagon) and panic activation.
To enter the valet mode, open the driver’s door and
keep the “UNLOCK/DISARM” button depressed for
more than two seconds . The security system status
indicator light will continue to flash two times per sec-
ond indicating that the system is in the valet mode.
To exit valet mode, open the driver’s door and keep
the “UNLOCK/DISARM” button pressed for more
than two seconds . The indicator will stop flashing.
NOTE
If the remote transmitter is used to lock or unlock
the doors while the valet mode is selected, the
turn signal lights do not flash but an electronic
Page 138 of 491

3-1
3
Instruments and controls
Ignition switch .............................................. 3-3 LOCK .................................................................. 3-3
ACC .................................................................... 3-4
ON ....................................................................... 3-4
START ................................................................ 3-4
Key reminder chime .......................................... 3-4
Ignition switch light (if equipped) .................... 3-5
Key interlock release (AT vehicles only) ........ 3-5
Hazard warning flasher ................................ 3-6
Meters and gauges (WRX-STi) .................... 3-7 Combination meter illumination ...................... 3-7
Cancelling sequential illumination of the combination meter ......................................... 3-7
Speedometer ..................................................... 3-7
Odometer/Trip meter ........................................ 3-8
Tachometer ........................................................ 3-9
Fuel gauge ......................................................... 3-9
Temperature gauge ........................................... 3-10
Ambient temperature gauge ............................ 3-11
REV indicator light and buzzer (WRX-STi) . 3-12 Setting the alarm-level engine speed .............. 3-13
Deactivating the REV alarm system ................ 3-14
Meters and gauges (Except WRX-STi) ........ 3-15 Speedometer ..................................................... 3-15
Odometer/Trip meter ........................................ 3-15
Tachometer ........................................................ 3-16
Fuel gauge ......................................................... 3-16
Temperature gauge ........................................... 3-17
Ambient temperature gauge (if equipped) ...... 3-18
Warning and indicator lights ....................... 3-19 Seatbelt warning light and chime .................... 3-19 SRS airbag system warning light .................... 3-20
CHECK ENGINE warning light/Malfunction
indicator lamp ................................................. 3-20
Charge warning light ........................................ 3-21
Oil pressure warning light ............................... 3-21
AT OIL TEMPerature warning light (for AT vehicles) ............................................. 3-22
Rear differential oil temperature warning light
(WRX-STi) ........................................................ 3-22
ABS warning light ............................................. 3-23
Brake system warning light ............................. 3-24
Door open warning lights ................................ 3-25
Front-wheel drive warning light (for AT vehicles – if equipped) ...................... 3-25
Intercooler water spray warning light
(WRX-STi) ........................................................ 3-25
Selector lever position indicator (AT vehicles) 3-26
Turn signal indicator lights .............................. 3-26
High beam indicator light ................................. 3-26
Cruise control indicator light ........................... 3-26
Cruise control set indicator light .................... 3-26
Driver’s control center differential auto indicator light (WRX-STi) ............................... 3-26
Driver’s control center differential indicator
lights (WRX-STi) ............................................. 3-27
Headlight indicator light (WRX-STi) ................ 3-27
REV indicator light (WRX-STi) ......................... 3-27
Clock .............................................................. 3-28
Light control switch ...................................... 3-29 Headlights ......................................................... 3-29
High/low beam change (dimmer) .................... 3-30
Headlight flasher ............................................... 3-30
Page 141 of 491
3-4
Instruments and controls
The key can be turned from “ACC” to “LOCK” only
when the selector lever is in the “P” position. !
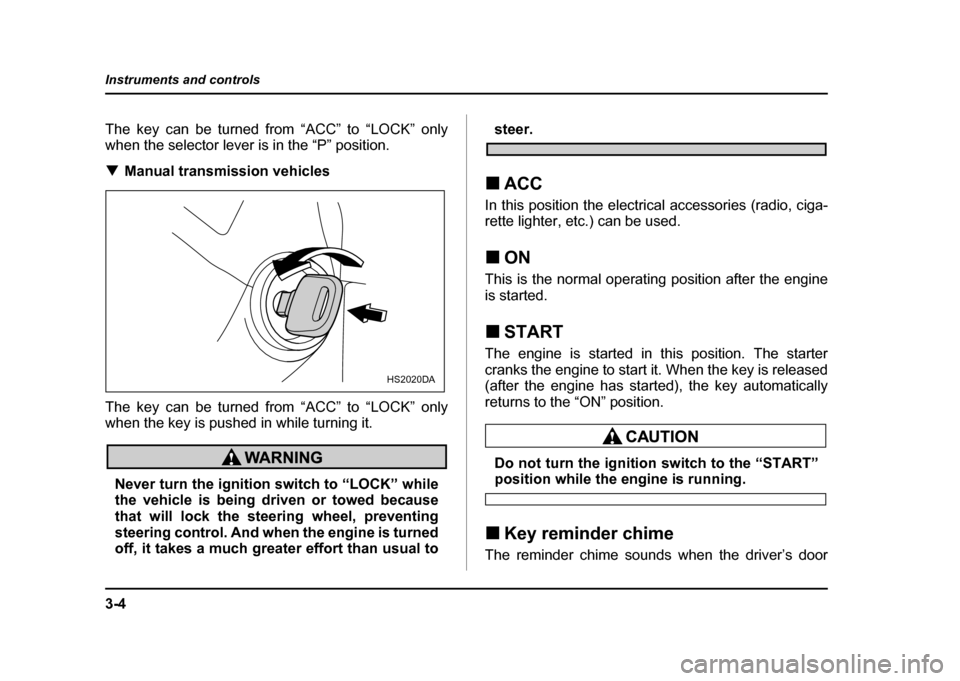
Manual transmission vehicles
The key can be turned from “ACC” to “LOCK” only
when the key is pushed in while turning it.
Never turn the ignition switch to “LOCK” while
the vehicle is being driven or towed because
that will lock the steering wheel, preventing
steering control. And when the engine is turned
off, it takes a much greater effort than usual to
steer.
! ACC
In this position the electrical accessories (radio, ciga-
rette lighter, etc.) can be used. ! ON
This is the normal operating position after the engine
is started. ! START
The engine is started in this position. The starter
cranks the engine to start it. When the key is released
(after the engine has started), the key automatically
returns to the “ON” position.
Do not turn the ignition switch to the “START”position while the engine is running.
! Key reminder chime
The reminder chime sounds when the driver’s door
HS2020DA
Page 146 of 491
3-9
Instruments and controls
– CONTINUED –
To set the trip meter to zero, select the A trip or B trip
meter by pushing the knob and keep the knob pushed for more than 2 seconds.
To ensure safety, do not attempt to change the
function of the indicator during driving, as an
accident could result.
NOTE
If the connection between the combination meter
and battery is broken for any reason such as vehi-
cle maintenance or fuse replacement, the data re-
corded on the trip meter will be lost. !Tachometer
The tachometer shows the engine speed in thousands
of revolutions per minute.
Do not operate the engine with the pointer of the tachometer in the red zone. In this range, fuel injection will be cut by the engine control
module to protect the engine from overrevving.
The engine will resume running normally after
the engine speed is reduced below the red
zone.
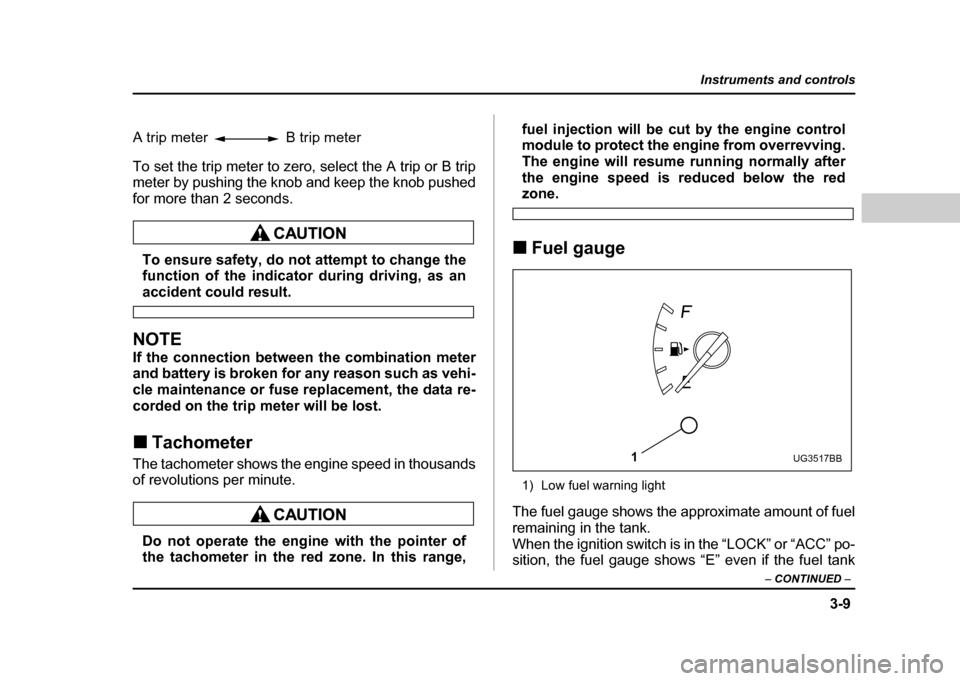
! Fuel gauge
1) Low fuel warning light
The fuel gauge shows the approximate amount of fuel
remaining in the tank.
When the ignition switch is in the “LOCK” or “ACC” po-
sition, the fuel gauge shows “E” even if the fuel tank
A trip meter B trip meter
1UG3517BB
Page 147 of 491
3-10
Instruments and controls
contains fuel.
The gauge may move slightly during braking, turning
or acceleration due to fuel level movement in the tank.
NOTE
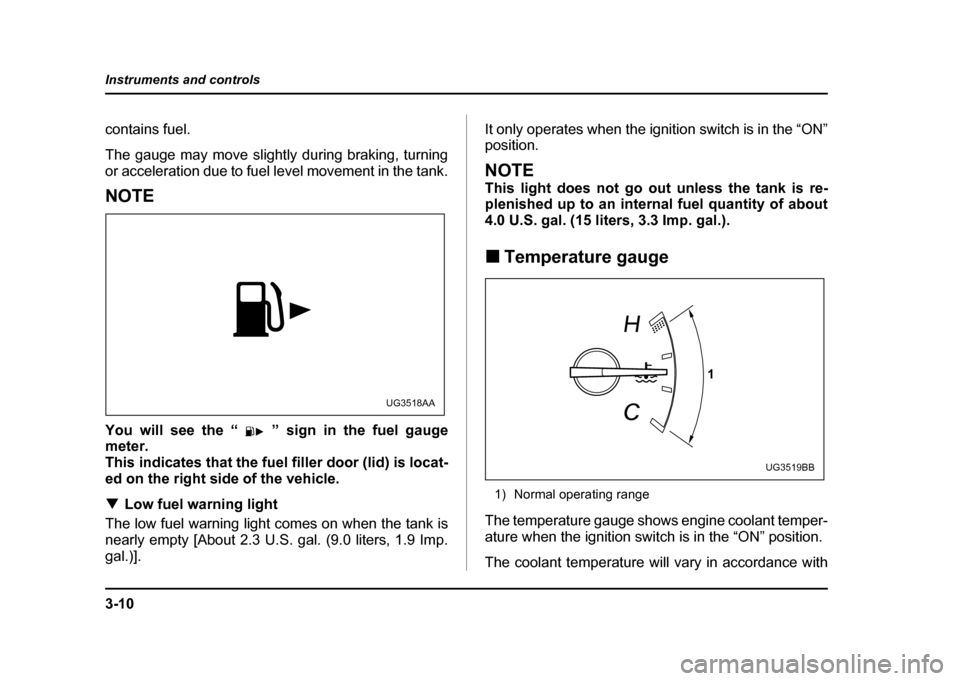
You will see the “ ” sign in the fuel gauge
meter.
This indicates that the fuel filler door (lid) is locat-
ed on the right side of the vehicle. !
Low fuel warning light
The low fuel warning light comes on when the tank is
nearly empty [About 2.3 U.S. gal. (9.0 liters, 1.9 Imp.
gal.)]. It only operates when the ignition switch is in the “ON” position.
NOTE
This light does not go out unless the tank is re-
plenished up to an internal fuel quantity of about
4.0 U.S. gal. (15 liters, 3.3 Imp. gal.). !
Temperature gauge
1) Normal operating range
The temperature gauge shows engine coolant temper-
ature when the ignition switch is in the “ON” position.
The coolant temperature will vary in accordance with
UG3518AA
1
UG3519BB