2004 PONTIAC GRAND PRIX ignition
[x] Cancel search: ignitionPage 235 of 432

The broken tape detection feature of your cassette tape
player may identify the cleaning cassette as a damaged
tape, in error. To prevent the cleaning cassette from
being ejected, use the following steps:
1. Turn the ignition on.
2. Turn the radio off.
3. Press and hold the CD TAPE button for ®ve
seconds. READY will appear on the display for
®ve seconds.
4. Insert the scrubbing action cleaning cassette.
5. Eject the cleaning cassette after the manufacturer's
recommended cleaning time.
After the cleaning cassette is ejected, the broken tape
detection feature will be active again.
You may also choose a non-scrubbing action, wet-type
cleaner which uses a cassette with a fabric belt to
clean the tape head. This type of cleaning cassette will
not eject on its own. A non-scrubbing action cleaner
may not clean as thoroughly as the scrubbing type
cleaner. The use of a non-scrubbing action, dry-type
cleaning cassette is not recommended.After you clean the player, press and hold the eject
button for ®ve seconds to reset the CLEAN PLAYER
indicator. The radio will display CLEANED to show the
indicator was reset.
Cassettes are subject to wear and the sound quality
may degrade over time. Always make sure the cassette
tape is in good condition before you have your tape
player serviced.
Care of Your CDs
Handle discs carefully. Store them in their original cases
or other protective cases and away from direct sunlight
and dust. If the surface of a disc is soiled, dampen
a clean, soft cloth in a mild, neutral detergent solution
and clean it, wiping from the center to the edge.
Be sure never to touch the side without writing when
handling discs. Pick up discs by grasping the outer
edges or the edge of the hole and the outer edge.
Care of Your CD Player
The use of CD lens cleaner discs is not advised, due to
the risk of contaminating the lens of the CD optics
with lubricants internal to the CD mechanism.
3-131
Page 263 of 432
If you drive regularly in steep country, or if you're
planning to visit there, here are some tips that can make
your trips safer and more enjoyable.
·Keep your vehicle in good shape. Check all ¯uid
levels and also the brakes, tires, cooling system
and transaxle. These parts can work hard on
mountain roads.
·Know how to go down hills. The most important
thing to know is this: let your engine do some of
the slowing down. Shift to a lower gear when you
go down a steep or long hill.
{CAUTION:
If you don't shift down, your brakes could get
so hot that they wouldn't work well. You would
then have poor braking or even none going
down a hill. You could crash. Shift down to let
your engine assist your brakes on a steep
downhill slope.
{CAUTION:
Coasting downhill in NEUTRAL (N) or with the
ignition off is dangerous. Your brakes will have
to do all the work of slowing down. They could
get so hot that they wouldn't work well.
You would then have poor braking or even none
going down a hill. You could crash. Always have
your engine running and your vehicle in gear
when you go downhill.
·Know how to go uphill. You may want to shift down to
a lower gear. The lower gears help cool your engine
and transaxle, and you can climb the hill better.
·Stay in your own lane when driving on two-lane
roads in hills or mountains. Don't swing wide or cut
across the center of the road. Drive at speeds that let
you stay in your own lane.
·As you go over the top of a hill, be alert. There could
be something in your lane, like a stalled car or an
accident.
·You may see highway signs on mountains that warn
of special problems. Examples are long grades,
passing or no-passing zones, a falling rocks area
or winding roads. Be alert to these and take
appropriate action.
4-27
Page 328 of 432
Replacing Brake System Parts
The braking system on a vehicle is complex. Its many
parts have to be of top quality and work well together if
the vehicle is to have really good braking. Your vehicle
was designed and tested with top-quality GM brake parts.
When you replace parts of your braking system Ð for
example, when your brake linings wear down and you
need new ones put in Ð be sure you get new approved
GM replacement parts. If you don't, your brakes may no
longer work properly. For example, if someone puts in
brake linings that are wrong for your vehicle, the balance
between your front and rear brakes can change Ð for the
worse. The braking performance you've come to expect
can change in many other ways if someone puts in the
wrong replacement brake parts.
Battery
Your new vehicle comes with a maintenance free
ACDelcožbattery. When it's time for a new battery, get
one that has the replacement number shown on the
original battery's label. We recommend an ACDelco
ž
battery. SeeEngine Compartment Overview on
page 5-12for battery location.
Warning:Battery posts, terminals and related
accessories contain lead and lead compounds,
chemicals known to the State of California to cause
cancer and reproductive harm. Wash hands after
handling.If your battery has a very low charge or is dead, you
may not be able to remove the ignition key from
the ignition switch or shift out of PARK (P). Refer to
Shifting Out of Park (P) on page 2-30.
Vehicle Storage
If you're not going to drive your vehicle for 25 days or
more, remove the black, negative (-) cable from the
battery. This will help keep your battery from
running down.
{CAUTION:
Batteries have acid that can burn you and gas
that can explode. You can be badly hurt if you
aren't careful. See ªJump Startingº next for
tips on working around a battery without
getting hurt.
Contact your dealer to learn how to prepare your
vehicle for longer storage periods.
Also, for your audio system, see
Theft-Deterrent
Feature on page 3-128.
5-48
Page 330 of 432
Notice:If you leave your radio on, it could be badly
damaged. The repairs wouldn't be covered by
your warranty.
3. Turn off the ignition on both vehicles. Unplug
unnecessary accessories plugged into the cigarette
lighter or in the accessory power outlet. Turn off
the radio and all lamps that aren't needed. This will
avoid sparks and help save both batteries. And it
could save your radio!
4. Open the hoods and locate the batteries. Find the
positive (+) and negative (-) terminal locations on
each vehicle. You will not need to access your
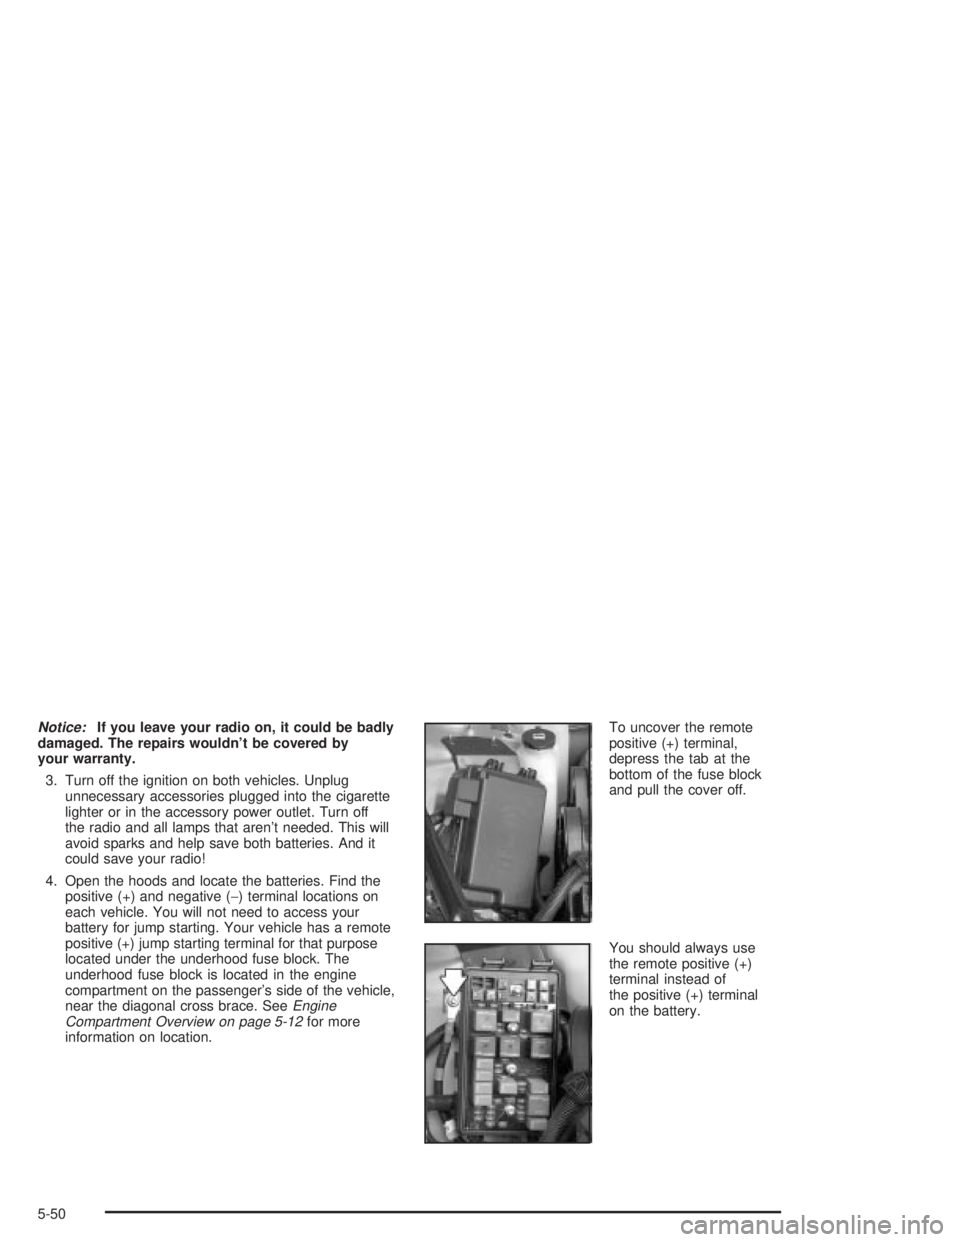
battery for jump starting. Your vehicle has a remote
positive (+) jump starting terminal for that purpose
located under the underhood fuse block. The
underhood fuse block is located in the engine
compartment on the passenger's side of the vehicle,
near the diagonal cross brace. See
Engine
Compartment Overview on page 5-12for more
information on location.To uncover the remote
positive (+) terminal,
depress the tab at the
bottom of the fuse block
and pull the cover off.
You should always use
the remote positive (+)
terminal instead of
the positive (+) terminal
on the battery.
5-50
Page 347 of 432
Windshield Wiper Blade
Replacement
Remove and replace a windshield wiper by following
these steps:
1. Put the ignition in ACCESSORY and turn the
windshield wipers on.
2. Stop the windshield wipers when they are in the
upright position by turning the key to the off position.
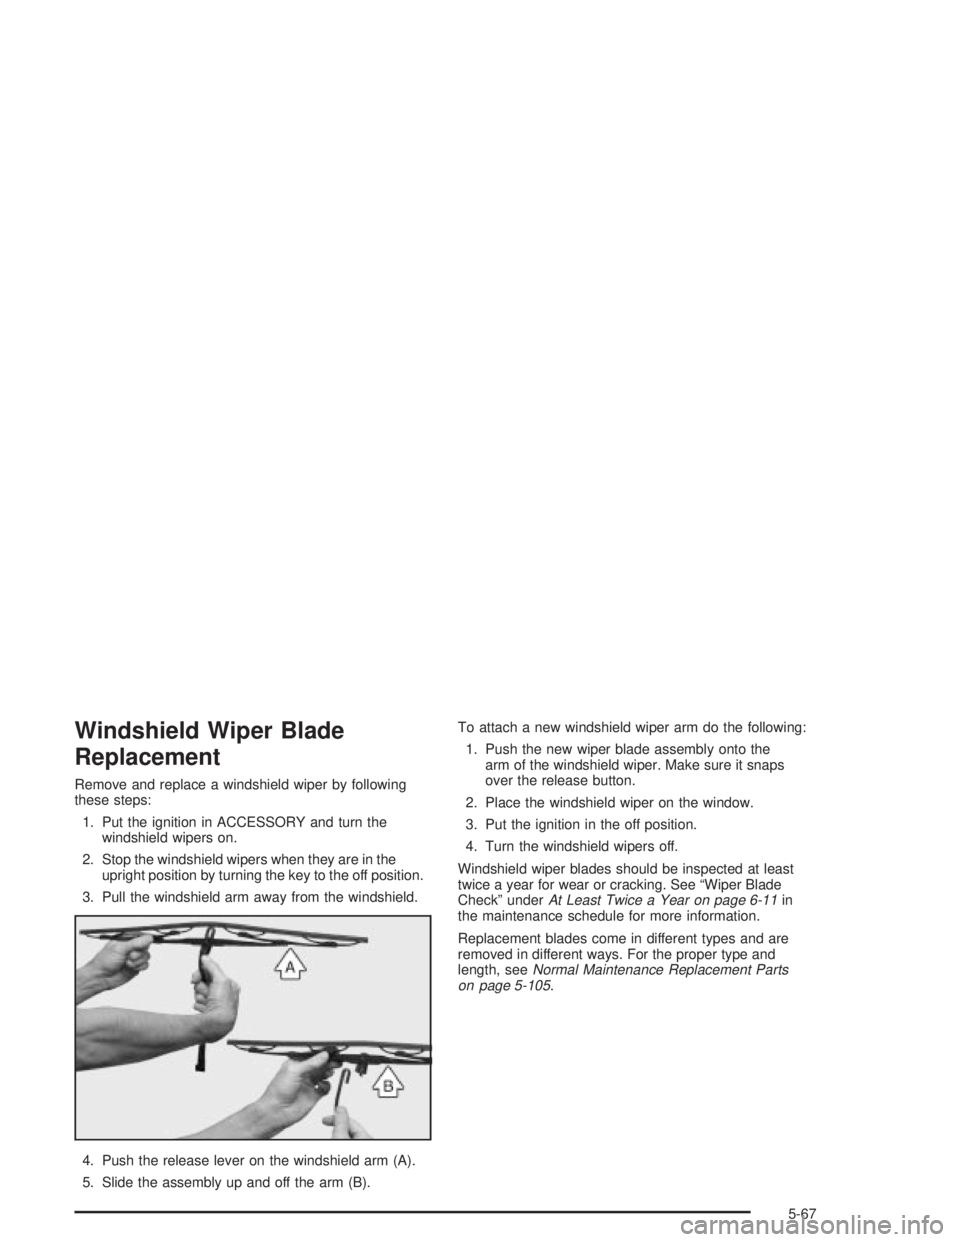
3. Pull the windshield arm away from the windshield.
4. Push the release lever on the windshield arm (A).
5. Slide the assembly up and off the arm (B).To attach a new windshield wiper arm do the following:
1. Push the new wiper blade assembly onto the
arm of the windshield wiper. Make sure it snaps
over the release button.
2. Place the windshield wiper on the window.
3. Put the ignition in the off position.
4. Turn the windshield wipers off.
Windshield wiper blades should be inspected at least
twice a year for wear or cracking. See ªWiper Blade
Checkº under
At Least Twice a Year on page 6-11in
the maintenance schedule for more information.
Replacement blades come in different types and are
removed in different ways. For the proper type and
length, see
Normal Maintenance Replacement Parts
on page 5-105.
5-67
Page 350 of 432
Tire Pressure Monitor System
This vehicle has the tire in¯ation monitor system, it can
alert you to a large change in the pressure of one
tire. The system ªlearnsº the pressure at each tire
throughout the operating speed range of your vehicle.
The system normally takes between 45 and 90 minutes
of driving to learn the tire pressures. This time may
be longer depending on your individual driving habits.
Learning need not be accumulated during a single
trip. Once learned, the system will remember the tire
pressures until the system is recalibrated.
See
DIC Warnings and Messages on page 3-65for
more information.
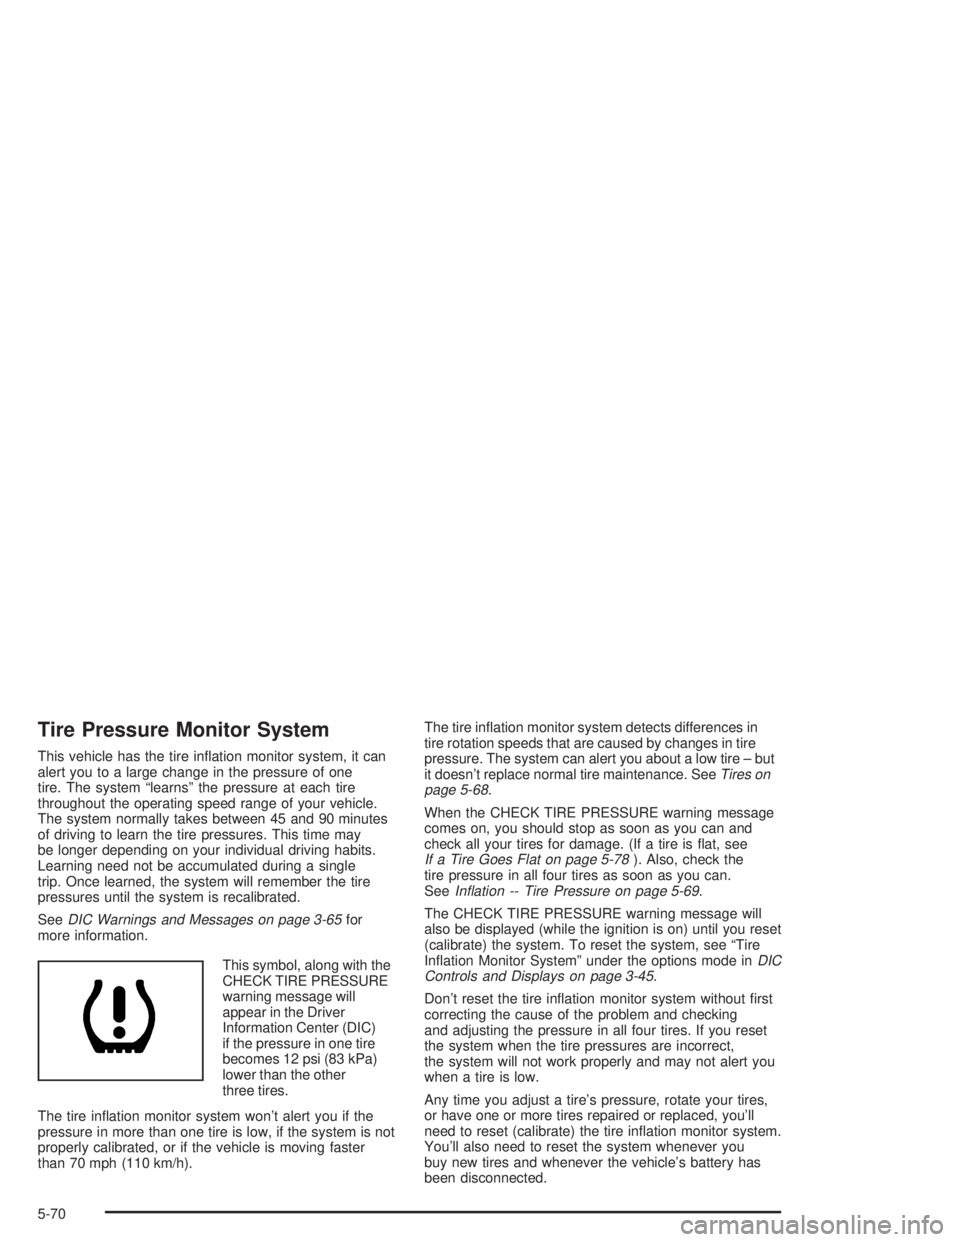
This symbol, along with the
CHECK TIRE PRESSURE
warning message will
appear in the Driver
Information Center (DIC)
if the pressure in one tire
becomes 12 psi (83 kPa)
lower than the other
three tires.
The tire in¯ation monitor system won't alert you if the
pressure in more than one tire is low, if the system is not
properly calibrated, or if the vehicle is moving faster
than 70 mph (110 km/h).The tire in¯ation monitor system detects differences in
tire rotation speeds that are caused by changes in tire
pressure. The system can alert you about a low tire ± but
it doesn't replace normal tire maintenance. See
Tires on
page 5-68.
When the CHECK TIRE PRESSURE warning message
comes on, you should stop as soon as you can and
check all your tires for damage. (If a tire is ¯at, see
If a Tire Goes Flat on page 5-78). Also, check the
tire pressure in all four tires as soon as you can.
See
In¯ation -- Tire Pressure on page 5-69.
The CHECK TIRE PRESSURE warning message will
also be displayed (while the ignition is on) until you reset
(calibrate) the system. To reset the system, see ªTire
In¯ation Monitor Systemº under the options mode in
DIC
Controls and Displays on page 3-45.
Don't reset the tire in¯ation monitor system without ®rst
correcting the cause of the problem and checking
and adjusting the pressure in all four tires. If you reset
the system when the tire pressures are incorrect,
the system will not work properly and may not alert you
when a tire is low.
Any time you adjust a tire's pressure, rotate your tires,
or have one or more tires repaired or replaced, you'll
need to reset (calibrate) the tire in¯ation monitor system.
You'll also need to reset the system whenever you
buy new tires and whenever the vehicle's battery has
been disconnected.
5-70
Page 383 of 432

Fuses Usage
13 A/C Clutch
14 Oxygen Sensor
15 Power Control Module
16Power Control Module/Electronic
Throttle Control
17 Electronic Throttle Control
18 Display
19 Anti-Lock Brake Solenoid
20 Fuel Injection
21 Transmission Solenoid
22 Fuel Pump
23 Anti-Lock Brakes
24 Electronic Ignition
26 Battery Main 1
27 Battery Main 2
28 Battery Main 3
29 Fan 1
30 Battery Main 4
31 Anti-Lock Brake Motor
32 Fan 2
33 StarterRelays Usage
34 Hghi-Beam Headlamps
35 Low-Beam Headlamps
36 Fog Lamps
37 Iginition 1
38 Air Conditioner Compressor
39 Horn
40 Powertrain
41 Fuel Pump
42 Fan 1
43 Fan 3
44 Windshield Wiper/High
45 Windshield Wiper
46 Fan 2
48 Crank
49 Spare Fuse
50 Spare Fuse
51 Spare Fuse
52 Blank
53 Blank
54 Blank
55 Fuse Puller
§A/C Clutch
5-103
Page 399 of 432
Ignition Transaxle Lock Check
While parked, and with the parking brake set, try to turn
the ignition key to LOCK in each shift lever position.
·The key should turn to LOCK only when the
shift lever is in PARK (P).
·The key should come out only in LOCK.
Parking Brake and Automatic Transaxle
Park (P) Mechanism Check
{CAUTION:
When you are doing this check, your vehicle
could begin to move. You or others could be
injured and property could be damaged. Make
sure there is room in front of your vehicle in
case it begins to roll. Be ready to apply the
regular brake at once should the vehicle begin
to move.Park on a fairly steep hill, with the vehicle facing
downhill. Keeping your foot on the regular brake, set the
parking brake.
·To check the parking brake's holding ability: With
the engine running and transaxle in NEUTRAL
(N), slowly remove foot pressure from the regular
brake pedal. Do this until the vehicle is held by the
parking brake only.
·To check the PARK (P) mechanism's holding
ability: With the engine running, shift to PARK (P).
Then release the parking brake followed by the
regular brake.
Underbody Flushing Service
At least every spring, use plain water to ¯ush any
corrosive materials from the underbody. Take care to
clean thoroughly any areas where mud and other debris
can collect.
6-13