2004 PONTIAC GRAND AM audio
[x] Cancel search: audioPage 168 of 364

Playing a CD
With the ignition on, insert a CD partway into the slot,
label side up. The player will pull it in, and the CD should
begin playing. READING DISC and the CD symbol
will appear on the display. If you want to insert a CD with
the ignition off, first press the EJECT button or push
the RCL knob. If you insert a CD with the radio off and
the ignition on, it will start to play.
If you select an EQ setting for your CD, it will be
activated each time you play a CD.
If you turn off the ignition or the radio with a CD in the
player, it will stay in the player. When you turn on
the ignition or the radio, the CD will start to play if it was
the last selected audio source.
As each new track starts to play, the track number will
appear on the display.
The CD player can play the smaller 3 inch (8 cm) single
CDs with an adapter ring. Full-size CDs and the
smaller CDs are loaded in the same manner.
If playing a CD-R the sound quality may be reduced
due to CD-R quality, the method of recording, the quality
of the music that has been recorded, and the way the
CD-R has been handled. You may experience an
increase in skipping, difficulty in finding tracks and/or
difficulty in loading and ejecting. If these problems occur
try a known good CD.Do not add paper labels to CDs, they could get caught
in the CD player.
If an error appears on the display, see “CD Messages”
later in this section.
\1 (Forward):Press and hold this pushbutton to
advance quickly within a track. You will hear sound at a
reduced volume. Release the pushbutton to play the
passage. The display will show the elapsed time of
the track.
RDM 2 (Random):Press this pushbutton to hear the
tracks in random, rather than sequential, order.
RDM and the track number will appear on the display.
Press RDM again to turn off random play.
3
#(Next Folder):This button does not have a
function for non-MP3 CDs.
4
s(Reverse):Press and hold this pushbutton to
reverse quickly within a track. You will hear sound at a
reduced volume. Release the pushbutton to play the
passage. The display will show the elapsed time of the
track.
6
!(Previous Folder):This button does not have a
function for non-MP3 CDs.
3-62
Page 170 of 364

If you wish to play large numbers of files, folders,
playlists, or sessions minimize the length of the file,
folder, or playlist name. You can also play an MP3 CD
that was recorded using no file folders. The system
can support up to 11 folders in depth, though, keep the
depth of the folders to a minimum in order to keep
down the complexity and confusion in trying to locate a
particular folder during playback. If a CD contains
more than the maximum of 50 folders, 50 playlists,
10 sessions, and 255 files the player will let you access
and navigate up to the maximum, but all items over
the maximum will be ignored.
Root Directory
The root directory will be treated as a folder. If the root
directory has compressed audio files, the directory
will be displayed as F1 ROOT. All files contained directly
under the root directory will be accessed prior to any
root directory folders. However, playlists (Px) will always
be accessed before root folders or files.
Empty Directory or Folder
If a root directory or a folder exists somewhere in the
file structure that contains only folders/subfolders and no
compressed files directly beneath them, the player will
advance to the next folder in the file structure that
contains compressed audio files and the empty folder
will not be displayed or numbered.
No Folder
When the CD contains only compressed files, the files will
be located under the root folder. The next and previous
folder functions will have no function on a CD that was
recorded without folders or playlists. When displaying the
name of the folder the radio will display ROOT.
When the CD contains only playlists and compressed
audio files, but no folders, all files will be located under
the root folder. The folder down and the folder up
buttons will search playlists (Px) first and then go to the
root folder. When the radio displays the name of the
folder the radio will display ROOT.
Order of Play
Tracks will be played in the following order:
•Play will begin from the first track in the first playlist
and will continue sequentially through all tracks in
each playlist. When the last track of the last playlist
has been played, play will continue from the first
track of the first playlist.
•If the CD does not contain any playlists, then play will
begin from the first track under the root directory.
When all tracks from the root directory have been
played, play will continue from files according to their
numerical listing. After playing the last track from the
last folder, play will begin again at the first track of
the first folder or root directory.
3-64
Page 171 of 364

When play enters a new folder, the display will not
automatically show the new folder name unless
you have chosen the folder mode as the default display,
see RCL later in this section. The new track name
will appear on the display.
File System and Naming
The song name that will be displayed will be the song
name that is contained in the ID3 tag. If the song name
is not present in the ID3 tag, then the radio will
display the file name without the extension (such
as.mp3) as the track name.
Track names longer than 32 characters or 4 pages will
be shortened. The display will not show parts of
words on the last page of text and the extension of the
filename will not be displayed.
Preprogrammed Playlists
You can access preprogrammed playlists which were
created by WinAmp™, MusicMatch™, or Real
Jukebox™ software, however, you will not have editing
capability. These playlists will be treated as special
folders containing compressed audio song files.
Playing a MP3
With the ignition on, insert a CD partway into the slot,
label side up. The player will pull it in and the CD
will begin to play after the player has read the table of
contents and the file structure and determined where the
first playable track is located. READING DISC will
appear on the display. After the MP3 has been read,
the number of folders and tracks will be displayed, then
the radio will go back to the default display. The CD
symbol will appear on the display. If you want to insert
an MP3 with the ignition off, first press the EJECT
button or push the RCL knob. If you insert a CD with
the radio off and the ignition on, it will start to play.
If you select an EQ setting for your CD, it will be
activated each time you play a CD.
If you turn off the ignition or the radio with a CD in the
player, it will stay in the player. When you turn on
the ignition or the radio, the CD will start to play if it was
the last selected audio source.
As each new track starts to play, the track number will
appear on the display.
The CD player can play the smaller 8cm single CDs
with an adapter ring. Full-size CDs and the smaller CDs
are loaded in the same manner.
3-65
Page 175 of 364

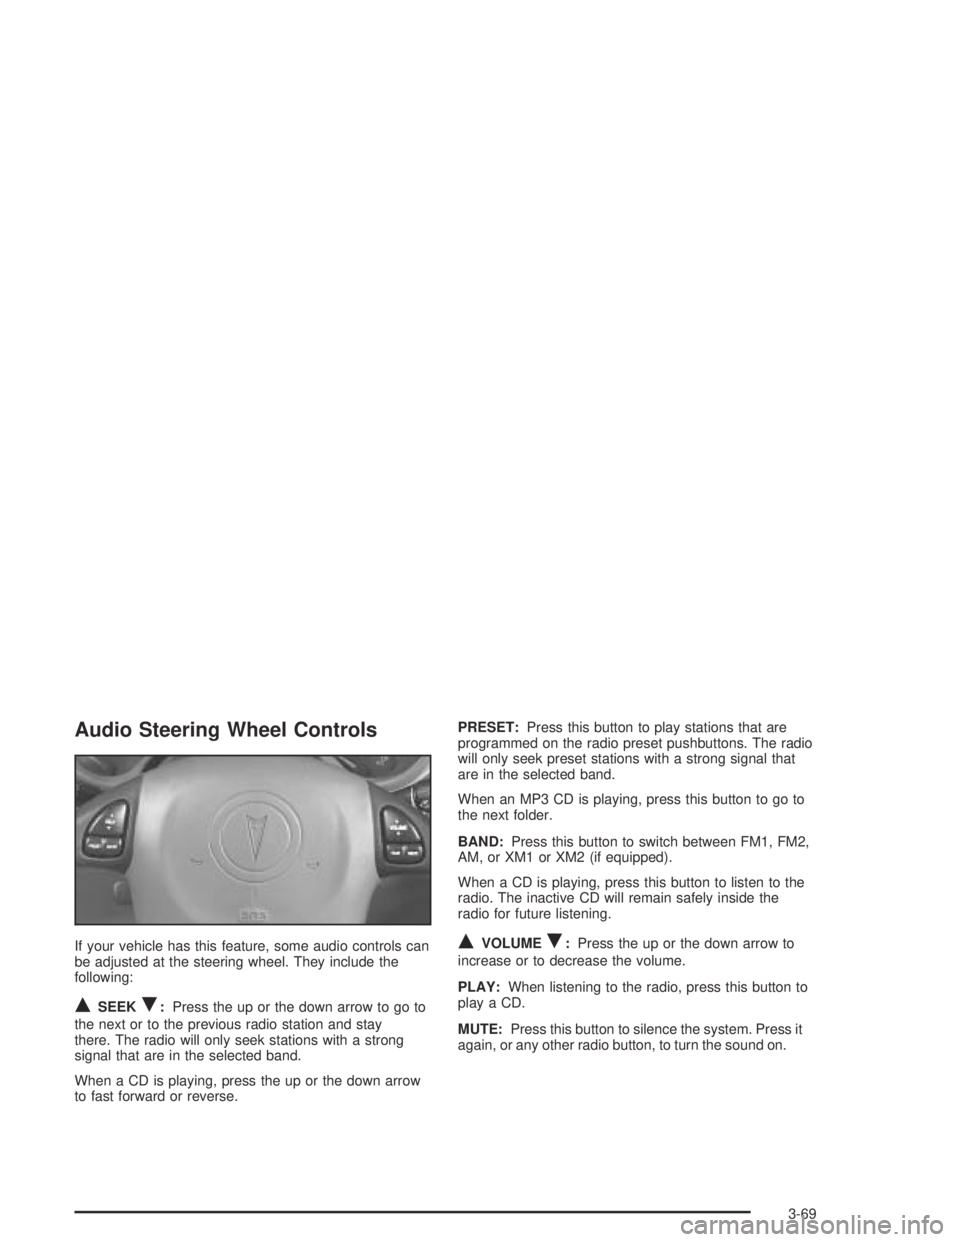
Audio Steering Wheel Controls
If your vehicle has this feature, some audio controls can
be adjusted at the steering wheel. They include the
following:
QSEEKR:Press the up or the down arrow to go to
the next or to the previous radio station and stay
there. The radio will only seek stations with a strong
signal that are in the selected band.
When a CD is playing, press the up or the down arrow
to fast forward or reverse.PRESET:Press this button to play stations that are
programmed on the radio preset pushbuttons. The radio
will only seek preset stations with a strong signal that
are in the selected band.
When an MP3 CD is playing, press this button to go to
the next folder.
BAND:Press this button to switch between FM1, FM2,
AM, or XM1 or XM2 (if equipped).
When a CD is playing, press this button to listen to the
radio. The inactive CD will remain safely inside the
radio for future listening.
QVOLUMER:Press the up or the down arrow to
increase or to decrease the volume.
PLAY:When listening to the radio, press this button to
play a CD.
MUTE:Press this button to silence the system. Press it
again, or any other radio button, to turn the sound on.
3-69
Page 267 of 364

Vehicle Storage
If you are not going to drive your vehicle for 25 days or
more, remove the black, negative (−) cable from the
battery. This will help keep your battery from
running down.
{CAUTION:
Batteries have acid that can burn you and gas
that can explode. You can be badly hurt if you
are not careful. SeeJump Starting on
page 5-41for tips on working around a battery
without getting hurt.
Contact your dealer to learn how to prepare your
vehicle for longer storage periods.
Also, for your audio system, seeTheft-Deterrent
Feature on page 3-68.
Jump Starting
If your battery has run down, you may want to use
another vehicle and some jumper cables to start your
vehicle. Be sure to follow the steps below to do it safely.
{CAUTION:
Batteries can hurt you. They can be dangerous
because:
They contain acid that can burn you.
They contain gas that can explode or
ignite.
They contain enough electricity to
burn you.
If you do not follow these steps exactly, some
or all of these things can hurt you.
Notice:Ignoring these steps could result in costly
damage to your vehicle that would not be covered
by your warranty.
Trying to start your vehicle by pushing or pulling it
will not work, and it could damage your vehicle.
5-41
Page 314 of 364

Instrument Panel Fuse Block
(Driver’s Side)
Your vehicle may not be equipped with all the fuses and
features listed.
Fuses Usage
WIPERWindshield Wiper Motor, Washer
Pump
TRUNK REL/
RADIO AMPTrunk Release Relay/Motor, Audio
Amplifier/RFA
TURN LPS Turn Signal Lamps
PWR MIRROR Power Mirrors
Fuses Usage
AIR BAG Air Bags
BFC BATT Body Computer (BFC)
PCM ACC Power Control Module (PCM)
DR LOCK Door Lock Motors
IPC/BFC ACC Cluster, Body Computer (BFC)
STOP LPS Stop Lamps
HAZARD LPS Hazard Lamps
IPC/HVAC
BATTHVAC Head, Cluster, Data Link
Connector
Circuit
BreakersUsage
PWR SEAT Power Seats
Relay Usage
TRUNK REL Trunk Relay
DR UNLOCK Door Unlock Relay
DR LOCK Door Lock Relay
DRIVER DR
UNLOCKDriver’s Door Unlock Relay
5-88
Page 316 of 364

Engine Compartment Fuse Block
Your vehicle may not be equipped with all the fuses and
features listed.
The engine compartment fuse block is located on the
driver’s side of the vehicle, near the battery.
Fuse Usage
1 Ignition Switch
2Right Electrical Center-Fog Lamps,
Radio, Body Function Control
Module, Interior Lamps
Fuse Usage
3Left Electrical Center-Stop Lamps,
Hazard Lamps, Body Function
Control Module, Cluster, Climate
Control System
4 Anti-Lock Brakes
5Left Electrical Center-Power Seats,
Power Mirrors, Door Locks, Trunk
Release, Audio Amplifier, Remote
Keyless Entry
6 Not Used
7 Ignition Switch
8 Cooling Fan #1
Relays Usage
9 Rear Defog
10 Not Used
11 Starter (V6 only)
12 Cooling Fan #1
13 HVAC Blower (Climate Control)
14 Cooling Fan #2
15 Cooling Fan
16 Air Conditioning Compressor
17 Not Used
18 Fuel Pump
5-90
Page 329 of 364

Engine Coolant Level Check
Check the engine coolant level and add
DEX-COOL®coolant mixture if necessary. SeeEngine
Coolant on page 5-23for further details.
Windshield Washer Fluid Level Check
Check the windshield washer fluid level in the windshield
washer tank and add the proper fluid if necessary.
At Least Once a Month
Tire In�ation Check
Visually inspect your tires and make sure tires are
inflated to the correct pressures. Do not forget to check
your spare tire. SeeTires on page 5-51for further
details.
Cassette Tape Player Service
Clean cassette tape player. Cleaning should be done
every 50 hours of tape play. SeeAudio System(s)
on page 3-38for further details.
At Least Once a Year
Starter Switch Check
{CAUTION:
When you are doing this inspection, the
vehicle could move suddenly. If the vehicle
moves, you or others could be injured.
1. Before you start, be sure you have enough room
around the vehicle.
2. Firmly apply both the parking brake and the regular
brake. SeeParking Brake on page 2-29if
necessary.
Do not use the accelerator pedal, and be ready to
turn off the engine immediately if it starts.
3. Try to start the engine in each gear. The starter
should work only in PARK (P) or NEUTRAL (N).
If the starter works in any other position, contact
your GM Goodwrench dealer for service.
6-9