2004 PONTIAC BONNEVILLE radio controls
[x] Cancel search: radio controlsPage 122 of 446
Audio System(s).............................................3-73
Setting the Time...........................................3-73
Radio with CD..............................................3-74
Radio with Cassette and CD..........................3-86
Trunk-Mounted CD Changer.........................3-101
Theft-Deterrent Feature................................3-105
Audio Steering Wheel Controls......................3-105Radio Reception.........................................3-106
Care of Your Cassette Tape Player...............3-107
Care of Your CDs.......................................3-108
Care of Your CD Player...............................3-108
Diversity Antenna System.............................3-108
XM™ Satellite Radio Antenna System............3-109
Chime Level Adjustment...............................3-109
Section 3 Instrument Panel
3-2
Page 184 of 446
DIC Vehicle Personalization
The DIC can be used to program the following
personalization features available with your vehicle:
Automatic Door Locks
Window Lock Out
Security Feedback
Delayed Locking
Perimeter Lighting
Memory Seats
Outside Curb View Assist Mirror
Driver ID
The DIC is used to program the personal choices of two
drivers. The drivers are recognized as DRIVER #1 and
DRIVER #2. You will let the DIC know which driver you
are by using your remote keyless entry transmitter or by
pressing the appropriate memory seat control button
located on the driver’s door or by choosing the driver with
the DIC. Each remote keyless entry transmitter was
preprogrammed to belong to DRIVER #1 or DRIVER #2.
Each transmitter may be programmed differently.When you press the unlock button on your transmitter,
the DIC will change driver numbers and the vehicle
will recall the personalization settings that were
last made to correspond to your transmitter, including
your radio and climate control settings. SeeClimate
Controls Personalization on page 3-35.
If you unlock the vehicle using your door key instead of
your transmitter, the DIC will not change drivers and
will recall the information from the last transmitter use or
the last driver change using the memory seat controls.
If this happens and you were not the last driver of
the vehicle, press your correct driver number on the
memory seat controls or press the unlock button on your
transmitter or select the personalization programming
mode and choose the correct driver number.
Use the following steps for personalization programming
instructions.
1. Turn the ignition on and keep the transaxle in
PARK (P).
2. Press the MODE button to reach personalization
programming display.
3. Press the SELECT button to enter personalization
programming mode.
3-64
Page 193 of 446
Audio System(s)
Notice:Before you add any sound equipment to
your vehicle – like a tape player, CB radio, mobile
telephone or two-way radio – be sure you can add
what you want. If you can, it’s very important to do it
properly. Added sound equipment may interfere with
the operation of your vehicle’s engine, radio or other
systems, and even damage them. Your vehicle’s
systems may interfere with the operation of sound
equipment that has been added improperly.
So, before adding sound equipment, check with
your dealer and be sure to check federal rules
covering mobile radio and telephone units.
Your audio system has been designed to operate easily
and to give years of listening pleasure. You will get
the most enjoyment out of it if you acquaint yourself with
it �rst. Figure out which radio you have in your vehicle,
�nd out what your audio system can do and how to
operate all of its controls to be sure you’re getting the
most out of the advanced engineering that went into it.
Your vehicle has a feature called Retained Accessory
Power (RAP). With RAP, you can play your audio
system even after the ignition is turned off. See
“Retained Accessory Power (RAP)” underIgnition
Positions on page 2-26.
Setting the Time
Press and hold HR or MIN for two seconds. Then press
and hold HR until the correct hour appears on the
display. AM will appear for morning hours. Press and
hold MIN until the correct minute appears on the display.
The time may be set with the ignition on or off.
To synchronize the time with an FM station broadcasting
Radio Data System (RDS) information, press and
hold HR and MIN at the same time until UPDATED and
the clock symbol appear on the display. If the time is
not available from the station, NO UPDATE will appear
on the display.
RDS time is broadcast once a minute. Once you have
tuned to an RDS broadcast station, it may take a
few minutes for your time to update.
3-73
Page 197 of 446
Setting the Tone (Bass/Treble)
TONE:Press and release this button until BASS, MID,
or TREB appears on the display. The SELECT LED
indicator will light to show that the tone control can be
adjusted. Turn the SELECT knob to increase or to
decrease. If a station is weak or noisy, you may want to
decrease the treble.
To adjust all of the tone controls to the middle position,
press and hold TONE until FLAT appears on the display.
EQ (Equalizer):Press this button to select customized
equalization settings.
You can set up to six customized equalization settings
by performing the following steps:
1. Turn the radio on.
2. Use the TONE button and the SELECT knob to
create the desired equalization.3. Press and hold the EQ button for two seconds.
SELECT EQ # will appear on the display and the
EQ symbol will �ash.
4. Press EQ or turn the SELECT knob to select the
desired EQ number.
5. Press and hold the EQ button or push the SELECT
knob to store the equalization setting and the
number. You will hear a beep and EQ SAVED will
appear on the display.
6. Repeat the steps for the other EQ settings and
numbers.
EQ 5 has been programmed at the factory for use with
talk radio, but it can be preset to a different tone.
3-77
Page 209 of 446
Setting Preset Stations
The six numbered pushbuttons let you return to your
favorite stations. You can set up to 30 stations (six FM1,
six FM2, and six AM, six XM1 and six XM2 (48
contiguous US states, if equipped), by performing the
following steps:
1. Turn the radio on.
2. Press BAND to select FM1, FM2, or AM, or XM1 or
XM2.
3. Tune in the desired station.
4. Press EQ to select the equalization.
5. Press and hold one of the six numbered
pushbuttons until you hear a beep. Whenever you
press that numbered pushbutton, the station
you set will return and the equalization that you
selected will be automatically stored for that
pushbutton.
6. Repeat the steps for each pushbutton.
Setting the Tone (Bass/Treble)
TONE:Press and release this button until BASS, MID,
or TREB appears on the display. The SELECT LED
indicator will light to show that the tone control can be
adjusted. Turn the SELECT knob to increase or to
decrease. If a station is weak or noisy, you may want to
decrease the treble.
To adjust all of the tone controls to the middle position,
press and hold TONE until FLAT appears on the
display.
EQ (Equalizer):Press this button to select customized
equalization settings.
You can set up to six customized equalization settings
by performing the following steps:
1. Turn the radio on.
2. Use the TONE button and the SELECT knob to
create the desired equalization.
3. Press and hold the EQ button for two seconds.
SELECT EQ # will appear on the display and the
EQ symbol will �ash.
4. Press EQ or turn the SELECT knob to select the
desired EQ number.
3-89
Page 216 of 446
Playing a Cassette Tape
Your tape player is built to work best with tapes that are
up to 30 to 45 minutes long on each side. Tapes
longer than that are so thin they may not work well in
this player. The longer side with the tape visible should
face to the right. If the ignition is on, but the radio is
off, the tape can be inserted and will begin playing. A
tape symbol will appear on the display whenever a tape
is inserted. If you hear nothing or hear a garbled
sound, the tape may not be in squarely. Press the eject
button to remove the tape and start over.
While the tape is playing, use the VOL, BAL, FADE,
TONE, EQ, and SEEK controls just as you do for
the radio. The display will show TAPE and an arrow
showing which side of the tape is playing. The
tape player automatically begins playing the other side
when it reaches the end of the tape.
If you want to insert a tape while the ignition is off, �rst
press the eject button or push the RCL knob. Cassette
tape adapter kits for portable CD players will work
in your cassette tape player.
Your tape bias is set automatically when a metal or
chrome tape is inserted.
If an error appears on the display, see “Cassette Tape
Messages” later in this section.
\1 (Forward):Press this pushbutton to advance the
tape rapidly. Press this pushbutton again to return to
playing speed. The radio will play while the tape
advances. You may select stations during forward
operation by using TUNE.
While in forward mode, the display will show FREQ and
FWD and two right arrows. If the radio is playing a
RDS station, the display will only show FREQ.
y2 (Side):Press this pushbutton to play the other
side of the tape.
4
s(Reverse):Press this pushbutton to reverse the
tape rapidly. Press it again to return to playing speed. The
radio will play while the tape reverses. You may select
stations during reverse operation by using TUNE.
EQ (Equalizer):Press EQ to select the desired
customized equalization setting while playing a cassette.
The equalization will be automatically set whenever
you play a cassette tape. See “EQ” listed previously for
more information.
3-96
Page 225 of 446
CD DOOR OPEN:The CD changer door is open.
Completely close the door to restore normal operation.
If the CD is not playing correctly, for any other
reason, try a known good CD.
If any error occurs repeatedly or if an error cannot be
corrected, contact your dealer. If your radio displays an
error message, write it down and provide it to your
dealer when reporting the problem.
Theft-Deterrent Feature
THEFTLOCK®is designed to discourage theft of your
radio. The feature works automatically by learning
a portion of the Vehicle Identi�cation Number (VIN).
If the radio is moved to a different vehicle, it will
not operate and LOCKED will appear on the display.
With THEFTLOCK activated, your radio will not operate
if stolen.
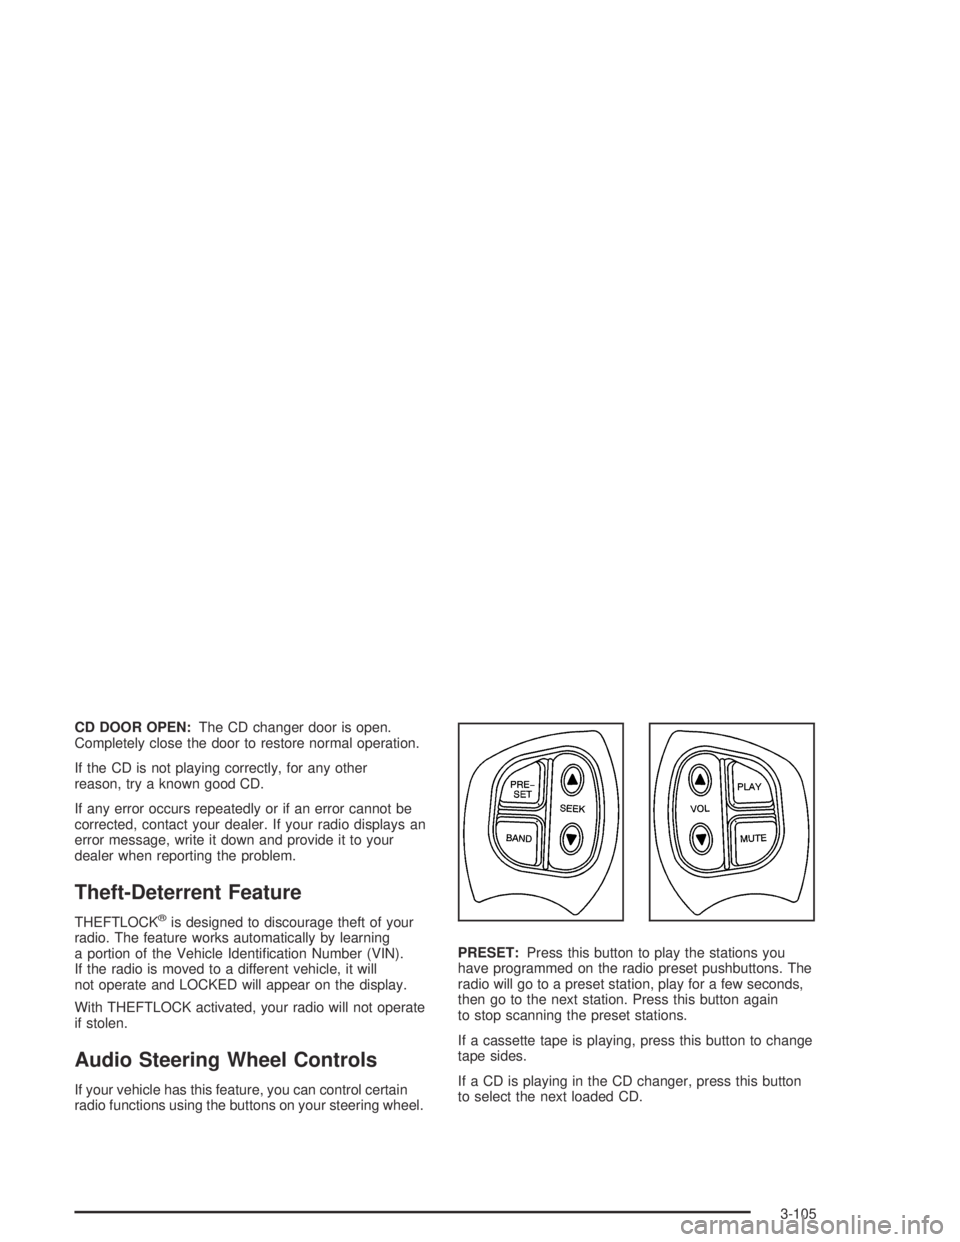
Audio Steering Wheel Controls
If your vehicle has this feature, you can control certain
radio functions using the buttons on your steering wheel.PRESET:Press this button to play the stations you
have programmed on the radio preset pushbuttons. The
radio will go to a preset station, play for a few seconds,
then go to the next station. Press this button again
to stop scanning the preset stations.
If a cassette tape is playing, press this button to change
tape sides.
If a CD is playing in the CD changer, press this button
to select the next loaded CD.
3-105
Page 431 of 446
A
Accessory In�ator...........................................5-78
Accessory Power Outlets.................................3-25
Adding Washer Fluid.......................................5-41
Additional Program Information........................... 7-9
Additives, Fuel................................................. 5-6
Add-On Electrical Equipment...........................5-100
Adjusting the Speakers (Balance/Fade)......3-78, 3-90
Air Bag
Readiness Light..........................................3-41
Air Bag Systems.............................................1-51
How Does an Air Bag Restrain?....................1-57
Servicing Your Air Bag-Equipped Vehicle.........1-60
What Makes an Air Bag In�ate?....................1-57
What Will You See After an Air Bag In�ates?......1-58
When Should an Air Bag In�ate?...................1-56
Where Are the Air Bags?..............................1-54
Air Cleaner/Filter, Engine.................................5-21
Airbag Sensing and Diagnostic Module (SDM).......7-10
AM .............................................................3-106
Antenna, Diversity Antenna System..................3-108
Antenna, XM™ Satellite Radio Antenna
System.....................................................3-109
Anti-lock Brake System (ABS)............................ 4-7
Anti-Lock Brake, System Warning Light..............3-44
Appearance Care............................................5-91
Care of Safety Belts....................................5-94
Chemical Paint Spotting...............................5-97Appearance Care (cont.)
Cleaning the Inside of Your Vehicle................5-91
Cleaning the Outside of Your Vehicle..............5-94
Finish Damage............................................5-96
Sheet Metal Damage...................................5-96
Underbody Maintenance...............................5-97
Vehicle Care/Appearance Materials................5-98
Weatherstrips..............................................5-94
Ashtrays........................................................3-26
Audio System(s).............................................3-73
Audio Steering Wheel Controls....................3-105
Care of Your Cassette Tape Player...............3-107
Care of Your CD Player..............................3-108
Care of Your CDs......................................3-108
Chime Level Adjustment.............................3-109
Diversity Antenna System............................3-108
Radio with Cassette and CD.........................3-86
Radio with CD............................................3-74
Setting the Time..........................................3-73
Theft-Deterrent Feature...............................3-105
Trunk-Mounted CD Changer........................3-101
Understanding Radio Reception...................3-106
XM™ Satellite Radio Antenna System...........3-109
Automatic Climate Control System.....................3-29
Automatic Door Locks.....................................3-66
Automatic Level Control...................................4-38
Automatic Operation........................................3-30
1