2004 NISSAN XTERRA change time
[x] Cancel search: change timePage 149 of 296

Repeat/Mix
Press the RPT MIX button to change CD play
patterns:
Repeat!Mix!All Mix!Normal Play
Repeat
Press the RPT MIX button (<1.5 seconds) once
to repeat the current track. The “1” icon is turned
on, and the display shows“Repeat Track”for 2
seconds. The display then shows the Track num-
ber and Elapsed time as normal.Mix
Press the RPT MIX button (<1.5 seconds) again
to start shuffle play of the current disc. The “MIX”
icon is turned on and the display shows“Mix
Tracks”for 2 seconds. The display then shows
the Track number and Elapsed time as normal.
All mix
Press the RPT MIX button (<1.5 seconds) again
to start shuffle play of all discs. The “MIX” icon is
turned on, and the display shows“Mix All
Tracks”for 2 seconds. The display then shows
the Track number and Elapsed time as normal.
Also, the indicators of the loaded discs are turned
on with amber color. (Green for current disc.)
Normal play
Press the RPT MIX button (<1.5 seconds) again
to return to normal play mode. The “MIX” icon and
the amber LEDs are turned off. The display
shows“Normal Play”for 2 seconds. The dis-
play then shows the Track number and Elapsed
time as normal.CD scan
1 Disc All Tracks
Press the SCAN button (<1.5 seconds) to scan
all tracks of the current disc for 7 seconds per
track. The display shows“Disc Scan”for 2
seconds, and then shows the track number and
elapsed time as normal. The SCAN icon is
flashed during Scan mode.
The Scan mode is canceled once it scans
through all tracks on the disc, or if the SCAN
button is pressed during Scan mode.
LHA0077LHA0078
Heater, air conditioner and audio systems4-25
ZREVIEW COPY:Ð2004 Xterra(xtr)
Owners Manual(owners)ÐUSA English(nna)
10/23/03Ðdebbie
X
Page 150 of 296

All Discs, 1 Track
Press and hold the SCAN button (>1.5 seconds)
to scan the first track of all the loaded discs for 7
seconds per track. The display shows“All Disc
Scan”for 2 seconds, and then shows the track
number and elapsed time as normal. The SCAN
icon is flashed during Scan mode.
The Scan mode is canceled once it scans
through all the loaded discs, or if the SCAN
button is pressed during Scan mode.
Eject CD
Current disc
1. Press the
button.
2. Thegreenindicator starts to blink and the
display shows“Disc Eject”for 2 seconds.
The display then changes to“Ejecting
Disc”.
3. The disc ejects. Remove the disc. (If the disc
is not removed within 15 seconds, the disc
will reload.)
4. The indicator and symbol for the disc are
turned off.Select a disc
1. Press the desired disc, then press
the
button.
2. Thegreenindicator starts blinking and the
display shows“Disc Eject”for 2 seconds.
The display then changes to“Ejecting
Disc”.
3. The disc ejects. Remove the disc. (If the disc
is not removed within 15 seconds, the disc
will reload.)
4. The indicator and symbol for the disc are
turned off.
LHA0079
4-26Heater, air conditioner and audio systems
ZREVIEW COPY:Ð2004 Xterra(xtr)
Owners Manual(owners)ÐUSA English(nna)
10/23/03Ðdebbie
X
Page 156 of 296
WARNING
cOn hot, sunny days, temperatures in a
closed vehicle could quickly become
high enough to cause severe or possi-
bly fatal injuries to people or animals.
Do not leave children or adults who
would normally require the support of
others in your vehicle. Unattended pets
should not be left alone either.
cProperly secure all cargo with ropes or
straps to help prevent it from sliding or
shifting. Do not place cargo higher than
the seatbacks. In a sudden stop or col-
lision, unsecured cargo could cause
personal injury.
EXHAUST GAS (carbon monoxide)
WARNING
cDo not breathe exhaust gases; they
contain colorless and odorless carbon
monoxide. Carbon monoxide is danger-
ous. It can cause unconsciousness or
death.
cIf you suspect that exhaust fumes are
entering the vehicle, drive with all win-
dows fully open, and have the vehicle
inspected immediately.cDo not run the engine in closed spaces
such as a garage.
cDo not park the vehicle with the engine
running for any extended length of time.
cKeep the back door and rear windows
closed while driving, otherwise exhaust
gases could be drawn into the passen-
ger compartment. If you must drive with
the back door or rear windows open,
follow these precautions:
1. Open all the windows.
2. Set the
air recirculation but-
ton (if so equipped) to off and the fan
control dial to 4 (high) to circulate
the air.
cIf electrical wiring or other cable con-
nections must pass to a trailer through
the seal on the back door or the body,
follow the manufacturer’s recommen-
dation to prevent carbon monoxide en-
try into the vehicle.
cThe exhaust system and body should be
inspected by a qualified mechanic
whenever:
a. The vehicle is raised for service.b. You suspect that exhaust fumes are
entering into the passenger
compartment.
c. You notice a change in the sound of
the exhaust system.
d. You have had an accident involving
damage to the exhaust system, un-
derbody, or rear of the vehicle.
THREE-WAY CATALYST
The three-way catalyst is an emission control
device installed in the exhaust system. Exhaust
gases in the three-way catalyst are burned at
high temperatures to help reduce pollutants.
WARNING
cThe exhaust gas and the exhaust sys-
tem are very hot. Keep people, animals
or flammable materials away from the
exhaust system components.
cDo not stop or park the vehicle over
flammable materials such as dry grass,
waste paper or rags. They may ignite
and cause a fire.
PRECAUTIONS WHEN STARTING
AND DRIVING
5-2Starting and driving
ZREVIEW COPY:Ð2004 Xterra(xtr)
Owners Manual(owners)ÐUSA English(nna)
11/20/03Ðcathy
X
Page 158 of 296
cWhen a spare tire is mounted or a wheel
is replaced, tire pressure will not be
indicated and the low tire pressure
warning system will not function. Con-
tact your NISSAN dealer as soon as
possible for tire replacement and/or
system resetting.
cDo not inject any tire liquid or aerosol
tire sealant into the tires, as this may
cause a malfunction of the tire pressure
sensors.
CAUTION
Do not place metalized film or any metal
parts (antenna, etc.) on the windows. This
may cause poor reception of the signals
from the tire pressure sensors, and the
low tire pressure warning system will not
function properly.
FCC Notice:
Changes or modifications not expressly ap-
proved by the manufacturer compliance
could void the user’s authority to operate
the equipment.
This device complies with Part 15 of the
FCC Rules and RSS-210 of Industry
Canada.Operation is subject to the following two
conditions: (1) This device may not cause
harmful interface, and (2) this device must
accept any interference received, including
interference that may cause undesired op-
eration of the device.
ON-PAVEMENT AND OFF-ROAD
DRIVING PRECAUTIONS
Utility vehicles have a significantly higher
rollover rate than other types of vehicles.
They have higher ground clearance than passenger
cars to make them capable of performing in a variety
of on-pavement and off-road applications. This
gives them a higher center of gravity than ordinary
cars. An advantage of higher ground clearance is a
better view of the road, allowing you to anticipate
problems. However, they are not designed for cor-
nering at the same speeds as conventional two-
wheel drive vehicles any more than low-slung
sports cars are designed to perform satisfactorily
under off-road conditions. If at all possible, avoid
sharp turns at high speeds. As with other vehicles of
this type, failure to operate this vehicle correctly
may result in loss of control or vehicle rollover. In a
rollover crash, an unbelted person is significantly
more likely to die than a person wearing a seat belt.
Be sure to read the driving safety precautions
later in this section.
AVOIDING COLLISION AND
ROLLOVER
WARNING
Failure to operate this vehicle in a safe
and prudent manner may result in loss of
control or an accident.
Be alert and drive defensively at all times. Obey
all traffic regulations. Avoid excessive speed,
high speed cornering, or sudden steering ma-
neuvers, because these driving practices could
cause you to lose control of your vehicle.As with
any vehicle, loss of control could result in a
collision with other vehicles or objects, or
cause the vehicle to roll over, particularly if
the loss of control causes the vehicle to
slide sideways.Be attentive at all times, and
avoid driving when tired. Never drive when under
the influence of alcohol or drugs (including pre-
scription or over-the-counter drugs which may
cause drowsiness) . Always wear your seat belt
as outlined in the “Safety – Seats, seat belts and
supplemental air bags” section of this manual,
and also instruct your passengers to do so.
Seat belts help reduce the risk of injury in colli-
sions and rollovers.In a rollover crash, an
unbelted or improperly belted person is
significantly more likely to be injured or
killed than a person wearing a seat belt.
5-4Starting and driving
ZREVIEW COPY:Ð2004 Xterra(xtr)
Owners Manual(owners)ÐUSA English(nna)
10/23/03Ðdebbie
X
Page 168 of 296
OFF: For driving up and down long
slopes where engine braking is nec-
essary push the Overdrive switch
once. The O/D OFF indicator light
in the instrument panel comes on at
this time.
When cruising at a low speed or climbing a
gentle slope, you may feel uncomfortable shift
shocks as the transmission shifts into and out of
Overdrive repeatedly. In this case, depress the
Overdrive switch to turn the Overdrive off. The
O/D OFF indicator light in the instrument panel
comes on at this time.
When driving conditions change, depress the
Overdrive switch to turn the Overdrive on.
Remember not to drive at high speeds for ex-
tended periods of time with the Overdrive off.
This reduces fuel economy.
MANUAL TRANSMISSION
WARNING
cDo not downshift abruptly on slippery
roads. This may cause a loss of control.
cDo not over-rev the engine when shift-
ing to a lower gear. This may cause a
loss of control or engine damage.
CAUTION
cDo not rest your foot on the clutch pedal
while driving. This may cause clutch
damage.
cFully depress the clutch pedal before
shifting to help prevent transmission
damage.
cStop your vehicle completely before
shifting into R (Reverse) .
cWhen the vehicle is stopped with the
engine running (for example, at a stop
light) , shift to N (Neutral) and release
the clutch pedal with the foot brake
applied.
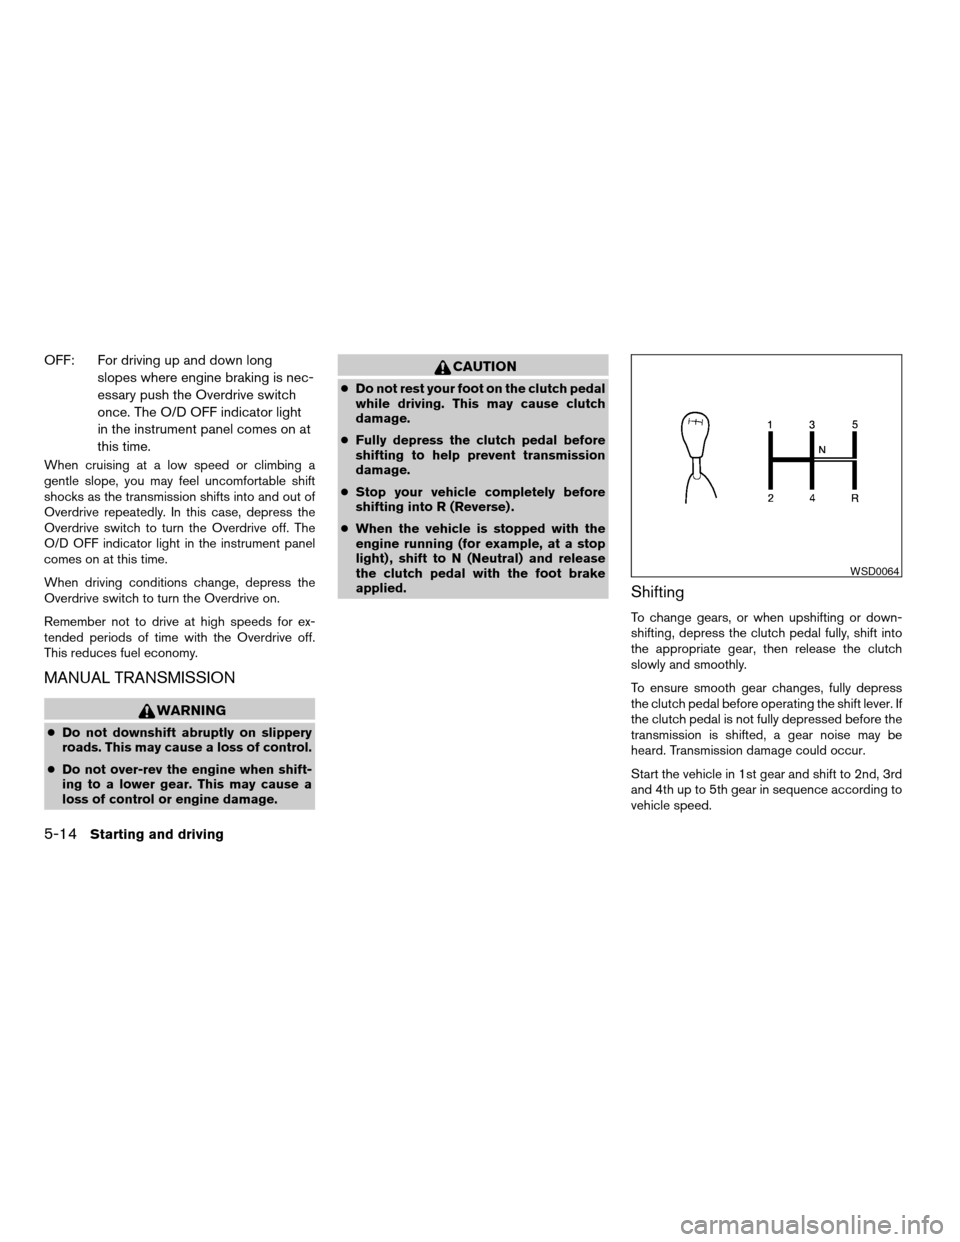
Shifting
To change gears, or when upshifting or down-
shifting, depress the clutch pedal fully, shift into
the appropriate gear, then release the clutch
slowly and smoothly.
To ensure smooth gear changes, fully depress
the clutch pedal before operating the shift lever. If
the clutch pedal is not fully depressed before the
transmission is shifted, a gear noise may be
heard. Transmission damage could occur.
Start the vehicle in 1st gear and shift to 2nd, 3rd
and 4th up to 5th gear in sequence according to
vehicle speed.
WSD0064
5-14Starting and driving
ZREVIEW COPY:Ð2004 Xterra(xtr)
Owners Manual(owners)ÐUSA English(nna)
10/23/03Ðdebbie
X
Page 216 of 296
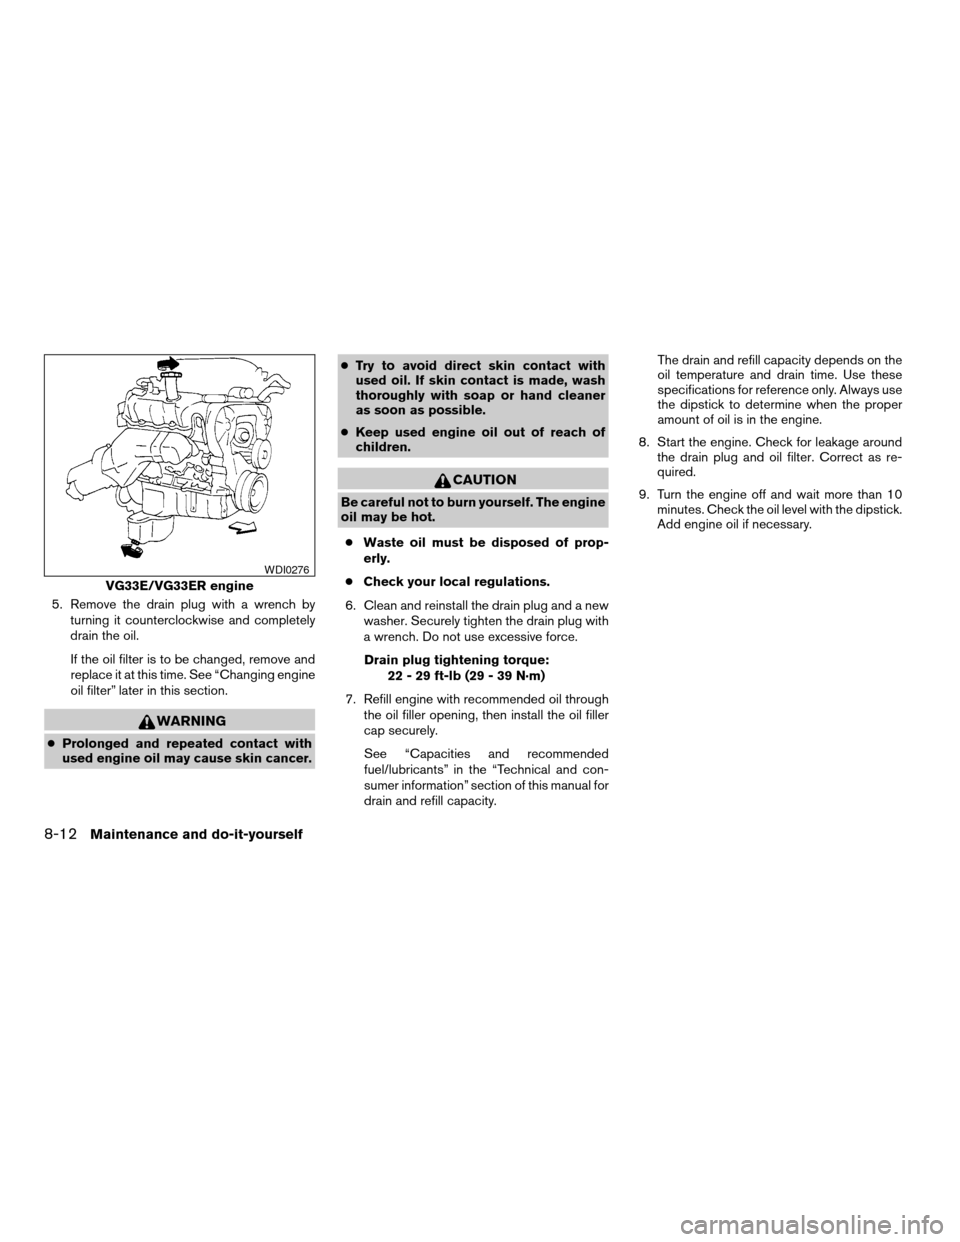
5. Remove the drain plug with a wrench by
turning it counterclockwise and completely
drain the oil.
If the oil filter is to be changed, remove and
replace it at this time. See “Changing engine
oil filter” later in this section.
WARNING
cProlonged and repeated contact with
used engine oil may cause skin cancer.cTry to avoid direct skin contact with
used oil. If skin contact is made, wash
thoroughly with soap or hand cleaner
as soon as possible.
cKeep used engine oil out of reach of
children.
CAUTION
Be careful not to burn yourself. The engine
oil may be hot.
cWaste oil must be disposed of prop-
erly.
cCheck your local regulations.
6. Clean and reinstall the drain plug and a new
washer. Securely tighten the drain plug with
a wrench. Do not use excessive force.
Drain plug tightening torque:
22 - 29 ft-lb (29 - 39 N·m)
7. Refill engine with recommended oil through
the oil filler opening, then install the oil filler
cap securely.
See “Capacities and recommended
fuel/lubricants” in the “Technical and con-
sumer information” section of this manual for
drain and refill capacity.The drain and refill capacity depends on the
oil temperature and drain time. Use these
specifications for reference only. Always use
the dipstick to determine when the proper
amount of oil is in the engine.
8. Start the engine. Check for leakage around
the drain plug and oil filter. Correct as re-
quired.
9. Turn the engine off and wait more than 10
minutes. Check the oil level with the dipstick.
Add engine oil if necessary.
VG33E/VG33ER engine
WDI0276
8-12Maintenance and do-it-yourself
ZREVIEW COPY:Ð2004 Xterra(xtr)
Owners Manual(owners)ÐUSA English(nna)
10/23/03Ðdebbie
X
Page 234 of 296

Under some driving or climate conditions, occa-
sional brake squeak, squeal or other noise may
be heard. Occasional brake noise during light to
moderate stops is normal and does not affect the
function or performance of the brake system.
The rear drum brakes (if so equipped) do not
have audible wear indicators. Should you ever
hear an unusually loud noise from the rear drum
brakes, have them inspected as soon as possible
by a NISSAN dealer.
Proper brake inspection intervals should
be followed.For more information regarding
brake inspections, see the appropriate mainte-
nance schedule information in the “NISSAN Ser-
vice and Maintenance Guide”.
BRAKE BOOSTER
Check the brake booster function as follows:
1. With the engine off, press and release the
brake pedal several times. When brake
pedal movement (distance of travel) remains
the same from one pedal application to the
next, continue on to the next step.
2. While depressing the brake pedal, start the
engine. The pedal height should drop a little.3. With the brake pedal depressed, stop the
engine. Keep the pedal depressed for about
30 seconds. The pedal height should not
change.
4. Run the engine for one minute without de-
pressing the brake pedal, then turn it off.
Depress the brake pedal several times. The
pedal travel distance will decrease gradually
with each depression as the vacuum is re-
leased from the booster.
If the brakes do not operate properly, have the
brakes checked by a NISSAN dealer.
8-30Maintenance and do-it-yourself
ZREVIEW COPY:Ð2004 Xterra(xtr)
Owners Manual(owners)ÐUSA English(nna)
10/23/03Ðdebbie
X
Page 237 of 296
5. Press thebutton, then thebutton two or three times to check the key-
fob operation.
If the battery is removed for any reason
other than replacement, perform step 5.
cAn improperly disposed battery can
hurt the environment. Always confirm
local regulations for battery disposal.
cThe keyfob is water-resistant; how-
ever, if it does get wet, immediately
wipe completely dry.
cThe operational range of the keyfob
extends to approximately 33 ft (10 m)
from the vehicle. This range may vary
with conditions.
FCC Notice:
Changes or modifications not expressly ap-
proved by the manufacturer for compliance
could void the user’s authority to operate
the equipment.
This device complies with Part 15 of the
FCC Rules and RSS-210 of Industry
Canada.Operation is subject to the following two
conditions: (1) This device may not cause
harmful interference, and (2) this device
must accept any interference received, in-
cluding interference that may cause undes-
ired operation of the device.HEADLIGHTS
The headlight is a semi-sealed beam type which
uses a replaceable headlight (halogen) bulb. A
bulb can be replaced from inside the engine
compartment without removing the headlight as-
sembly.
CAUTION
cHigh pressure halogen gas is sealed
inside the halogen bulb. The bulb may
break if the glass envelope is scratched
or the bulb is dropped.
cWhen handling the bulb, do not touch
the glass envelope.
cDO NOT TOUCH THE BULB
cUse the same number and wattage as
originally installed:
Wattage 65/55Bulb No. HB5/9007*
*: Always check with the Parts Depart-
ment at a NISSAN dealer for the latest
parts information.
cDo not leave the bulb out of the head-
light reflector for a long period of time
as dust, moisture and smoke may enter
the headlight body and affect the per-
formance of the headlight.
LIGHTS
Maintenance and do-it-yourself8-33
ZREVIEW COPY:Ð2004 Xterra(xtr)
Owners Manual(owners)ÐUSA English(nna)
10/23/03Ðdebbie
X