2004 NISSAN TITAN isofix
[x] Cancel search: isofixPage 60 of 328

cThe LATCH system anchors are de-
signed to withstand only those loads
imposed by correctly fitted child re-
straints. Under no circumstance are
they to be used for adult seat belts or
harnesses.
Some child restraints include two rigid or
webbing-mounted attachments that can be con-
nected to two anchors located at certain seating
positions in your vehicle. This system is known as
the LATCH (Lower Anchors and Tethers for CHil-
dren) system. This system may also be referred to
as the ISOFIX or ISOFIX compatible system.
With this system, you do not have to use a vehicleseat belt to secure the child restraint. Your vehicle
is equipped with special anchor points that are
used with LATCH system compatible child re-
straints. Check your child restraint for a label
stating that it is compatible with the LATCH sys-
tem. This information may also be in the child
restraint owner’s manual. If you have such a child
restraint, refer to the illustration for the seating
positions equipped with LATCH system anchors
which can be used to secure the child restraint.
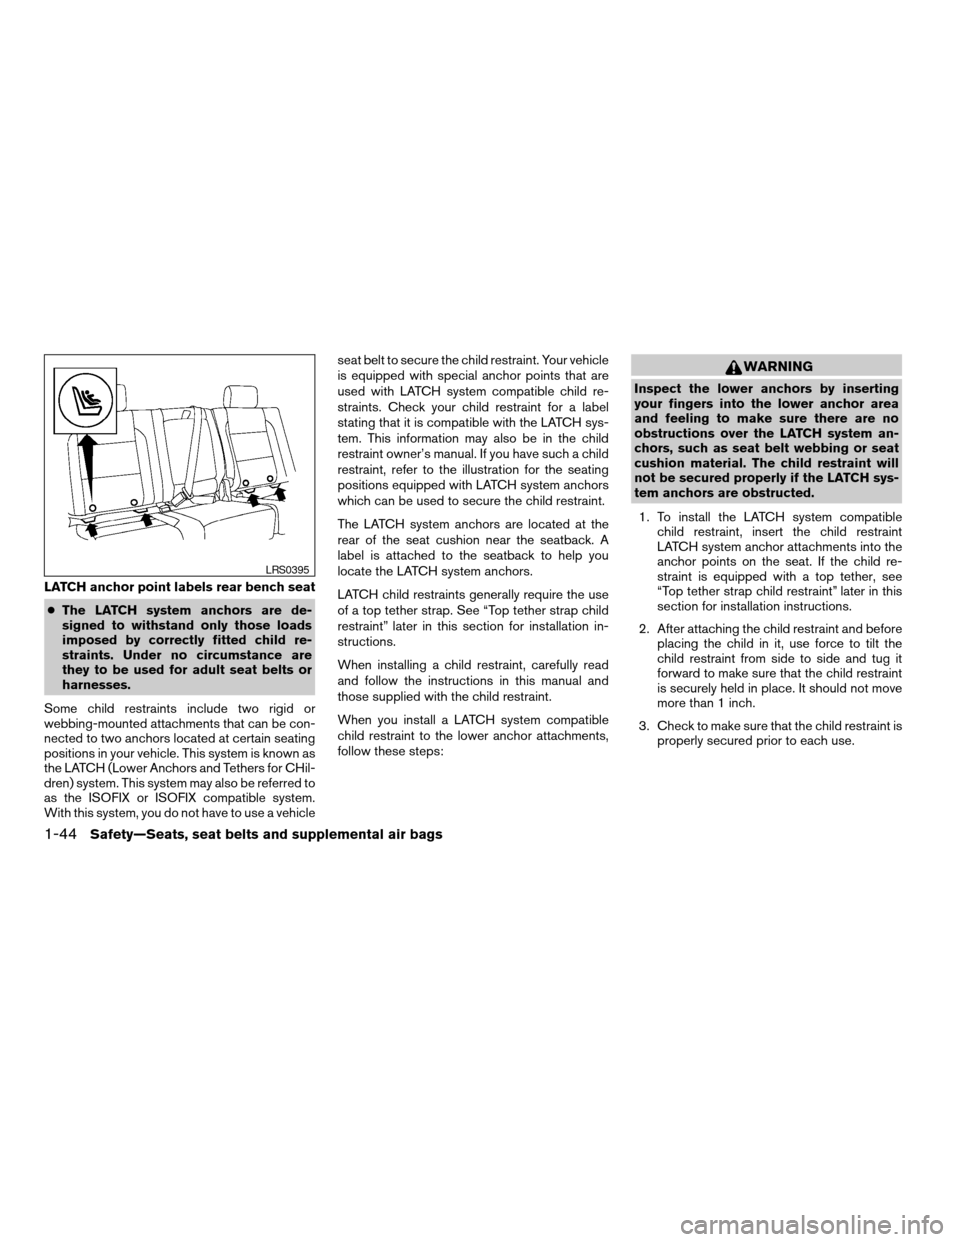
The LATCH system anchors are located at the
rear of the seat cushion near the seatback. A
label is attached to the seatback to help you
locate the LATCH system anchors.
LATCH child restraints generally require the use
of a top tether strap. See “Top tether strap child
restraint” later in this section for installation in-
structions.
When installing a child restraint, carefully read
and follow the instructions in this manual and
those supplied with the child restraint.
When you install a LATCH system compatible
child restraint to the lower anchor attachments,
follow these steps:
WARNING
Inspect the lower anchors by inserting
your fingers into the lower anchor area
and feeling to make sure there are no
obstructions over the LATCH system an-
chors, such as seat belt webbing or seat
cushion material. The child restraint will
not be secured properly if the LATCH sys-
tem anchors are obstructed.
1. To install the LATCH system compatible
child restraint, insert the child restraint
LATCH system anchor attachments into the
anchor points on the seat. If the child re-
straint is equipped with a top tether, see
“Top tether strap child restraint” later in this
section for installation instructions.
2. After attaching the child restraint and before
placing the child in it, use force to tilt the
child restraint from side to side and tug it
forward to make sure that the child restraint
is securely held in place. It should not move
more than 1 inch.
3. Check to make sure that the child restraint is
properly secured prior to each use.
LATCH anchor point labels rear bench seat
LRS0395
1-44Safety—Seats, seat belts and supplemental air bags
ZREVIEW COPY:Ð2004 Titan(tzw)
Owners Manual(owners)ÐUSA English(nna)
02/20/04Ðtbrooks
X
Page 323 of 328

G
Garage door opener, HomeLinkTUniversal
Transceiver...................2-49
Gascap.....................3-11
Gauge
Automatic transmission fluid temperature
gauge.....................2-7
Engine coolant temperature gauge.....2-5
Engine oil pressure gauge..........2-6
Fuel gauge..................2-6
Odometer...................2-4
Speedometer.................2-4
Tachometer..................2-5
Trip odometer.................2-4
Voltmeter...................2-7
General maintenance..............8-2
Glove box....................2-37
Grocery hooks.................2-42
H
Hazard warning flasher switch.........2-27
Head restraints..................1-6
Headlight and turn signal switch........2-23
Headphones (See NISSAN mobile
entertainment system).............4-41
Heated mirror switch..............2-23
Heated seats..................2-29
Heater
Heater and air conditioner controls. . . .4-12
Heater operation..............4-13
HomeLinkTUniversal Transceiver.......2-49
Hood release..................3-11
Horn.......................2-28I
Ignition switch..................5-7
Immobilizer system..........2-21, 3-2, 5-8
Important vehicle information label.......9-10
In-cabin microfilter...............8-16
Increasing fuel economy............5-19
Indicator lights and audible reminders
(See warning/indicator lights and audible
reminders)....................2-12
Inside automatic anti-glare mirror.......3-16
Inside mirror...................3-15
Instrument brightness control.........2-26
Instrument panel.................2-2
Interior light...................2-47
ISOFIX child restraints.............1-43
J
Jump starting...................6-8
K
Key ........................3-2
Keyless entry system
(See remote keyless entry system).......3-7
L
Labels
Air conditioner specification label.....9-11
Emission control information label.....9-10
Engine serial number............9-10F.M.V.S.S. certification label........9-10
Vehicle identification number (VIN) plate . .9-9
Warning labels (for SRS)..........1-25
LATCH (Lower Anchors and Tethers for CHildren)
System......................1-43
License plate
Installing the license plate.........9-11
Light
Air bag warning light.........1-26, 2-16
Brake light (See stop light).........8-26
Bulb check/instrument panel........2-12
Bulb replacement..............8-26
Charge warning light............2-14
Fog light switch...............2-27
Headlight and turn signal switch......2-23
Interior light.................2-47
Light bulbs..................8-24
Low tire pressure warning light......2-15
Low washer fluid warning light.......2-16
Passenger air bag and status light .1-20, 2-18
Personal lights...............2-49
Security indicator light........1-20, 2-18
Warning/indicator lights and audible
reminders..................2-12
Lights
Map lights..................2-49
Lock
Child safety rear door lock..........3-6
Door locks..................3-3
Power door locks...............3-4
Low fuel warning light.............2-15
Low tire pressure warning light........2-15
Low tire pressure warning system........5-3
Low washer fluid warning light.........2-16
Luggage (See vehicle loading information) . .9-12
10-3
ZREVIEW COPY:Ð2004 Titan(tzw)
Owners Manual(owners)ÐUSA English(nna)
03/01/04Ðdebbie
X