2004 NISSAN SENTRA stop start
[x] Cancel search: stop startPage 172 of 248

2. Open the drain plug on the engine block.
3. Open the radiator cap to drain the coolant.
cWaste coolant must be disposed of prop-
erly.
cCheck your local regulations.
4. Flush the cooling system by running fresh
water through the radiator.
5. Close the drain plugs on the radiator and the
engine block securely.6. See the “Technical and consumer informa-
tion” section for cooling system capacity. Fill
the radiator slowly with the proper mixture of
coolant and water. Fill the reservoir tank up
to the MAX level.
7. For QG18DE engine only, open and close
the air release plug(s) to release air. Then fill
the radiator again and install the radiator
cap.8. Start the engine, and warm it up until it
reaches normal operating temperature.
Then race the engine two or three times
under no load. Watch the engine coolant
temperature gauge for signs of overheating.
9. Stop the engine. After it completely cools
down, refill the radiator up to the filler open-
ing. Fill the engine coolant reservoir tank up
to the MAX level.
10. For QG18DE engine only, open and close
the air release plug(s) to release air. Then fill
the radiator again and install the radiator
cap.
11. Check the drain plugs on the radiator and
the engine block for any sign of leakage. For
QG18DE only, also check the air release
plug for any sign of leakage.
QG18DE engine
WDI0171
QG18DE engine
WDI0172
8-10Maintenance and do-it-yourself
ZREVIEW COPY:Ð2004 Sentra(b15)
Owners Manual(owners)ÐUSA English(nna)
03/18/04Ðtbrooks
X
Page 185 of 248

3. Disconnect the ignition coils from the spark
plugs.
4. Remove the spark plugs with a spark plug
socket.
The plug socket has a rubber seal that holds
the spark plug so it does not fall when it is
pulled out. Make sure each spark plug is
snugly fitted into the spark plug socket.
5. Fit the new plugs, one at a time, into the
spark plug socket and install them.Use
only the specified spark plugs.Turn
each plug several full turns by hand, then
tighten with the spark plug socket to the
correct torque. Do not overtighten.
Spark plug tightening torque:
14 - 22 ft-lb (20 - 29 N·m)
6. Holding the boot, reconnect each high ten-
sion cable/ignition coil to its proper spark
plug by pushing it on until you feel a snap.
7. Install the ignition coil bolts.
Ignition coil bolt tightening torque:
33 - 44 in-lb (3.8 - 5.0 N·m)
Connect the ignition coil connector.
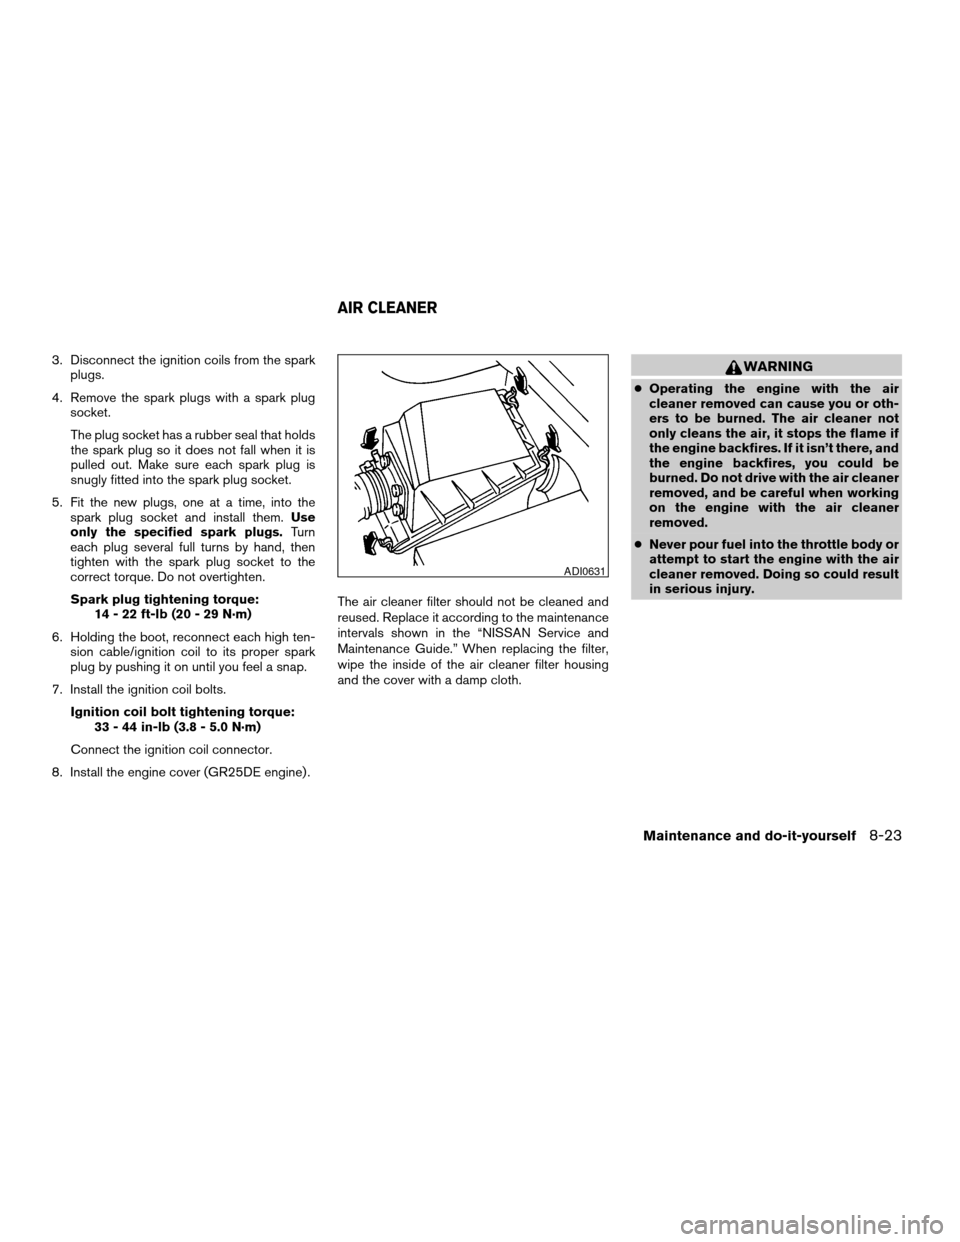
8. Install the engine cover (GR25DE engine) .The air cleaner filter should not be cleaned and
reused. Replace it according to the maintenance
intervals shown in the “NISSAN Service and
Maintenance Guide.” When replacing the filter,
wipe the inside of the air cleaner filter housing
and the cover with a damp cloth.WARNING
cOperating the engine with the air
cleaner removed can cause you or oth-
ers to be burned. The air cleaner not
only cleans the air, it stops the flame if
the engine backfires. If it isn’t there, and
the engine backfires, you could be
burned. Do not drive with the air cleaner
removed, and be careful when working
on the engine with the air cleaner
removed.
cNever pour fuel into the throttle body or
attempt to start the engine with the air
cleaner removed. Doing so could result
in serious injury.
ADI0631
AIR CLEANER
Maintenance and do-it-yourself8-23
ZREVIEW COPY:Ð2004 Sentra(b15)
Owners Manual(owners)ÐUSA English(nna)
03/18/04Ðtbrooks
X
Page 191 of 248

Self-adjusting brakes
Your vehicle is equipped with self-adjusting
brakes.
The front (and rear, if so equipped) disc-type
brakes self-adjust every time the brake pedal is
applied. The rear drum-type brakes also self-
adjust every time the brake pedal is applied.
If the brake pedal goes down farther than normal,
it may be due to a lack of adjustment of the rear
drum brakes. To adjust, apply the parking brake
several times.
WARNING
See a NISSAN dealer for a brake system
check if the brake pedal height does not
return to normal.
Brake pad wear indicators
The disc brake pads on your vehicle have audible
wear indicators. When a brake pad requires re-
placement, a high pitched scraping or screech-
ing sound will be heard when the vehicle is in
motion. The noise will be heard whether or not the
brake pedal is depressed. Have the brakes
checked as soon as possible if the wear indicator
sound is heard.
Under some driving or climate conditions, occa-
sional brake squeak, squeal or other noise maybe heard. Occasional brake noise during light to
moderate stops is normal and does not affect the
function or performance of the brake system.
The rear drum brakes (if so equipped) do not
have audible wear indicators. Should you ever
hear an unusually loud noise from the rear drum
brakes, have them inspected as soon as possible
by a NISSAN dealer.
Proper brake inspection intervals should
be followed.For more information regarding
brake inspections, see the appropriate mainte-
nance schedule information in the “NISSAN Ser-
vice and Maintenance Guide”.
BRAKE BOOSTER
Check the brake booster function as follows:
1. With the engine off, press and release the
brake pedal several times. When brake
pedal movement (distance of travel) remains
the same from one pedal application to the
next, continue on to the next step.
2. While depressing the brake pedal, start the
engine. The pedal height should drop a little.
3. With the brake pedal depressed, stop the
engine. Keep the pedal depressed for about
30 seconds. The pedal height should not
change.4. Run the engine for one minute without de-
pressing the brake pedal, then turn it off.
Depress the brake pedal several times. The
pedal travel distance will decrease gradually
with each depression as the vacuum is re-
leased from the booster.
If the brakes do not operate properly, have the
brakes checked by a NISSAN dealer.
Maintenance and do-it-yourself8-29
ZREVIEW COPY:Ð2004 Sentra(b15)
Owners Manual(owners)ÐUSA English(nna)
03/18/04Ðtbrooks
X
Page 230 of 248

Trailer towing tips
In order to gain skill and an understanding of the
vehicle’s behavior, you should practice turning,
stopping and backing up in an area which is free
from traffic. Steering stability and braking perfor-
mance will be somewhat different than under
normal driving conditions.
cAlways secure items in the trailer to prevent
load shift while driving.
cAvoid abrupt starts, acceleration or stops.
cAvoid sharp turns or lane changes.
cAlways drive your vehicle at a moderate
speed.
cAlways block the wheels on both vehicle and
trailer when parking. Parking on a slope is
not recommended; however, if you must do
so, and if your vehicle is equipped with an
automatic transmission, first block the
wheels and apply the parking brake, and
then move the transmission shift selector
lever into the P (Park) position. If you move
the shift selector lever to the P (Park) posi-
tion before blocking the wheels and applying
the parking brake, transmission damage
could occur.
cWhen going down a hill, shift into a lower
gear and use the engine braking effect.When going up a long grade, downshift the
transmission to a lower gear and reduce
speed to reduce chances of engine over-
loading and/or overheating. However, for
long steep grades, do not stay in 1st or 2nd
gear when driving above 35 MPH (56 km/h) .
cIf the engine coolant rises to an extremely
high temperature when the air conditioner
system is on, turn off the air conditioner.
Coolant heat can be additionally vented by
opening the windows, switching the fan
control to high and setting the temperature
control to the HOT position.
cTrailer towing requires more fuel than normal
circumstances.
cAvoid towing a trailer for your vehicle’s first
500 miles (805 km) .
cFor the first 500 miles that you do tow, do
not drive over 50 MPH (80 km/h) .
cHave your vehicle serviced more often than
at intervals specified in the recommended
Maintenance Schedule in the “NISSAN Ser-
vice and Maintenance Guide”.
cWhen making a turn, your trailer wheels will
be closer to the inside of the turn than your
vehicle wheels. To compensate for this,
make a larger than normal turning radius
during the turn.cCrosswinds and rough roads will adversely
affect vehicle/trailer handling, possibly caus-
ing vehicle sway. When being passed by
larger vehicles, be prepared for possible
changes in crosswinds that could affect ve-
hicle handling. If swaying does occur, firmly
grip the steering wheel, steer straight ahead,
and immediately (but gradually) reduce ve-
hicle speed. This combination will help sta-
bilize the vehicle. Never increase speed.
cBe careful when passing other vehicles.
Passing while towing a trailer requires con-
siderably more distance than normal pass-
ing. Remember, the length of the trailer must
also pass the other vehicle before you can
safely change lanes.
cTo maintain engine braking efficiency and
electrical charging performance, do not use
5th gear (manual transmission) or overdrive
(automatic transmission) .
cAvoid holding the brake pedal down too long
or too frequently. This could cause the
brakes to overheat, resulting in reduced
braking efficiency.
When towing a trailer, transmission
oil/fluid should be changed more fre-
quently. For additional information, see the
“Maintenance and do-it-yourself” section
earlier in this manual.
9-18Technical and consumer information
ZREVIEW COPY:Ð2004 Sentra(b15)
Owners Manual(owners)ÐUSA English(nna)
03/18/04Ðtbrooks
X
Page 231 of 248

FLAT TOWING
Towing your vehicle with all four wheels on the
ground is sometimes called flat towing. This
method is sometimes used when towing a vehicle
behind a recreational vehicle, such as a motor
home.
CAUTION
cFailure to follow these guidelines can
result in severe transmission damage.
cWhenever flat towing your vehicle, al-
ways tow forward, never backward.
cDO NOT tow any automatic transmis-
sion vehicle with all four wheels on the
ground (flat towing) . Doing so WILL
DAMAGE internal transmission parts
due to lack of transmission lubrication.
cFor emergency towing procedures refer
to “Towing recommended by NISSAN”
in the “In case of emergency” section of
this manual.
Automatic Transmission
To tow a vehicle equipped with an automatic
transmission, an appropriate vehicle dollyMUST
be placed under the towed vehicle’s drive
wheels.Alwaysfollow the dolly manufacturer’s
recommendations when using their product.
Manual Transmission
cAlways tow with the manual transmission in
Neutral.
cAfter towing 500 miles, start and idle the
engine with the transmission in Neutral for
two minutes. Failure to idle the engine after
every 500 miles of towing may cause dam-
age to internal transmission parts.DOT (Department of Transportation) Quality
Grades: All passenger car tires must conform to
federal safety requirements in addition to these
grades.
Quality grades can be found where applicable on
the tire sidewall between tread shoulder and
maximum section width. For example:
Treadwear 200 Traction AA Temperature A
Treadwear
Treadwear grade is a comparative rating based
on tire wear rate when tested under controlled
conditions on specified government test courses.
For example, a tire graded 150 would wear one
and a half (1-1/2) times as well on the govern-
ment course as a tire graded 100. However,
relative tire performance depends on actual driv-
ing conditions, and may vary significantly due to
variations in driving habits, service practices and
differences in road characteristics and climate.
Traction AA, A, B and C
The traction grades, from highest to lowest, are
AA, A, B, and C. Those grades represent the
tire’s ability to stop on wet pavement as mea-
sured under controlled conditions on specified
government test surfaces of asphalt and con-
crete. A tire marked C may have poor traction
performance.
UNIFORM TIRE QUALITY GRADING
Technical and consumer information9-19
ZREVIEW COPY:Ð2004 Sentra(b15)
Owners Manual(owners)ÐUSA English(nna)
03/18/04Ðtbrooks
X
Page 233 of 248

If you believe that your vehicle has a defect which
could cause a crash or could cause injury or
death, you should immediately inform the Na-
tional Highway Traffic Safety Administration
(NHTSA) in addition to notifying NISSAN.
If NHTSA receives similar complaints, it may
open an investigation, and if it finds that a safety
defect exists in a group of vehicles, it may order a
recall and remedy campaign. However, NHTSA
cannot become involved in individual problems
between you, your dealer, or NISSAN.
To contact NHTSA, you may call the Auto Safety
Hotline toll-free at 1-888-327-4236. You may
also write to: NHTSA, U.S. Department of Trans-
portation, Washington, D.C. 20590. You can also
obtain other information about motor vehicle
safety from the Hotline.
You may notify NISSAN by contacting our Con-
sumer Affairs Department, toll-free, at 1-800-
NISSAN-1.Due to legal requirements in some states and
Canadian Provinces, your vehicle may be re-
quired to be in what is called the “ready condi-
tion” for an Inspection/Maintenance (I/M) test of
the emission control system.
The vehicle is set to the “ready condition” when it
is driven through certain driving patterns. Usually,
the ready condition can be obtained by ordinary
usage of the vehicle.
If a powertrain system component is repaired or
the battery is disconnected, the vehicle may be
reset to a “not ready” condition. Before taking the
I/M test, drive the vehicle through the following
pattern to set the vehicle to the ready condition. If
you cannot or do not want to perform the driving
pattern, a NISSAN dealer can conduct it for you.
WARNING
Always drive the vehicle in a safe and
prudent manner according to traffic con-
ditions and obey all traffic laws.
1. Start the engine when the engine coolant
temperature gauge needle points to C. Al-
low the engine to idle until the gauge needle
points between the C and H (normal oper-
ating temperature) .2. Accelerate the vehicle to 55 MPH (88
km/h) , then quickly release the accelerator
pedal completely and keep it released for at
least 6 seconds.
3. Quickly depress the accelerator pedal for a
moment, then drive the vehicle at a speed of
53 - 60 MPH (86 - 96 km/h) for at least 5
minutes.
4. Stop the vehicle.
5. Accelerate the vehicle to 35 MPH (55 km/h)
and maintain the speed for 20 seconds.
6. Repeat steps 4 through 5 at least three
times.
7. Accelerate the vehicle to 55 MPH (88 km/h)
and maintain the speed for at least 3 min-
utes.
8. Stop the vehicle. Place the transmission se-
lector lever in the P (Park) or N (Neutral)
position.
9. Turn the engine off.
10. Repeat steps1-8atleast one more time.
If steps 1 through 7 are interrupted, repeat the
preceding step. Any safe driving mode is accept-
able between steps. Do not stop the engine until
step 7 is completed.
REPORTING SAFETY DEFECTS (US
only)READINESS FOR INSPECTION/
MAINTENANCE (I/M) TEST
Technical and consumer information9-21
ZREVIEW COPY:Ð2004 Sentra(b15)
Owners Manual(owners)ÐUSA English(nna)
04/02/04Ðrhinson
X
Page 237 of 248

10 Index
A
Air bag (See supplemental restraint
system)......................1-6
Air bag warning light...........1-17, 2-11
Air cleaner housing filter............8-23
Air conditioner
Air conditioner operation...........4-5
Air conditioner service............4-9
Air conditioner specification label.....9-11
Air conditioner system refrigerant and
lubrication recommendations........9-6
Heater and air conditioner controls.....4-2
Servicing air conditioner...........4-9
Air flow charts..................4-6
Alarm system (See vehicle security system). .2-13
Anchor point locations.............1-35
Antenna.....................4-17
Anti-lock brake system (ABS).........5-19
Anti-lock brake warning light..........2-9
Audible reminders................2-12
Audio system..................4-10
Compact disc (CD) player.........4-15
FM-AM radio with compact disc (CD)
player....................4-13
Radio....................4-10
Automatic
Automatic power window switch.....2-27
Automatic transmission fluid (ATF). . . .8-14
Driving with automatic transmission.....5-7
Transmission selector lever lock release . .5-9B
Battery......................8-19
Charge warning light............2-10
Battery replacement
(See remote keyless entry system). . . .3-9, 8-32
Before starting the engine............5-6
Belts (See drive belts).............8-21
Brake
Anti-lock brake system (ABS).......5-19
Brake booster................8-29
Brake fluid..................8-17
Brake light (See stop light).........8-36
Brake pedal.................8-28
Brake system................5-18
Brake warning light..............2-9
Brake wear indicators........2-12, 8-29
Parking brake check............8-28
Parking brake operation..........5-13
Self-adjusting brakes............8-29
Break-in schedule................5-15
Brightness control
Instrument panel..............2-19
Bulb check/instrument panel..........2-9
Bulb replacement................8-36C
Capacities and recommended
fuel/lubricants...................9-2
Car phone or CB radio.............4-17
Cargo (See vehicle loading information) . . .9-12
CD care and cleaning.............4-16
CD player (See audio system).........4-15
Check engine indicator light
(See malfunction indicator lamp).......2-11
Child restraint with top tether strap......1-34
Child restraints.......1-20, 1-21, 1-26, 1-33
Precautions on child restraints.......1-26
Top tether strap anchor point locations . .1-35
Child safety rear door lock............3-5
Chimes, audible reminders...........2-12
Cigarette lighter.................2-22
Cleaning exterior and interior..........7-2
Clock......................4-14
Clutch
Clutch fluid.................8-18
Coin box.....................2-25
Cold weather driving..............5-20
Compact disc (CD) player...........4-15
Console box...................2-25
Controls
Heater and air conditioner controls.....4-2
Coolant
Capacities and recommended
fuel/lubricants.................9-2
Changing engine coolant..........8-9
ZREVIEW COPY:Ð2004 Sentra(b15)
Owners Manual(owners)ÐUSA English(nna)
04/02/04Ðdebbie
X
Page 239 of 248

Heater
Heater and air conditioner controls.....4-2
Heater operation...............4-4
Hood release..................3-11
Horn.......................2-21
I
Ignition switch..................5-4
Immobilizer system..........2-13, 3-2, 5-5
Important vehicle information label.......9-10
In-cabin microfilter...............8-24
Increasing fuel economy............5-16
Indicator lights and audible reminders
(See warning/indicator lights and audible
reminders).....................2-9
Inside mirror...................3-16
Instrument brightness control.........2-19
Instrument panel.................2-2
Interior light...................2-29
Interior trunk lid release.............3-13
ISOFIX child restraints.............1-33
J
Jump starting...................6-7
K
Key ........................3-2
Keyless entry system
(See remote keyless entry system).......3-5L
Labels
Air conditioner specification label.....9-11
Emission control information label.....9-11
Engine serial number............9-10
F.M.V.S.S. certification label........9-10
Vehicle identification number (VIN) plate . .9-9
Warning labels (for SRS)..........1-16
LATCH (Lower Anchors and Tethers for CHildren)
System......................1-33
License plate
Installing the license plate.........9-12
Light
Air bag warning light.........1-17, 2-11
Brake light (See stop light).........8-36
Bulb check/instrument panel........2-9
Bulb replacement..............8-36
Charge warning light............2-10
Fog light switch...............2-20
Headlight aiming adjustment........8-34
Headlight and turn signal switch......2-18
Headlights..................8-34
Interior light.................2-29
Light bulbs..................8-34
Low washer fluid warning light.......2-10
Spotlights (See map light).........2-30
Trunk light..................2-30
Warning/indicator lights and audible
reminders...................2-9
Lights
Map lights..................2-30
Lock
Child safety rear door lock..........3-5
Door locks..................3-3Fuel filler lid lock opener lever.......3-14
Power door locks...............3-4
Trunk lid lock opener lever.........3-11
Low fuel warning light.............2-10
Low washer fluid warning light.........2-10
Luggage (See vehicle loading information) . .9-12
M
Maintenance
General maintenance............8-2
Inside the vehicle...............8-3
Maintenance precautions..........8-5
Outside the vehicle..............8-2
Seat belt maintenance...........1-25
Under the hood and vehicle.........8-4
Malfunction indicator lamp (MIL)........2-11
Manual front seat adjustment..........1-2
Manual windows................2-28
Map lights....................2-30
Meters and gauges................2-3
Instrument brightness control.......2-19
Mirror
Inside mirror.................3-16
Outside mirrors...............3-16
Vanity mirror.................3-16
Multi-remote control system
(See remote keyless entry system).......3-5
N
Nissan vehicle immobilizer system
(NVIS).................2-13, 3-2, 5-5
10-3
ZREVIEW COPY:Ð2004 Sentra(b15)
Owners Manual(owners)ÐUSA English(nna)
04/02/04Ðdebbie
X