2004 NISSAN SENTRA check engine light
[x] Cancel search: check engine lightPage 134 of 248
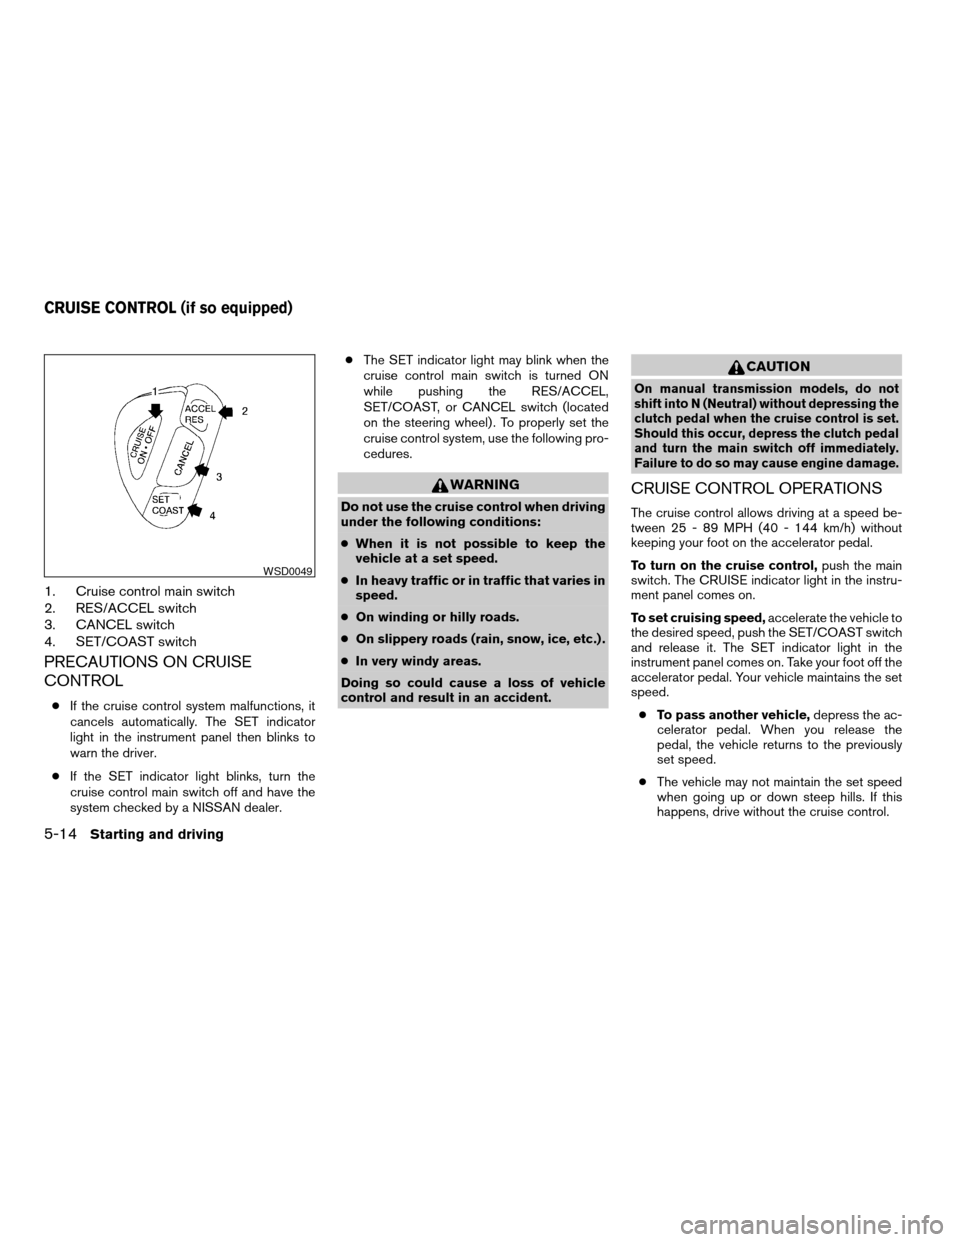
1. Cruise control main switch
2. RES/ACCEL switch
3. CANCEL switch
4. SET/COAST switch
PRECAUTIONS ON CRUISE
CONTROL
cIf the cruise control system malfunctions, it
cancels automatically. The SET indicator
light in the instrument panel then blinks to
warn the driver.
cIf the SET indicator light blinks, turn the
cruise control main switch off and have the
system checked by a NISSAN dealer.cThe SET indicator light may blink when the
cruise control main switch is turned ON
while pushing the RES/ACCEL,
SET/COAST, or CANCEL switch (located
on the steering wheel) . To properly set the
cruise control system, use the following pro-
cedures.
WARNING
Do not use the cruise control when driving
under the following conditions:
cWhen it is not possible to keep the
vehicle at a set speed.
cIn heavy traffic or in traffic that varies in
speed.
cOn winding or hilly roads.
cOn slippery roads (rain, snow, ice, etc.) .
cIn very windy areas.
Doing so could cause a loss of vehicle
control and result in an accident.
CAUTION
On manual transmission models, do not
shift into N (Neutral) without depressing the
clutch pedal when the cruise control is set.
Should this occur, depress the clutch pedal
and turn the main switch off immediately.
Failure to do so may cause engine damage.
CRUISE CONTROL OPERATIONS
The cruise control allows driving at a speed be-
tween 25 - 89 MPH (40 - 144 km/h) without
keeping your foot on the accelerator pedal.
To turn on the cruise control,push the main
switch. The CRUISE indicator light in the instru-
ment panel comes on.
To set cruising speed,accelerate the vehicle to
the desired speed, push the SET/COAST switch
and release it. The SET indicator light in the
instrument panel comes on. Take your foot off the
accelerator pedal. Your vehicle maintains the set
speed.
cTo pass another vehicle,depress the ac-
celerator pedal. When you release the
pedal, the vehicle returns to the previously
set speed.
cThe vehicle may not maintain the set speed
when going up or down steep hills. If this
happens, drive without the cruise control.
WSD0049
CRUISE CONTROL (if so equipped)
5-14Starting and driving
ZREVIEW COPY:Ð2004 Sentra(b15)
Owners Manual(owners)ÐUSA English(nna)
03/18/04Ðtbrooks
X
Page 163 of 248

8 Maintenance and do-it-yourself
Maintenance requirements..........................8-2
General maintenance..............................8-2
Explanation of general maintenance items.........8-2
Maintenance precautions...........................8-5
Engine compartment check locations................8-6
Engine cooling system.............................8-8
Checking engine coolant level...................8-8
Changing engine coolant........................8-9
Engine oil........................................8-11
Checking engine oil level.......................8-11
Changing engine oil...........................8-12
Changing engine oil filter.......................8-13
Automatic transmission fluid.......................8-14
Temperature conditions for checking.............8-15
Power steering fluid...............................8-17
Brake and clutch fluid.............................8-17
Brake fluid....................................8-18
Clutch fluid...................................8-18
Window washer fluid.............................8-19
Window washer fluid reservoir..................8-19
Battery..........................................8-19
Jump starting.................................8-21
Drive belts.......................................8-21
Spark plugs......................................8-22Replacing spark plugs.........................8-22
Air cleaner.......................................8-23
In-cabin Microfilter (if so equipped)..............8-24
Windshield wiper blades..........................8-27
Cleaning.....................................8-27
Replacing....................................8-27
Parking brake and brake pedal.....................8-28
Checking parking brake........................8-28
Checking brake pedal..........................8-28
Brake booster.................................8-29
Fuses...........................................8-30
Engine compartment...........................8-30
Passenger compartment.......................8-31
Battery replacement..............................8-32
Lights...........................................8-34
Headlights....................................8-34
Fog lights (if so equipped)......................8-35
Exterior and interior lights.......................8-36
Wheels and tires.................................8-39
Tire pressure..................................8-39
Tire labeling...................................8-42
Types of tires..................................8-45
Tire chains....................................8-45
Changing wheels and tires.....................8-46
ZREVIEW COPY:Ð2004 Sentra(b15)
Owners Manual(owners)ÐUSA English(nna)
03/18/04Ðtbrooks
X
Page 176 of 248
CAUTION
Be careful not to burn yourself. The engine
oil may be hot.
5. Wipe the engine oil filter mounting surface
with a clean rag.
Be sure to remove any old gasket material
remaining on the mounting surface of the
engine.
6. Coat the gasket on the new filter with clean
engine oil.7. Screw on the oil filter until a slight resistance
is felt, then tighten an additional 2/3 turn.
8. Start the engine and check for leakage
around the oil filter. Correct as required.
9. Turn the engine off and wait more than 10
minutes. Check the oil level. Add engine oil if
necessary.
WARNING
cWhen the engine is running, keep
hands, jewelry and clothing away from
any moving parts such as the cooling
fan and drive belts.
cAutomatic transmission fluid is poison-
ous and should be stored carefully in
marked containers out of the reach of
children.
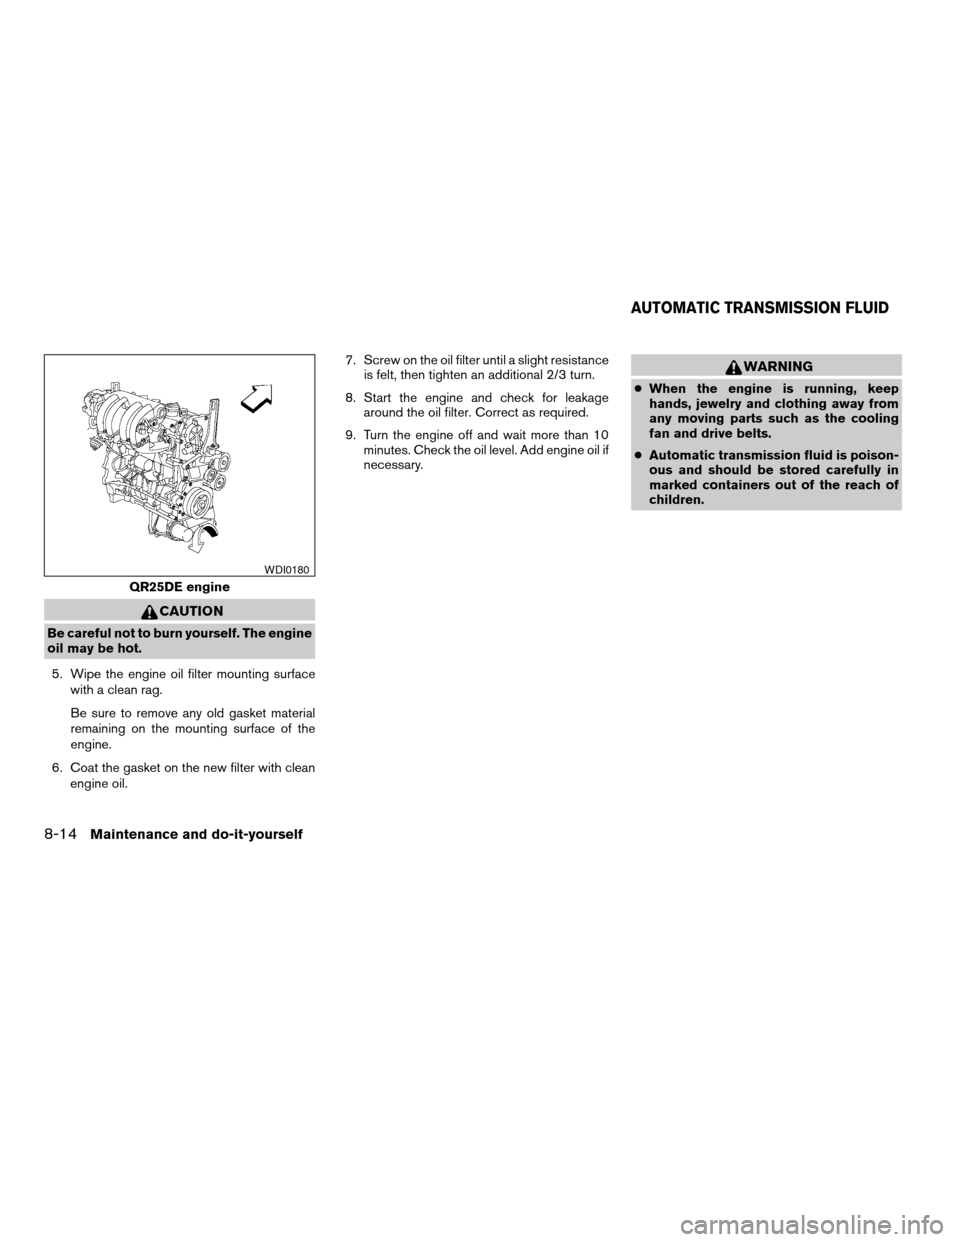
QR25DE engine
WDI0180
AUTOMATIC TRANSMISSION FLUID
8-14Maintenance and do-it-yourself
ZREVIEW COPY:Ð2004 Sentra(b15)
Owners Manual(owners)ÐUSA English(nna)
03/18/04Ðtbrooks
X
Page 191 of 248
Self-adjusting brakes
Your vehicle is equipped with self-adjusting
brakes.
The front (and rear, if so equipped) disc-type
brakes self-adjust every time the brake pedal is
applied. The rear drum-type brakes also self-
adjust every time the brake pedal is applied.
If the brake pedal goes down farther than normal,
it may be due to a lack of adjustment of the rear
drum brakes. To adjust, apply the parking brake
several times.
WARNING
See a NISSAN dealer for a brake system
check if the brake pedal height does not
return to normal.
Brake pad wear indicators
The disc brake pads on your vehicle have audible
wear indicators. When a brake pad requires re-
placement, a high pitched scraping or screech-
ing sound will be heard when the vehicle is in
motion. The noise will be heard whether or not the
brake pedal is depressed. Have the brakes
checked as soon as possible if the wear indicator
sound is heard.
Under some driving or climate conditions, occa-
sional brake squeak, squeal or other noise maybe heard. Occasional brake noise during light to
moderate stops is normal and does not affect the
function or performance of the brake system.
The rear drum brakes (if so equipped) do not
have audible wear indicators. Should you ever
hear an unusually loud noise from the rear drum
brakes, have them inspected as soon as possible
by a NISSAN dealer.
Proper brake inspection intervals should
be followed.For more information regarding
brake inspections, see the appropriate mainte-
nance schedule information in the “NISSAN Ser-
vice and Maintenance Guide”.
BRAKE BOOSTER
Check the brake booster function as follows:
1. With the engine off, press and release the
brake pedal several times. When brake
pedal movement (distance of travel) remains
the same from one pedal application to the
next, continue on to the next step.
2. While depressing the brake pedal, start the
engine. The pedal height should drop a little.
3. With the brake pedal depressed, stop the
engine. Keep the pedal depressed for about
30 seconds. The pedal height should not
change.4. Run the engine for one minute without de-
pressing the brake pedal, then turn it off.
Depress the brake pedal several times. The
pedal travel distance will decrease gradually
with each depression as the vacuum is re-
leased from the booster.
If the brakes do not operate properly, have the
brakes checked by a NISSAN dealer.
Maintenance and do-it-yourself8-29
ZREVIEW COPY:Ð2004 Sentra(b15)
Owners Manual(owners)ÐUSA English(nna)
03/18/04Ðtbrooks
X
Page 192 of 248
ENGINE COMPARTMENT
CAUTION
Never use a fuse of a higher or lower
amperage rating than specified on the
fuse box cover. This could damage the
electrical system or cause a fire.
If any electrical equipment does not come on,
check for an open fuse.
1. Be sure the ignition switch and the headlight
switch are OFF.
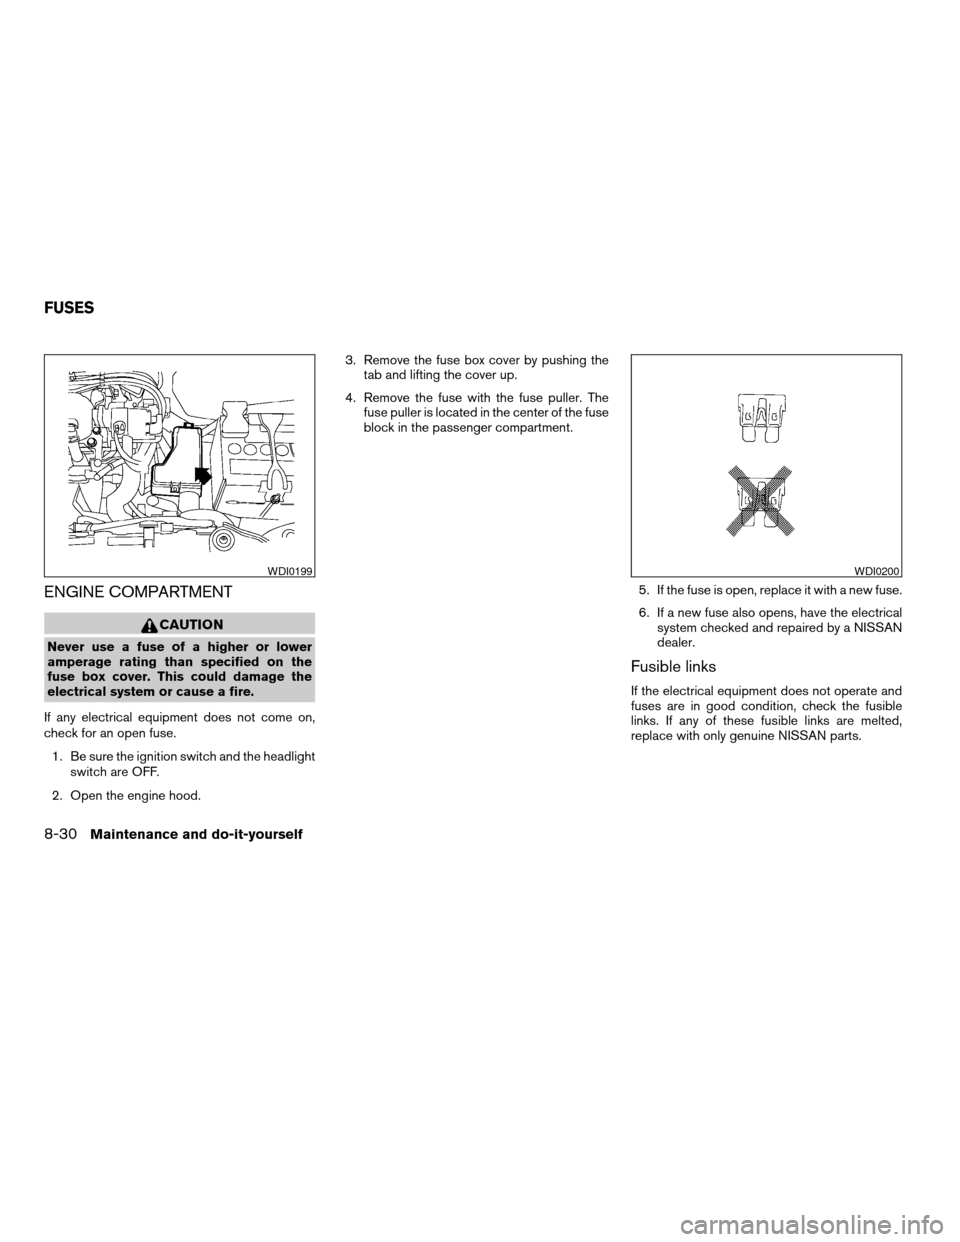
2. Open the engine hood.3. Remove the fuse box cover by pushing the
tab and lifting the cover up.
4. Remove the fuse with the fuse puller. The
fuse puller is located in the center of the fuse
block in the passenger compartment.
5. If the fuse is open, replace it with a new fuse.
6. If a new fuse also opens, have the electrical
system checked and repaired by a NISSAN
dealer.
Fusible links
If the electrical equipment does not operate and
fuses are in good condition, check the fusible
links. If any of these fusible links are melted,
replace with only genuine NISSAN parts.
WDI0199WDI0200
FUSES
8-30Maintenance and do-it-yourself
ZREVIEW COPY:Ð2004 Sentra(b15)
Owners Manual(owners)ÐUSA English(nna)
03/18/04Ðtbrooks
X
Page 196 of 248
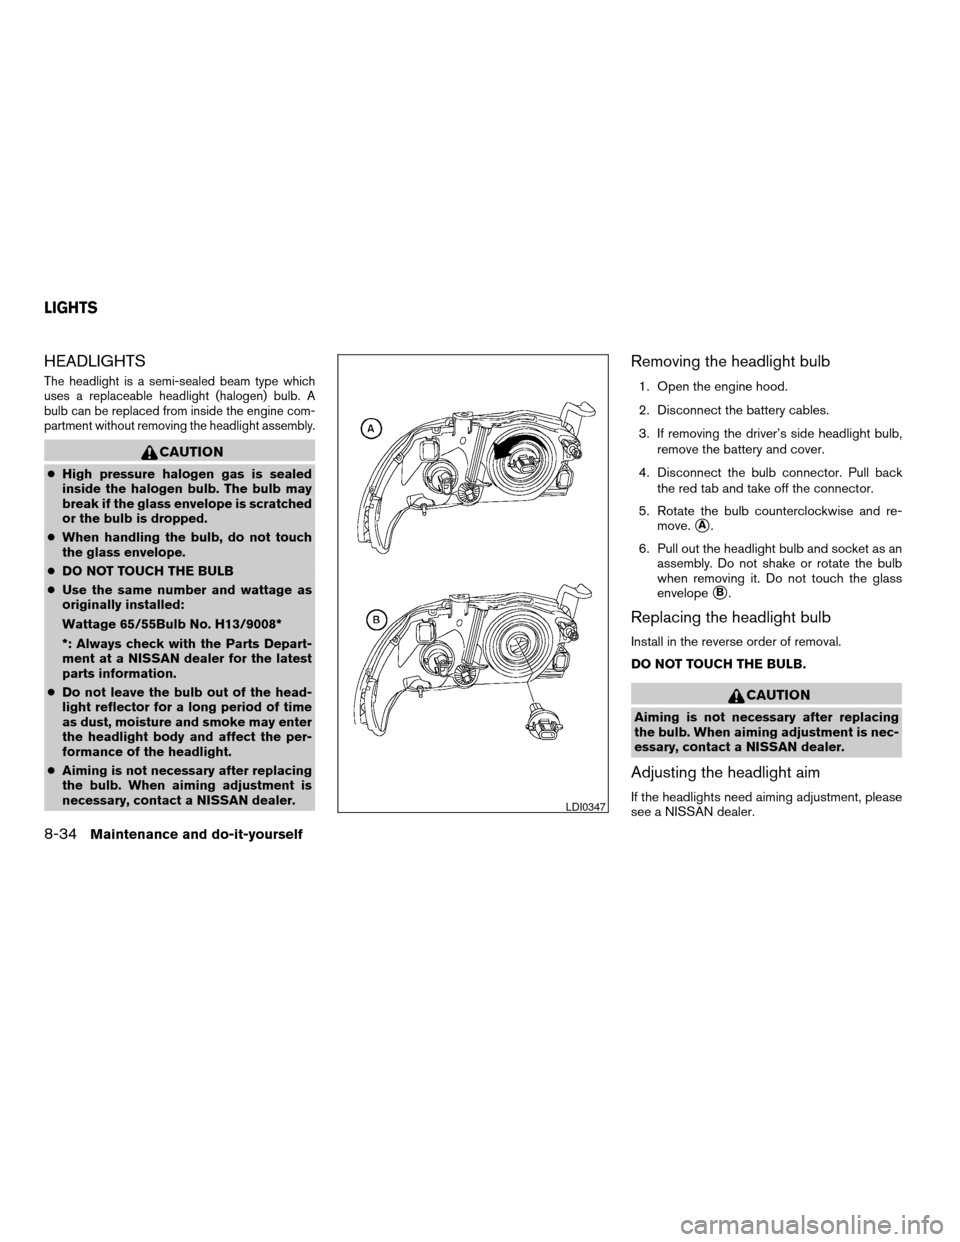
HEADLIGHTS
The headlight is a semi-sealed beam type which
uses a replaceable headlight (halogen) bulb. A
bulb can be replaced from inside the engine com-
partment without removing the headlight assembly.
CAUTION
cHigh pressure halogen gas is sealed
inside the halogen bulb. The bulb may
break if the glass envelope is scratched
or the bulb is dropped.
cWhen handling the bulb, do not touch
the glass envelope.
cDO NOT TOUCH THE BULB
cUse the same number and wattage as
originally installed:
Wattage 65/55Bulb No. H13/9008*
*: Always check with the Parts Depart-
ment at a NISSAN dealer for the latest
parts information.
cDo not leave the bulb out of the head-
light reflector for a long period of time
as dust, moisture and smoke may enter
the headlight body and affect the per-
formance of the headlight.
cAiming is not necessary after replacing
the bulb. When aiming adjustment is
necessary, contact a NISSAN dealer.
Removing the headlight bulb
1. Open the engine hood.
2. Disconnect the battery cables.
3. If removing the driver’s side headlight bulb,
remove the battery and cover.
4. Disconnect the bulb connector. Pull back
the red tab and take off the connector.
5. Rotate the bulb counterclockwise and re-
move.
sA.
6. Pull out the headlight bulb and socket as an
assembly. Do not shake or rotate the bulb
when removing it. Do not touch the glass
envelope
sB.
Replacing the headlight bulb
Install in the reverse order of removal.
DO NOT TOUCH THE BULB.
CAUTION
Aiming is not necessary after replacing
the bulb. When aiming adjustment is nec-
essary, contact a NISSAN dealer.
Adjusting the headlight aim
If the headlights need aiming adjustment, please
see a NISSAN dealer.LDI0347
LIGHTS
8-34Maintenance and do-it-yourself
ZREVIEW COPY:Ð2004 Sentra(b15)
Owners Manual(owners)ÐUSA English(nna)
03/18/04Ðtbrooks
X
Page 216 of 248

Aftermarket fuel additives
NISSAN does not recommend the use of any
aftermarket fuel additives (for example, fuel injec-
tor cleaner, octane booster, intake valve deposit
removers, etc.) which are sold commercially.
Many of these additives intended for gum, varnish
or deposit removal may contain active solvents or
similar ingredients that can be harmful to the fuel
system and engine.
Octane rating tips
Using unleaded gasoline with an octane
rating lower than stated can cause persis-
tent, heavy “spark knock.” (“Spark knock”
is a metallic rapping noise.) If severe, this
can lead to engine damage. If you detect a
persistent heavy spark knock even when
using gasoline of the stated octane rating,
or if you hear steady spark knock while
holding a steady speed on level roads, have
a NISSAN dealer correct the condition.
Failure to correct the condition is misuse of
the vehicle, for which NISSAN is not re-
sponsible.
Incorrect ignition timing may result in spark
knock, after-run and/or overheating, which may
cause excessive fuel consumption or enginedamage. If any of the above symptoms are en-
countered, have your vehicle checked at a
NISSAN dealer.
However, now and then you may notice
light spark knock for a short time while
accelerating or driving up hills. This is not a
cause for concern, because you get the
greatest fuel benefit when there is light
spark knock for a short time under heavy
engine load.
9-4Technical and consumer information
ZREVIEW COPY:Ð2004 Sentra(b15)
Owners Manual(owners)ÐUSA English(nna)
03/18/04Ðtbrooks
X
Page 237 of 248

10 Index
A
Air bag (See supplemental restraint
system)......................1-6
Air bag warning light...........1-17, 2-11
Air cleaner housing filter............8-23
Air conditioner
Air conditioner operation...........4-5
Air conditioner service............4-9
Air conditioner specification label.....9-11
Air conditioner system refrigerant and
lubrication recommendations........9-6
Heater and air conditioner controls.....4-2
Servicing air conditioner...........4-9
Air flow charts..................4-6
Alarm system (See vehicle security system). .2-13
Anchor point locations.............1-35
Antenna.....................4-17
Anti-lock brake system (ABS).........5-19
Anti-lock brake warning light..........2-9
Audible reminders................2-12
Audio system..................4-10
Compact disc (CD) player.........4-15
FM-AM radio with compact disc (CD)
player....................4-13
Radio....................4-10
Automatic
Automatic power window switch.....2-27
Automatic transmission fluid (ATF). . . .8-14
Driving with automatic transmission.....5-7
Transmission selector lever lock release . .5-9B
Battery......................8-19
Charge warning light............2-10
Battery replacement
(See remote keyless entry system). . . .3-9, 8-32
Before starting the engine............5-6
Belts (See drive belts).............8-21
Brake
Anti-lock brake system (ABS).......5-19
Brake booster................8-29
Brake fluid..................8-17
Brake light (See stop light).........8-36
Brake pedal.................8-28
Brake system................5-18
Brake warning light..............2-9
Brake wear indicators........2-12, 8-29
Parking brake check............8-28
Parking brake operation..........5-13
Self-adjusting brakes............8-29
Break-in schedule................5-15
Brightness control
Instrument panel..............2-19
Bulb check/instrument panel..........2-9
Bulb replacement................8-36C
Capacities and recommended
fuel/lubricants...................9-2
Car phone or CB radio.............4-17
Cargo (See vehicle loading information) . . .9-12
CD care and cleaning.............4-16
CD player (See audio system).........4-15
Check engine indicator light
(See malfunction indicator lamp).......2-11
Child restraint with top tether strap......1-34
Child restraints.......1-20, 1-21, 1-26, 1-33
Precautions on child restraints.......1-26
Top tether strap anchor point locations . .1-35
Child safety rear door lock............3-5
Chimes, audible reminders...........2-12
Cigarette lighter.................2-22
Cleaning exterior and interior..........7-2
Clock......................4-14
Clutch
Clutch fluid.................8-18
Coin box.....................2-25
Cold weather driving..............5-20
Compact disc (CD) player...........4-15
Console box...................2-25
Controls
Heater and air conditioner controls.....4-2
Coolant
Capacities and recommended
fuel/lubricants.................9-2
Changing engine coolant..........8-9
ZREVIEW COPY:Ð2004 Sentra(b15)
Owners Manual(owners)ÐUSA English(nna)
04/02/04Ðdebbie
X