2004 NISSAN QUEST ignition
[x] Cancel search: ignitionPage 182 of 320

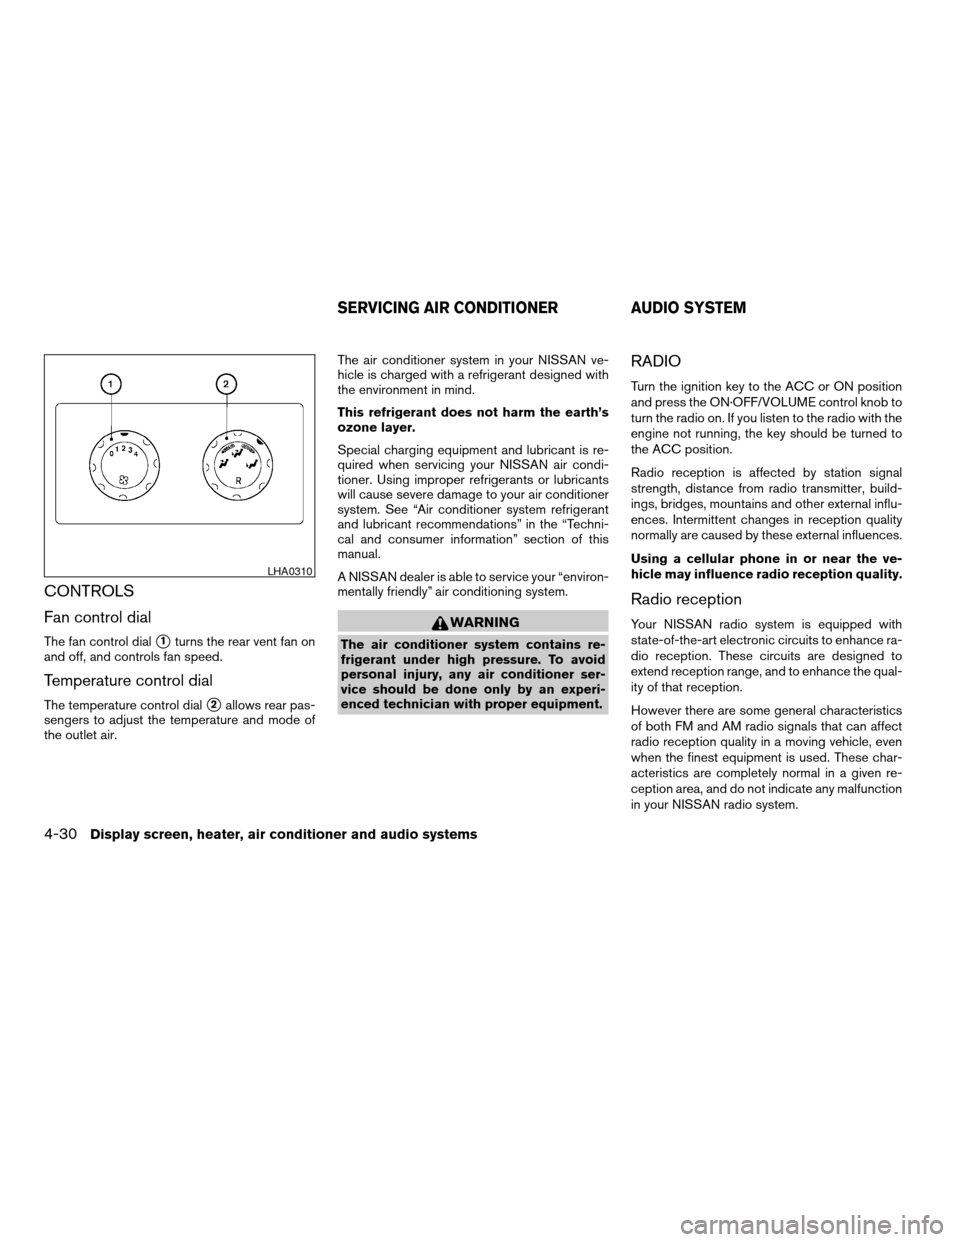
CONTROLS
Fan control dial
The fan control dials1turns the rear vent fan on
and off, and controls fan speed.
Temperature control dial
The temperature control dials2allows rear pas-
sengers to adjust the temperature and mode of
the outlet air.The air conditioner system in your NISSAN ve-
hicle is charged with a refrigerant designed with
the environment in mind.
This refrigerant does not harm the earth’s
ozone layer.
Special charging equipment and lubricant is re-
quired when servicing your NISSAN air condi-
tioner. Using improper refrigerants or lubricants
will cause severe damage to your air conditioner
system. See “Air conditioner system refrigerant
and lubricant recommendations” in the “Techni-
cal and consumer information” section of this
manual.
A NISSAN dealer is able to service your “environ-
mentally friendly” air conditioning system.
WARNING
The air conditioner system contains re-
frigerant under high pressure. To avoid
personal injury, any air conditioner ser-
vice should be done only by an experi-
enced technician with proper equipment.
RADIO
Turn the ignition key to the ACC or ON position
and press the ON·OFF/VOLUME control knob to
turn the radio on. If you listen to the radio with the
engine not running, the key should be turned to
the ACC position.
Radio reception is affected by station signal
strength, distance from radio transmitter, build-
ings, bridges, mountains and other external influ-
ences. Intermittent changes in reception quality
normally are caused by these external influences.
Using a cellular phone in or near the ve-
hicle may influence radio reception quality.
Radio reception
Your NISSAN radio system is equipped with
state-of-the-art electronic circuits to enhance ra-
dio reception. These circuits are designed to
extend reception range, and to enhance the qual-
ity of that reception.
However there are some general characteristics
of both FM and AM radio signals that can affect
radio reception quality in a moving vehicle, even
when the finest equipment is used. These char-
acteristics are completely normal in a given re-
ception area, and do not indicate any malfunction
in your NISSAN radio system.
LHA0310
SERVICING AIR CONDITIONER AUDIO SYSTEM
4-30Display screen, heater, air conditioner and audio systems
ZREVIEW COPY:Ð2004 Quest(van)
Owners Manual(owners)ÐUSA English(nna)
10/08/03Ðtbrooks
X
Page 187 of 320

Audio main operation
ON·OFF/Volume control:
Turn the ignition key to ACC or ON, and then
push the ON·OFF/Volume control knob while the
system is off to call up the mode (radio or CD)
which was playing immediately before the system
was turned off.
To turn the system off, press the ON·OFF/Volume
control knob.
Turn the ON·OFF/Volume control knob to adjust
the volume.
This vehicle has speed sensitive control volume
(SSV) for audio. The audio volume changes as
the driving speed changes.
AUDIO knob (BASS, TREBLE, FADE, BAL-
ANCE and SSV):
Press the AUDIO knob to change the mode as
follows:
BASS!TREBLE!FADE!BALANCE!
SSV
To adjust Bass, Treble, Fade and Balance, press
the AUDIO knob until the desired mode appears
in the display. Turn the Tuning knob to adjust
Bass and Treble to the desired level. You can also
use the Tuning knob to adjust Fader and Balance
modes. Fader adjusts the sound level betweenthe front and rear speakers and Balance adjusts
the sound between the right and left speakers.
To change the SSV mode to OFF, LOW, MID or
HIGH, turn the Tuning knob to the right or left.
Once you have adjusted the sound quality to the
desired level, press the AUDIO knob repeatedly
until the radio or CD display reappears. Other-
wise, the radio or CD display will automatically
reappear after about 10 seconds.
Display CD text:
To change the text displayed while playing a CD,
press the AUDIO knob until “Display Mode” ap-
pears.
Turn the Tuning knob within 2 seconds. The text
will change as follows:
Track numberÃ!Track titleÃ!Disc titleÃ!
Track number
Display satellite radio text (if so equipped):
To change the text displayed while listening to
satellite radio, press the AUDIO knob until “Dis-
play Mode” appears.
Turn the Tuning knob within 2 seconds. The text
will change as follows:
Channel numberÃ!Channel nameÃ!Artist
Ã!TitleÃ!Channel numberPause/mute button:
To mute or pause the audio sound, push the
PAUSE/MUTE button.
To release the mute or pause, push the button
again.
FM/AM/SAT radio operation
FM/AM/SAT band select:
Pushing the FM-AM or SAT radio select button
will change the band as follows:
AMÃ!FM or SAT (Satellite- if so equipped)
When FM-AM or SAT radio select button is
pushed while the ignition switch is in the ACC or
ON, the radio will come on at the station last
played.
The last station played will also come on when
the ON·OFF/Volume control knob is depressed
to ON.
No satellite radio reception is available and “NO
SAT” is displayed when the SAT button is
pressed unless optional satellite receiver and
antenna are installed (retrofit unavailable with-
outh factory satellite radio pre-wiring) , and an
XMTor SIRIUS™ satellite radio service subscrip-
tion is active.
If a compact disc is playing when the FM-AM or
SAT radio select button is pushed, the compact
Display screen, heater, air conditioner and audio systems4-35
ZREVIEW COPY:Ð2004 Quest(van)
Owners Manual(owners)ÐUSA English(nna)
10/08/03Ðtbrooks
X
Page 190 of 320

Turn the ignition key to the ACC or ON position and
insert the compact disc into the slot with the label
side facing up. The compact disc will be guided
automatically into the slot and start playing.
If the radio is already operating, it will automati-
cally turn off and the compact disc will play.
If the system has been turned off while the com-
pact disc was playing, pushing the ON·OFF/VOL
control knob will start the compact disc.
3.1 in (8 cm) diameter compact discs can also be
used without an adapter.
CD button:
When the CD button is pushed with the system
off and the compact disc loaded, the system will
turn on and the compact disc will start to play.
When the CD button is pushed with the compact
disc loaded but the radio playing, the radio will
automatically be turned off and the compact disc
will start to play.
REW (Rewind) , FF (Fast
Forward):
When the
(rewind) or(fast forward)
button is pushed while the compact disc is being
played, the compact disc will play while rewind-
ing or fast forwarding. When the button is re-
leased, the compact disc will return to normal
play speed.
SEEK/TRACK:
When the
button is pushed for less than
1.5 seconds while a compact disc is playing, the
track being played returns to its beginning. Push
several times to skip back through tracks. The
compact disc will go back the number of times
the button is pushed.
When the
button is pushed for less than
1.5 seconds while a compact disc is playing, the
next track will start to play from its beginning.
Push several times to skip through tracks. The
compact disc will advance the number of times
the button is pushed. (When the last track on the
compact disc is skipped through, the first track
will be played.)
When the
orbutton is pushed for
more than 1.5 seconds, each track will play for
about 10 seconds. To stop playing, push
the
button.
REPEAT (RPT):
When the PROG/RPT button is pushed while the
compact disc is being played, the play pattern
can be changed as follows:
ALL DISC RPT!1 TRACK RPT!1 DISC RDM
!ALL DISC RPTALL DISC RPT: the entire disk will be repeated
1 TRACK RPT: the current track will be repeated
1 DISC RDM: all tracks will be played randomly
REAR AV:
Pushing the REAR AV button for less than 1.5
seconds turns the rear seat audio controller on.
Pushing it again will turn the rear seat audio
controller off. If the vehicle is not equipped with a
rear seat audio controller, the display will show
“REAR AV N/A”.
If a DVD is loaded in the DVD entertainment
system (if so equipped) , pushing the REAR AV
button for more than 1.5 seconds will turn the
DVD player on.
When the REAR AV button is pushed for more
than 1.5 seconds with a DVD loaded and another
audio source playing, the other source will auto-
matically be turned off and the DVD will start to
play.
(SPEAKER CONTROL) button:
Push this button to turn the rear speakers off and
headphones on. Push this button again to turn
rear seat speakers back on and headphones off.
4-38Display screen, heater, air conditioner and audio systems
ZREVIEW COPY:Ð2004 Quest(van)
Owners Manual(owners)ÐUSA English(nna)
10/08/03Ðtbrooks
X
Page 191 of 320

CD EJECT:
When the
button is pushed with the com-
pact disc loaded, the compact disc will be
ejected.
When
button is pushed while the compact
disc is being played, the compact disc will eject
and the system will turn off.
If the compact disc ejects and is not re-
moved, it will be pulled back into the slot to
protect it (except 3.1 in (8 cm) diameter
compact discs) .
CD IN indicator:
CD IN indicator appears on the display when the
CD is loaded with the system on.
Compact disc (CD) changer operation
(Type B)
CAUTION
cDo not force a compact disc into the CD
insert slot. This could damage the CD
and/or CD changer/player.
cTrying to load a CD with the CD door
closed could damage the CD and/or CD
changer.Turn the ignition key to the ACC or ON position
and insert the compact disc into the slot with the
label side facing up. The compact disc will be
guided automatically into the slot and start play-
ing. To insert the disc, first push the LOAD button.
If the radio is already operating, it will automati-
cally turn off and the compact disc will play.
If the system has been turned off while the com-
pact disc was playing, pushing the ON·OFF/VOL
control knob will start the compact disc.
LOAD button:
To insert a CD in the CD changer, push the LOAD
button for less than 1.5 seconds. Select the
loading slot by pushing the CD insert select
button (1 - 6) , then insert the CD.
To insert 6 CDs to the CD changer, push the
LOAD button for more than 1.5 seconds.
The slot numbers (1 - 6) will illuminate on the
display when CDs are loaded into the changer.
CD button:
When the CD button is pushed with the system
off and the compact disc loaded, the system will
turn on and the compact disc will start to play.When the CD button is pushed with the compact
disc loaded with the radio playing, the radio will
automatically be turned off and the compact disc
will start to play.
REW (Rewind) , FF (Fast
Forward):
When the
(rewind) or(fast forward)
button is pushed while a compact disc is playing,
the compact disc will play while rewinding or fast
forwarding . When the button is released, the
compact disc will return to normal play speed.
When the CD button is pushed with the system
off and the compact disc loaded, the system will
turn on and the compact disc will start to play.
When the CD button is pushed with the compact
disc loaded with the tape or the radio playing, the
tape or radio will automatically be turned off and
the compact disc will start to play.
SEEK/TRACK:
When the
button is pushed for less than 1.5
seconds while a compact disc is playing, the
track being played returns to its beginning. Push
several times to skip back through tracks. The
compact disc will go back the number of times
the button is pushed.
Display screen, heater, air conditioner and audio systems4-39
ZREVIEW COPY:Ð2004 Quest(van)
Owners Manual(owners)ÐUSA English(nna)
10/08/03Ðtbrooks
X
Page 193 of 320

CD CARE AND CLEANING
cHandle a CD by its edges. Do not bend the
disc. Never touch the surface of the disc.
cAlways place the discs in the storage case
when they are not being used.
c
To clean a disc, wipe the surface from the center
to the outer edge using a clean, soft cloth. Do
not wipe the disc using a circular motion.
cDo not use a conventional record cleaner or
alcohol intended for industrial use.
cA new disc may be rough on the inner and
outer edges. Remove the rough edges by
rubbing the inner and outer edges with the
side of a pen or pencil as illustrated.
1. Volume control switch
2. MODE select switch
3. POWER on/off switch
4. Tuning switch
STEERING WHEEL SWITCH FOR
AUDIO CONTROL (if so equipped)
The audio system can be operated using the
controls on the steering wheel.
POWER on/off switch
With the ignition key turned to the ACC or ON
position, push the POWER switch to turn the
audio system on or off.
MODE select switch
Push the mode select switch to change the mode
in the following sequence: AM, FM, SAT and CD.
Volume control switch
Push the volume control switch up or down to
increase or decrease the volume.
Tuning
Memory change (radio):
Push the tuning switch (
or) for less
than 1.5 seconds to change the radio frequency.
Seek tuning (radio):
Push the tuning switch (
or) for
more than 1.5 seconds to seek the next or previ-
ous radio station.
FF, REW:
Push the tuning switch (
or) for less
1.5 seconds to return to the beginning of the
present program or skip to the next program.
Push several times to skip back or skip through
programs.
To stop the FF or REW function, press the
orbutton for less than 1.5 seconds again.
LHA0049LHA0269
Display screen, heater, air conditioner and audio systems4-41
ZREVIEW COPY:Ð2004 Quest(van)
Owners Manual(owners)ÐUSA English(nna)
10/08/03Ðtbrooks
X
Page 200 of 320

Power ON/OFF:
Push the power button to turn the headphones
on or off.
Volume control:
Turn the volume control knob to adjust the vol-
ume.
The headphones will automatically be turned off
in 30 seconds if there is no sound during that
period. To prevent the battery from being dis-
charged, keep the power suppy turned off when
not in use.NOTE:
For optimum infrared headphone perfor-
mance, increase the volume on the rear
seat controller to the maximum level and
adjust the infrared headphone volume us-
ing the volume control on the headphones.
Using a lower volume setting on the rear
seat controller can cause static noise in the
infrared headphones.
PLAYING A DIGITAL VIDEO DISC
(DVD)
CAUTION
cOnly operate the DVD while the vehicle
engine is running. Operating the DVD
for extended periods of time with the
engine OFF can discharge the vehicle
battery.
cDo not allow the system to get wet.
Excessive moisture such as spilled liq-
uids may cause the system to
malfunction.
cThe driver must not attempt to wear the
headphones while the vehicle is in mo-
tion so that full attention may be given
to vehicle operation.cWhile playing video CD media, this DVD
player does not guarantee complete
functionality of all video CD formats.
With the DVD player, you can hear DVD videos,
video CDs and CDs using headphones. Passen-
gers in the rear seat can enjoy the sound inde-
pendently of the front seat.
Press the REAR AV button located on the front
controls for more than 1.5 seconds to hear the
sound of the DVD player through the speakers.
Pushing the
button on the front controls
turns the rear speakers on and off.
It is possible to operate the DVD player by remote
control.
Headphones are a wireless type and no cables
are necessary. You can use them in almost all the
ranges in the rear seat. (It is not possible to use
the headphones in the front seat.)
POWER on/off button:
With the ignition switch turned to the ACC or ON
position, push the POWER button to turn the
DVD player on or off.
Insert the DVD into the slot with the label side
facing up. The DVD will be guided automatically
into the slot.
4-48Display screen, heater, air conditioner and audio systems
ZREVIEW COPY:Ð2004 Quest(van)
Owners Manual(owners)ÐUSA English(nna)
10/08/03Ðtbrooks
X
Page 207 of 320

5 Starting and driving
Precautions when starting and driving................5-2
Exhaust gas (carbon monoxide)..................5-2
Three-way catalyst..............................5-2
Low tire pressure warning system................5-3
Avoiding collision and rollover....................5-4
Drinking alcohol/drugs and driving................5-5
Ignition switch.....................................5-5
Automatic transmission..........................5-5
Key positions..................................5-6
Nissan vehicle immobilizer system (NVIS).........5-6
Before starting the engine..........................5-6
Starting the engine................................5-7
Driving the vehicle.................................5-7
Automatic transmission..........................5-7
Parking brake....................................5-11
Cruise control....................................5-12
Precautions on cruise control...................5-12
Cruise control operations.......................5-12
Break-in schedule................................5-13Increasing fuel economy...........................5-14
Parking/parking on hills............................5-15
Power steering...................................5-15
Brake system....................................5-16
Brake precautions.............................5-16
Anti-lock brake system (ABS)...................5-16
Traction control system (TCS)......................5-18
Vehicle dynamic control (VDC) system
(if so equipped)..................................5-19
Rear sonar system (if so equipped).................5-20
Cold weather driving..............................5-21
Freeing a frozen door lock......................5-21
Anti-freeze....................................5-21
Battery.......................................5-21
Draining of coolant water.......................5-21
Tire equipment................................5-21
Special winter equipment.......................5-22
Driving on snow or ice.........................5-22
ZREVIEW COPY:Ð2004 Quest(van)
Owners Manual(owners)ÐUSA English(nna)
10/08/03Ðtbrooks
X
Page 209 of 320

cDo not stop or park the vehicle over
flammable materials such as dry grass,
waste paper or rags. They may ignite
and cause a fire.
CAUTION
cDo not use leaded gasoline. Deposits
from leaded gasoline will seriously re-
duce the three-way catalyst’s ability to
help reduce exhaust pollutants.
cKeep your engine tuned up. Malfunc-
tions in the ignition, fuel injection, or
electrical systems can cause overrich
fuel flow into the three-way catalyst,
causing it to overheat. Do not keep driv-
ing if the engine misfires, or if notice-
able loss of performance or other un-
usual operating conditions are
detected. Have the vehicle inspected
promptly by a NISSAN dealer.
cAvoid driving with an extremely low fuel
level. Running out of fuel could cause
the engine to misfire, damaging the
three-way catalyst.
cDo not race the engine while warming it
up.
cDo not push or tow your vehicle to start
the engine.
LOW TIRE PRESSURE WARNING
SYSTEM
This vehicle is equipped with the low tire pres-
sure warning system, which displays pressure of
all tires (except the spare tire) on the display
screen by sending a signal from a sensor that is
installed in each wheel.
The low tire pressure warning system will activate
only when the vehicle is driven at speeds above
20 MPH (32 km/h) . Also, this system may not
detect a sudden drop in tire pressure (for ex-
ample a flat tire while driving) .
Tire pressure rises and falls depending on the
heat caused by the vehicle’s operation and the
outside temperature. Low outside temperature
can lower the temperature of the air inside the tire
which can cause a lower tire inflation pressure.
This may cause the low tire pressure warning
light to illuminate.
If the warning light illuminates in low ambient
temperature as described above, check the tire
pressure for all four tires. Adjust the tire pressure
to the recommended COLD tire pressure shown
on the Tire and Loading Information label to turn
the low tire pressure warning light OFF.
Frequently check the tire pressure information
display on the display screen and adjust pressure
of each tire properly. (The order of the tire pres-sure figures displayed on the screen does not
correspond with the actual order of the tire posi-
tion.) See “Tire pressure information” in the “Dis-
play screen, heater, air conditioner and audio
systems” section for tire pressure monitor.
Low tire pressure warning
If the vehicle is being driven with very low tire
pressure (lower than 28 psi, 193 kPa) , the low
tire pressure warning light comes on and the
chime sounds for about 10 seconds.
For additional information regarding the above
warning, see “Warning/indicator lights and au-
dible reminders” in the “Instruments and con-
trols” section.
Starting and driving5-3
ZREVIEW COPY:Ð2004 Quest(van)
Owners Manual(owners)ÐUSA English(nna)
10/08/03Ðtbrooks
X