2004 NISSAN QUEST wheel
[x] Cancel search: wheelPage 123 of 320

3 Pre-driving checks and adjustments
Keys .............................................3-2
Nissan vehicle immobilizer system (NVIS)
keys..........................................3-2
Doors............................................3-3
Locking with key................................3-3
Locking with inside lock knob....................3-4
Locking with power door lock switch.............3-5
Operating the manual sliding door
(if so equipped)................................3-5
Using the main ON/OFF switch for the
power sliding door..............................3-6
Operating the power sliding door
(if so equipped)................................3-7
Child safety sliding door lock....................3-9
Remote keyless entry system.......................3-9
How to use remote keyless entry system.........3-10
Battery replacement...........................3-13
Hood...........................................3-14
Back door.......................................3-15
Operating the manual back door................3-15
Using the main ON/OFF switch for the
power back door..............................3-16Operating the power back door
(if so equipped)...............................3-16
Back door release.............................3-18
Fuel filler lid......................................3-20
Opener operation..............................3-20
Fuel filler cap..................................3-20
Steering wheel...................................3-21
Tilt operation..................................3-21
Pedal position adjustment (if so equipped)..........3-22
Sun visors.......................................3-22
Vanity mirrors.................................3-23
Mirrors..........................................3-23
Inside mirror (if so equipped)....................3-23
Automatic anti-glare inside mirror
(if so equipped)...............................3-23
Outside mirrors...............................3-24
Automatic drive positioner (if so equipped)..........3-25
Memory storage function.......................3-26
Entry/exit function.............................3-27
System operation..............................3-28
ZREVIEW COPY:Ð2004 Quest(van)
Owners Manual(owners)ÐUSA English(nna)
10/08/03Ðtbrooks
X
Page 143 of 320
cDo not fill a portable fuel container in
the vehicle or trailer. Static electricity
can cause an explosion of flammable
liquid, vapor or gas in any vehicle or
trailer. To reduce the risk of serious
injury or death when filling portable fuel
containers:
– Always place the container on the
ground when filling.
– Do not use electronic devices when
filling.
– Keep the pump nozzle in contact
with the container while you are fill-
ing it.
– Use only approved portable fuel con-
tainers for flammable liquid.
CAUTION
cIf fuel is spilled on the vehicle body,
flush it away with water to avoid paint
damage.cTighten until the fuel filler cap clicks.
Failure to tighten the fuel filler cap
properly may cause the
mal-
function indicator lamp (MIL) to illumi-
nate. If the
lamp illuminates be-
cause the fuel filler cap is loose or
missing, tighten or install the cap and
continue to drive the vehicle.
The
lamp should turn off after a
few driving trips. If the
lamp
does not turn off after a few driving
trips, have the vehicle inspected by a
NISSAN dealer.
cFor additional information, see the
“Malfunction indicator lamp (MIL)” in
the “Instruments and Controls” section
earlier in this manual.
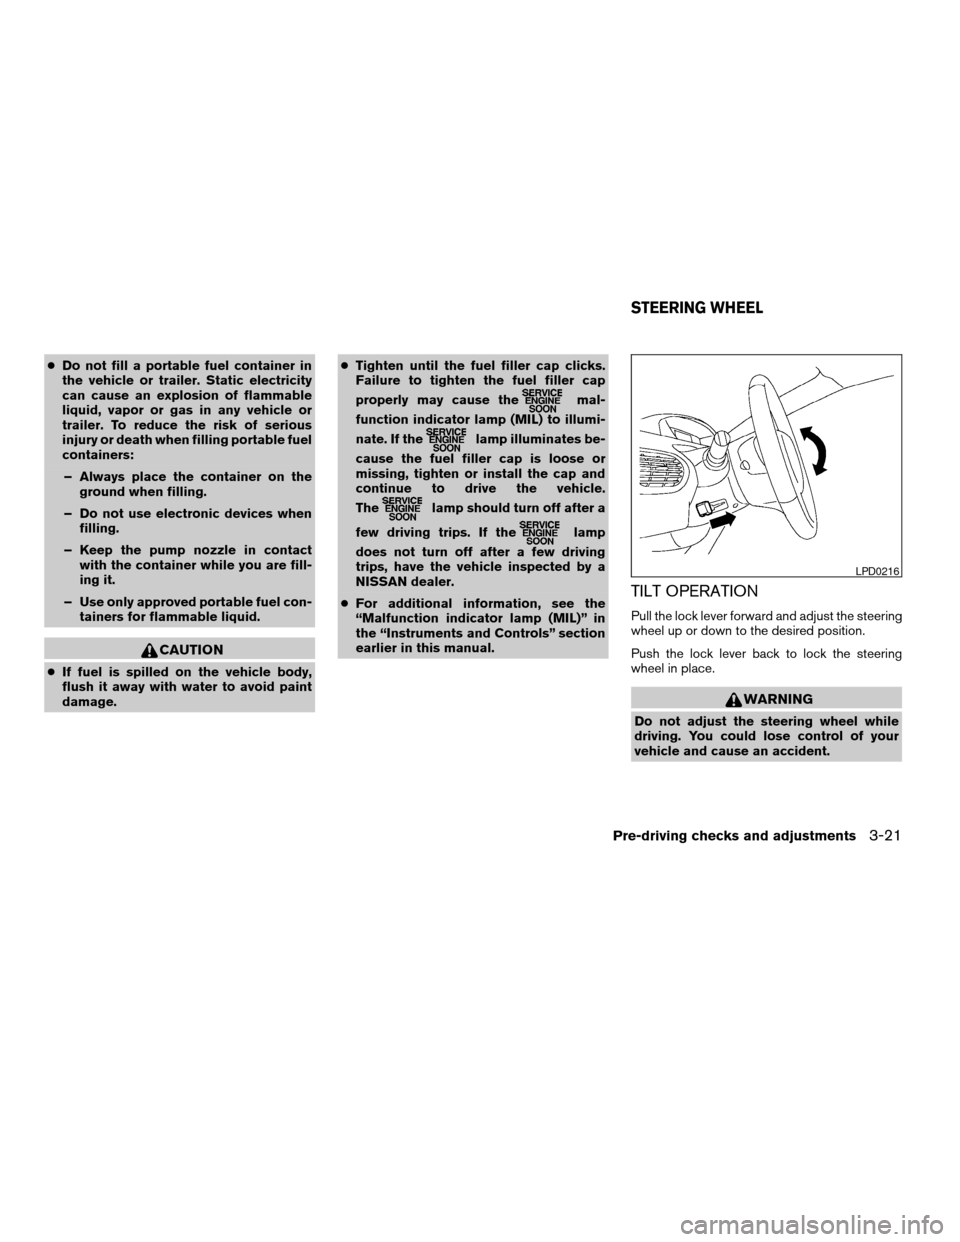
TILT OPERATION
Pull the lock lever forward and adjust the steering
wheel up or down to the desired position.
Push the lock lever back to lock the steering
wheel in place.
WARNING
Do not adjust the steering wheel while
driving. You could lose control of your
vehicle and cause an accident.
LPD0216
STEERING WHEEL
Pre-driving checks and adjustments3-21
ZREVIEW COPY:Ð2004 Quest(van)
Owners Manual(owners)ÐUSA English(nna)
10/08/03Ðtbrooks
X
Page 152 of 320

4 Display screen, heater, air conditioner
and audio systems
Control panel buttons — without navigation system....4-2
Names of components..........................4-3
How to use JOYSTICK and “ENTER” button.......4-3
How to use “PREV” button......................4-3
How to use “TRIP” button.......................4-3
How to use “FUEL ECON” button................4-4
Clock.........................................4-4
How to use “E/M” button........................4-4
How to use
(maintenance) button..........4-5
How to use the “SETTING” button................4-5
button...................................4-7
Control panel buttons — with navigation system.......4-8
Names of the components.......................4-8
How to use joystick and “ENTER” button..........4-9
How to use “PREV” button......................4-9
Setting up the start-up screen...................4-9
How to use the “TRIP” button....................4-9
How to use the “SETTING” button...............4-12
button..................................4-16
Ventilators.......................................4-17
Heater and air conditioner (manual).................4-17
Controls......................................4-18
Heater operation..............................4-19Air conditioner operation.......................4-20
Air flow charts.................................4-21
Heater and air conditioner (automatic)
(if so equipped)..................................4-27
Automatic operation...........................4-27
Manual operation..............................4-28
Rear control button............................4-29
Operating tips.................................4-29
Rear seat air conditioner..........................4-29
Controls......................................4-30
Servicing air conditioner...........................4-30
Audio system....................................4-30
Radio........................................4-30
FM radio reception............................4-31
AM radio reception............................4-31
Satellite radio reception (if so equipped).........4-31
Audio operation precautions....................4-32
FM-AM-SAT radio with compact disc (CD)
player (Type A)/CD changer (Type B)............4-34
CD care and cleaning..........................4-41
Steering wheel switch for audio control
(if so equipped)...............................4-41
Rear audio controls (if so equipped).............4-43
ZREVIEW COPY:Ð2004 Quest(van)
Owners Manual(owners)ÐUSA English(nna)
10/08/03Ðtbrooks
X
Page 157 of 320
HOW TO USE(maintenance)
BUTTON
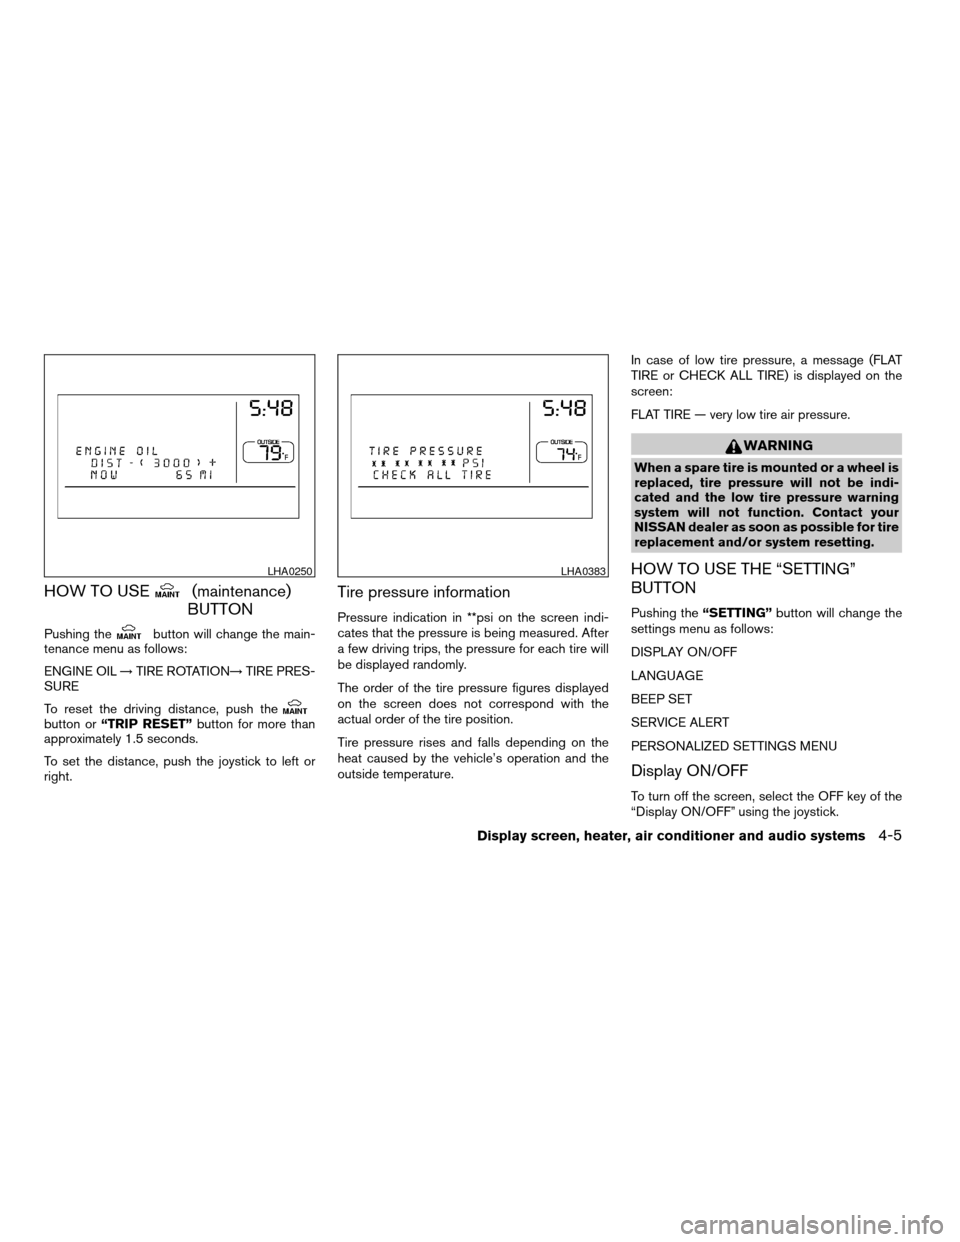
Pushing thebutton will change the main-
tenance menu as follows:
ENGINE OIL!TIRE ROTATION!TIRE PRES-
SURE
To reset the driving distance, push the
button or“TRIP RESET”button for more than
approximately 1.5 seconds.
To set the distance, push the joystick to left or
right.
Tire pressure information
Pressure indication in **psi on the screen indi-
cates that the pressure is being measured. After
a few driving trips, the pressure for each tire will
be displayed randomly.
The order of the tire pressure figures displayed
on the screen does not correspond with the
actual order of the tire position.
Tire pressure rises and falls depending on the
heat caused by the vehicle’s operation and the
outside temperature.In case of low tire pressure, a message (FLAT
TIRE or CHECK ALL TIRE) is displayed on the
screen:
FLAT TIRE — very low tire air pressure.
WARNING
When a spare tire is mounted or a wheel is
replaced, tire pressure will not be indi-
cated and the low tire pressure warning
system will not function. Contact your
NISSAN dealer as soon as possible for tire
replacement and/or system resetting.
HOW TO USE THE “SETTING”
BUTTON
Pushing the“SETTING”button will change the
settings menu as follows:
DISPLAY ON/OFF
LANGUAGE
BEEP SET
SERVICE ALERT
PERSONALIZED SETTINGS MENU
Display ON/OFF
To turn off the screen, select the OFF key of the
“Display ON/OFF” using the joystick.
LHA0250LHA0383
Display screen, heater, air conditioner and audio systems4-5
ZREVIEW COPY:Ð2004 Quest(van)
Owners Manual(owners)ÐUSA English(nna)
10/08/03Ðtbrooks
X
Page 163 of 320
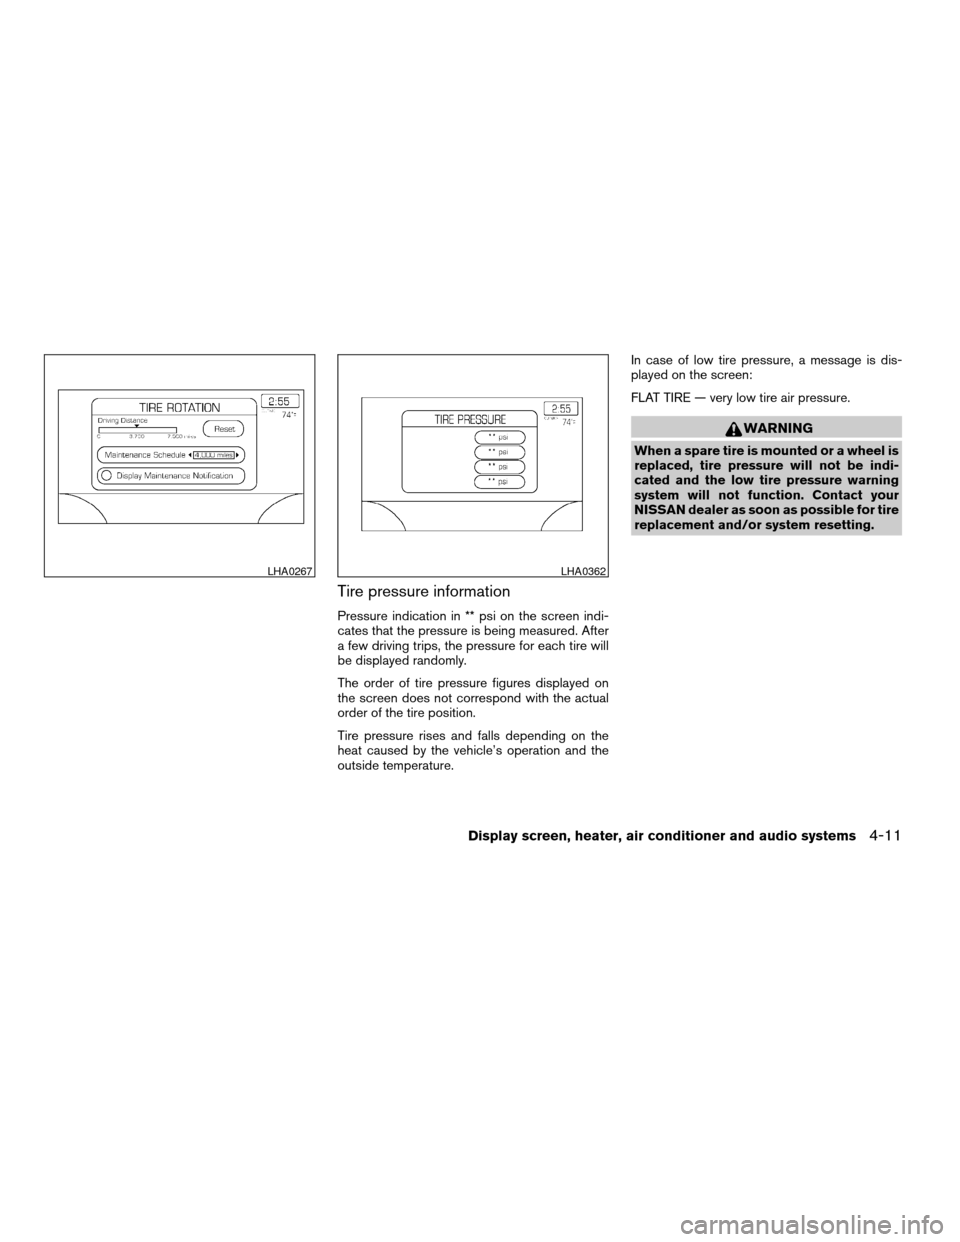
Tire pressure information
Pressure indication in ** psi on the screen indi-
cates that the pressure is being measured. After
a few driving trips, the pressure for each tire will
be displayed randomly.
The order of tire pressure figures displayed on
the screen does not correspond with the actual
order of the tire position.
Tire pressure rises and falls depending on the
heat caused by the vehicle’s operation and the
outside temperature.In case of low tire pressure, a message is dis-
played on the screen:
FLAT TIRE — very low tire air pressure.
WARNING
When a spare tire is mounted or a wheel is
replaced, tire pressure will not be indi-
cated and the low tire pressure warning
system will not function. Contact your
NISSAN dealer as soon as possible for tire
replacement and/or system resetting.
LHA0267LHA0362
Display screen, heater, air conditioner and audio systems4-11
ZREVIEW COPY:Ð2004 Quest(van)
Owners Manual(owners)ÐUSA English(nna)
10/08/03Ðtbrooks
X
Page 193 of 320

CD CARE AND CLEANING
cHandle a CD by its edges. Do not bend the
disc. Never touch the surface of the disc.
cAlways place the discs in the storage case
when they are not being used.
c
To clean a disc, wipe the surface from the center
to the outer edge using a clean, soft cloth. Do
not wipe the disc using a circular motion.
cDo not use a conventional record cleaner or
alcohol intended for industrial use.
cA new disc may be rough on the inner and
outer edges. Remove the rough edges by
rubbing the inner and outer edges with the
side of a pen or pencil as illustrated.
1. Volume control switch
2. MODE select switch
3. POWER on/off switch
4. Tuning switch
STEERING WHEEL SWITCH FOR
AUDIO CONTROL (if so equipped)
The audio system can be operated using the
controls on the steering wheel.
POWER on/off switch
With the ignition key turned to the ACC or ON
position, push the POWER switch to turn the
audio system on or off.
MODE select switch
Push the mode select switch to change the mode
in the following sequence: AM, FM, SAT and CD.
Volume control switch
Push the volume control switch up or down to
increase or decrease the volume.
Tuning
Memory change (radio):
Push the tuning switch (
or) for less
than 1.5 seconds to change the radio frequency.
Seek tuning (radio):
Push the tuning switch (
or) for
more than 1.5 seconds to seek the next or previ-
ous radio station.
FF, REW:
Push the tuning switch (
or) for less
1.5 seconds to return to the beginning of the
present program or skip to the next program.
Push several times to skip back or skip through
programs.
To stop the FF or REW function, press the
orbutton for less than 1.5 seconds again.
LHA0049LHA0269
Display screen, heater, air conditioner and audio systems4-41
ZREVIEW COPY:Ð2004 Quest(van)
Owners Manual(owners)ÐUSA English(nna)
10/08/03Ðtbrooks
X
Page 209 of 320
cDo not stop or park the vehicle over
flammable materials such as dry grass,
waste paper or rags. They may ignite
and cause a fire.
CAUTION
cDo not use leaded gasoline. Deposits
from leaded gasoline will seriously re-
duce the three-way catalyst’s ability to
help reduce exhaust pollutants.
cKeep your engine tuned up. Malfunc-
tions in the ignition, fuel injection, or
electrical systems can cause overrich
fuel flow into the three-way catalyst,
causing it to overheat. Do not keep driv-
ing if the engine misfires, or if notice-
able loss of performance or other un-
usual operating conditions are
detected. Have the vehicle inspected
promptly by a NISSAN dealer.
cAvoid driving with an extremely low fuel
level. Running out of fuel could cause
the engine to misfire, damaging the
three-way catalyst.
cDo not race the engine while warming it
up.
cDo not push or tow your vehicle to start
the engine.
LOW TIRE PRESSURE WARNING
SYSTEM
This vehicle is equipped with the low tire pres-
sure warning system, which displays pressure of
all tires (except the spare tire) on the display
screen by sending a signal from a sensor that is
installed in each wheel.
The low tire pressure warning system will activate
only when the vehicle is driven at speeds above
20 MPH (32 km/h) . Also, this system may not
detect a sudden drop in tire pressure (for ex-
ample a flat tire while driving) .
Tire pressure rises and falls depending on the
heat caused by the vehicle’s operation and the
outside temperature. Low outside temperature
can lower the temperature of the air inside the tire
which can cause a lower tire inflation pressure.
This may cause the low tire pressure warning
light to illuminate.
If the warning light illuminates in low ambient
temperature as described above, check the tire
pressure for all four tires. Adjust the tire pressure
to the recommended COLD tire pressure shown
on the Tire and Loading Information label to turn
the low tire pressure warning light OFF.
Frequently check the tire pressure information
display on the display screen and adjust pressure
of each tire properly. (The order of the tire pres-sure figures displayed on the screen does not
correspond with the actual order of the tire posi-
tion.) See “Tire pressure information” in the “Dis-
play screen, heater, air conditioner and audio
systems” section for tire pressure monitor.
Low tire pressure warning
If the vehicle is being driven with very low tire
pressure (lower than 28 psi, 193 kPa) , the low
tire pressure warning light comes on and the
chime sounds for about 10 seconds.
For additional information regarding the above
warning, see “Warning/indicator lights and au-
dible reminders” in the “Instruments and con-
trols” section.
Starting and driving5-3
ZREVIEW COPY:Ð2004 Quest(van)
Owners Manual(owners)ÐUSA English(nna)
10/08/03Ðtbrooks
X
Page 210 of 320
WARNING
cIf the low tire pressure warning light
flashes while driving, avoid sudden
steering maneuvers or abrupt braking,
reduce vehicle speed, pull off the road
to a safe location and stop the vehicle
as soon as possible. Serious vehicle
damage could occur and may lead to an
accident and could result in serious
personal injury. Check the tire pressure
for all four tires. Adjust the tire pressure
to the recommended COLD tire pres-
sure shown on the Tire and Loading
Information label to turn the low tire
pressure warning light OFF. If you have
a flat tire, replace it with a spare tire as
soon as possible. (See “Flat tire” in the
“In case of emergency” section for
changing a flat tire.)
cWhen a spare tire is mounted or a wheel
is replaced, tire pressure will not be
indicated and the low tire pressure
warning system will not function. Con-
tact your NISSAN dealer as soon as
possible for tire replacement and/or
system resetting.cDo not inject any tire liquid or aerosol
tire sealant into the tires, as this may
cause a malfunction of the tire pressure
sensors.
CAUTION
Do not place metalized film or any metal
parts (antenna, etc.) on the windows. This
may cause poor reception of the signals
from the tire pressure sensors, and the
low tire pressure warning system will not
function properly.
FCC Notice:
Changes or modifications not expressly ap-
proved by the manufacturer compliance
could void the user’s authority to operate
the equipment.
This device complies with Part 15 of the
FCC Rules and RSS-210 of Industry
Canada.
Operation is subject to the following two
conditions: (1) This device may not cause
harmful interface, and (2) this device must
accept any interference received, including
interference that may cause undesired op-
eration of the device.
AVOIDING COLLISION AND
ROLLOVER
WARNING
Failure to operate this vehicle in a safe
and prudent manner may result in loss of
control or an accident.
Be alert and drive defensively at all times. Obey
all traffic regulations. Avoid excessive speed,
high speed cornering, or sudden steering ma-
neuvers, because these driving practices could
cause you to lose control of your vehicle.As with
any vehicle, loss of control could result in a
collision with other vehicles or objects, or
cause the vehicle to roll over, particularly if
the loss of control causes the vehicle to
slide sideways.Be attentive at all times, and
avoid driving when tired. Never drive when under
the influence of alcohol or drugs (including pre-
scription or over-the-counter drugs which may
cause drowsiness) . Always wear your seat belt
as outlined in the “Safety – Seats, seat belts and
supplemental air bags” section of this manual,
and also instruct your passengers to do so.
Seat belts help reduce the risk of injury in colli-
sions and rollovers.In a rollover crash, an
unbelted or improperly belted person is
significantly more likely to be injured or
killed than a person wearing a seat belt.
5-4Starting and driving
ZREVIEW COPY:Ð2004 Quest(van)
Owners Manual(owners)ÐUSA English(nna)
10/08/03Ðtbrooks
X