2004 NISSAN FRONTIER reset
[x] Cancel search: resetPage 143 of 296

Editing travel preset
1. Press and hold the TRAVEL PRESET button
(>3 seconds) until the radio beeps to start
the editing mode. The green Travel Preset
indicator will flash while in TRAVEL PRESET
EDIT mode.
2. The radio displays“TRAVEL EDIT”for 2
seconds and then changes to“SET A-*”.
3. Press TUNE/FF-REV (
or)to
select a mode.
4. Press the TRAVEL PRESET button to save
the mode.
5. Display is changed to“SET B-*”, repeat
steps 3 and 4.
6. Display is changed to“SET C-*”, repeat
step 3.
7. Press the TRAVEL PRESET button to exit
the edit mode and return to normal mode.
*: AM, FM, FM RDS, Rock, Classic Rock, Soft
Rock, Top 40, Country, Jazz, Classical, Oldies,
News, Sports, Talk.
Storing Travel Preset stations in permanent
memory
1. While in Travel Preset mode, press and hold
the TRAVEL PRESET button until it beeps
(>3 seconds) .2. The presets are transferred from Travel Pre-
set memory to the permanent preset
memory for A, B, and C.“PRESETS
LOADED”is displayed.
3. The TRAVEL PRESET indicator turns off.
Preset scan
Pressing the PRESET SCAN button (<1.5 sec-
onds) scans the permanent preset memory that is
selected (A, B or C) from 1–6 for 5 seconds. If
the Travel Preset is ON, the travel preset that is
selected (A, B or C) from 1–6 is scanned for 5
seconds.
LHA0085
Heater, air conditioner and audio systems4-21
ZREVIEW COPY:Ð2004 Truck/Frontier(d22)
Owners Manual(owners)ÐUSA English(nna)
11/21/03Ðdebbie
X
Page 144 of 296

All preset scan
Pressing the PRESET SCAN button (>1.5 sec-
onds) scans all the permanent preset memory
banks (A, B or C) from 1–6 for 5 seconds. If the
Travel Preset is ON, all the travel preset memory
banks (A, B or C) from 1–6 are scanned for 5
seconds.
Canceling preset scan mode
Pressing any button except CLOCK, EJECT and
PTY cancels the Preset Scan mode.
RDS (radio data system)
RDS stands for Radio Data System, and is a data
information service transmitted by some radiostations on the FM band (not AM band) encoded
within a regular radio broadcast. Currently, most
RDS stations are in large cities, but many stations
are now considering broadcasting RDS data.
RDS can display:
cStation call sign, such as “WHFR 98.3”.
cStation name, such as “The Groove”.
cMusic or programming type, such as “Clas-
sical”, “Country”, or “Rock”.
cTraffic reports about delays or construction.
If the station broadcasts RDS information the
RDS icon is displayed. The RDS information will
be displayed according to the option chosen in
the RDS setup mode. (FM & RDS is the default.)
Press the RDS button again to display the fre-
quency for 3 seconds. The radio will then return
to the normal display. If the station does not
broadcast RDS information, the RDS icon will not
be displayed.
Setting RDS mode
Press and RDS button (>3 seconds) until the
display shows“RDS SET MODE”. This display
will last 2 seconds and then change to
“TRAFFIC-OFF”. Press TUNE/FF-REV (or) to toggle the RDS traffic mode from
“OFF” to “ON”. Press the RDS button again to
set your RDS traffic mode selection.The display changes to“SHOW”for the second
part of the RDS mode selection. Press TUNE/FF-
REV (
or) to switch between the
following RDS display modes:
c“FM & RDS”: the radio display will show the
station’s broadcast frequency and the sta-
tion’s name.
c“RDS ONLY”: the radio display will show the
station’s name only.
c
“RDS TEMP”: the radio display will show the
station’s name for 5 seconds and then display
only the radio station’s broadcast frequency.
PTY (program type)
PTY can be used to search for a certain program
type. Certain areas have a limited number of
stations that transmit RDS. Many stations trans-
mit call letters and frequencies only. Searching or
scanning by program type may yield a limited
number of selections.
1. Press the PTY button. The display changes
from“RDS PTY SEARCH”to“SELECT
BY TUNE”.
2. Press TUNE/FF-REV (
or)
up/down button to choose a specific pro-
gram type:
ROCK, CLASSIC ROCK, SOFT ROCK,
TOP 40, COUNTRY, JAZZ, CLASSICAL,
OLDIES, NEWS, SPORTS, TALK, ANY
LHA0086
4-22Heater, air conditioner and audio systems
ZREVIEW COPY:Ð2004 Truck/Frontier(d22)
Owners Manual(owners)ÐUSA English(nna)
11/21/03Ðdebbie
X
Page 145 of 296

3. Press the SEEK or SCAN button to search
for the next station with the selected PTY.
The SCAN icon flashes when the SCAN
button is pressed. The radio continues to
seek or scan until a radio station is found
matching the selected PTY
4. Press the PTY button again to cancel the
PTY SEEK mode.
Compact disc (CD) player operation
Turn the ignition key to the ACC or ON position.
CAUTION
cDo not force a compact disc into the CD
insert slot. This could damage the CD
and/or CD changer/player.
cTrying to load a CD with the CD door
closed could damage the CD and/or CD
changer.
CD button
When the CD button is pressed with a compact
disc loaded and the radio playing, the radio turns
off and the last used compact disc starts to play.
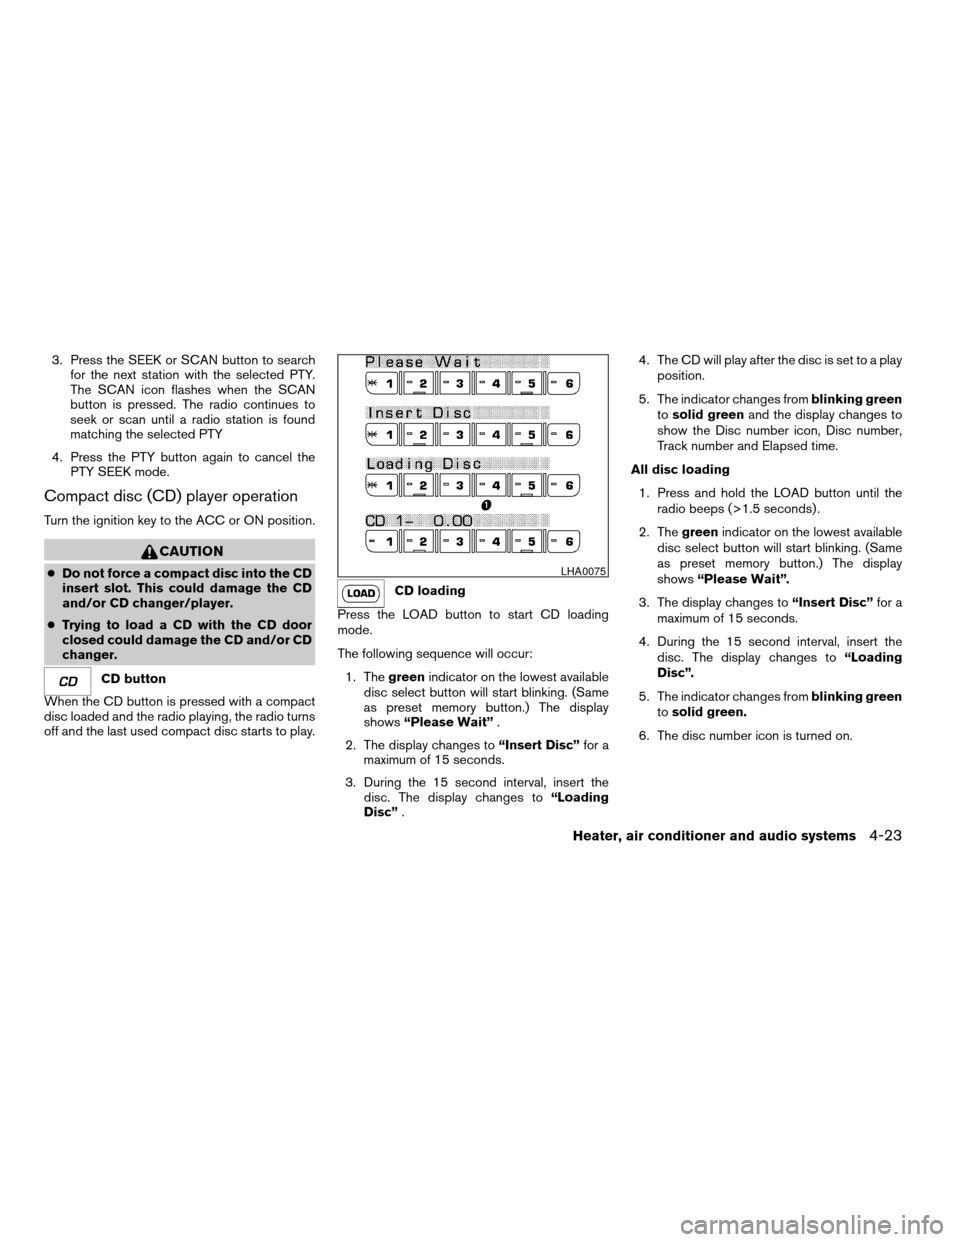
CD loading
Press the LOAD button to start CD loading
mode.
The following sequence will occur:
1. Thegreenindicator on the lowest available
disc select button will start blinking. (Same
as preset memory button.) The display
shows“Please Wait”.
2. The display changes to“Insert Disc”for a
maximum of 15 seconds.
3. During the 15 second interval, insert the
disc. The display changes to“Loading
Disc”.4. The CD will play after the disc is set to a play
position.
5. The indicator changes fromblinking green
tosolid greenand the display changes to
show the Disc number icon, Disc number,
Track number and Elapsed time.
All disc loading
1. Press and hold the LOAD button until the
radio beeps (>1.5 seconds) .
2. Thegreenindicator on the lowest available
disc select button will start blinking. (Same
as preset memory button.) The display
shows“Please Wait”.
3. The display changes to“Insert Disc”for a
maximum of 15 seconds.
4. During the 15 second interval, insert the
disc. The display changes to“Loading
Disc”.
5. The indicator changes fromblinking green
tosolid green.
6. The disc number icon is turned on.
LHA0075
Heater, air conditioner and audio systems4-23
ZREVIEW COPY:Ð2004 Truck/Frontier(d22)
Owners Manual(owners)ÐUSA English(nna)
11/21/03Ðdebbie
X
Page 150 of 296

CD CARE AND CLEANING
cHandle a CD by its edges. Do not bend the
disc. Never touch the surface of the disc.
cAlways place the discs in the storage case
when they are not being used.
cTo clean a disc, wipe the surface from the
center to the outer edge using a clean, soft
cloth. Do not wipe the disc using a circular
motion.
cDo not use a conventional record cleaner or
alcohol intended for industrial use.cA new disc may be rough on the inner and
outer edges. Remove the rough edges by
rubbing the inner and outer edges with the
side of a pen or pencil as illustrated.
1. SEEK up button
2. Mode button
3. SEEK down button
4. Volume control button
STEERING WHEEL SWITCH FOR
AUDIO CONTROL (if so equipped)
The steering wheel switch for audio controls is
mounted on the left side of the steering wheel.
Press the MODE button to turn the radio on or, if
the radio is already on, to switch between the
Radio presets (A, B or C) and CD Mode.
LHA0049WHA0234
4-28Heater, air conditioner and audio systems
ZREVIEW COPY:Ð2004 Truck/Frontier(d22)
Owners Manual(owners)ÐUSA English(nna)
11/21/03Ðdebbie
X
Page 151 of 296

A!B!C!CD Mode
The last CD that was loaded starts to play when
in CD Mode. If there is no CD loaded, the CD
changer enters Disc Loading Mode.
If in Radio presets A, B or C:
cPress
or(<1.5 seconds) to
advance to the next preset station or to
return to the previous preset station.
cHold down
or(>1.5 sec-
onds) . The radio will seek up or down to the
next radio station.
If in CD Mode:
cPress
or(<1.5 seconds) to
advance to the next selection on the CD or
return to the previous selection on the CD.
cHold down
or(>1.5 seconds)
to advance to the next CD or return to the
previous CD.
Volume control is located on the side of the audio
control switch. Press the top of the volume con-
trol to increase volume. Press the bottom of the
volume control to decrease volume.
ANTENNA
The antenna cannot be shortened, but can be
removed. When you need to remove the antenna,
turn the antenna rod counterclockwise.
To install the antenna rod, turn the antenna clock-
wise. Tighten the antenna rod to specification
using a suitable tool such as an open-end
wrench. The antenna rod tightening specification
is 3.4 - 3.6 N·m (30 - 32 in-lb) . Do not use pliers
to tighten the antenna as they can leave marks on
the antenna surface. The antenna rod cannot be
hand tightened to the proper specification.
CAUTION
Always properly tighten the antenna rod
during installation or the antenna rod may
break during vehicle operation.When installing a CB, ham radio or car phone in
your NISSAN, be sure to observe the following
cautions, otherwise the new equipment may ad-
versely affect the MFI (Multiport Fuel Injection)
system and other electronic parts.
WARNING
cA cellular telephone should not be used
while driving so full attention may be
given to vehicle operation. Some juris-
dictions prohibit the use of cellular tele-
phones while driving.
cIf you must make a call while your ve-
hicle is in motion, the hands free cellu-
lar phone operational mode (if so
equipped) is highly recommended. Ex-
ercise extreme caution at all times so
full attention may be given to vehicle
operation.
cIf a conversation in a moving vehicle
requires you to take notes, pull off the
road to a safe location and stop your
vehicle before doing so.
CAUTION
cKeep the antenna as far away as pos-
sible from the Engine Control Module
(ECM) .
CAR PHONE OR CB RADIO
Heater, air conditioner and audio systems4-29
ZREVIEW COPY:Ð2004 Truck/Frontier(d22)
Owners Manual(owners)ÐUSA English(nna)
11/21/03Ðdebbie
X
Page 155 of 296

cKeep your engine tuned up. Malfunc-
tions in the ignition, fuel injection, or
electrical systems can cause overrich
fuel flow into the three-way catalyst,
causing it to overheat. Do not keep driv-
ing if the engine misfires, or if notice-
able loss of performance or other un-
usual operating conditions are
detected. Have the vehicle inspected
promptly by a NISSAN dealer.
cAvoid driving with an extremely low fuel
level. Running out of fuel could cause
the engine to misfire, damaging the
three-way catalyst.
cDo not race the engine while warming it
up.
cDo not push or tow your vehicle to start
the engine.
LOW TIRE PRESSURE WARNING
SYSTEM
The low tire pressure warning system monitors
tire pressure of all tires (except the spare tire) .
The low tire pressure warning system will activate
only when the vehicle is driven at speeds above
20 MPH (32 km/h) . Also, this system may not
detect a sudden drop in tire pressure (for ex-
ample a flat tire while driving) .Tire pressure rises and falls depending on the
heat caused by the vehicle’s operation and the
outside temperature. Low outside temperature
can lower the temperature of the air inside the tire
which can cause a lower tire inflation pressure.
This may cause the low tire pressure warning
light to illuminate.
If the warning light illuminates in low ambient
temperature as described above, check the tire
pressure for all four tires. Adjust the tire pressure
to the recommended COLD tire pressure shown
on the tire placard to turn the low tire pressure
warning light OFF.
Frequently check the tire pressure and adjust
pressure of each tire properly.
Low tire pressure warning
If the vehicle is being driven with very low tire
pressure (lower than 28 psi, 193 kPa) , the low
tire pressure warning light comes on and the
chime sounds for about 10 seconds.
For additional information regarding the above
warning, see “Warning/indicator lights and au-
dible reminders” in the “Instruments and con-
trols” section.
WARNING
cIf the low tire pressure warning light
flashes while driving, avoid sudden
steering maneuvers or abrupt braking,
reduce vehicle speed, pull off the road
to a safe location and stop the vehicle
as soon as possible. Serious vehicle
damage could occur and may lead to an
accident and could result in serious
personal injury. Check the tire pressure
for all four tires. Adjust the tire pressure
to the recommended COLD tire pres-
sure shown on the tire placard to turn
the low tire pressure warning light OFF.
If you have a flat tire, replace it with a
spare tire as soon as possible. (See
“Flat tire” in the “In case of emergency”
section for changing a flat tire.)
cWhen a spare tire is mounted or a wheel
is replaced, tire pressure will not be
indicated and the low tire pressure
warning system will not function. Con-
tact your NISSAN dealer as soon as
possible for tire replacement and/or
system resetting.
cDo not inject any tire liquid or aerosol
tire sealant into the tires, as this may
cause a malfunction of the tire pressure
sensors.
Starting and driving5-3
ZREVIEW COPY:Ð2004 Truck/Frontier(d22)
Owners Manual(owners)ÐUSA English(nna)
11/21/03Ðdebbie
X
Page 167 of 296

Overdrive switch (KA24DE engine
type a)
ON: For typical driving, push the over-
drive switch ON
with the se-
lector lever in the D (Drive) position.
The transmission is upshifted into
OVERDRIVE as the vehicle speed
increases.
Overdrive does not engage until the engine
has reached operating temperature.
OFF: For driving up and down long
slopes where engine braking is nec-
essary push the switch OFF
.
The indicator light in the instrument
panel comes on at this time. When
cruising at a low speed or climbing
a gentle slope, you may feel uncom-
fortable shift shocks as the trans-
mission repeatedly shifts between
3rd and overdrive. In this case, set
the overdrive switch in the
OFF
position.
When driving conditions change, reset the over-
drive switch in the ONposition to turn the
overdrive on. The indicator light goes out at this
time.
Remember not to drive at high speeds for ex-
tended periods of time with the overdrive switch
set in the OFF
position. This reduces fuel
economy.
Overdrive switch (KA24DE engine
type b)
Each time your vehicle is started, the transmis-
sion is automatically “reset” to overdrive ON.
ON: For normal driving the overdrive
switch is engaged. The transmission
is upshifted into overdrive as the
vehicle speed increases.
The overdrive does not engage until the
engine has reached operating temperature.
WSD0069WSD0070
Starting and driving5-15
ZREVIEW COPY:Ð2004 Truck/Frontier(d22)
Owners Manual(owners)ÐUSA English(nna)
11/21/03Ðdebbie
X
Page 168 of 296

OFF: For driving up and down long
slopes where engine braking is
necessary, push the overdrive
switch once. The O/D OFF indicator
light illuminates at this time.
When cruising at a low speed or climbing a
gentle slope, you may feel uncomfortable shift
shocks as the transmission shifts between 3rd
gear and overdrive repeatedly. In this case, press
the overdrive switch.
When driving conditions change, press the over-
drive switch to turn the Overdrive on. The O/D
OFF indicator light goes out.
Remember not to drive at high speeds for ex-
tended periods of time with the O/D OFF light
illuminated. This reduces fuel economy.
Overdrive switch (VG33E or VG33ER
engine)
Each time your vehicle is started, the transmis-
sion is automatically “reset” to overdrive ON.
ON: With the engine running and the
shift selector lever in the D (Drive)
position, the transmission upshifts
into Overdrive as vehicle speed
increases.
Overdrive does not engage until the engine
has reached operating temperature.
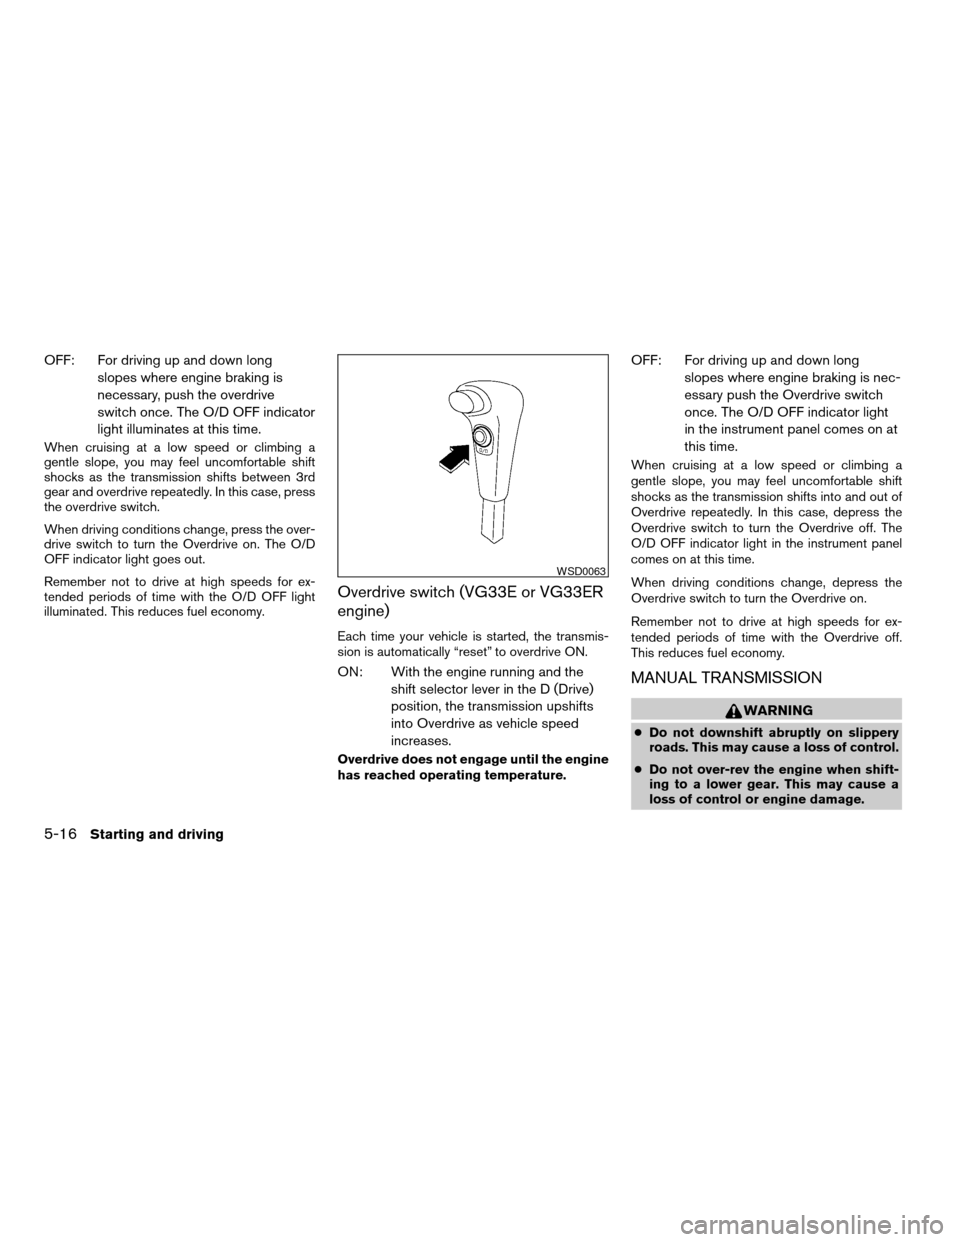
OFF: For driving up and down long
slopes where engine braking is nec-
essary push the Overdrive switch
once. The O/D OFF indicator light
in the instrument panel comes on at
this time.
When cruising at a low speed or climbing a
gentle slope, you may feel uncomfortable shift
shocks as the transmission shifts into and out of
Overdrive repeatedly. In this case, depress the
Overdrive switch to turn the Overdrive off. The
O/D OFF indicator light in the instrument panel
comes on at this time.
When driving conditions change, depress the
Overdrive switch to turn the Overdrive on.
Remember not to drive at high speeds for ex-
tended periods of time with the Overdrive off.
This reduces fuel economy.
MANUAL TRANSMISSION
WARNING
cDo not downshift abruptly on slippery
roads. This may cause a loss of control.
cDo not over-rev the engine when shift-
ing to a lower gear. This may cause a
loss of control or engine damage.
WSD0063
5-16Starting and driving
ZREVIEW COPY:Ð2004 Truck/Frontier(d22)
Owners Manual(owners)ÐUSA English(nna)
11/21/03Ðdebbie
X