2004 NISSAN ARMADA seats
[x] Cancel search: seatsPage 78 of 344
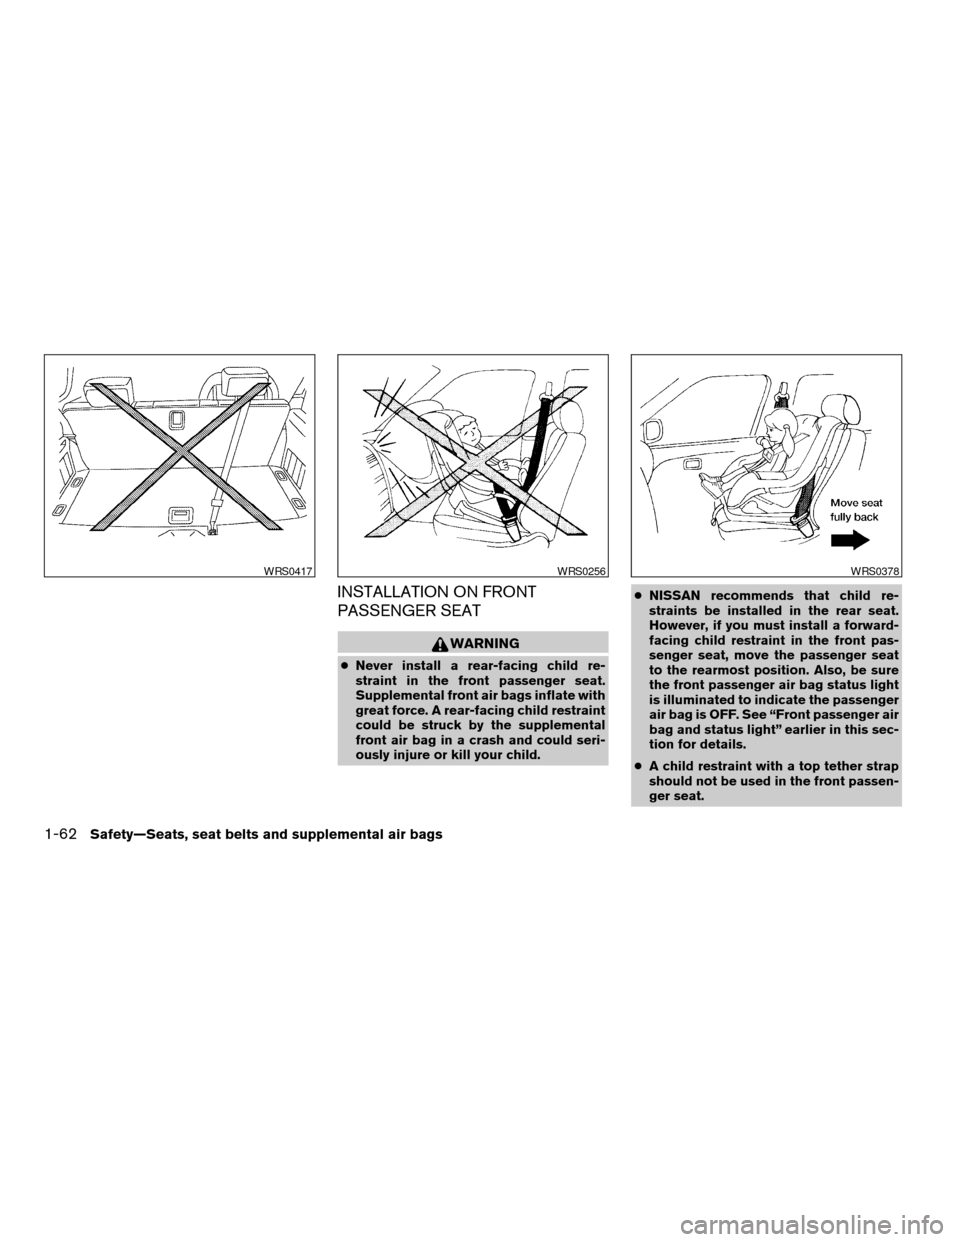
INSTALLATION ON FRONT
PASSENGER SEAT
WARNING
cNever install a rear-facing child re-
straint in the front passenger seat.
Supplemental front air bags inflate with
great force. A rear-facing child restraint
could be struck by the supplemental
front air bag in a crash and could seri-
ously injure or kill your child.cNISSAN recommends that child re-
straints be installed in the rear seat.
However, if you must install a forward-
facing child restraint in the front pas-
senger seat, move the passenger seat
to the rearmost position. Also, be sure
the front passenger air bag status light
is illuminated to indicate the passenger
air bag is OFF. See “Front passenger air
bag and status light” earlier in this sec-
tion for details.
cA child restraint with a top tether strap
should not be used in the front passen-
ger seat.
WRS0417WRS0256WRS0378
1-62Safety—Seats, seat belts and supplemental air bags
ZREVIEW COPY:Ð2004 Pathfinder Armada
(wzw)
Owners Manual(owners)ÐUSA English(nna)
01/14/04Ðtbrooks
X
Page 79 of 344
cThe three-point seat belt in your vehicle
is equipped with an automatic locking
mode retractor which must be used
when installing a child restraint.
cFailure to use the retractor’s locking
mode will result in the child restraint
not being properly secured. The re-
straint could tip over or otherwise be
unsecured and cause injury to the child
in a sudden stop or collision. Also, it can
change the operation of the front pas-
senger air bag. See “Front passenger
air bag and status light” earlier in this
section.
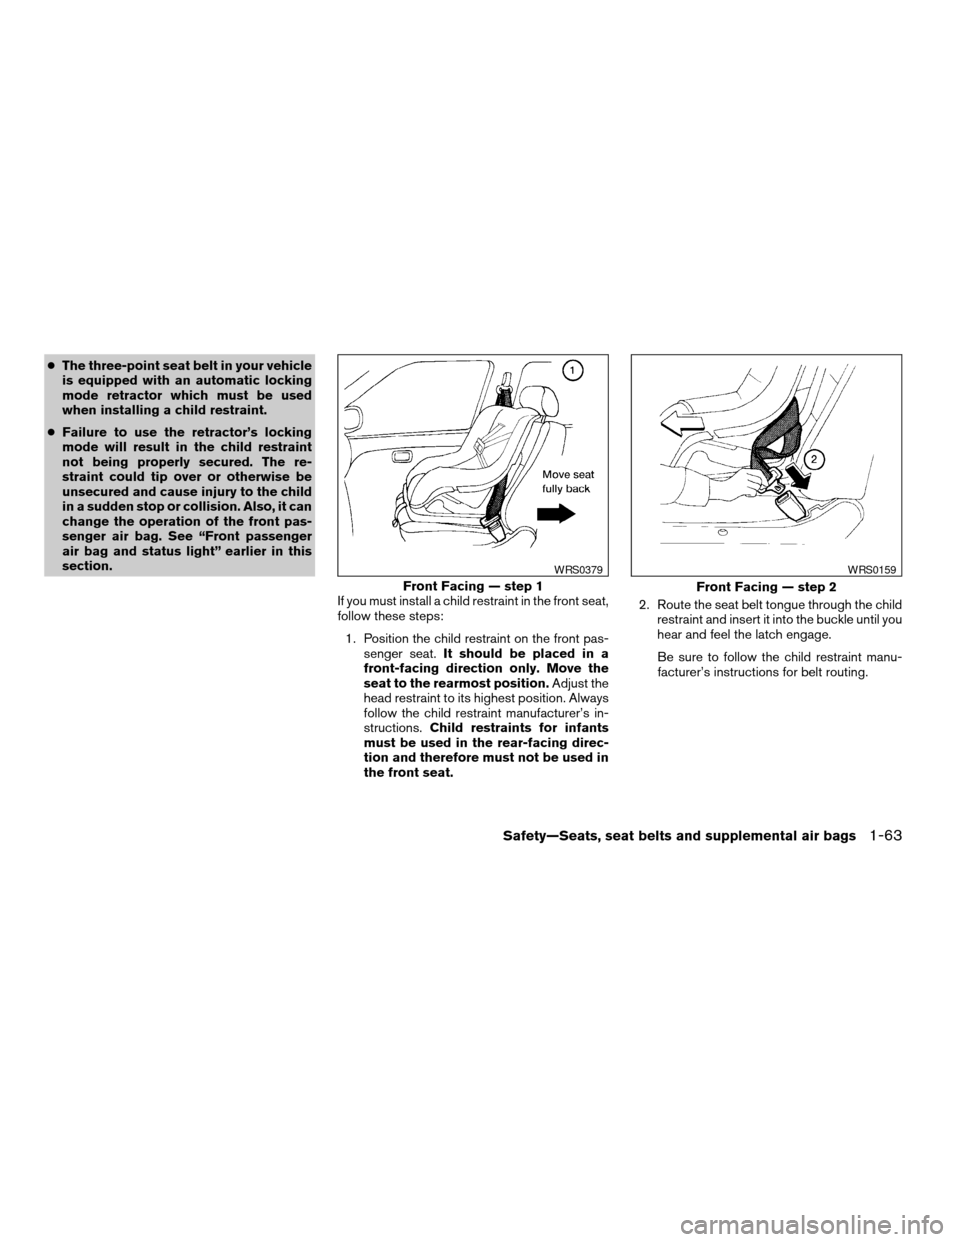
If you must install a child restraint in the front seat,
follow these steps:
1. Position the child restraint on the front pas-
senger seat.It should be placed in a
front-facing direction only. Move the
seat to the rearmost position.Adjust the
head restraint to its highest position. Always
follow the child restraint manufacturer’s in-
structions.Child restraints for infants
must be used in the rear-facing direc-
tion and therefore must not be used in
the front seat.2. Route the seat belt tongue through the child
restraint and insert it into the buckle until you
hear and feel the latch engage.
Be sure to follow the child restraint manu-
facturer’s instructions for belt routing.
Front Facing — step 1
WRS0379
Front Facing — step 2
WRS0159
Safety—Seats, seat belts and supplemental air bags1-63
ZREVIEW COPY:Ð2004 Pathfinder Armada
(wzw)
Owners Manual(owners)ÐUSA English(nna)
01/14/04Ðtbrooks
X
Page 80 of 344

3. Pull on the shoulder belt until all of the belt is
fully extended. At this time, the seat belt
retractor is in the automatic locking mode
(child restraint mode) . It reverts to emer-
gency locking mode when the seat belt is
fully retracted.4. Allow the seat belt to retract slightly. Pull up
on the shoulder belt to remove any slack in
the belt.5. Before placing the child in the child restraint,
use force to tilt the child restraint from side
to side, and tug it forward to make sure that
it is securely held in place. It should not move
more than 1 inch.
6. Check that the retractor is in the automatic
locking mode by trying to pull more seat belt
out of the retractor. If you cannot pull any
more belt webbing out of the retractor, the
retractor is in the automatic locking mode.
Front Facing — step 3
WRS0160
Front Facing — step 4
WRS0161
Front Facing — step 5
WRS0380
1-64Safety—Seats, seat belts and supplemental air bags
ZREVIEW COPY:Ð2004 Pathfinder Armada
(wzw)
Owners Manual(owners)ÐUSA English(nna)
01/14/04Ðtbrooks
X
Page 81 of 344

7. Check to make sure the child restraint is
properly secured prior to each use. If the
seat belt is not locked, repeat steps 3
through 6.
8. Turn the ignition to the ON position. The
passenger air bag status light should say
“OFF”
or. If this light is not illu-
minated it may indicate a malfunction.Move
the child restraint to another seating
position.Have the system checked by a
NISSAN dealer.
After the child restraint is removed and the seat
belt is fully retracted, the automatic locking mode
(child restraint mode) is canceled.
Safety—Seats, seat belts and supplemental air bags1-65
ZREVIEW COPY:Ð2004 Pathfinder Armada
(wzw)
Owners Manual(owners)ÐUSA English(nna)
01/14/04Ðtbrooks
X
Page 98 of 344
For additional information, see “Low tire pressure
warning system” in the “Starting and driving”
section and “Low tire pressure warning system”
in the “In case of emergency” section.
WARNING
cIf the light does not come on with the
key switch turned ON, have the vehicle
checked by a NISSAN dealer as soon as
possible.
cIf the light comes on while driving,
avoid sudden steering maneuvers or
abrupt braking, reduce vehicle speed,
pull off the road to a safe location and
stop the vehicle as soon as possible.
Serious vehicle damage could occur
and may lead to an accident and could
result in serious personal injury. Check
the tire pressure for all four tires. Adjust
the tire pressure to the recommended
COLD tire pressure shown on the Tire
and Loading Information label to turn
the low tire pressure warning light OFF.
If the light still comes on while driving
after adjusting the tire pressure, a tire
may be flat. If you have a flat tire, re-
place it with a spare tire as soon as
possible.cWhen a spare tire is mounted or a wheel
is replaced, tire pressure will not be
indicated and the low tire pressure
warning system will not function. Con-
tact your NISSAN dealer as soon as
possible for tire replacement and/or
system resetting.
CAUTION
cThe low tire pressure warning system is
not a substitute for the regular tire pres-
sure check. Be sure to check the tire
pressure regularly.
cIf the vehicle is being driven at speeds
of less than 20 MPH (32 km/h) , the low
tire pressure warning system may not
operate correctly.
cBe sure to install the specified size of
tires to the 4 wheels correctly.
Low windshield washer fluid
warning light
This light comes on when the windshield washer
fluid is at a low level. Add windshield washer fluid
as necessary. See the “Maintenance and do-it-
yourself” section of this manual.
Seat belt warning light and
chime
The light and chime remind you to fasten your
seat belts. The light illuminates whenever the
ignition key is turned to the ON or START position
and remains illuminated until the driver’s seat belt
is fastened. At the same time, the chime sounds
for about 6 seconds unless the driver’s seat belt
is securely fastened.
Refer to “Seat belts” in the “Safety—Seats, seat
belts and supplemental air bags” section for pre-
cautions on seat belt usage.
Supplemental air bag warning
light
When the ignition key is in the ON or START
position, the supplemental air bag warning light
illuminates for about 7 seconds and then turns
off. This means the system is operational.
If any of the following conditions occur, the
supplemental front air bags, supplemental side
air bags (if so equipped) , curtain side-impact and
rollover air bags, and pre-tensioner seat belt sys-
tems need servicing and your vehicle must be
taken to a NISSAN dealer:
cThe supplemental air bag warning light re-
mains on after approximately 7 seconds.
2-16Instruments and controls
ZREVIEW COPY:Ð2004 Pathfinder Armada
(wzw)
Owners Manual(owners)ÐUSA English(nna)
01/14/04Ðtbrooks
X
Page 99 of 344
cThe supplemental air bag warning light
flashes intermittently.
cThe supplemental air bag warning light does
not come on at all.
Unless checked and repaired, the supplemental
restraint system (air bag system) and/or the pre-
tensioner seat belts may not function properly.
For additional details see “Supplemental restraint
system” in the “Safety—Seats, seat belts and
supplemental air bags” section of this manual.
WARNING
If the supplemental air bag warning light
is on, it could mean that the supplemental
front air bag, supplemental side air bag,
curtain side-impact and rollover air bag
systems (if so equipped) and/or pre-
tensioner seat belt systems will not oper-
ate in an accident.
INDICATOR LIGHTS
Automatic transmission posi-
tion indicator light
When the ignition key is turned to the ON posi-
tion, this indicator light shows the automatic
transmission selector lever position. See “Driving
the vehicle” in the “Starting and driving” section
of this manual.
Cruise main switch indicator
light
The light comes on when the cruise control main
switch is pushed. The light goes out when the
main switch is pushed again. When the cruise
main switch indicator light comes on, the cruise
control system is operational.
Cruise set switch indicator
light
The light comes on while the vehicle speed is
controlled by the cruise control system. If the light
blinks while the engine is running, it may indicate
the cruise control system is not functioning prop-
erly. Have the system checked by a NISSAN
dealer.
4WD shift indicator light
(
model)
The light should turn off within 1 second after
turning the ignition switch to ON.
While the engine is running, the 4WD shift indi-
cator light will illuminate the position selected by
the 4WD shift switch.
The 4WD shift indicator light may blink
while shifting from one drive mode to the
other.
orFront passenger
air bag status light
The front passenger air bag status light (or) will be lit and the passenger front air
bag will be OFF depending on how the front
passenger seat is being used.
For front passenger air bag status light operation,
see “Front passenger air bag and status light” in
the “Safety — Seats, seat belts and supplemental
air bags” section of this manual.
High beam indicator light
(Blue)
This blue light comes on when the headlight high
beams are on and goes out when the low beams
are selected.
The high beam indicator light also comes on
when the passing signal is activated.
Malfunction indicator lamp
(MIL)
If this indicator lamp comes on steady or blinks
while the engine is running, it may indicate a
potential emission control malfunction.
The malfunction indicator lamp may also come on
steady if the fuel filler cap is loose or missing, or if
the vehicle runs out of fuel. Check to make sure
Instruments and controls2-17
ZREVIEW COPY:Ð2004 Pathfinder Armada
(wzw)
Owners Manual(owners)ÐUSA English(nna)
01/14/04Ðtbrooks
X
Page 111 of 344
cTurn signals do not work when the haz-
ard warning flasher lights are on.
The flashers will operate with the ignition switch
in any position.
Some state laws may prohibit the use of
the hazard warning flasher switch while
driving.
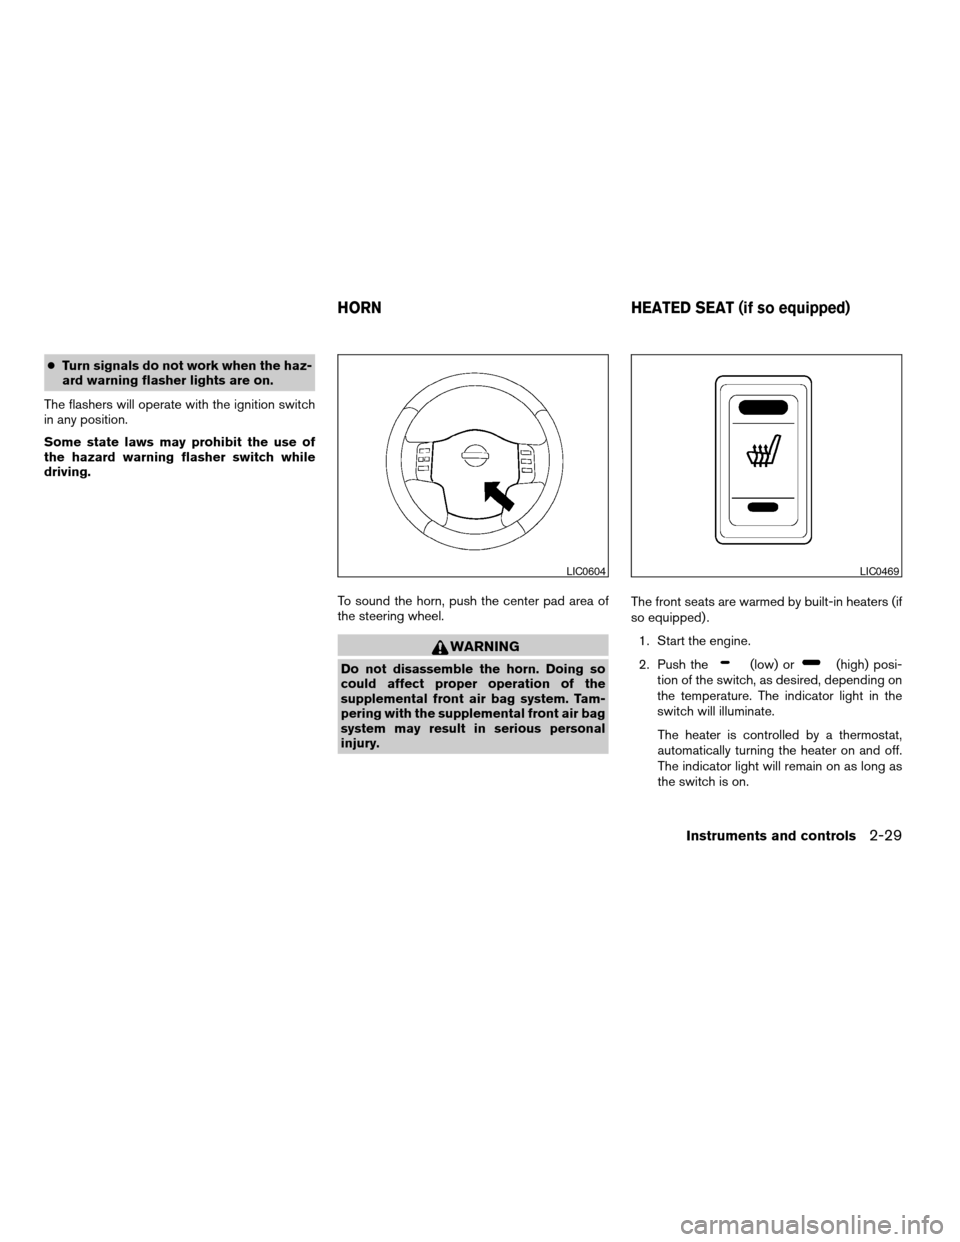
To sound the horn, push the center pad area of
the steering wheel.
WARNING
Do not disassemble the horn. Doing so
could affect proper operation of the
supplemental front air bag system. Tam-
pering with the supplemental front air bag
system may result in serious personal
injury.The front seats are warmed by built-in heaters (if
so equipped) .
1. Start the engine.
2. Push the(low) or(high) posi-
tion of the switch, as desired, depending on
the temperature. The indicator light in the
switch will illuminate.
The heater is controlled by a thermostat,
automatically turning the heater on and off.
The indicator light will remain on as long as
the switch is on.
LIC0604LIC0469
HORN HEATED SEAT (if so equipped)
Instruments and controls2-29
ZREVIEW COPY:Ð2004 Pathfinder Armada
(wzw)
Owners Manual(owners)ÐUSA English(nna)
01/14/04Ðtbrooks
X
Page 125 of 344
WARNING
cProperly secure all cargo with ropes or
straps to help prevent it from sliding or
shifting. Do not place cargo higher than
the seatbacks. In a sudden stop or col-
lision, unsecured cargo could cause
personal injury.
cUse suitable ropes and hooks to secure
cargo.
cNever allow anyone to ride in the lug-
gage area. It is extremely dangerous to
ride in a cargo area inside of a vehicle.
In a collision, people riding in these
areas are more likely to be seriously
injured or killed.
cDo not allow people to ride in any area
of your vehicle that is not equipped with
seats and seat belts.
cBe sure everyone in your vehicle is in a
seat and using a seat belt properly.
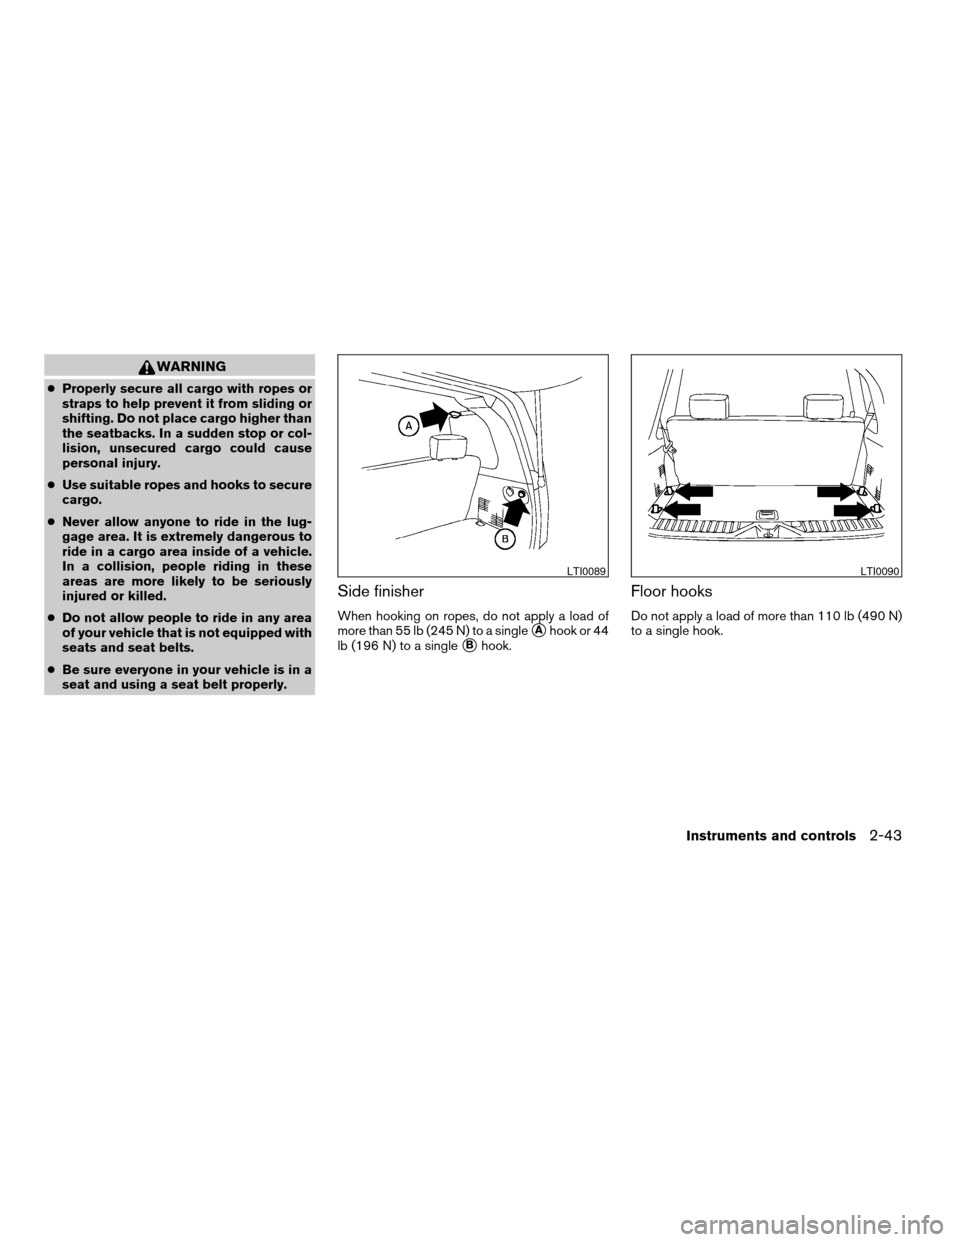
Side finisher
When hooking on ropes, do not apply a load of
more than 55 lb (245 N) to a single
sAhook or 44
lb (196 N) to a single
sBhook.
Floor hooks
Do not apply a load of more than 110 lb (490 N)
to a single hook.
LTI0089LTI0090
Instruments and controls2-43
ZREVIEW COPY:Ð2004 Pathfinder Armada
(wzw)
Owners Manual(owners)ÐUSA English(nna)
01/14/04Ðtbrooks
X