2004 NISSAN ARMADA brake
[x] Cancel search: brakePage 284 of 344
BRAKE BOOSTER
Check the brake booster function as follows:
1. With the engine off, press and release the
brake pedal several times. When brake
pedal movement (distance of travel) remains
the same from one pedal application to the
next, continue on to the next step.
2. While depressing the brake pedal, start the
engine. The pedal height should drop a little.
3. With the brake pedal depressed, stop the
engine. Keep the pedal depressed for about
30 seconds. The pedal height should not
change.
4. Run the engine for one minute without de-
pressing the brake pedal, then turn it off.
Depress the brake pedal several times. The
pedal travel distance will decrease gradually
with each depression as the vacuum is re-
leased from the booster.
If the brakes do not operate properly, have the
brakes checked by a NISSAN dealer.
ENGINE COMPARTMENT
CAUTION
Never use a fuse of a higher or lower
amperage rating than specified on the
fuse box cover. This could damage the
electrical system or cause a fire.
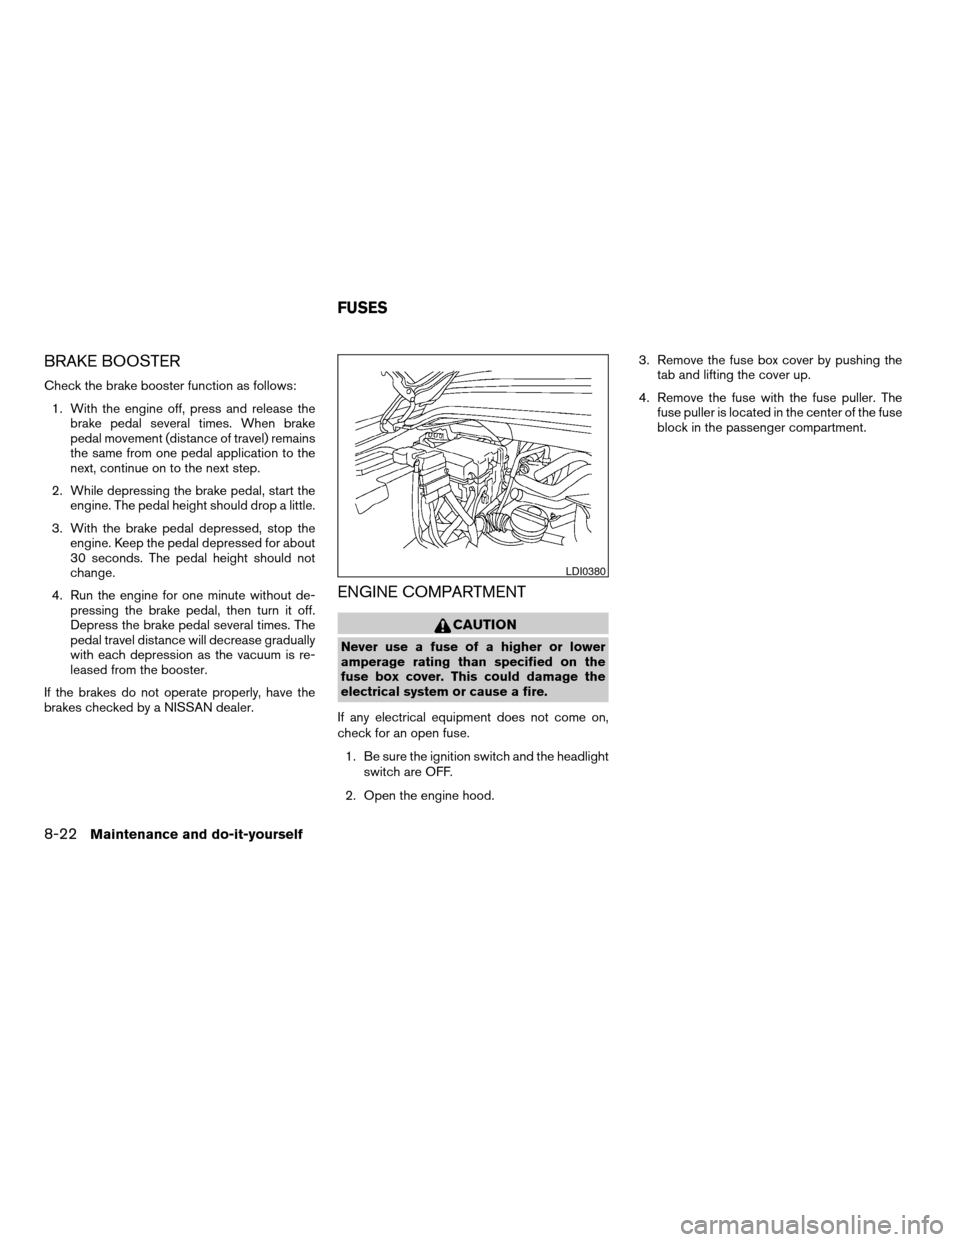
If any electrical equipment does not come on,
check for an open fuse.
1. Be sure the ignition switch and the headlight
switch are OFF.
2. Open the engine hood.3. Remove the fuse box cover by pushing the
tab and lifting the cover up.
4. Remove the fuse with the fuse puller. The
fuse puller is located in the center of the fuse
block in the passenger compartment.
LDI0380
FUSES
8-22Maintenance and do-it-yourself
ZREVIEW COPY:Ð2004 Pathfinder Armada
(wzw)
Owners Manual(owners)ÐUSA English(nna)
01/14/04Ðtbrooks
X
Page 300 of 344
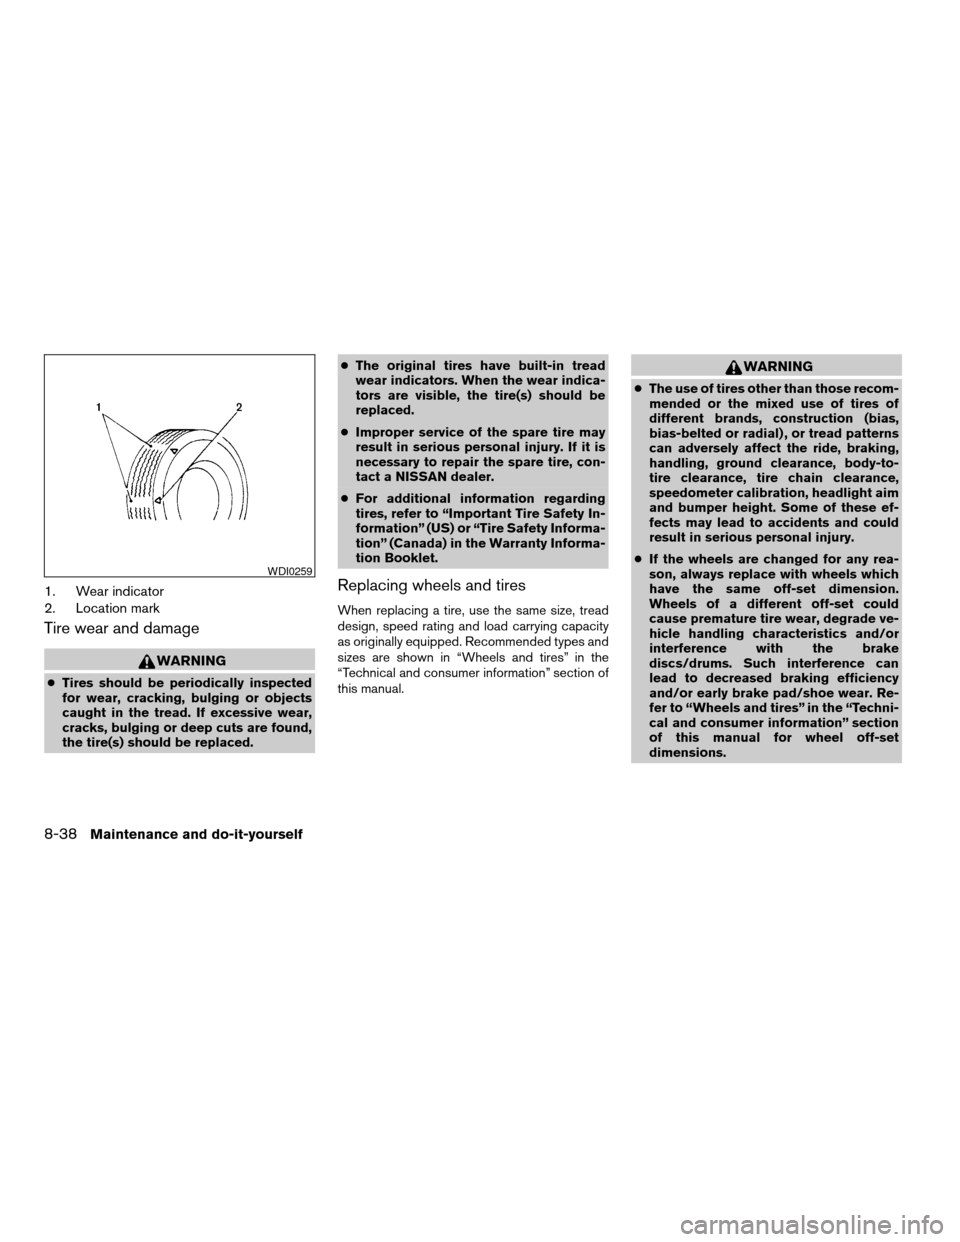
1. Wear indicator
2. Location mark
Tire wear and damage
WARNING
cTires should be periodically inspected
for wear, cracking, bulging or objects
caught in the tread. If excessive wear,
cracks, bulging or deep cuts are found,
the tire(s) should be replaced.cThe original tires have built-in tread
wear indicators. When the wear indica-
tors are visible, the tire(s) should be
replaced.
cImproper service of the spare tire may
result in serious personal injury. If it is
necessary to repair the spare tire, con-
tact a NISSAN dealer.
cFor additional information regarding
tires, refer to “Important Tire Safety In-
formation” (US) or “Tire Safety Informa-
tion” (Canada) in the Warranty Informa-
tion Booklet.
Replacing wheels and tires
When replacing a tire, use the same size, tread
design, speed rating and load carrying capacity
as originally equipped. Recommended types and
sizes are shown in “Wheels and tires” in the
“Technical and consumer information” section of
this manual.
WARNING
cThe use of tires other than those recom-
mended or the mixed use of tires of
different brands, construction (bias,
bias-belted or radial) , or tread patterns
can adversely affect the ride, braking,
handling, ground clearance, body-to-
tire clearance, tire chain clearance,
speedometer calibration, headlight aim
and bumper height. Some of these ef-
fects may lead to accidents and could
result in serious personal injury.
cIf the wheels are changed for any rea-
son, always replace with wheels which
have the same off-set dimension.
Wheels of a different off-set could
cause premature tire wear, degrade ve-
hicle handling characteristics and/or
interference with the brake
discs/drums. Such interference can
lead to decreased braking efficiency
and/or early brake pad/shoe wear. Re-
fer to “Wheels and tires” in the “Techni-
cal and consumer information” section
of this manual for wheel off-set
dimensions.
WDI0259
8-38Maintenance and do-it-yourself
ZREVIEW COPY:Ð2004 Pathfinder Armada
(wzw)
Owners Manual(owners)ÐUSA English(nna)
01/14/04Ðtbrooks
X
Page 304 of 344
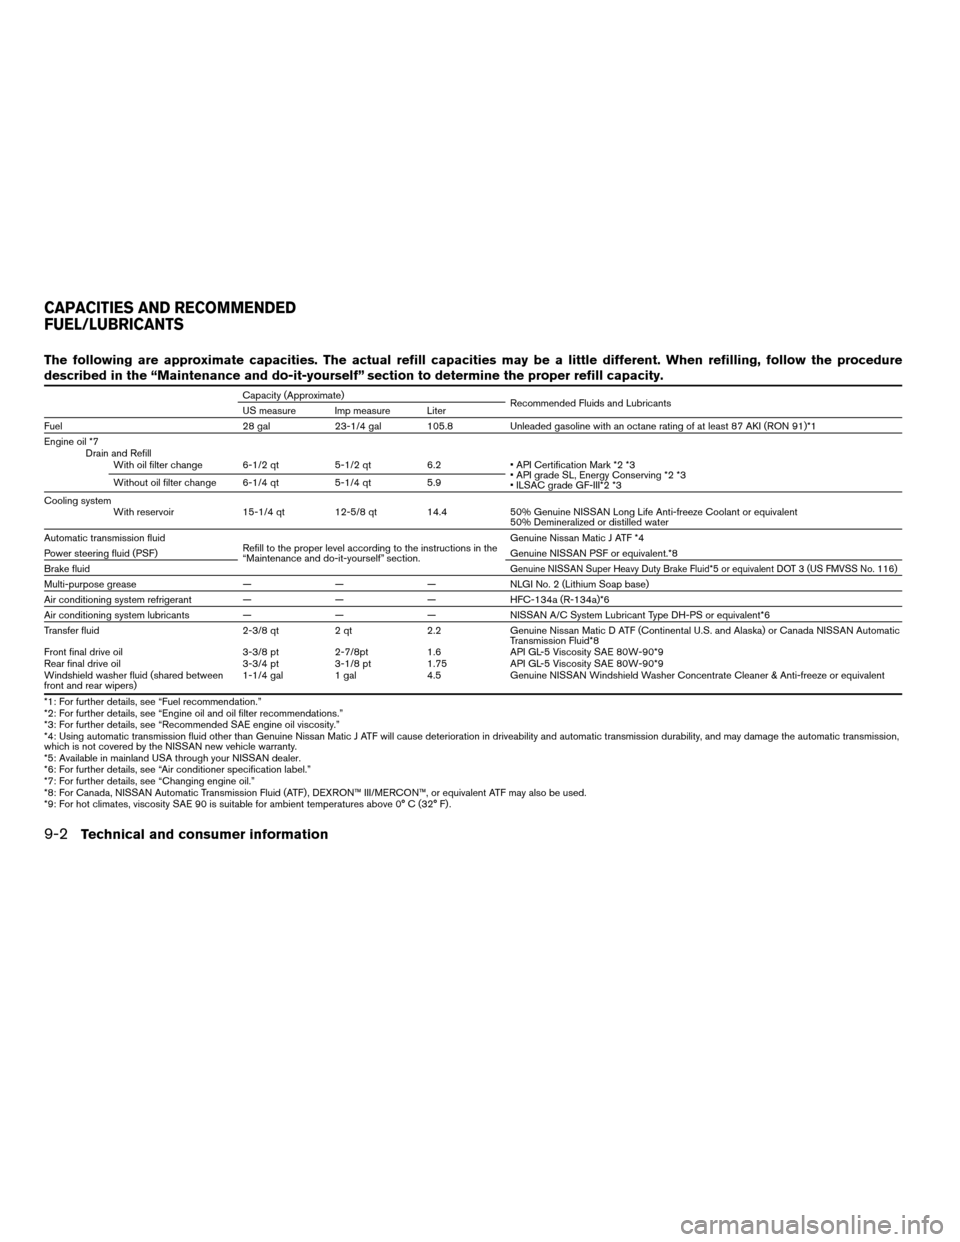
The following are approximate capacities. The actual refill capacities may be a little different. When refilling, follow the procedure
described in the “Maintenance and do-it-yourself” section to determine the proper refill capacity.
Capacity (Approximate)
Recommended Fluids and Lubricants
US measure Imp measure Liter
Fuel 28 gal 23-1/4 gal 105.8 Unleaded gasoline with an octane rating of at least 87 AKI (RON 91)*1
Engine oil *7
Drain and Refill
With oil filter change 6-1/2 qt 5-1/2 qt 6.2 • API Certification Mark *2 *3
• API grade SL, Energy Conserving *2 *3
• ILSAC grade GF-III*2 *3 Without oil filter change 6-1/4 qt 5-1/4 qt 5.9
Cooling system
With reservoir 15-1/4 qt 12-5/8 qt 14.4 50% Genuine NISSAN Long Life Anti-freeze Coolant or equivalent
50% Demineralized or distilled water
Automatic transmission fluid
Refill to the proper level according to the instructions in the
“Maintenance and do-it-yourself” section.Genuine Nissan Matic J ATF *4
Power steering fluid (PSF)Genuine NISSAN PSF or equivalent.*8
Brake fluid
Genuine NISSAN Super Heavy Duty Brake Fluid*5 or equivalent DOT 3 (US FMVSS No. 116)Multi-purpose grease — — — NLGI No. 2 (Lithium Soap base)
Air conditioning system refrigerant — — — HFC-134a (R-134a)*6
Air conditioning system lubricants — — — NISSAN A/C System Lubricant Type DH-PS or equivalent*6
Transfer fluid 2-3/8 qt 2 qt 2.2 Genuine Nissan Matic D ATF (Continental U.S. and Alaska) or Canada NISSAN Automatic
Transmission Fluid*8
Front final drive oil 3-3/8 pt 2-7/8pt 1.6 API GL-5 Viscosity SAE 80W-90*9
Rear final drive oil 3-3/4 pt 3-1/8 pt 1.75 API GL-5 Viscosity SAE 80W-90*9
Windshield washer fluid (shared between
front and rear wipers)1-1/4 gal 1 gal 4.5 Genuine NISSAN Windshield Washer Concentrate Cleaner & Anti-freeze or equivalent
*1: For further details, see “Fuel recommendation.”
*2: For further details, see “Engine oil and oil filter recommendations.”
*3: For further details, see “Recommended SAE engine oil viscosity.”
*4: Using automatic transmission fluid other than Genuine Nissan Matic J ATF will cause deterioration in driveability and automatic transmission durability, and may damage the automatic transmission,
which is not covered by the NISSAN new vehicle warranty.
*5: Available in mainland USA through your NISSAN dealer.
*6: For further details, see “Air conditioner specification label.”
*7: For further details, see “Changing engine oil.”
*8: For Canada, NISSAN Automatic Transmission Fluid (ATF) , DEXRON™ III/MERCON™, or equivalent ATF may also be used.
*9: For hot climates, viscosity SAE 90 is suitable for ambient temperatures above 0° C (32° F) .
CAPACITIES AND RECOMMENDED
FUEL/LUBRICANTS
9-2Technical and consumer information
ZREVIEW COPY:Ð2004 Pathfinder Armada
(wzw)
Owners Manual(owners)ÐUSA English(nna)
01/14/04Ðtbrooks
X
Page 317 of 344
cDo not load your vehicle any heavier than
the GVWR or the maximum front and rear
GAWRs. If you do, parts of your vehicle
can break, tire damage could occur, or it
can change the way your vehicle handles.
This could result in loss of control and
cause personal injury.
cOverloading not only can shorten the
life of your vehicle and the tire, but can
also cause unsafe vehicle handling and
longer braking distances. This may
cause a premature tire failure which
could result in a serious accident and
personal injury. Failures caused by
overloading are not covered by the ve-
hicle’s warranty.
MEASUREMENT OF WEIGHTS
Secure loose items to prevent weight shifts that
could affect the balance of your vehicle. When
the vehicle is loaded, drive to a scale and weigh
the front and the rear wheels separately to deter-
mine axle loads. Individual axle loads should not
exceed either of the gross axle weight ratings
(GAWR) . The total of the axle loads should not
exceed the gross vehicle weight rating (GVWR) .
These ratings are given on the vehicle certifica-
tion label. If weight ratings are exceeded, move or
remove items to bring all weights below the rat-
ings.
WARNING
Overloading or improper loading of a
trailer and its cargo can adversely affect
vehicle handling, braking and perfor-
mance and may lead to accidents.
CAUTION
cDo not tow a trailer or haul a heavy load
for the first 500 miles (800 km) . Your
engine, axle or other parts could be
damaged.
cFor the first 500 miles (800 km) that you
tow a trailer, do not drive over 50 mph
(80 km/h) and do not make starts at full
throttle. This helps the engine and other
parts of your vehicle wear in at the
heavier loads.
Your new vehicle was designed to be used pri-
marily to carry passengers and cargo. Remember
that towing a trailer places additional loads on
your vehicle’s engine, drive train, steering, brak-
ing and other systems.
ANissan Trailer Towing Guide (U.S. only)is
available from a NISSAN dealer. This guide in-
cludes information on trailer towing ability and the
special equipment required for proper towing.
MAXIMUM LOAD LIMITS
Maximum trailer loads
Never allow the total trailer load to exceed the
value specified in the following Towing
Load/Specification Chart found later in this sec-
tion. The total trailer load equals trailer weight
plus its cargo weight.
cWhen towing a trailer load of 1,000 lbs.
(454 kg) or more, trailers with a brake sys-
tem MUST be used.
The maximum GCWR (Gross Combined Weight
Rating) should not exceed the value specified in
the following Towing Load/ Specification Chart.
The GCWR equals the combined weight of the
towing vehicle (including passengers and cargo)
plus the total trailer load. Towing loads greater
than these or using improper towing equipment
could adversely affect vehicle handling, braking
and performance.
The ability of your vehicle to tow a trailer is not
only related to the maximum trailer loads, but also
the places you plan to tow. Tow weights appro-
priate for level highway driving may have to be
reduced on very steep grades or in low traction
situations (for example, on slippery boat ramps) .
Temperature conditions can also affect towing.
For example, towing a heavy trailer in high outside
TOWING A TRAILER
Technical and consumer information9-15
ZREVIEW COPY:Ð2004 Pathfinder Armada
(wzw)
Owners Manual(owners)ÐUSA English(nna)
01/14/04Ðtbrooks
X
Page 320 of 344
Ball mount
The hitch ball is attached to the ball mount and
the ball mount is inserted into the hitch receiver.
Choose a proper class ball mount based on the
trailer weight. Additionally, the ball mount should
be chosen to keep the trailer tongue level with the
ground.
Weight carrying hitches
A weight carrying or9dead weight9ball mount is
one that is designed to carry the whole amount of
tongue weight and gross weight directly on the
ball mount and on the receiver.
Weight distribution hitch
This type of hitch is also called a “load-leveling” or
“equalizing” hitch. A set of bars attach to the ball
mount and to the trailer to distribute the tongue
weight (hitch weight) of your trailer. Many ve-
hicles can’t carry the full tongue weight of a given
trailer, and need some of the tongue weight
transferred through the frame and pushing down
on the front wheels. This gives stability to the tow
vehicle.
Another reason to have a weight distributing ball
mount is to comply with the rating on your re-
ceiver. Most receivers have a weight carrying
rating of 5000 lbs. gross weight, 500 lbs. tongue
weight and a weight distribution rating of 10,000lbs. gross weight, 1000 lbs. tongue weight. This
means that without using a weight distributing
ballmount, the receiver is only designed to carry
5000 lbs.
When hooking up a trailer using a weight distrib-
uting hitch, always refer to the hitch manufactur-
er’s instructions.
1. Park unloaded vehicle on a level surface.
With the ignition on and the doors closed,
allow the vehicle to stand for several minutes
so that it can level.
2. Measure the height of a reference point on
the front and rear bumpers at the center of
the vehicle.
3. Attach the trailer to the vehicle and adjust
the hitch equalizers so that the front bumper
height is within0-.5inches (0 – 13 mm) of
the reference height measured in step 2. The
rear bumper should be no higher than the
reference height measured in step 2.
WARNING
Properly adjust the weight distributing
hitch so the rear of the bumper is no
higher than the measured reference
height when the trailer is attached. If the
rear bumper is higher than the measured
reference height when loaded, the vehicle
may handle unpredictably which could
cause a loss of vehicle control and cause
serious personal injury or property
damage.
Sway control device
Sway control devices are used to help control the
effects of sudden maneuvers, wind gusts, and
buffeting caused by other vehicles. Make sure the
sway control device is compatible with the trail-
er’s brake system.
Class I hitch
Class I trailer hitch equipment (receiver, ball
mount and hitch ball) can be used to tow trailers
of a maximum weight of 2,000 lb (909 kg) .
Class II hitch
A Class II trailer hitch equipment (receiver, ball
mount and hitch ball) can be used to tow trailers
of a maximum weight of 3,500 lb (1,510 kg) .
9-18Technical and consumer information
ZREVIEW COPY:Ð2004 Pathfinder Armada
(wzw)
Owners Manual(owners)ÐUSA English(nna)
01/14/04Ðtbrooks
X
Page 321 of 344
Class III hitch
A Class III trailer hitch equipment (receiver, ball
mount and hitch ball) can be used to tow trailers
of a maximum weight of 5,000 lb (2,272 kg) .
Class IV hitch
A Class IV trailer hitch equipment (receiver, ball
mount and hitch ball) can be used to tow trailers
of a maximum weight of 10,000 lb (4,545 kg) . A
weight distributing hitch should be used to tow
trailers that weigh over 5,000 lb (2,272 kg) .
Your vehicle may be equipped with Class IV
trailer hitch equipment that has a 10,000 lb
(4,545 kg) maximum weight rating, but your ve-
hicle is only capable of towing the maximum
trailer weights shown in the Towing
Load/Specification Chart earlier in this section.
CAUTION
cSpecial hitches which include frame re-
inforcements are required for towing
above 2,000 lb (907 kg) . Suitable genu-
ine NISSAN hitches, ball mounts and
hitch balls for pickup trucks and sport
utility vehicles are available at a
NISSAN dealer.cThe hitch should not be attached to or
affect the operation of the impact-
absorbing bumper.
cDo not use axle-mounted hitches.
cDo not modify the vehicle exhaust sys-
tem, brake system, etc. to install a
trailer hitch.
cTo reduce the possibility of additional
damage if your vehicle is struck from
the rear, where practical, remove the
hitch and/or receiver when not in use.
cAfter the hitch is removed, seal the bolt
holes to prevent exhaust fumes, water
or dust from entering the passenger
compartment.
cRegularly check that all trailer hitch
mounting bolts are securely mounted.
cWhen towing with the hitch ball
mounted to the rear bumper, do not
make sharp turns. The trailer may con-
tact the bumper and cause damage to
the bumper or trailer.
Tire pressures
cWhen towing a trailer, inflate the vehicle tires
to the recommended cold tire pressure indi-
cated on the tire placard.cTrailer tire condition, size, load rating and
proper inflation pressure should be in accor-
dance with the trailer and tire manufacturer’s
specifications.
Safety chains
Always use suitable safety chains between your
vehicle and the trailer. The safety chains should
be crossed and should be attached to the hitch,
not to the vehicle bumper or axle. The safety
chains can be attached to the bumper if the hitch
ball is mounted to the bumper. Be sure to leave
enough slack in the chains to permit turning
corners.
Trailer lights
Trailer lights should comply with federal and/or
local regulations. For assistance in hooking up
trailer lights, contact a NISSAN dealer. Vehicles
equipped with the optional trailer tow package
are equipped with a 7-pin trailer harness connec-
tor. If your trailer is equipped with a flat 4-pin
connector, an adapter will be needed to connect
the trailer lights to the vehicle. Adapters are avail-
able at auto parts stores and hitch retailers.
Trailer brakes
If your trailer is equipped with a braking system,
make sure it conforms to federal and/or local
regulations and that it is properly installed.
Technical and consumer information9-19
ZREVIEW COPY:Ð2004 Pathfinder Armada
(wzw)
Owners Manual(owners)ÐUSA English(nna)
01/14/04Ðtbrooks
X
Page 322 of 344
WARNING
Never connect a trailer brake system di-
rectly to the vehicle brake system.
Electric trailer brake controller
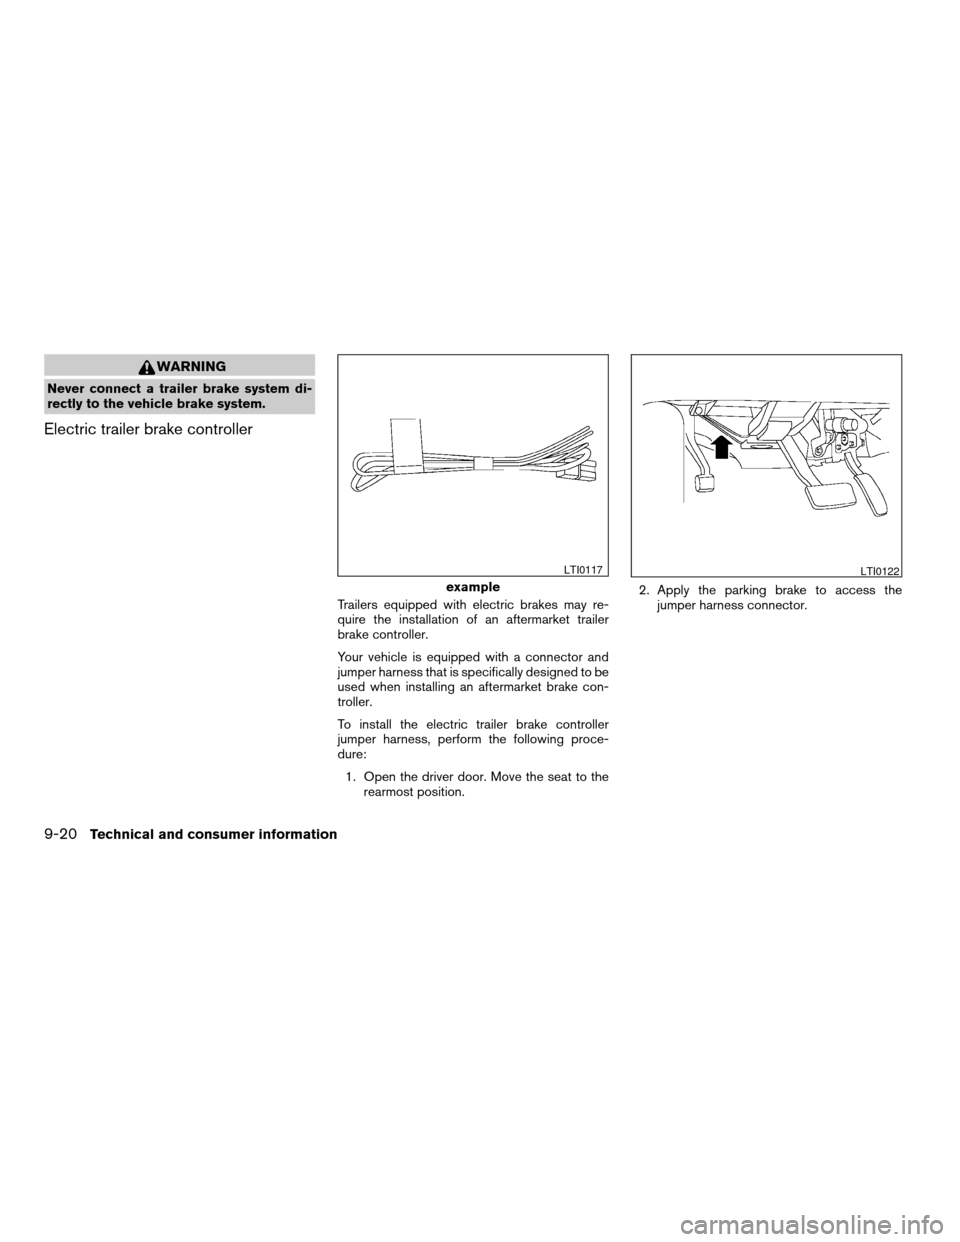
Trailers equipped with electric brakes may re-
quire the installation of an aftermarket trailer
brake controller.
Your vehicle is equipped with a connector and
jumper harness that is specifically designed to be
used when installing an aftermarket brake con-
troller.
To install the electric trailer brake controller
jumper harness, perform the following proce-
dure:
1. Open the driver door. Move the seat to the
rearmost position.2. Apply the parking brake to access the
jumper harness connector.
example
LTI0117LTI0122
9-20Technical and consumer information
ZREVIEW COPY:Ð2004 Pathfinder Armada
(wzw)
Owners Manual(owners)ÐUSA English(nna)
01/14/04Ðtbrooks
X
Page 323 of 344
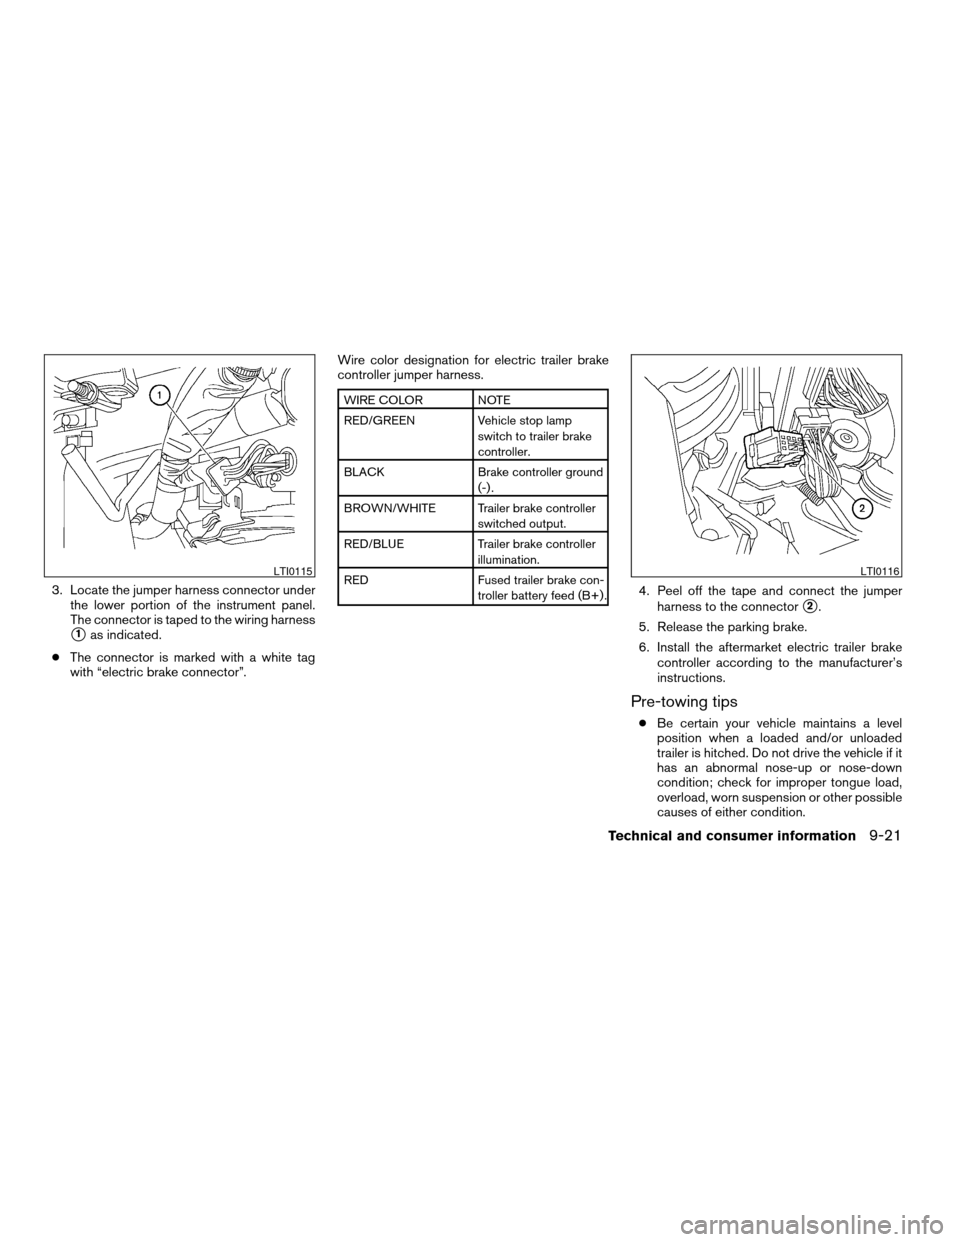
3. Locate the jumper harness connector under
the lower portion of the instrument panel.
The connector is taped to the wiring harness
s1as indicated.
cThe connector is marked with a white tag
with “electric brake connector”.Wire color designation for electric trailer brake
controller jumper harness.
WIRE COLOR NOTE
RED/GREEN Vehicle stop lamp
switch to trailer brake
controller.
BLACK Brake controller ground
(-) .
BROWN/WHITE Trailer brake controller
switched output.
RED/BLUE Trailer brake controller
illumination.
RED Fused trailer brake con-
troller battery feed (B+) .
4. Peel off the tape and connect the jumper
harness to the connector
s2.
5. Release the parking brake.
6. Install the aftermarket electric trailer brake
controller according to the manufacturer’s
instructions.
Pre-towing tips
cBe certain your vehicle maintains a level
position when a loaded and/or unloaded
trailer is hitched. Do not drive the vehicle if it
has an abnormal nose-up or nose-down
condition; check for improper tongue load,
overload, worn suspension or other possible
causes of either condition.
LTI0115LTI0116
Technical and consumer information9-21
ZREVIEW COPY:Ð2004 Pathfinder Armada
(wzw)
Owners Manual(owners)ÐUSA English(nna)
01/14/04Ðtbrooks
X