2004 NISSAN ARMADA Ignition
[x] Cancel search: IgnitionPage 184 of 344

CONTROLS
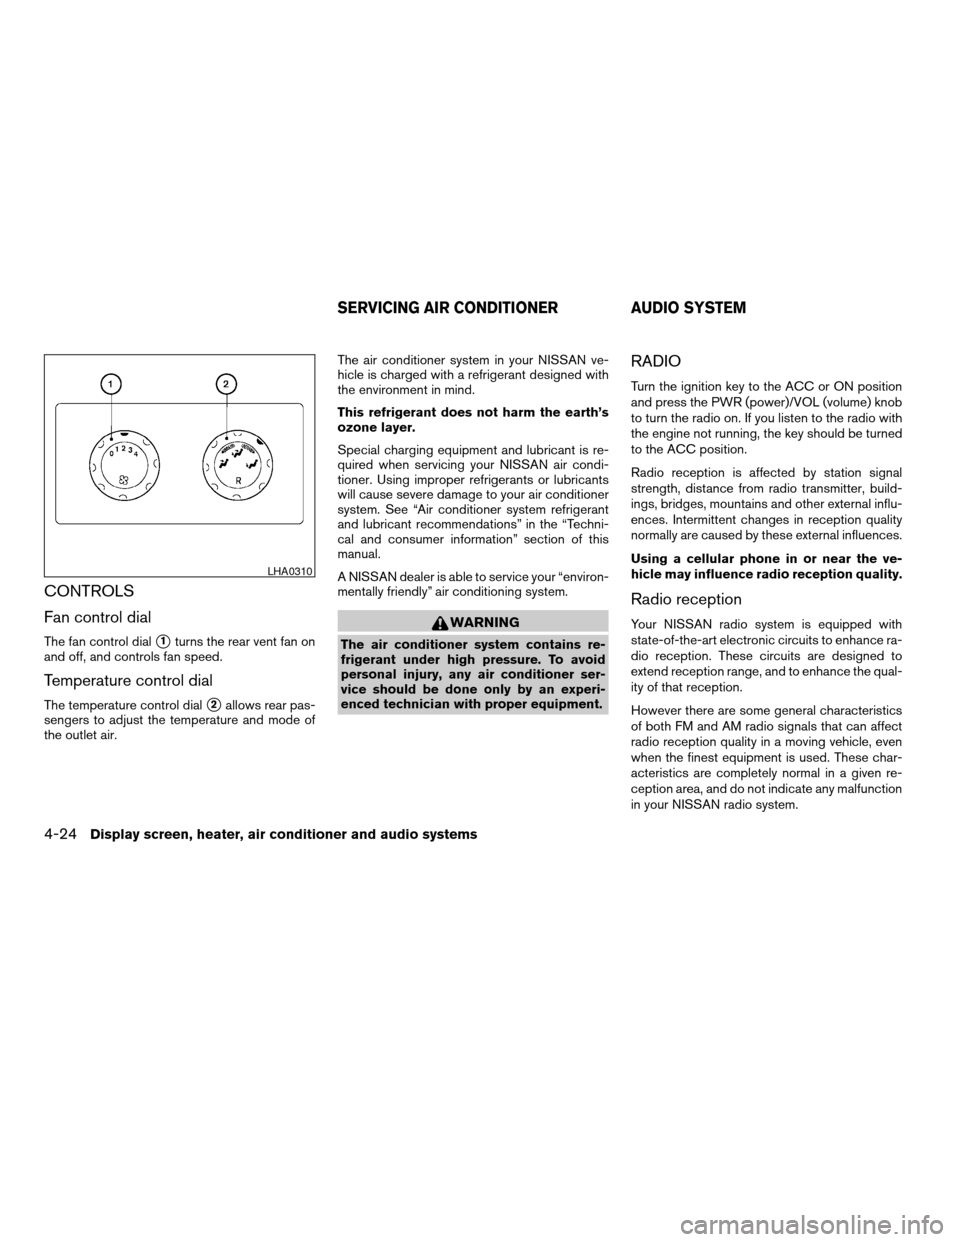
Fan control dial
The fan control dials1turns the rear vent fan on
and off, and controls fan speed.
Temperature control dial
The temperature control dials2allows rear pas-
sengers to adjust the temperature and mode of
the outlet air.The air conditioner system in your NISSAN ve-
hicle is charged with a refrigerant designed with
the environment in mind.
This refrigerant does not harm the earth’s
ozone layer.
Special charging equipment and lubricant is re-
quired when servicing your NISSAN air condi-
tioner. Using improper refrigerants or lubricants
will cause severe damage to your air conditioner
system. See “Air conditioner system refrigerant
and lubricant recommendations” in the “Techni-
cal and consumer information” section of this
manual.
A NISSAN dealer is able to service your “environ-
mentally friendly” air conditioning system.
WARNING
The air conditioner system contains re-
frigerant under high pressure. To avoid
personal injury, any air conditioner ser-
vice should be done only by an experi-
enced technician with proper equipment.
RADIO
Turn the ignition key to the ACC or ON position
and press the PWR (power)/VOL (volume) knob
to turn the radio on. If you listen to the radio with
the engine not running, the key should be turned
to the ACC position.
Radio reception is affected by station signal
strength, distance from radio transmitter, build-
ings, bridges, mountains and other external influ-
ences. Intermittent changes in reception quality
normally are caused by these external influences.
Using a cellular phone in or near the ve-
hicle may influence radio reception quality.
Radio reception
Your NISSAN radio system is equipped with
state-of-the-art electronic circuits to enhance ra-
dio reception. These circuits are designed to
extend reception range, and to enhance the qual-
ity of that reception.
However there are some general characteristics
of both FM and AM radio signals that can affect
radio reception quality in a moving vehicle, even
when the finest equipment is used. These char-
acteristics are completely normal in a given re-
ception area, and do not indicate any malfunction
in your NISSAN radio system.
LHA0310
SERVICING AIR CONDITIONER AUDIO SYSTEM
4-24Display screen, heater, air conditioner and audio systems
ZREVIEW COPY:Ð2004 Pathfinder Armada
(wzw)
Owners Manual(owners)ÐUSA English(nna)
01/14/04Ðtbrooks
X
Page 187 of 344

1. PRESET ABC button
2. Display
3. CD button
4. CD eject button
5. CD insert slot
6. MENU button
7. AUDIO button
8. Station select buttons
9. SEEK/TRACK button
10. PWR/VOL control knob
11. BAND select button
FM-AM RADIO WITH COMPACT
DISC (CD) PLAYER (if so equipped)
PWR/VOL control knob
Turn the ignition key to the ACC or ON position,
then push the PWR/VOL control knob. If you
listen to the radio with the engine not running,
turn the key to the ACC position. The mode (radio
or CD) that was playing immediately before the
system was turned off resumes playing.
When no CD is loaded, the radio comes on.
Pushing the PWR/VOL control knob again turns
the system off.
Turn the PWR/VOL control knob to the right to
increase volume or to the left to decrease volume.
LHA0117
Display screen, heater, air conditioner and audio systems4-27
ZREVIEW COPY:Ð2004 Pathfinder Armada
(wzw)
Owners Manual(owners)ÐUSA English(nna)
01/14/04Ðtbrooks
X
Page 190 of 344

Compact disc (CD) player operation
Turn the ignition key to the ACC or ON position,
and carefully insert the compact disc into the slot
with the label side up. The compact disc is auto-
matically pulled into the slot and starts to play.
If the radio is already operating, it automatically
turns off and the compact disc begins to play.
CAUTION
Do not force a compact disc into the CD
insert slot. This could damage the CD
and/or CD changer/player.
CD button
When the CD button is pushed with a compact
disc loaded and the radio playing, the radio turns
off and the compact disc starts to play.
Track up/down, FF/REV
(rewind) buttons
Track up/down
When the
button is pushed and released
while the compact disc is playing, the selection
following the present one starts to play from the
beginning. Push the
button several times to
skip several selections. Each time the button is
pushed, the CD advances 1 additional selection.
The number appears in the display window.(When the last selection on the compact disc is
skipped, the first selection is played.)
When the
button is pushed and released, the
selection being played returns to the beginning.
Push the
button several times to skip back
several selections. Each time the button is
pushed, the CD moves back 1 selection.
If the play pattern is in MIX mode when the
orbutton is pushed the next selection will be
chosen at random.
FF (Fast Forward)/REV (Reverse)
When the
orbutton is pushed and held
while the compact disc is playing, the compact
disc plays at an increased speed while fast for-
warding or rewinding. When the button is re-
leased, the compact disc returns to normal play
speed.
MENU
When the
button is pushed while the com-
pact disc is playing, the play pattern changes as
follows:
RPT:The current selection is repeated.
MIX:Selections are played at random, not fol-
lowing the sequence on the compact disc. Thesame program may be repeated twice. If the
button is pushed in the MIX mode, selections will
be chosen at random.
Blank(no symbol): All selections are played
repeatedly in sequence.
When a new compact disc is inserted, the
play pattern automatically changes to ALL.
CD EJECT button
When the
button is pushed with a com-
pact disc loaded, the compact disc ejects.
When the
button is pushed while the com-
pact disc is playing, the compact disc ejects and
the system turns off.
DISC indicator light
This light
comes on when a compact disc
is loaded into the player.
4-30Display screen, heater, air conditioner and audio systems
ZREVIEW COPY:Ð2004 Pathfinder Armada
(wzw)
Owners Manual(owners)ÐUSA English(nna)
01/14/04Ðtbrooks
X
Page 192 of 344

1. SEEK/TRACK change button
2. TUNE/REW/FF button
3. Display
4. PAUSE/MUTE button
5. PROG/RPT button6. H/M button (clock set buttons)
7. PRESET A-B-C select button
8. CD play button
9. RADIO button
10. AUX button11.
speaker control button
12. REAR AV button
13. LOAD button
14. CD insert slot
15. CD eject button
16. POWER/VOLUME control knob
17. Station and CD select buttons (1 - 6)
18. Tuning and AUDIO control knob
(BASS, MID, TREBLE, FADE and BAL-
ANCE)
FM-AM-SAT RADIO WITH
COMPACT DISC CHANGER (Type A
and B) (if so equipped)
No satellite radio reception is available and “NO
SAT” is displayed when the RADIO button is
pressed to access satellite radio stations unless
optional satellite receiver and antenna are in-
stalled (retrofit unavailable without factory satel-
lite radio pre-wiring) , and an XMTor SIRIUS™
satellite radio service subscription is active.
Audio main operation
POWER/VOLUME control:
Turn the ignition key to ACC or ON, and then
push the POWER/VOLUME control knob while
Type B
LHA0385
4-32Display screen, heater, air conditioner and audio systems
ZREVIEW COPY:Ð2004 Pathfinder Armada
(wzw)
Owners Manual(owners)ÐUSA English(nna)
01/14/04Ðtbrooks
X
Page 193 of 344

the system is off to call up the mode (radio or CD)
which was playing immediately before the system
was turned off.
To turn the system off, press the
POWER/VOLUME control knob.
Turn the POWER/VOLUME control knob to ad-
just the volume.
This vehicle has speed sensitive control volume
(SSV) for audio. The audio volume changes as
the driving speed changes.
AUDIO knob (BASS, MIDRANGE, TREBLE,
FADE, BALANCE and SSV):
Press the AUDIO knob to change the mode as
follows:
BASS!MID!TREBLE!FADE!BALANCE
!SSV
To adjust Bass, Mid (Midrange) , Treble, Fade and
Balance, press the AUDIO knob until the desired
mode appears in the display. Turn the Tuning
knob to adjust Bass and Treble to the desired
level. You can also use the Tuning knob to adjust
Fader and Balance modes. Fader adjusts the
sound level between the front and rear speakers
and Balance adjusts the sound between the right
and left speakers.
To change the SSV mode to OFF, LOW, MID or
HIGH, turn the Tuning knob to the right or left.Once you have adjusted the sound quality to the
desired level, press the AUDIO knob repeatedly
until the radio or CD display reappears. Other-
wise, the radio or CD display will automatically
reappear after about 10 seconds.
Clock set (type B only)
1. Press and hold the H button to advance
hours.
2. Press and hold the M button to advance
minutes.
For setting the clock on type A audio systems see
“Adjusting the time” on page 4-9.
Display CD text:
To change the text displayed while playing a CD,
press the AUDIO knob until “Display Mode” ap-
pears.
Turn the Tuning knob within 2 seconds. The text
will change as follows:
Track numberÃ!Track titleÃ!Disc titleÃ!
Track number
Display satellite radio text (if so equipped):
To change the text displayed while listening to
satellite radio, press the AUDIO knob until “Dis-
play Mode” appears.Turn the Tuning knob within 2 seconds. The text
will change as follows:
Channel numberÃ!Channel nameÃ!Artist
Ã!TitleÃ!Channel number
Pause/mute button:
To mute or pause the audio sound, push the
PAUSE/MUTE button.
To release the mute or pause, push the button
again.
FM/AM/SAT radio operation
FM/AM/SAT band select:
Pushing the RADIO button will change the band
as follows:
AMÃ!FM or SAT (Satellite)
When the RADIO button is pushed while the
ignition switch is in the ACC or ON position, the
radio will come on at the station last played.
The last station played will also come on when
the POWER/VOLUME control knob is de-
pressed to ON.
No satellite radio reception is available and “NO
SAT” is displayed when the RADIO button is
pressed to access satellite radio stations unless
optional satellite receiver and antenna are in-
stalled (retrofit unavailable without factory satel-
Display screen, heater, air conditioner and audio systems4-33
ZREVIEW COPY:Ð2004 Pathfinder Armada
(wzw)
Owners Manual(owners)ÐUSA English(nna)
01/14/04Ðtbrooks
X
Page 196 of 344

Turn the ignition key to the ACC or ON position
and insert the compact disc into the slot with the
label side facing up. The compact disc will be
guided automatically into the slot and start play-
ing. To insert the disc, first push the LOAD button.
If the radio is already operating, it will automati-
cally turn off and the compact disc will play.
If the system has been turned off while the com-
pact disc was playing, pushing the
POWER/VOLUME control knob will start the
compact disc.
LOAD button:
To insert a CD in the CD changer, push the LOAD
button for less than 1.5 seconds. Select the
loading slot by pushing the CD insert select
button (1 - 6) , then insert the CD.
To insert 6 CDs to the CD changer, push the
LOAD button for more than 1.5 seconds.
The slot numbers (1 - 6) will illuminate on the
display when CDs are loaded into the changer.
CD button:
When the CD button is pushed with the system
off and the compact disc loaded, the system will
turn on and the compact disc will start to play.When the CD button is pushed with the compact
disc loaded with the radio playing, the radio will
automatically be turned off and the compact disc
will start to play.
REW (Rewind) , FF (Fast
Forward):
When the
(rewind) or(fast forward)
button is pushed while a compact disc is playing,
the compact disc will play while rewinding or fast
forwarding . When the button is released, the
compact disc will return to normal play speed.
When the CD button is pushed with the system
off and the compact disc loaded, the system will
turn on and the compact disc will start to play.
When the CD button is pushed with the compact
disc loaded with the tape or the radio playing, the
tape or radio will automatically be turned off and
the compact disc will start to play.
SEEK/TRACK:
When the
button is pushed for less than 1.5
seconds while a compact disc is playing, the
track being played returns to its beginning. Push
several times to skip back through tracks. The
compact disc will go back the number of times
the button is pushed.
When the
button is pushed for less than 1.5
seconds while the compact disc is playing, thenext track will start to play from its beginning.
Push several times to skip through tracks. The
compact disc will advance the number of times
the button is pushed. (When the last track on the
compact disc is skipped through, the first track
will be played.)
When pushing the
orbutton for more
than 1.5 seconds, each track will play for about
10 seconds. To stop playing, push
the
button again.
CD select buttons:
To play another CD that has been loaded, push a
CD select button (1 - 6) .
REPEAT (RPT):
When the PROG/RPT play button is pushed
while the compact disc is played, the play pattern
can be changed as follows:
ALL DISC RPT!1 DISC RPT!1 TRACK RPT
!ALL DISC RDM!1 DISC RDM!ALL DISC
RPT
ALL DISC RPT: All discs loaded will be repeated.
1 DISC RPT: The disc that is currently playing will
be repeated.
1 TRACK RPT: The track that is currently playing
will be repeated
ALL DISC RDM: Tracks from all discs will be
played randomly
4-36Display screen, heater, air conditioner and audio systems
ZREVIEW COPY:Ð2004 Pathfinder Armada
(wzw)
Owners Manual(owners)ÐUSA English(nna)
01/14/04Ðtbrooks
X
Page 199 of 344

POWER on/off switch
With the ignition key turned to the ACC or ON
position, push the POWER switch to turn the
audio system on or off.
MODE select switch
Push the mode select switch to change the mode
in the following sequence: AM, FM, CD, DVD and
SAT.
Volume control switch
Push the volume control switch up or down to
increase or decrease the volume.
Tuning
Memory change (radio):
Push the tuning switch (
or) for less
than 1.5 seconds to change the radio frequency.
Seek tuning (radio):
Push the tuning switch (
or) for
more than 1.5 seconds to seek the next or previ-
ous radio station.FF, REW:
Push the tuning switch (
or) for less
1.5 seconds to return to the beginning of the
present program or skip to the next program.
Push several times to skip back or skip through
programs.
To stop the FF or REW function, press the
orbutton for less than 1.5 seconds again.
When playing a CD in the CD changer (if so
equipped) , push the tuning switch (
or) for more than 1.5 seconds to change
between discs when multiple CDs are loaded.
Display screen, heater, air conditioner and audio systems4-39
ZREVIEW COPY:Ð2004 Pathfinder Armada
(wzw)
Owners Manual(owners)ÐUSA English(nna)
01/14/04Ðtbrooks
X
Page 205 of 344

Power ON/OFF:
Push the power button to turn the headphones
on or off.
Volume control:
Turn the volume control knob to adjust the vol-
ume.
The headphones will automatically be turned off
in 30 seconds if there is no sound during that
period. To prevent the battery from being dis-
charged, keep the power suppy turned off when
not in use.
NOTE:
For optimum infrared headphone perfor-
mance, increase the volume on the rear
seat controller to the maximum level and
adjust the infrared headphone volume us-
ing the volume control on the headphones.
Using a lower volume setting on the rear
seat controller can cause static noise in the
infrared headphones.PLAYING A DIGITAL VIDEO DISC
(DVD)
CAUTION
cOnly operate the DVD while the vehicle
engine is running. Operating the DVD
for extended periods of time with the
engine OFF can discharge the vehicle
battery.
cDo not allow the system to get wet.
Excessive moisture such as spilled liq-
uids may cause the system to
malfunction.
cThe driver must not attempt to wear the
headphones while the vehicle is in mo-
tion so that full attention may be given
to vehicle operation.
cWhile playing video CD media, this DVD
player does not guarantee complete
functionality of all video CD formats.
With the DVD player, you can hear DVD videos,
video CDs and CDs using headphones. Passen-
gers in the rear seat can enjoy the sound inde-
pendently of the front seat.
Press the REAR AV button located on the front
controls for more than 1.5 seconds to hear the
sound of the DVD player through the speakers.Pushing the
button on the front controls
turns the rear speakers on and off.
It is possible to operate the DVD player by remote
control.
Headphones are a wireless type and no cables
are necessary. You can use them in almost all the
ranges in the rear seat. (It is not possible to use
the headphones in the front seat.)
POWER on/off button:
With the ignition switch turned to the ACC or ON
position, push the POWER button to turn the
DVD player on or off.
Insert the DVD into the slot with the label side
facing up. The DVD will be guided automatically
into the slot.
If the DVD player is off and a DVD is inserted, the
DVD player will automatically turn on.
CAUTION
Do not force the compact disc into the
slot. This could damage the player.
MODE select button:
Push the Mode button to select Audio/Video
source between DVD and AUX input (input jacks
Display screen, heater, air conditioner and audio systems4-45
ZREVIEW COPY:Ð2004 Pathfinder Armada
(wzw)
Owners Manual(owners)ÐUSA English(nna)
01/14/04Ðtbrooks
X