Page 62 of 264
1. Headlight and turn signal switch
(P. 2-18)
2. Meters and gauges (P. 2-3)
3. Windshield wiper/washer switch
(P. 2-16)
4. Center ventilator (P. 4-2)
5. Audio system controls (if so equipped)
(P. 4-14)
6. Front passenger supplemental air bag
(P. 1-8)
7. Glove box (P. 2-29)
8. Heater and air conditioner (manual)
(P. 4-3)
9. Hazard warning flasher switch
(P. 2-23)
10. Power outlet (P. 2-26)
11. Rear window defroster switch (manual)
(P. 2-17)
12. Cruise control main/set switch (if so
equipped) (P. 5-12)
13. Driver supplemental air bag (P. 1-8)
14. Steering wheel switch for audio control
(if so equipped) (P. 4-29)
15. Tilt/telescopic steering wheel controls
(P. 3-14)
16. Traction control system (TCS) off
switch (if so equipped) (P. 2-25)
WIC0605
INSTRUMENT PANEL
2-2Instruments and controls
ZREVIEW COPY:Ð2004 Altima(l30)
Owners Manual(owners)ÐUSA English(nna)
10/13/03Ðtbrooks
X
Page 76 of 264

Security indicator light (NISSAN Ve-
hicle Immobilizer System)
The security indicator lights1is located on the
instrument panel near the windshield.
The security indicator light blinks every 3 sec-
onds whenever the ignition switch is in the
LOCK, OFF or ACC position. This function indi-
cates the NISSAN Vehicle Immobilizer System
(NVIS) is operational.
If the NVIS is malfunctioning, the light will remain
on while the ignition key is in the ON position.If the light still remains on and/or the en-
gine will not start, see a NISSAN dealer for
NVIS service as soon as possible. Please
bring all NVIS keys that you have when
visiting your NISSAN dealer for service.
SWITCH OPERATION
The windshield wiper and washer switch oper-
ates when the ignition key is in the ON position.
Push the lever down to operate the wiper at the
following speed:
s1Intermittent — intermittent operation can be
adjusted by turning the knob toward
sA
(Slower) orsB(Faster) .
s2Low — continuous low speed operation
s3High — continuous high speed operation
Push the lever up
s4to have one sweep opera-
tion of the wiper.
WIC0270WIC0613
WINDSHIELD WIPER AND WASHER
SWITCH
2-16Instruments and controls
ZREVIEW COPY:Ð2004 Altima(l30)
Owners Manual(owners)ÐUSA English(nna)
10/10/03Ðtbrooks
X
Page 79 of 264
HEADLIGHT CONTROL SWITCH
Lighting
s1When turning the switch to theposi-
tion, the front parking, tail, license plate and
instrument panel lights come on.
s2When turning the switch to theposi-
tion, the headlights come on and all the other
lights remain on.
Type A
WIC0312
Type B
WIC0313
Type C
WIC0314
Instruments and controls2-19
ZREVIEW COPY:Ð2004 Altima(l30)
Owners Manual(owners)ÐUSA English(nna)
10/10/03Ðtbrooks
X
Page 80 of 264

Autolight system (if so equipped)
The autolight system allows the headlights to be
set so they turn on and off automatically. The
autolight system can:
cTurn on the headlights automatically when it
is dark.
See your NISSAN dealer to have the
autolight activation sensitivity setting
adjusted.
cTurn off the headlights when it is light.
cKeep the headlights on for up to 180 sec-
onds after you turn the key to OFF, open andclose the driver’s or passenger’s door, and
then close all doors.
The default time delay for autolight
shutoff is 45 seconds. See your
NISSAN dealer to have the time delay
setting adjusted.
If the ignition switch is turned OFF and one of the
doors is opened, the headlights remain ON for 5
minutes.
To set the autolight system:
1. Make sure the headlight switch is in the
AUTO position
s1.
2. Turn the ignition key to ON.
3. The autolight system automatically turns the
headlights on and off.
To turn the autolight system off, turn the switch to
the OFF,
,orposition.
Be sure you do not put anything on top of
the autolight sensor located in the top
driver side of the instrument panel. The
autolight sensor controls the autolight; if it
is covered, the autolight sensor reacts as if
it is dark out and the headlights will illumi-
nate. If this occurs while parked with the
engine off and the key in the ON position,
your vehicle’s battery could become dis-
charged.
Headlight beam select
s1To select the high beam function, push the
lever forward. The high beam lights come on
and the
light illuminates.
s2Pull the lever back to select the low beam.
s3Pulling and releasing the lever flashes the
headlight high beams on and off.
Battery saver system
If the ignition switch is turned OFF while the
headlight switch is in theorposi-
tion, the headlights will turn off after 5 minutes.
WIC0597LIC0318
2-20Instruments and controls
ZREVIEW COPY:Ð2004 Altima(l30)
Owners Manual(owners)ÐUSA English(nna)
10/10/03Ðtbrooks
X
Page 81 of 264

CAUTION
cBe sure to turn the light switch to the
OFF position when you leave the ve-
hicle for extended periods of time, oth-
erwise the battery will go dead.
cNever leave the light switch on when
the engine is not running for extended
periods of time even if the headlights
turn off automatically.
DAYTIME RUNNING LIGHT SYSTEM
(Canada only)
The headlights automatically illuminate at a re-
duced intensity when the engine is started with
the parking brake released. The daytime running
lights operate with the headlight switch in the
OFF position or in the
position. Turn the
headlight switch to theposition for full
illumination when driving at night.
If the parking brake is applied before the engine is
started, the daytime running lights do not illumi-
nate. The daytime running lights illuminate when
the parking brake is released. The daytime run-
ning lights will remain on until the ignition switch
is turned off.
WARNING
When the daytime running light system is
active, tail lights on your vehicle are not
on. It is necessary at dusk to turn on your
headlights. Failure to do so could cause
an accident injuring yourself and others.
INSTRUMENT BRIGHTNESS
CONTROL
The instrument cluster illuminates when the igni-
tion switch is in ON position.
The instrument brightness control operates when
the headlight control switch is in the
AUTO,
orposition.
Turn the control to adjust the brightness of instru-
ment panel lights when driving at night.
The instrument brightness control will not adjust
the brightness when the headlights or parking
lights are off.
WIC0273
Instruments and controls2-21
ZREVIEW COPY:Ð2004 Altima(l30)
Owners Manual(owners)ÐUSA English(nna)
10/10/03Ðtbrooks
X
Page 86 of 264

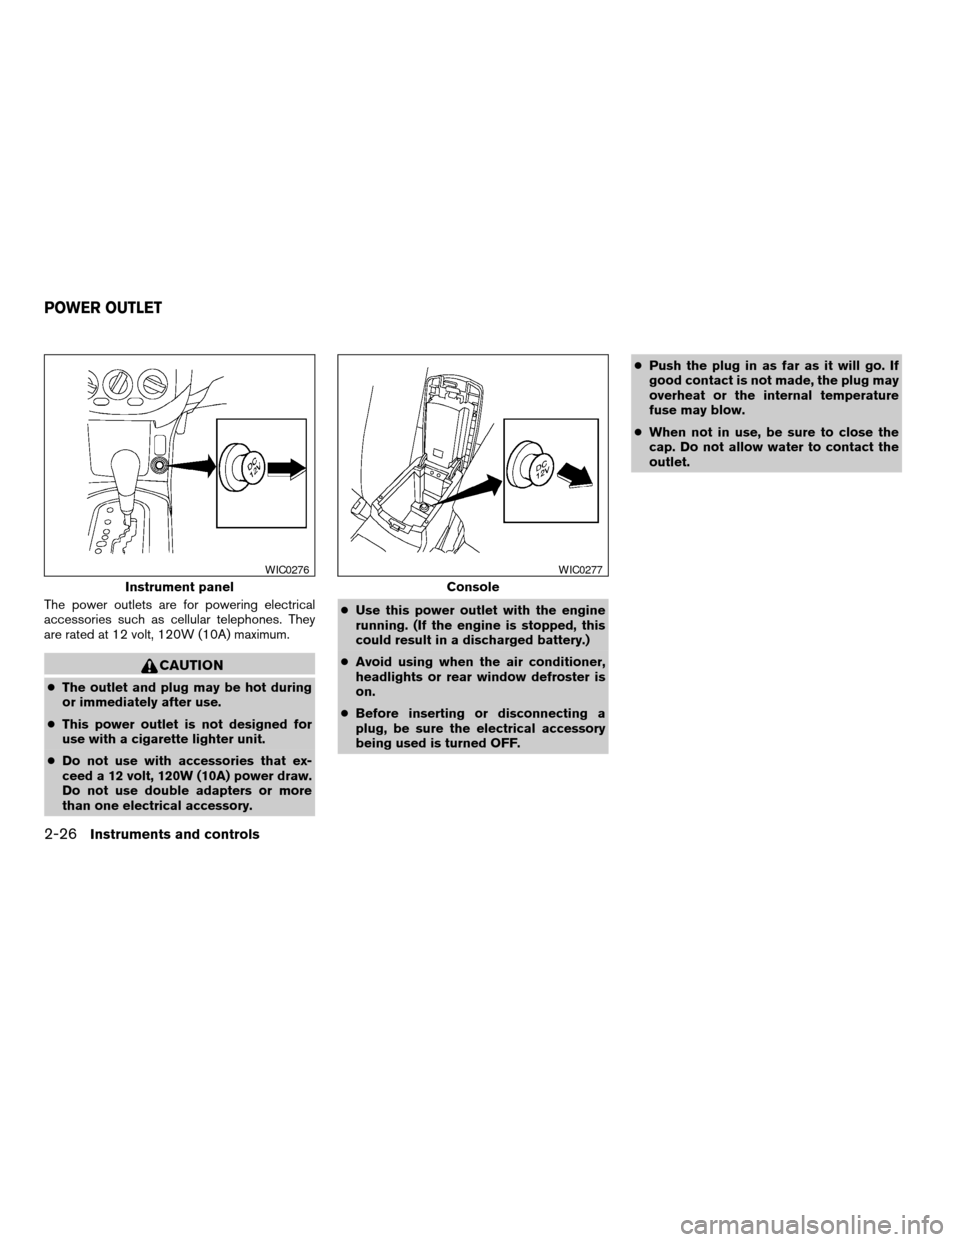
The power outlets are for powering electrical
accessories such as cellular telephones. They
are rated at 12 volt, 120W (10A) maximum.
CAUTION
cThe outlet and plug may be hot during
or immediately after use.
cThis power outlet is not designed for
use with a cigarette lighter unit.
cDo not use with accessories that ex-
ceed a 12 volt, 120W (10A) power draw.
Do not use double adapters or more
than one electrical accessory.cUse this power outlet with the engine
running. (If the engine is stopped, this
could result in a discharged battery.)
cAvoid using when the air conditioner,
headlights or rear window defroster is
on.
cBefore inserting or disconnecting a
plug, be sure the electrical accessory
being used is turned OFF.cPush the plug in as far as it will go. If
good contact is not made, the plug may
overheat or the internal temperature
fuse may blow.
cWhen not in use, be sure to close the
cap. Do not allow water to contact the
outlet.
Instrument panel
WIC0276
Console
WIC0277
POWER OUTLET
2-26Instruments and controls
ZREVIEW COPY:Ð2004 Altima(l30)
Owners Manual(owners)ÐUSA English(nna)
10/10/03Ðtbrooks
X
Page 92 of 264

CARGO NET (if so equipped)
The cargo net helps keep packages in the cargo
area from moving around while the vehicle is in
motion.
To install the cargo net, attach the hooks to the
retainers.
To remove the cargo net, detach the hooks from
the cargo net retainers.
WARNING
cProperly secure all cargo with ropes or
straps to help prevent it from sliding or
shifting. In a sudden stop or collision,
unsecured cargo could cause personal
injury.
cBe sure to secure all four hooks into the
retainers. The cargo restrained in the
net must not exceed 30 lbs. (13.6 kg) or
the net may not stay secured.
POWER WINDOWS
WARNING
cMake sure that all passengers have
their hands, etc. inside the vehicle while
it is in motion and before closing the
windows. Use the window lock switch
to prevent unexpected use of the power
windows.
cDo not leave children unattended inside
the vehicle. They could unknowingly ac-
tivate switches or controls and become
trapped in a window. Unattended chil-
dren could become involved in serious
accidents.
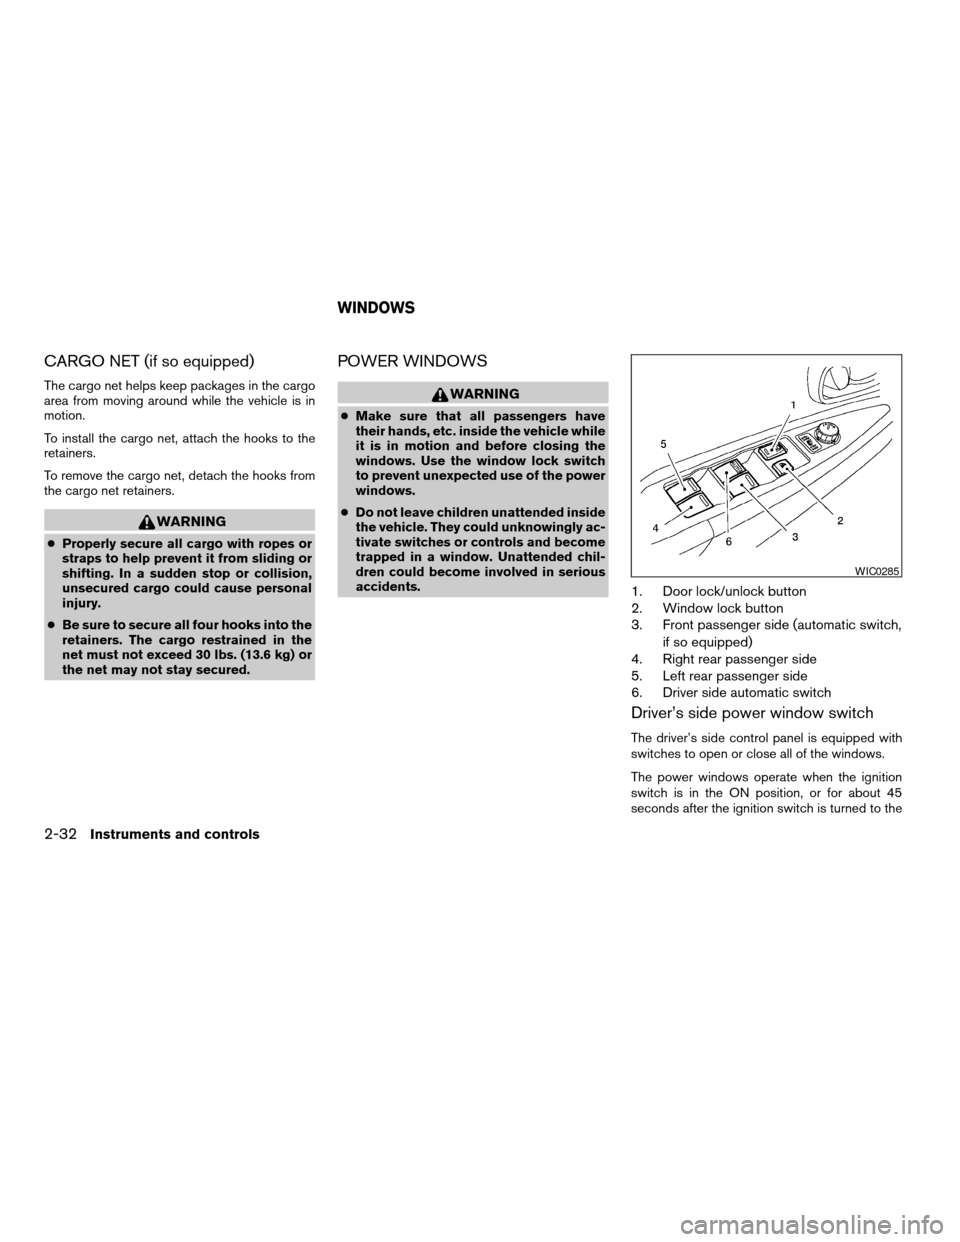
1. Door lock/unlock button
2. Window lock button
3. Front passenger side (automatic switch,
if so equipped)
4. Right rear passenger side
5. Left rear passenger side
6. Driver side automatic switch
Driver’s side power window switch
The driver’s side control panel is equipped with
switches to open or close all of the windows.
The power windows operate when the ignition
switch is in the ON position, or for about 45
seconds after the ignition switch is turned to the
WIC0285
WINDOWS
2-32Instruments and controls
ZREVIEW COPY:Ð2004 Altima(l30)
Owners Manual(owners)ÐUSA English(nna)
10/10/03Ðtbrooks
X
Page 112 of 264
s1Pull the hood lock release handle located
below the driver side instrument panel; the
hood springs up slightly.
s2Lift the lever at the front of the hood with your
fingertips and raise the hood.
s3Remove the support rod from the clamp.
s4Insert the support rod into the slot on the
passenger side fender ledge.5. When closing the hood, return the support
rod to its original position, lower the hood to
approximately 12 inches above the latch and
release it. This allows proper engagement of
the hood latch.
WARNING
cMake sure the hood is completely
closed and latched before driving. Fail-
ure to do so could cause the hood to fly
open and result in an accident.
cIf you see steam or smoke coming from
the engine compartment, to avoid injury
do not open the hood.
LPD0072
HOOD
3-10Pre-driving checks and adjustments
ZREVIEW COPY:Ð2004 Altima(l30)
Owners Manual(owners)ÐUSA English(nna)
10/13/03Ðtbrooks
X