Page 31 of 224
TURN SIGNAL CONTROL
²Push down to activate the left
turn signal.
²Push up to activate the right turn
signal.
The flash rate of the turn signal will speed up considerably if the left or
right turn lamp bulb (front or rear) is burned out.
Cornering lamps
When the turn signal is used and the headlamps are on, the cornering
lamps will light either the right or left side depending on the direction of
the turn.
MAP/COURTESY LAMPS
Without a moon roof
With a moon roof
To turn on the map lamps, press the
map lamp control.
2004 Marauder(mdr)
Owners Guide (post-2002-fmt)
USA English(fus)
Lights
31
Page 39 of 224

TILT STEERING WHEEL
To adjust the steering wheel:
1. Pull and hold the steering wheel
release control toward you.
2. Move the steering wheel up or
down until you find the desired
location.
3. Release the steering wheel
release control. This will lock the
steering wheel in position.
Never adjust the steering wheel when the vehicle is moving.
ILLUMINATED VISOR MIRROR
Lift the mirror cover to turn on the
visor mirror lamps.
OVERHEAD CONSOLE WITHOUT MOON ROOF (IF EQUIPPED)
The appearance of your vehicle's overhead console will vary according to
your option package. Some of the features in the overhead console
include a compass and HomeLinkt. To program the Homelinkt, refer to
HomelinktWireless Control Systemit this chapter.
Electronic compass display (if equipped)
Compass:The compass display is contained in the overhead console.
The vehicle heading is displayed as one of N, NE, E, SE, S, SW, W and
NW.
The compass reading may be affected when you drive near large
buildings, bridges, power lines and powerful broadcast antenna. Magnetic
or metallic objects placed in or on the vehicle may also affect compass
accuracy. Adjustments may need to be made to the zone and calibration
of the compass.
2004 Marauder(mdr)
Owners Guide (post-2002-fmt)
USA English(fus)
Driver Controls
39
Page 41 of 224

OVERHEAD CONSOLE WITH MOON ROOF (IF EQUIPPED)
The appearance of your vehicle's overhead console will vary according to
your option package. Some of the features in the overhead console
include Compass, Homelink, and Moon Roof controls.
Compass mode
The compass reading may be affected when you drive near large
buildings, bridges, power lines and powerful broadcast antenna. Magnetic
or metallic objects placed in, on or near the vehicle may also affect
compass accuracy.
1. Turn ignition to the ON position.
2. Start the engine.
3. From a blank display press and
release the MODE button once. The
directional heading will be
displayed.
Note:If the compass is
de-calibrated, CAL will be displayed
in the right corner of the display.
Refer toªCalibration modeºin this
section for more details.
4. The overhead console displays the compass heading in one of eight
directions: NORTH, NORTHEAST, EAST, SOUTHEAST, SOUTH,
SOUTHWEST, WEST, and NORTHWEST.
Zone variation mode
Most geographic areas (zones) have a magnetic north compass point that
varies slightly from the northerly direction on maps. A correct zone
setting will eliminate compass heading error.
For optimum calibration, turn off all electrical accessories (heater/air
conditioning, wipers, etc.) and make sure all vehicle doors are shut.
To set the compass zone:
1. Press and release the MODE
button until the compass directional
heading is displayed.
2004 Marauder(mdr)
Owners Guide (post-2002-fmt)
USA English(fus)
Driver Controls
41
Page 54 of 224

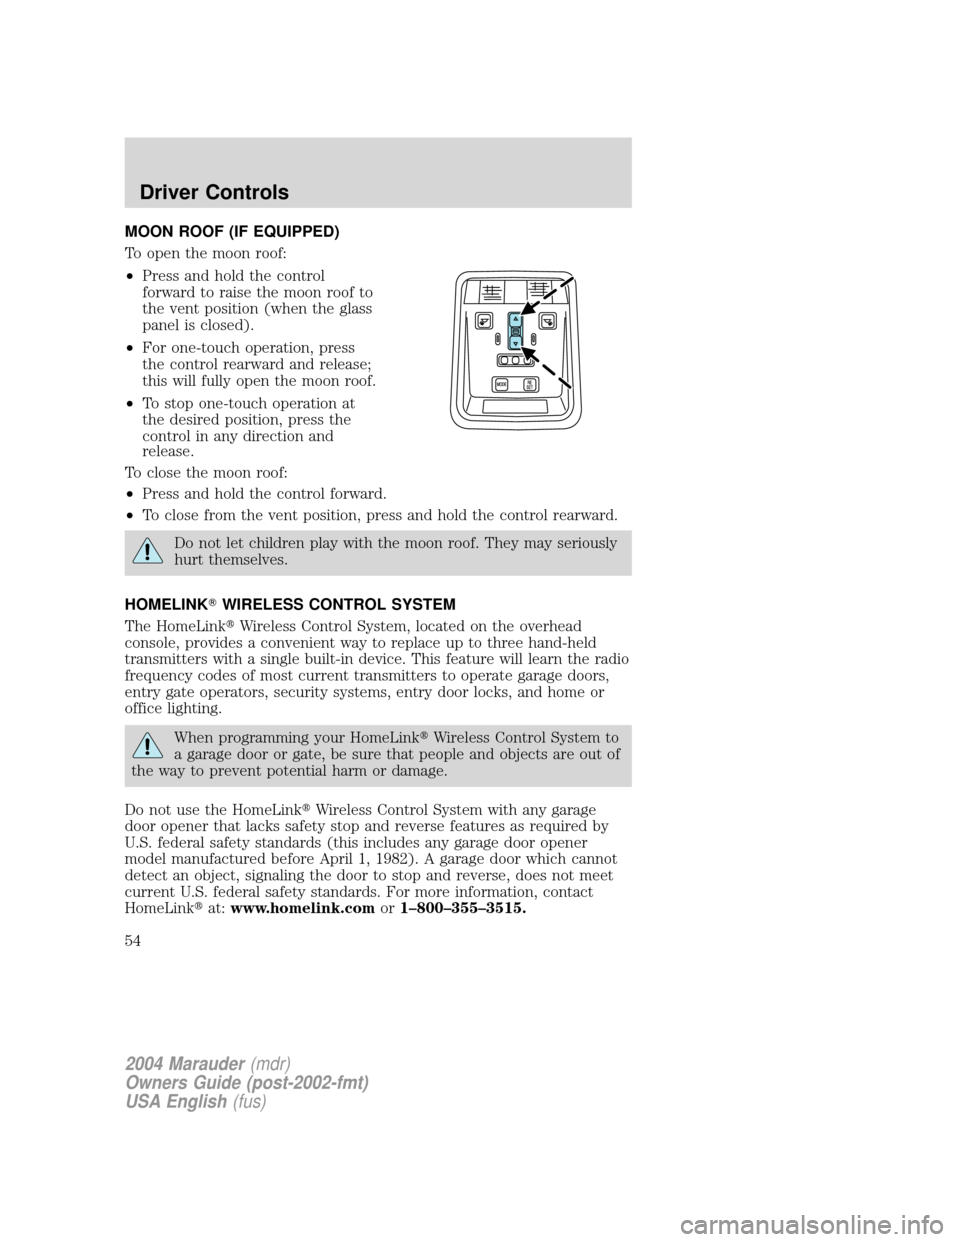
MOON ROOF (IF EQUIPPED)
To open the moon roof:
²Press and hold the control
forward to raise the moon roof to
the vent position (when the glass
panel is closed).
²For one-touch operation, press
the control rearward and release;
this will fully open the moon roof.
²To stop one-touch operation at
the desired position, press the
control in any direction and
release.
To close the moon roof:
²Press and hold the control forward.
²To close from the vent position, press and hold the control rearward.
Do not let children play with the moon roof. They may seriously
hurt themselves.
HOMELINKTWIRELESS CONTROL SYSTEM
The HomeLinktWireless Control System, located on the overhead
console, provides a convenient way to replace up to three hand-held
transmitters with a single built-in device. This feature will learn the radio
frequency codes of most current transmitters to operate garage doors,
entry gate operators, security systems, entry door locks, and home or
office lighting.
When programming your HomeLinktWireless Control System to
a garage door or gate, be sure that people and objects are out of
the way to prevent potential harm or damage.
Do not use the HomeLinktWireless Control System with any garage
door opener that lacks safety stop and reverse features as required by
U.S. federal safety standards (this includes any garage door opener
model manufactured before April 1, 1982). A garage door which cannot
detect an object, signaling the door to stop and reverse, does not meet
current U.S. federal safety standards. For more information, contact
HomeLinktat:www.homelink.comor1±800±355±3515.
2004 Marauder(mdr)
Owners Guide (post-2002-fmt)
USA English(fus)
Driver Controls
54
Page 61 of 224

Childproof door locks
²When these locks are set, the
rear doors cannot be opened from
the inside.
²The rear doors can be opened
from the outside when the doors
are unlocked.
The childproof locks are located on
rear edge of each rear door and
must be set separately for each door. Setting the lock for one door will
not automatically set the lock for both doors.
²Move lock control up to engage the childproof lock.
²Move control down to disengage childproof locks.
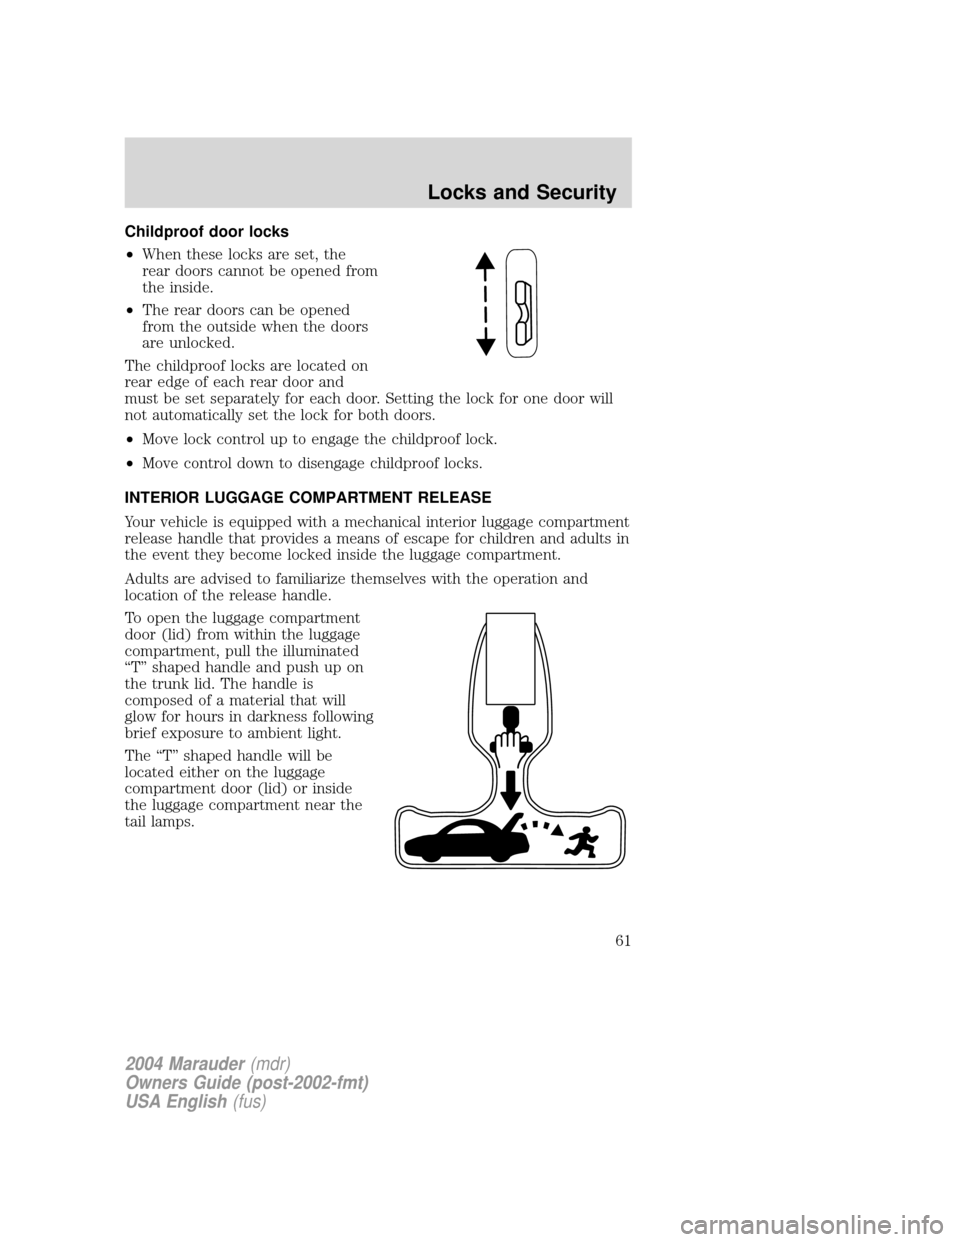
INTERIOR LUGGAGE COMPARTMENT RELEASE
Your vehicle is equipped with a mechanical interior luggage compartment
release handle that provides a means of escape for children and adults in
the event they become locked inside the luggage compartment.
Adults are advised to familiarize themselves with the operation and
location of the release handle.
To open the luggage compartment
door (lid) from within the luggage
compartment, pull the illuminated
ªTº shaped handle and push up on
the trunk lid. The handle is
composed of a material that will
glow for hours in darkness following
brief exposure to ambient light.
The ªTº shaped handle will be
located either on the luggage
compartment door (lid) or inside
the luggage compartment near the
tail lamps.
2004 Marauder(mdr)
Owners Guide (post-2002-fmt)
USA English(fus)
Locks and Security
61
Page 134 of 224

Fuse/Relay
LocationFuse Amp
RatingPassenger Compartment Fuse
Panel Description
10 10A Rear window defrost, Heated
mirrors
11 5A Traction control indicator relay
(ABS w/traction control only)
12 15A Multi-function switch for
turn/hazard lamps
13 5A Audio (Run/Accy)
14 10A Anti-lock Brake System (ABS),
Instrument Cluster
15 15A Speed control, LCM, EATC blower
motor relay, Door lock switch
illumination, Moonroof, Heated
seat switch
16 15A Reversing lamps, Shift lock, DRL
module, VAP Steering, Electronic
day/night mirror, Overhead
console, Air suspension, Climate
control, Heated seat module,
Speed chime module (GCC only),
DDM, Back-up lamps
17 7.5A Wiper motor
18 15A Fog lamps
19 15A Brake lamps, Brake signal for
PCM, ABS and speed control
module, DDM
20 Ð Not used
21 15A LCM for park lamps and interior
illumination, Autolamp/Sunload
sensor
22 20A Speed control servo,
Multi-function switch for hazard
lamps, Brake on/off switch, Feed
for IP fuse 19
2004 Marauder(mdr)
Owners Guide (post-2002-fmt)
USA English(fus)
Roadside Emergencies
134
Page 136 of 224
The high-current fuses are coded as follows.
Fuse/Relay
LocationFuse Amp
RatingPower Distribution Box
Description
1 25A* Audio
2 20A* Power point
3 25A* Heated seats
4 15A* Horns
5 20A* Fuel pump module
6 15A* Alternator
7 25A* Moonroof
8 20A* Driver's Door Module (DDM)
9 ± Not used
10 Ð Not used
11 20A* Daytime running lamps
12 Ð Not used
13 Ð Not used
14 Ð Not used
15 Ð Not used
503
502
501
24
23401
20
19 22
21RELAY
302 RELAY
304 RELAY
303
RELAY
301 207
201 202 203204
209
206
208
205602
601118 114
110 106
102
117 113
109 105
101
116 112
108 104
115 111
107 103
18 16
14 1210 8
64
2
17 15
13 1197
53
1
2004 Marauder(mdr)
Owners Guide (post-2002-fmt)
USA English(fus)
Roadside Emergencies
136
Page 138 of 224
Fuse/Relay
LocationFuse Amp
RatingPower Distribution Box
Description
115 50A** Ignition switch feed to IP fuses 16
and 18
116 30A** Wipers
117 ± Not used
118 20A** ABS
201 1/2 ISO Horn relay
202 1/2 ISO PCM relay
203 1/2 ISO Fuel pump relay
204 1/2 ISO A/C clutch relay
205 1/2 ISO Traction control switch relay
206 Ð Not used
207 1/2 ISO Fog lamp relay
208 1/2 ISO Moonroof relay
209 1/2 ISO Hi-beam disable with fog lamp
relay
301 Full ISO Blower motor relay
302 Full ISO Starter solenoid relay
303 Full ISO Air suspension relay
304 Full ISO Heated backlight relay
401 Ð Not used
501 Diode PCM diode
502 Diode A/C clutch
503 Ð Not used
601 Ð Not used
602 20A** Adjustable pedals, Power seat,
Locks, Decklid, Lumbar
* Mini fuse ** Circuit breaker/Maxi fuse
Relays
Relays are located in the power distribution box and should be replaced
by qualified technicians.
2004 Marauder(mdr)
Owners Guide (post-2002-fmt)
USA English(fus)
Roadside Emergencies
138