Page 124 of 314
124 Controls in detailAudio systemSkipping tracks forwards / backwards�
Press the f button.
The next track on the CD will be played.
�
Press the e button.
If the track has been playing for more
than ten seconds, it will revert to the
start of that track. If it has been playing
for less than ten seconds, it will revert
to the preceding track.
To skip several tracks, the respective
button must be pressed until the de-
sired track is reached. If the beginning
or end of the CD is reached during the
search, the first or last track will be
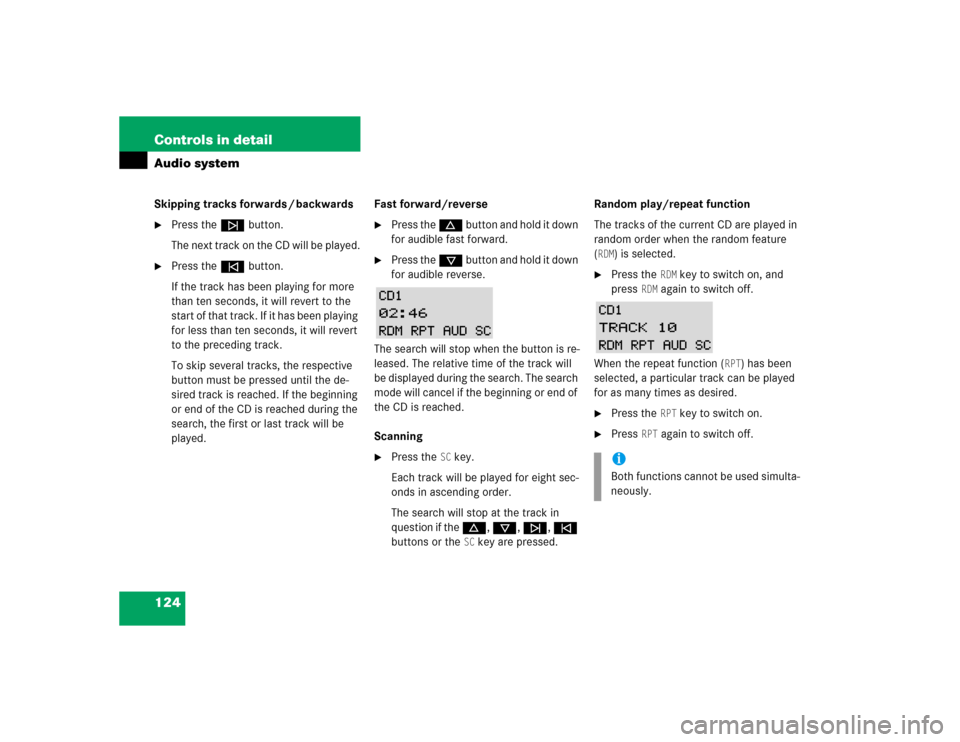
played.Fast forward/reverse
�
Press the d button and hold it down
for audible fast forward.
�
Press the c button and hold it down
for audible reverse.
The search will stop when the button is re-
leased. The relative time of the track will
be displayed during the search. The search
mode will cancel if the beginning or end of
the CD is reached.
Scanning
�
Press the
SC key.
Each track will be played for eight sec-
onds in ascending order.
The search will stop at the track in
question if the d, c, f, e
buttons or the
SC key are pressed.Random play/repeat function
The tracks of the current CD are played in
random order when the random feature
(
RDM
) is selected.
�
Press the
RDM
key to switch on, and
press
RDM
again to switch off.
When the repeat function (
RPT
) has been
selected, a particular track can be played
for as many times as desired.
�
Press the
RPT
key to switch on.
�
Press
RPT
again to switch off.
iBoth functions cannot be used simulta-
neously.
Page 134 of 314
134 Controls in detailRetractable hardtop
Locking the retractable hardtop after
raising/lowering
If the retractable hardtop is not properly
locked, lock it as described below.Problems when operating the retract-
able hardtop
Unlocked status noticed when stopped
�
Switch on the ignition.
�
To lock the retractable hardtop in its
fully closed position, push the retract-
able hardtop switch forward.
Unlocked status noticed while driving
�
Stop the vehicle.
�
Leave the ignition switched on
�
To lock the retractable hardtop in its
fully closed position, push the retract-
able hardtop switch forward.
!If the indicator lamp in the retractable
hardtop switch flashes slowly, a mal-
function has occurred in the system.
If the indicator lamp in the retractable
hardtop switch flashes rapidly, the
trunk lid and/or the luggage cover may
be open, and need to be closed.Warning!
G
To prevent possible accidents, drive the ve-
hicle only with the retractable hardtop either
completely closed and locked, or fully low-
ered into its storage compartment.
Warning!
G
The retractable hardtop is not fully closed
and locked:�
if the indicator lamp in the retractable
hardtop switch remains lit (key in steer-
ing lock position2).
�
if the indicator lamp flashes, and a warn-
ing sounds for ten seconds when start-
ing to drive.
Warning!
G
Stop the vehicle and lock the retractable
hardtop before continuing to drive. You
could otherwise endanger yourself and oth-
ers.
Page 150 of 314
150 Controls in detailUseful features
Upgrade signals
The Tele Aid system processes calls using
the following priority.�
Automatic emergency – First priority
�
Manual emergency – Second priority
�
Roadside assistance – Third priority
�
Information – Fourth priority
Should a higher priority call be initiated
while you are connected, an upgrade (al-
ternating) tone will be heard, and the ap-
propriate indicator lamp will flash. If
certain information such as vehicle identi-
fication number or customer information is
not available, the operator may need to re-
transmit.During this time you will hear a beep and
voice contact will be interrupted. Voice
contact will resume once the retransmis-
sion is completed. Once a call is conclud-
ed, a beep will be heard and the respective
indicator lamp will stop flashing. Audio sys-
tem operation will resume.
!If the indicator lamps do not start flash-
ing after pressing one of the buttons or
remain illuminated (in red) at any time,
the Tele Aid system has detected a
fault or the service is not currently ac-
tive, and may not initiate a call. Visit
your Mercedes-Benz Center and have
the system checked or contact the Re-
sponse Center at 1-800-756-9018 (in
the USA) or 1-888-923-8367 (in
Canada) as soon as possible.
!If the indicator lamp continues to flash
or the system does not reset, contact
the Response Center at
1-800-756-9018 (in the USA) or
1-888-923-8367 (in Canada), or
Mercedes-Benz Customer Assistance
at 1-800-FOR-MERCedes
(1-800-367-6372) in the USA or Cus-
tomer Service at 1-800-387-0100 in
Canada.
Page 195 of 314
195 Operation
Vehicle care
Wiper blades�
Fold wiper arm forward.
�
Clean the wiper blade inserts with a
clean cloth and detergent solution.Window cleaning
�
Fold wiper arm forward.
�
Use a window cleaning solution on all
glass surfaces.
An automotive glass cleaner is recom-
mended.Rear window cleaning
The corner flaps of the rear shelf partially
cover the rear window. This prevents the
window from being fully cleaned with the
hardtop closed.
Warning!
G
For safety reasons, switch off wipers and re-
move Key from starter switch before clean-
ing the wiper blades, otherwise the wiper
motor might suddenly turn on and cause in-
jury.!Fold the windshield wiper arms back
onto the windshield before turning the
key in the starter switch.
Hold onto the wiper when folding the
wiper arm back. If released, the force
of the impact from the tensioning
spring could crack the windshield.
Warning!
G
For safety reasons, switch off wipers and re-
move Key from starter switch before clean-
ing the wiper blades, otherwise the wiper
motor might suddenly turn on and cause in-
jury.!Fold the windshield wiper arms back
onto the windshield before turning the
key in the steering lock.
Hold onto the wiper when folding the
wiper arm back. If released, the force
of the impact from the tensioning
spring could crack the windshield.
!Do not manually move corner flaps or
rear shelf. Doing so will result in dam-
age to the roof folding mechanism that
is not covered by the Mercedes-Benz
Limited Warranty.Warning!
G
If a warning sounds and the indicator lamp
in the hardtop switch blinks, immediately
stop cleaning and move back from window
to prevent possible injury.
The hardtop is lowered into its storage com-
partment.
Page 208 of 314
208 Practical hintsWhat to do if …Problem
Possible cause
Suggested solution
#
The red charge indicator lamp
lights up while the engine is
running.
The battery was charged with a battery
charger or jump started.
�
Have the battery checked at a service
station.
The battery is no longer charging.
Possible causes:�
alternator malfunctioning
�
broken poly-V-belt
�
Stop immediately and check the
poly-V-belts.
If one is broken:
�
Do not continue to drive. Otherwise
the engine will overheat due to an in-
operative water pump which may re-
sult in damage to the engine. Notify
an authorized Mercedes-Benz Center.
If it is intact:
�
Drive immediately to the nearest
authorized Mercedes-Benz Center.
Adjust driving to be consistent with
reduced braking responsiveness.
Page 246 of 314
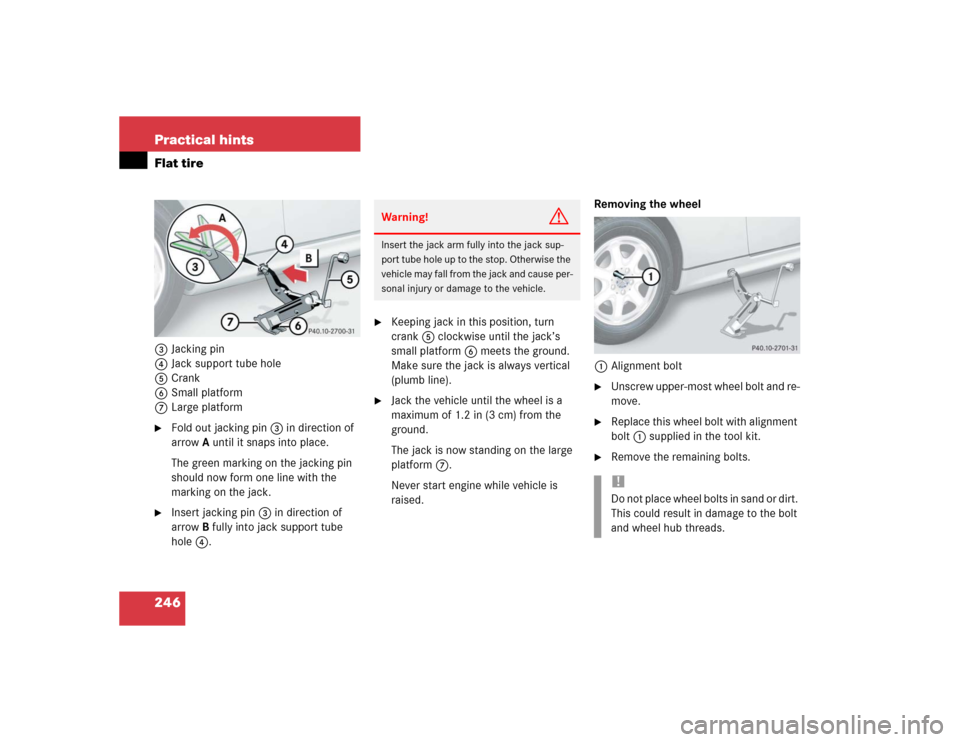
246 Practical hintsFlat tire3Jacking pin
4Jack support tube hole
5Crank
6Small platform
7Large platform�
Fold out jacking pin3 in direction of
arrowA until it snaps into place.
The green marking on the jacking pin
should now form one line with the
marking on the jack.
�
Insert jacking pin3 in direction of
arrowB fully into jack support tube
hole4.
�
Keeping jack in this position, turn
crank5 clockwise until the jack’s
small platform6 meets the ground.
Make sure the jack is always vertical
(plumb line).
�
Jack the vehicle until the wheel is a
maximum of 1.2 in (3 cm) from the
ground.
The jack is now standing on the large
platform7.
Never start engine while vehicle is
raised.Removing the wheel
1Alignment bolt
�
Unscrew upper-most wheel bolt and re-
move.
�
Replace this wheel bolt with alignment
bolt1 supplied in the tool kit.
�
Remove the remaining bolts.
Warning!
G
Insert the jack arm fully into the jack sup-
port tube hole up to the stop. Otherwise the
vehicle may fall from the jack and cause per-
sonal injury or damage to the vehicle.
!Do not place wheel bolts in sand or dirt.
This could result in damage to the bolt
and wheel hub threads.