Page 340 of 434
 you have as follows:�
The TIREFIT container of kit 1 i")
339 Practical hints
Flat tire
�Flat tire
Your SL 55 AMG may be equipped with a
TIREFIT kit.
You can identify which TIREFIT kit
(SL 55 AMG only) you have as follows:�
The TIREFIT container of kit 1 is a
squeeze container.
For information on sealing a damaged
tire with TIREFIT kit 1, see
(�page 340).
�
The TIREFIT container of kit 2 is a rigid
container.
For information on sealing a damaged
tire with TIREFIT kit 2, see
(�page 345).
Preparing the vehicle�
Park the vehicle as far as possible from
moving traffic on a hard surface.
�
Turn on the hazard warning flashers.
�
Turn the steering wheel so that the
front wheels are in a straight ahead po-
sition.
�
Set the parking brake.
�
Move the gear selector lever to P.
Vehicles with SmartKey :
�
Turn off the engine (
�page 53).
�
Remove the SmartKey from the starter
switch.Vehicles with SmartKey with
KEYLESS-GO*:
�
Turn off the engine by pressing the
KEYLESS-GO* button on the gear se-
lector lever once (
�page 54).
�
Open the driver’s door (this puts the
starter switch in position 0, same as
with the SmartKey removed from the
starter switch). The driver's door then
can be closed again.
�
Have any passenger exit the vehicle at
a safe distance from the roadway. iOpen door only when conditions are
safe to do so.
Page 341 of 434

340 Practical hintsFlat tireSealing tires with TIREFIT kit 1
Small tire punctures, particularly those in
the tread, can be sealed with TIREFIT.
TIREFIT can be used in ambient tempera-
tures down to -4°F (-20°C).The TIREFIT kit stored in the trunk contains
the TIREFIT container, a filler hose, a valve
stem tool, a valve, and a sticker.
�
Foreign objects (e.g. screws or nails)
should not be removed from the tire.
�
Attach the sticker where it will be easily
seen by the driver on the instrument
cluster.
1Filler hose
2TIREFIT container
Warning!
G
Keep TIREFIT away from sparks, open flame
or heat source.
Do not smoke.
Warning!
G
TIREFIT is a limited repair device. TIREFIT
cannot be used for cuts or punctures larger
than approx. 0.16 in (4 mm) and tire dam-
age caused by driving with extremely low
tire pressure, or on a flat tire, or a damaged
wheel.
Do not drive the vehicle under such circum-
stances.
Contact your nearest Mercedes-Benz
Center for assistance or call Roadside
Assistance.
Page 342 of 434
341 Practical hints
Flat tire
�
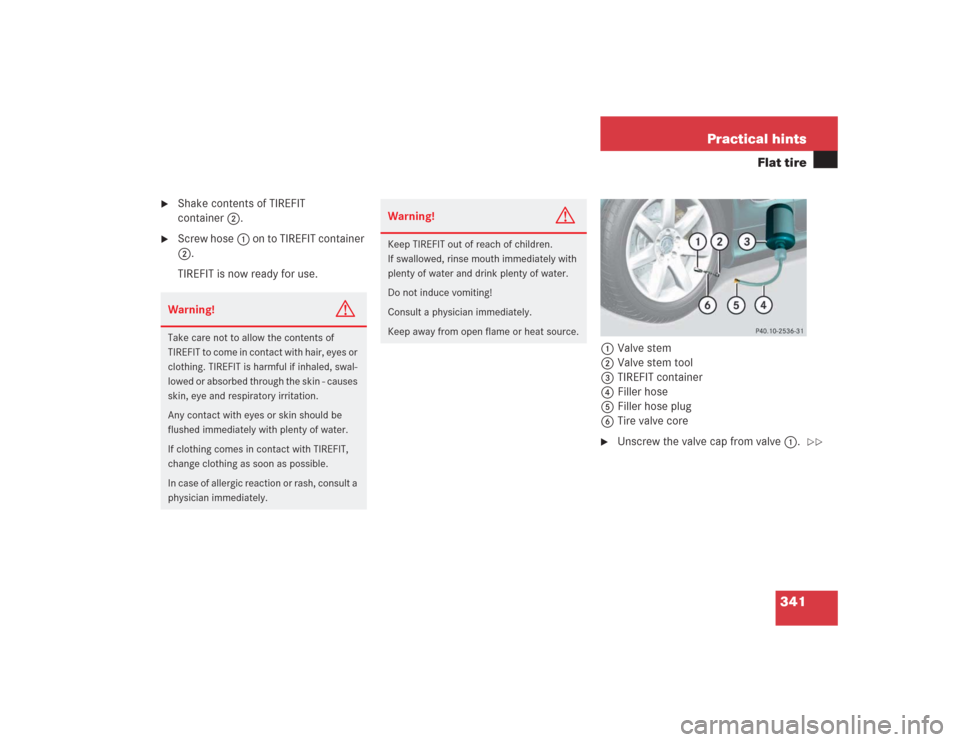
Shake contents of TIREFIT
container2.
�
Screw hose1 on to TIREFIT container
2.
TIREFIT is now ready for use.
1Valve stem
2Valve stem tool
3TIREFIT container
4Filler hose
5Filler hose plug
6Tire valve core
�
Unscrew the valve cap from valve1.
Warning!
G
Take care not to allow the contents of
TIREFIT to come in contact with hair, eyes or
clothing. TIREFIT is harmful if inhaled, swal-
lowed or absorbed through the skin - causes
skin, eye and respiratory irritation.
Any contact with eyes or skin should be
flushed immediately with plenty of water.
If clothing comes in contact with TIREFIT,
change clothing as soon as possible.
In case of allergic reaction or rash, consult a
physician immediately.
Warning!
G
Keep TIREFIT out of reach of children.
If swallowed, rinse mouth immediately with
plenty of water and drink plenty of water.
Do not induce vomiting!
Consult a physician immediately.
Keep away from open flame or heat source.
��
Page 343 of 434
342 Practical hintsFlat tire�
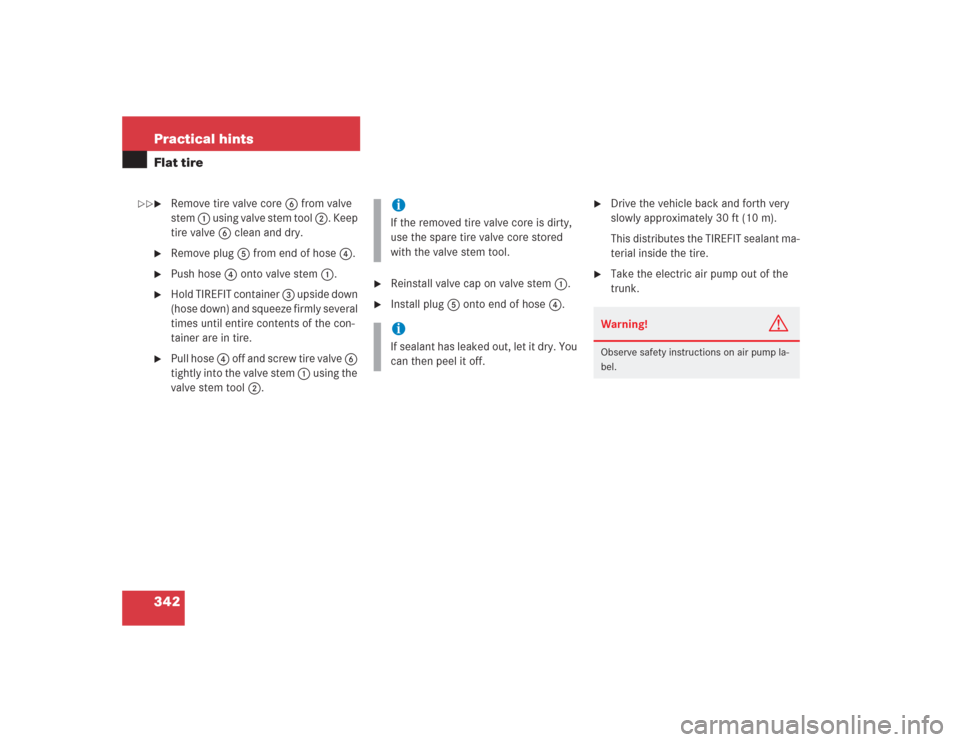
Remove tire valve core6 from valve
stem 1 using valve stem tool 2. Keep
tire valve6 clean and dry.
�
Remove plug 5 from end of hose4.
�
Push hose 4 onto valve stem 1.
�
Hold TIREFIT container 3 upside down
(hose down) and squeeze firmly several
times until entire contents of the con-
tainer are in tire.
�
Pull hose 4 off and screw tire valve 6
tightly into the valve stem 1 using the
valve stem tool 2.
�
Reinstall valve cap on valve stem 1.
�
Install plug 5 onto end of hose 4.
�
Drive the vehicle back and forth very
slowly approximately 30 ft (10 m).
This distributes the TIREFIT sealant ma-
terial inside the tire.
�
Take the electric air pump out of the
trunk.
iIf the removed tire valve core is dirty,
use the spare tire valve core stored
with the valve stem tool.iIf sealant has leaked out, let it dry. You
can then peel it off.
Warning!
G
Observe safety instructions on air pump la-
bel.
��
Page 344 of 434

343 Practical hints
Flat tire
1Flap
2Air hose with pressure gauge and vent
screw
3Union nut
4Electrical plug�
Open flap 1 on air pump.
�
Pull out electrical plug 4 and air hose
with the pressure gauge 2.
�
Screw air hose 2 onto the tire valve.
�
Insert electrical plug 4 into vehicle ci-
gar lighter socket.
�
Turn the SmartKey in the ignition to po-
sition 1 (
�page 31).
or
�
Press the KEYLESS-GO* start/stop
button on the gear selector lever once.
Do not depress brake pedal.
�
Press I on the electric air pump switch.
The electric air pump should now
switch on and inflate the tire.
After 5 minutes, the pressure gauge must
display at least 26 psi (1.8 bar). The air
hose and the union nut can become hot
during inflation. Please exercise appropri-
ate caution.
�
If this tire pressure is not attained, turn
off the electric air pump, detach the air
hose from the tire valve, and again
drive vehicle back and forth very slowly
approximately 30 ft (10 m).
This serves to better distribute the
TIREFIT sealant material inside the tire.
�
Inflate the tire again.
�
Press 0 on the electric air pump switch.
�
Turn the SmartKey in the ignition to
position0.
or
�
Press KEYLESS-GO* start/stop button
on the gear selector lever twice. Do not
depress brake pedal.
The electric air pump should now be
switched off.!Do not operate the electric air pump
longer than eight minutes without in-
terruption. Otherwise it may overheat.
You may operate the air pump again af-
ter it has cooled off.
��
Page 345 of 434

344 Practical hintsFlat tire�
Detach the electric air pump.
The air hose may still be hot. Please ex-
ercise appropriate caution.
�
Store the electrical plug and the air
hose behind the flap and place the air
pump back in the trunk.
�
Close the trunk lid.
�
Drive away immediately.
The TIREFIT sealant will distribute itself
evenly inside the tire.
�
After driving vehicle for an initial
10 minutes, check tire pressure using
the pressure gauge on the air pump.
Warning!
G
If a tire pressure of 26 psi (1.8 bar) is not at-
tained, tire is too severely damaged for
TIREFIT to provide a reliable tire repair.
In this case, TIREFIT cannot properly seal
the tire.
Do not drive the vehicle.
Contact the nearest Mercedes-Benz Center
or call Roadside Assistance.
Warning!
G
Do not exceed vehicle speed of
50 mph (80 km / h). A TIREFIT repair is not
designed to operate at higher speeds.
The sticker must be attached on the instru-
ment cluster where it will be easily seen by
the driver.
Vehicle handling characteristics may
change. Adapt your driving accordingly.
Warning!
G
If tire pressure has fallen below
20 psi (1.3 bar) do not continue to drive the
vehicle.
Park your vehicle safely away from the road-
way and contact the nearest authorized
Mercedes-Benz Center or Roadside Assis-
tance.
If tire pressure is at least 20 psi (1.3 bar), in-
flate tire to correct pressure (see label on
fuel filler flap), and drive vehicle to nearest
tire repair facility to have tire repaired or re-
placed.
Recommended duration of use:
300 miles (500 km) at 50 mph (80 km / h)
with the recommended tire pressure.
��
Page 346 of 434

345 Practical hints
Flat tire
�
Visit an authorized Mercedes-Benz
Center as soon as possible to obtain a
new TIREFIT kit.
�
Bring used TIREFIT materials to an au-
thorized Mercedes-Benz Center for
proper disposal.
�
Replace your TIREFIT container every
four years. Containers are available at
your authorized Mercedes-Benz Cen-
ter.
Sealing tires with TIREFIT kit 2
Small tire punctures, particularly those in
the tread, can be sealed with TIREFIT.
TIREFIT can be used in ambient tempera-
tures down to -4°F (-20°C).
Warning!
G
Follow recommend tire pressures.
Do not overinflate tires. Overinflating tires
can result in sudden deflation (blowout) be-
cause they are more likely to become punc-
tured or damaged by road debris, potholes,
etc.
Do not underinflate tires. Underinflated tires
wear unevenly, adversely affect handling
and fuel economy, and are more likely to fail
from being overheated.
Do not overload the tires by exceeding the
specified vehicle capacity weight (as indicat-
ed by the label on the pillar in the driver’s
door opening). Overloading the tires can
overheat them, possibly causing a blowout.
Warning!
G
Do not exceed vehicle speed of 50 mph
(80 km/h). A TIREFIT repair is not designed
to operate at higher speeds.
The sticker must be attached on the instru-
ment cluster where it will be easily seen by
the driver.
Vehicle handling characteristics may
change. Adapt your driving accordingly.
Warning!
G
Keep TIREFIT away from sparks, open flame
or heat source.
Do not smoke.
Page 347 of 434

should not be removed from the tire.
�
Take TIREFIT, the sticker, and the elec-
tric air pump out of the trunk.
�
Attach the stick")
346 Practical hintsFlat tire�
Foreign objects (e.g. screws or nails)
should not be removed from the tire.
�
Take TIREFIT, the sticker, and the elec-
tric air pump out of the trunk.
�
Attach the sticker where it will be easily
seen by the driver on the instrument
cluster.1TIREFIT container
2Flap
3Notch
4Electrical plug
5Air hose
6Flange
�
Open flap2 on the electric air pump.
�
Pull plug4 and air hose5 out of the
pump housing.
Warning!
G
TIREFIT is a limited repair device. TIREFIT
cannot be used for cuts or punctures larger
than approx. 0.16 in (4 mm) and tire dam-
age caused by driving with extremely low
tire pressure, or on a flat tire, or a damaged
wheel.
Do not drive the vehicle under such circum-
stances.
Contact your nearest Mercedes-Benz
Center for assistance or call Roadside
Assistance.
Warning!
G
Take care not to allow the contents of
TIREFIT to come in contact with hair, eyes or
clothing. TIREFIT is harmful if inhaled, swal-
lowed or absorbed through the skin - causes
skin, eye and respiratory irritation.
Any contact with eyes or skin should be
flushed immediately with plenty of water.
If clothing comes in contact with TIREFIT,
change clothing as soon as possible.
In case of allergic reaction or rash, consult a
physician immediately.Warning!
G
Keep TIREFIT out of reach of children.
If swallowed, rinse mouth immediately with
plenty of water and drink plenty of water.
Do not induce vomiting!
Consult a physician immediately.
Keep away from open flame or heat source.
iIf sealant has leaked out, let it dry. You
can then peel it off.