Page 336 of 434

335 Practical hints
Replacing bulbs
�
Turn locking mechanism 2 clockwise.
�
Plug the connector onto the bulb.
�
Align headlamp cover and click into
place.
Replacing parking and standing lamp
bulbs
�
Switch off the lights.
�
Open the hood (
�page 253).
�
Press ends of headlamp cover tab to-
gether and remove cover.
�
Pull out the bulb socket with the bulb.
�
Pull the bulb out of the bulb socket.
�
Insert a new bulb in the socket.
�
Reinstall the bulb socket.
�
Align headlamp cover and click into
place.Replacing side marker lamp
�
Switch off the lights.
�
Carefully slide lamp towards rear.
�
Remove front end first.
�
Twist bulb socket counterclockwise
and pull out.
�
Pull bulb out of the bulb socket.
�
Insert new bulb in socket.
�
Reinstall bulb socket, push in, and twist
clockwise.
�
To reinstall lamp, set rear end in
bumper and let front end snap into
place.
Replacing bulbs for rear lamps
Tail lamp assemblies
1Backup lamp
2Turn signal lamp
3Driver’s side: Rear fog lamp
Passenger’s side: Substitute lamp�
Switch off the lights.
�
Open the trunk lid (
�page 99).
�
Fold trim to side and remove.
�
Twist bulb socket counterclockwise
and pull out.
iHave the headlamp adjustment
checked regularly.
��
Page 337 of 434
336 Practical hintsReplacing bulbs�
Gently push bulb into socket, turn
counterclockwise and remove.
�
Insert new bulb and reinstall bulb sock-
et.
The bulb socket should audibly click
into place.
�
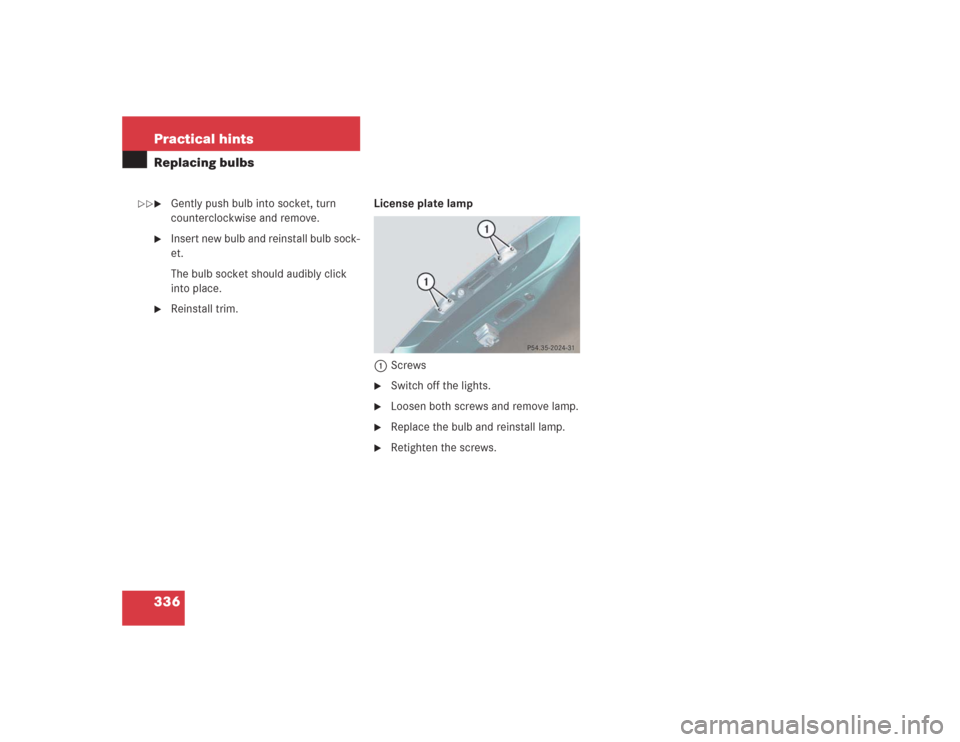
Reinstall trim.License plate lamp
1Screws
�
Switch off the lights.
�
Loosen both screws and remove lamp.
�
Replace the bulb and reinstall lamp.
�
Retighten the screws.
��
Page 365 of 434

364 Practical hintsJump startingThe starter battery is located on the right
side of the engine compartment.�
Make sure the two vehicles do not
touch.
�
Turn off all electrical consumers.
�
Apply parking brake.
�
Shift gear selector lever to positionP.
�
Remove the red cover from positive ter-
minal on both vehicles (
�page 358).1Negative terminal of charged battery
2Negative terminal of discharged
battery
3Positive terminal of discharged battery
4Positive terminal of charged battery
�
Connect positive terminals 3 and 4
of the batteries with the jumper cables.
Clamp cable to charged battery 4
first.
�
Start the engine of the vehicle with the
charged battery and run at idle speed.
�
Connect negative terminals 1 and 2
of the batteries with the jumper cables.
Clamp cable to charged battery 1
first.
�
Start the engine of the disabled vehi-
cle.
You can now turn on the electrical con-
sumers. Do not turn on the lights under
any circumstances.
�
Remove the jumper cables first from
negative terminals 1 and 2 and then
from positive terminals 3 and 4.
You can now turn on the lights.
�
Have the battery checked at the near-
est Mercedes-Benz Center.
Warning!
G
Keep flames or sparks away from battery.
Do not smoke.
Observe all safety instructions and precau-
tions when handling automotive batteries
(�page 260).
!Never invert the terminal connections.
!Do not tow-start the vehicle.