Page 144 of 434

143 Controls in detail
Control system
Setting locator lighting
During darkness, the following lamps will
come on when the exterior lamp switch is
in position U, the locator lighting fea-
ture is activated, and the vehicle is un-
locked by SmartKey: �
the parking lamps
�
the tail lamps
�
the license plate lamps
�
the front fog lamps
To activate locator lighting:
�
Make sure the locator lighting feature
is set to
On (see below).
�
Turn the exterior lamp switch to posi-
tion U.
The locator lighting switches off when the
driver’s door is opened. It switches off au-
tomatically after a period of approximately
40 seconds.
�
Move the selection marker with button
æ or ç to the
Lighting
sub-
menu
�
Press button j or k repeatedly
until you see this message in the left
display:
Locator lighting
.
The selection marker is on the current
setting.
�
Press æ or ç to select the de-
sired setting.
The locator lighting will be switched on
or off.Setting night security illumination
(Exterior lamps delayed switch-off)
Use the
Headlamps delayed switch-off
function to set whether and for how long
you would like the exterior lamps to illumi-
nate during darkness after all doors are
closed. When the delayed switch-off fea-
ture is activated and the exterior lamp
switch is in position U before the en-
gine is turned off, the following lamps will
remain lit after you remove the SmartKey
from the starter switch:
�
the parking lamps
�
the tail lamps
�
the license plate lamps
�
the front fog lamps
To activate night security illumination:
�
Select delayed switch-off period (see
below).
�
Turn the exterior lamp switch to posi-
tion U before turning off the engine.
Page 146 of 434
145 Controls in detail
Control system
Interior lighting delayed switch-off
Use this function to set whether and for
how long you would like the interior light-
ing to remain lit during darkness after the
SmartKey is removed from the starter
switch. �
Move the selection marker with button
æ or ç to the
Lighting
sub-
menu.
�
Press button j or k repeatedly
until you see this message in the left
display:
Int. lighting delayed
switch-off
.
The selection marker is on the current
setting.
�
Press æ or ç to select the de-
sired lamp-on time period. You can se-
lect:�
0 s
, the delayed switch-off feature
is deactivated
�
5 s
, 10 s
, 15 s
or
20 s
, the delayed
switch-off feature is activatedVehicle submenu
Access the
Vehicle
submenu via the
Set-
tings
menu. Use the
Vehicle
submenu to
make general vehicle settings. The follow-
ing functions are available:
Function
Page
Set station selection mode
(radio)
146
Set automatic locking
146
Tire pressure display*
147
Page 147 of 434
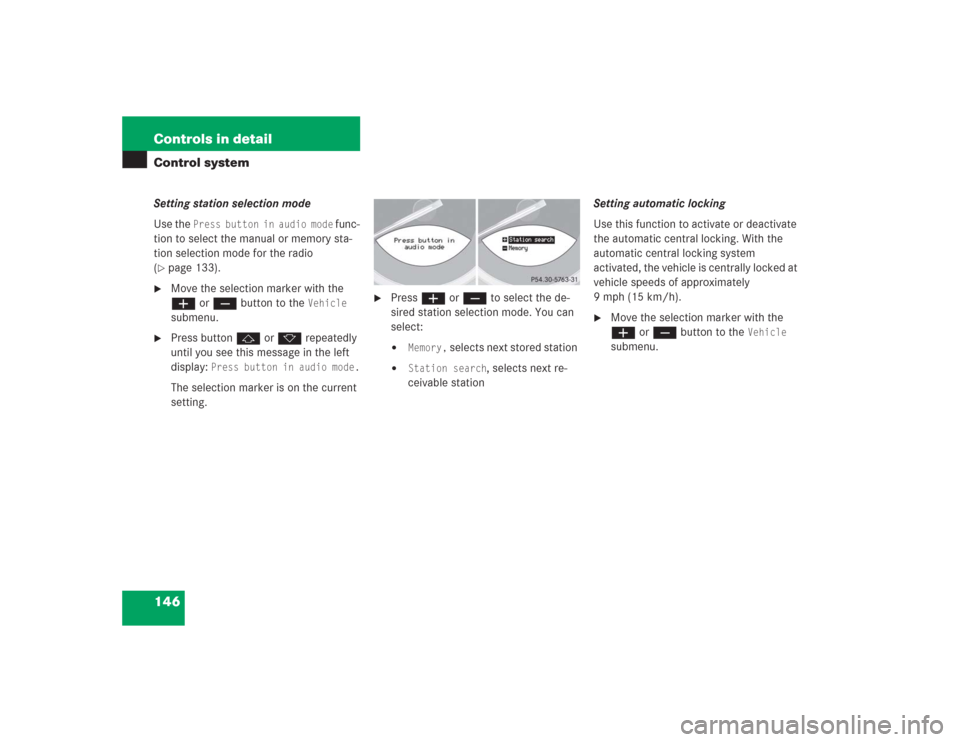
146 Controls in detailControl systemSetting station selection mode
Use the
Press button in audio mode
func-
tion to select the manual or memory sta-
tion selection mode for the radio
(
�page 133).
�
Move the selection marker with the
æ or ç button to the
Vehicle
submenu.
�
Press button j or k repeatedly
until you see this message in the left
display:
Press button in audio mode.
The selection marker is on the current
setting.
�
Press æ or ç to select the de-
sired station selection mode. You can
select:�
Memory,
selects next stored station
�
Station search
, selects next re-
ceivable stationSetting automatic locking
Use this function to activate or deactivate
the automatic central locking. With the
automatic central locking system
activated, the vehicle is centrally locked at
vehicle speeds of approximately
9mph(15km/h).
�
Move the selection marker with the
æ or ç button to the
Vehicle
submenu.
Page 148 of 434
147 Controls in detail
Control system
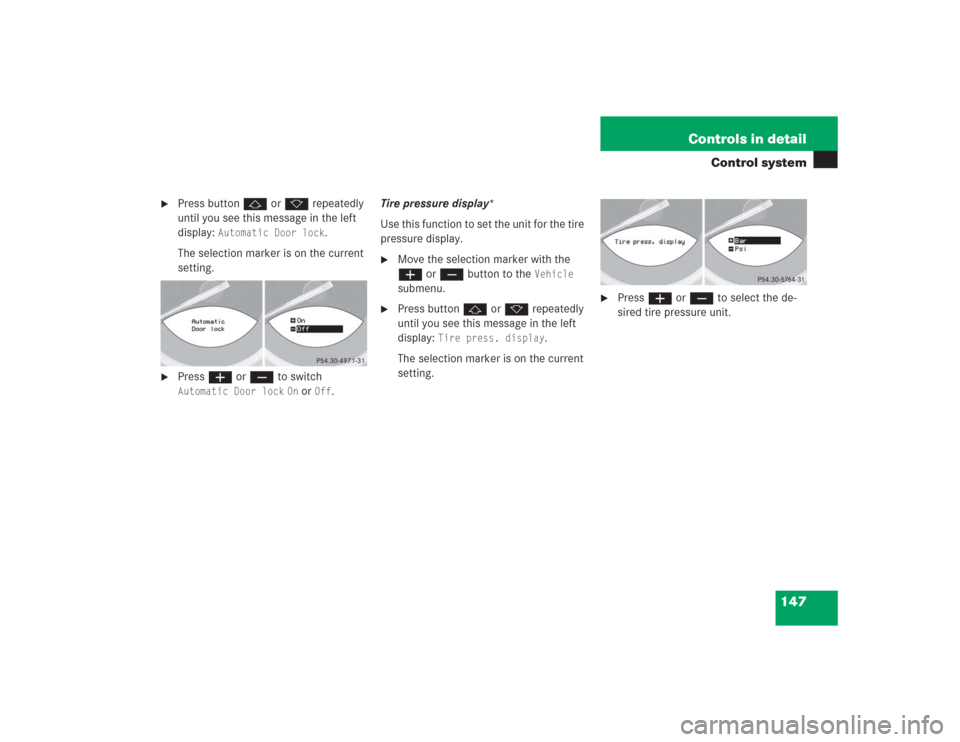
�
Press button j or k repeatedly
until you see this message in the left
display:
Automatic Door lock
.
The selection marker is on the current
setting.
�
Press æ or ç to switch Automatic Door lock
On or
Off
.Tire pressure display*
Use this function to set the unit for the tire
pressure display.
�
Move the selection marker with the
æ or ç button to the
Vehicle
submenu.
�
Press button j or k repeatedly
until you see this message in the left
display:
Tire press. display
.
The selection marker is on the current
setting.
�
Press æ or ç to select the de-
sired tire pressure unit.
Page 149 of 434

148 Controls in detailControl systemConvenience submenu
Access the
Convenience
submenu via the
Settings
menu. Use the
Convenience
sub-
menu to change the settings for a number
of convenience features. The following
functions are available:
Activating easy-entry/exit feature
Use this function to activate and deacti-
vate the easy-entry/exit feature. When the
feature is activated, the steering wheel and
driver’s seat will move back to facilitate ex-
iting the vehicle when you
�
remove the SmartKey from the starter
switch
�
open the driver’s doorAfter entering the vehicle, the steering
wheel and seat will move into the position
stored in memory when
�
the driver’s door is closed
�
you insert the SmartKey in the starter
switch or press the KEYLESS-GO*
start/stop button and
�
press and hold the appropriate stored
position button on the memory switch
(�page 114)
�
Move the selection marker with button
æ or ç to the
Convenience
sub-
menu.
�
Press button j or k repeatedly
until you see this message in the left
display:
Easy-entry feature Acti-
vate
.
The selection marker is on the current
setting.
Function
Page
Activate easy-entry/exit fea-
ture
148
Set key-dependency
149
Set parking position for exterior
rear view mirror
149
Warning!
G
You must make sure that no one can be-
come trapped or injured by the moving
steering wheel and the driver’s seat when
the easy-entry / exit feature is in operation
and the driver’s door is being opened or the
SmartKey is removed from the starter
switch.
Do not leave children unattended in the ve-
hicle, or with access to an unlocked vehicle.
Children could open the driver’s door and
unintentionally activate the easy-entry/exit
feature, which could result in an accident
and/or serious personal injury.
iTo cancel seat/steering wheel move-
ment, press one of the following:�
the seat adjustment switch
(�page 34)
�
the steering column switch
(�page 37)
�
the memory switch (
�page 114)
Page 159 of 434

158 Controls in detailAutomatic transmissionGear selector lever position
Effect
ì
Park position
Gear selector lever position
when the vehicle is parked. Place
gear selector lever in positionP
only when vehicle is stopped.
The park position is not intended
to serve as a brake when the
vehicle is parked. Rather, the
driver should always set the
parking brake in addition to
placing the gear selector lever in
positionP to secure the vehicle.
EffectThe SmartKey can only be
removed from the starter switch
with the gear selector lever in
positionP. With the SmartKey
removed, the gear selector lever
is locked in positionP.
í
Reverse gear
Place gear selector lever in
positionR only when vehicle is
stopped.
Effect
ë
Neutral
No power is transmitted from the
engine to the drive axle. When
the brakes are released, the
vehicle can be moved freely
(pushed or towed).
To avoid damage to the trans-
mission, never engageN while
driving.
If the ESP is deactivated or
malfunctioning:
Move gear selector lever toN
only if the vehicle is in danger of
skidding, e.g. on icy roads.
ê
Drive
The transmission shifts
automatically. All forward gears
are available.
Page 160 of 434

159 Controls in detail
Automatic transmission
!
Coasting the vehicle, or driving for any
other reason with gear selector lever
inN can result in transmission damage
that is not covered by the
Mercedes-Benz Limited Warranty.
Warning!
G
Getting out of your vehicle with the gear
selector lever not fully engaged in positionP
is dangerous. Also, positionP alone is not
intended to or capable of preventing your
vehicle from moving, possibly hitting people
or objects.
Always set the parking brake in addition to
shifting to positionP (
�page 45).
When parked on an incline, turn the front
wheels towards the road curb.
Do not park this vehicle in areas where com-
bustible materials such as grass, hay or
leaves can come into contact with the hot
exhaust system, as these materials could be
ignited and cause a vehicle fire.
Warning!
G
When leaving the vehicle, always remove the
SmartKey from the starter switch, take the
SmartKey with KEYLESS-GO* with you and
lock the vehicle. Do not leave children unat-
tended in the vehicle, or with access to an
unlocked vehicle. Children could move the
gear selector lever from positionP, which
could result in an accident and/or serious
personal injury.
Page 182 of 434

181 Controls in detail
Power windows
�Power windows
Opening and closing the windows
The side windows can be opened and
closed electrically. The switches for all the
side windows are on the driver’s door. The
switch for the passenger side is on the pas-
senger door.
1Left front and rear windows
2Right front and rear windows
�
Switch on ignition.
Warning!
G
When closing the windows, make sure that
there is no danger of anyone being injured
by the closing procedure.
The closing of the door windows can be im-
mediately halted by releasing the switch or,
if the switch was pulled past the resistance
point and released, by either pressing or
pulling the respective switch.
If the window encounters an obstruction
that blocks its path in a circumstance where
you pulled the switch past the resistance
point and released it to close the window,
the automatic reversal function will stop the
window and open it slightly.
If the window encounters an obstruction
that blocks its path in a circumstance where
you are closing the window by pulling and
holding the switch, by pressing and holding
button
‹
on the SmartKey,
or by pressing and holding the lock button
(vehicles with KEYLESS-GO*) on the door
handle, the automatic reversal function will
not operate.
When leaving the vehicle, always remove the
SmartKey from the starter switch, take the
SmartKey with KEYLESS-GO* with you, and
lock your vehicle. Do not leave children un-
attended in the vehicle, or with access to an
unlocked vehicle. Unsupervised use of vehi-
cle equipment can cause an accident
and/or serious personal injury.iYou can also open or close the win-
dows using the , button on the
control panel of the automatic climate
control (
�page 175).