Page 164 of 434
163 Controls in detail
Automatic transmission
Manual shift program SL 55 AMG
In the manual shift program mode you can
change the gears manually on the steering
wheel (
�page 160) or by using the gear
selector lever (
�page 156).
Allow engine to warm up under low load
use. Do not place full load on the engine
until the operating temperature has been
reached. Shift into reverse gear only when
the vehicle is stopped.Program mode selector switch
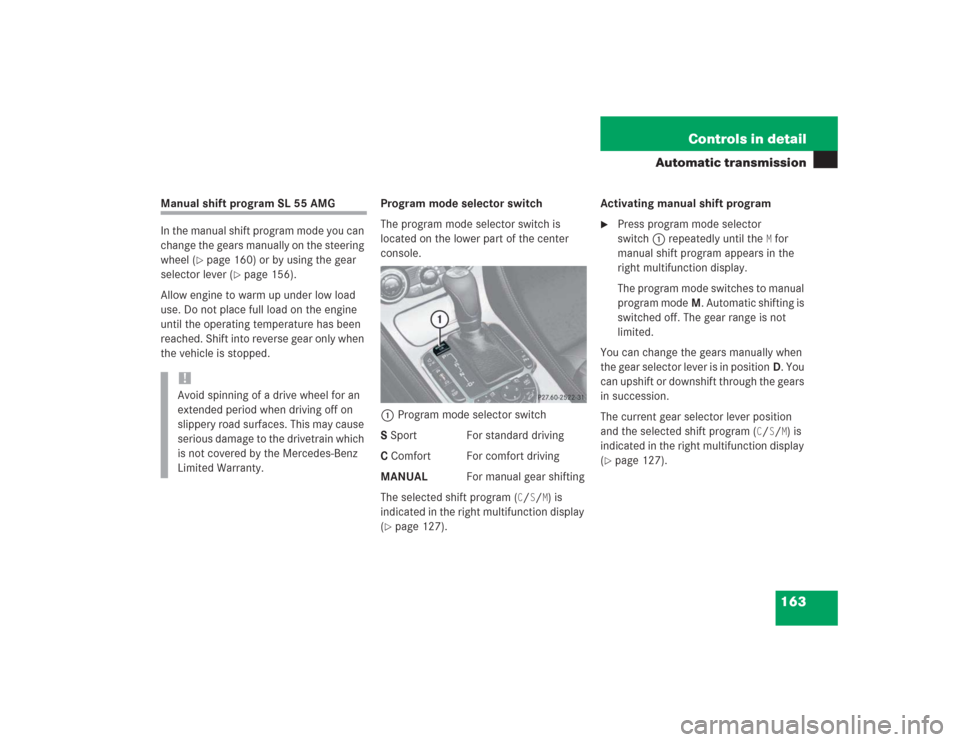
The program mode selector switch is
located on the lower part of the center
console.
1Program mode selector switch
S Sport For standard driving
C Comfort For comfort driving
MANUAL For manual gear shifting
The selected shift program (
C/S/M) is
indicated in the right multifunction display
(
�page 127).Activating manual shift program
�
Press program mode selector
switch1 repeatedly until the
M for
manual shift program appears in the
right multifunction display.
The program mode switches to manual
program modeM. Automatic shifting is
switched off. The gear range is not
limited.
You can change the gears manually when
the gear selector lever is in positionD. You
can upshift or downshift through the gears
in succession.
The current gear selector lever position
and the selected shift program (
C/S/M) is
indicated in the right multifunction display
(
�page 127).
!Avoid spinning of a drive wheel for an
extended period when driving off on
slippery road surfaces. This may cause
serious damage to the drivetrain which
is not covered by the Mercedes-Benz
Limited Warranty.
Page 165 of 434
164 Controls in detailAutomatic transmissionDownshifting�
Briefly press the gear selector lever to
the left in theD-direction
(�page 156).
or
�
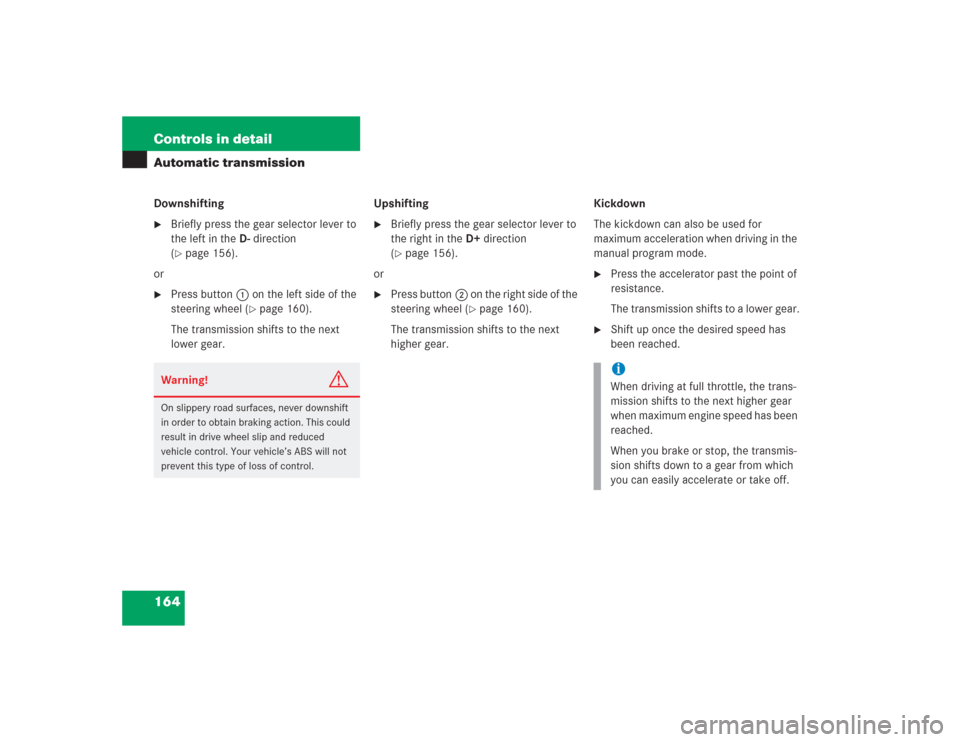
Press button1 on the left side of the
steering wheel (
�page 160).
The transmission shifts to the next
lower gear.Upshifting
�
Briefly press the gear selector lever to
the right in theD+direction
(�page 156).
or
�
Press button2 on the right side of the
steering wheel (
�page 160).
The transmission shifts to the next
higher gear.Kickdown
The kickdown can also be used for
maximum acceleration when driving in the
manual program mode.
�
Press the accelerator past the point of
resistance.
The transmission shifts to a lower gear.
�
Shift up once the desired speed has
been reached.
Warning!
G
On slippery road surfaces, never downshift
in order to obtain braking action. This could
result in drive wheel slip and reduced
vehicle control. Your vehicle’s ABS will not
prevent this type of loss of control.
iWhen driving at full throttle, the trans-
mission shifts to the next higher gear
when maximum engine speed has been
reached.
When you brake or stop, the transmis-
sion shifts down to a gear from which
you can easily accelerate or take off.
Page 166 of 434
165 Controls in detail
Automatic transmission
Deactivating manual shift program�
Press the program mode selector
switch repeatedly until
S or
C appears
in the right multifunction display.
or
�
Restart the engine.
The transmission will go into the auto-
matic shift program mode last selected
(SorC).
Program modeM is not stored.Emergency operation (Limp Home
Mode)
If vehicle acceleration worsens or the
transmission no longer shifts, the trans-
mission is most likely operating in limp
home (emergency operation) mode. In this
mode only second gear and reverse gear
can be activated.�
Stop the vehicle.
�
Move gear selector lever toP.
�
Turn off the engine.
�
Wait at least ten seconds before
restarting.
�
Restart the engine.
�
Move gear selector lever to positionD
(for second gear) orR.
�
Have the transmission checked at an
authorized Mercedes-Benz Center as
soon as possible.
iThe last selected automatic program
mode (S orC) is switched on when the
engine is restarted in the automatic
program mode.
Page 168 of 434
167 Controls in detail
Good visibility
Activating exterior rear view mirror
parking position
Follow these steps to activate the mirror
parking position so that the passen-
ger-side exterior rear view mirror will be
turned downward to the stored position.�
Make sure you have stored a parking
position for the passenger-side exterior
rear view mirror (
�page 115).
�
Make sure the
Mirror setting when
parking
function in the
Convenience
submenu of the control system is
switched to
ON (�page 149).
�
Switch on ignition (if not already on).
�
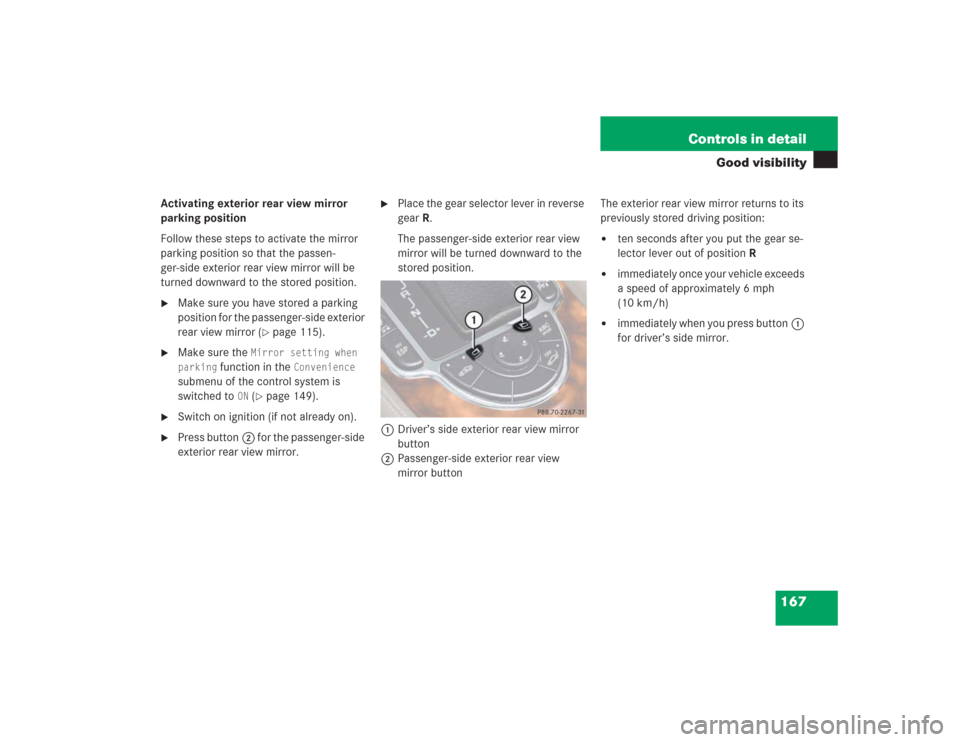
Press button2 for the passenger-side
exterior rear view mirror.
�
Place the gear selector lever in reverse
gearR.
The passenger-side exterior rear view
mirror will be turned downward to the
stored position.
1Driver’s side exterior rear view mirror
button
2Passenger-side exterior rear view
mirror buttonThe exterior rear view mirror returns to its
previously stored driving position:
�
ten seconds after you put the gear se-
lector lever out of positionR
�
immediately once your vehicle exceeds
a speed of approximately 6 mph
(10 km/h)
�
immediately when you press button1
for driver’s side mirror.
Page 195 of 434
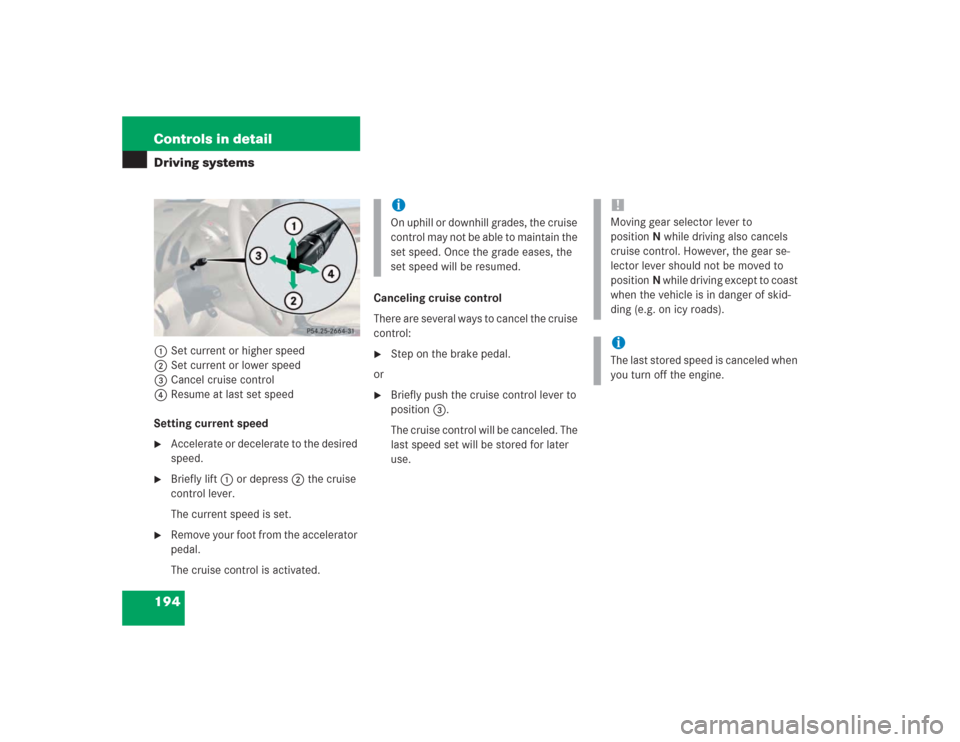
194 Controls in detailDriving systems1Set current or higher speed
2Set current or lower speed
3Cancel cruise control
4Resume at last set speed
Setting current speed�
Accelerate or decelerate to the desired
speed.
�
Briefly lift1 or depress2 the cruise
control lever.
The current speed is set.
�
Remove your foot from the accelerator
pedal.
The cruise control is activated.Canceling cruise control
There are several ways to cancel the cruise
control:
�
Step on the brake pedal.
or
�
Briefly push the cruise control lever to
position3.
The cruise control will be canceled. The
last speed set will be stored for later
use.iOn uphill or downhill grades, the cruise
control may not be able to maintain the
set speed. Once the grade eases, the
set speed will be resumed.
!Moving gear selector lever to
positionN while driving also cancels
cruise control. However, the gear se-
lector lever should not be moved to
positionN while driving except to coast
when the vehicle is in danger of skid-
ding (e.g. on icy roads).iThe last stored speed is canceled when
you turn off the engine.
Page 201 of 434
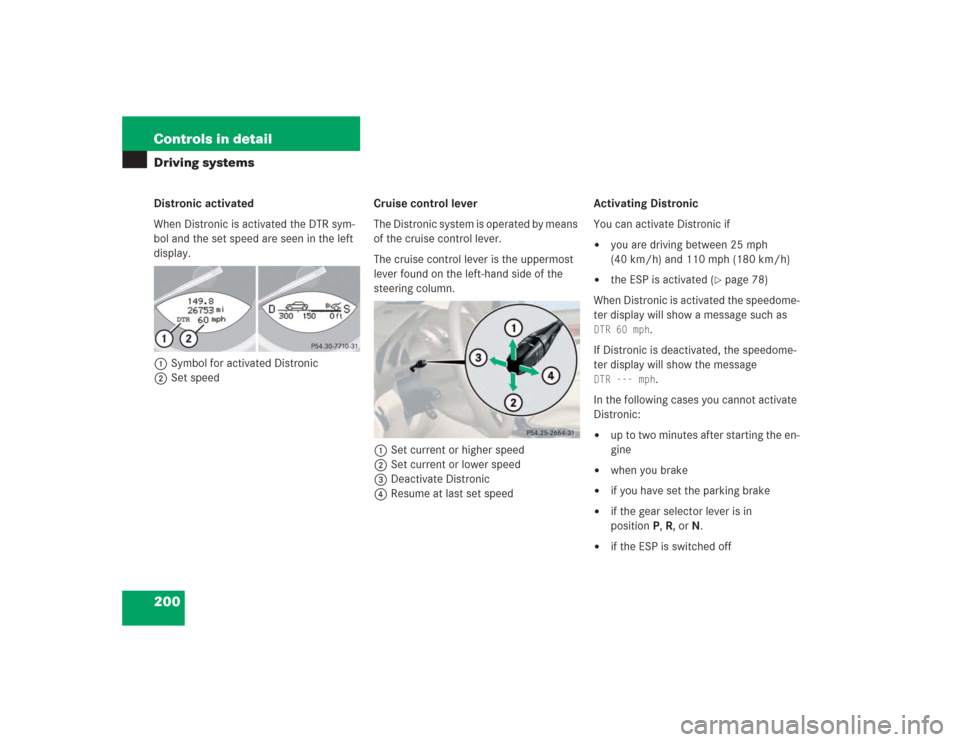
200 Controls in detailDriving systemsDistronic activated
When Distronic is activated the DTR sym-
bol and the set speed are seen in the left
display.
1Symbol for activated Distronic
2Set speedCruise control lever
The Distronic system is operated by means
of the cruise control lever.
The cruise control lever is the uppermost
lever found on the left-hand side of the
steering column.
1Set current or higher speed
2Set current or lower speed
3Deactivate Distronic
4Resume at last set speedActivating Distronic
You can activate Distronic if
�
you are driving between 25 mph
(40 km/h) and 110 mph (180 km/h)
�
the ESP is activated (
�page 78)
When Distronic is activated the speedome-
ter display will show a message such as
DTR 60 mph
.
If Distronic is deactivated, the speedome-
ter display will show the message
DTR --- mph
.
In the following cases you cannot activate
Distronic:
�
up to two minutes after starting the en-
gine
�
when you brake
�
if you have set the parking brake
�
if the gear selector lever is in
positionP, R, or N.
�
if the ESP is switched off
Page 204 of 434
203 Controls in detail
Driving systems
Distronic deactivates automatically when�
you set the parking brake
�
you drive slower than 25 mph
(40 km/h)
�
the ESP is active (
�page 78) or you de-
activate the ESP
�
You move the gear selector lever into
positionN.
A signal will sound. The
DTR off
mes-
sage appears in the speedometer dis-
play for approximately five seconds.Setting the following distance in
Distronic
You can set the specified following for Dis-
tronic by varying the time setting between
1.0 and 2.0 seconds. Using this time set-
ting and the current speed of your vehicle,
Distronic calculates and sets the required
following distance to the vehicle ahead.
The set distance will be shown in the
speedometer display field.
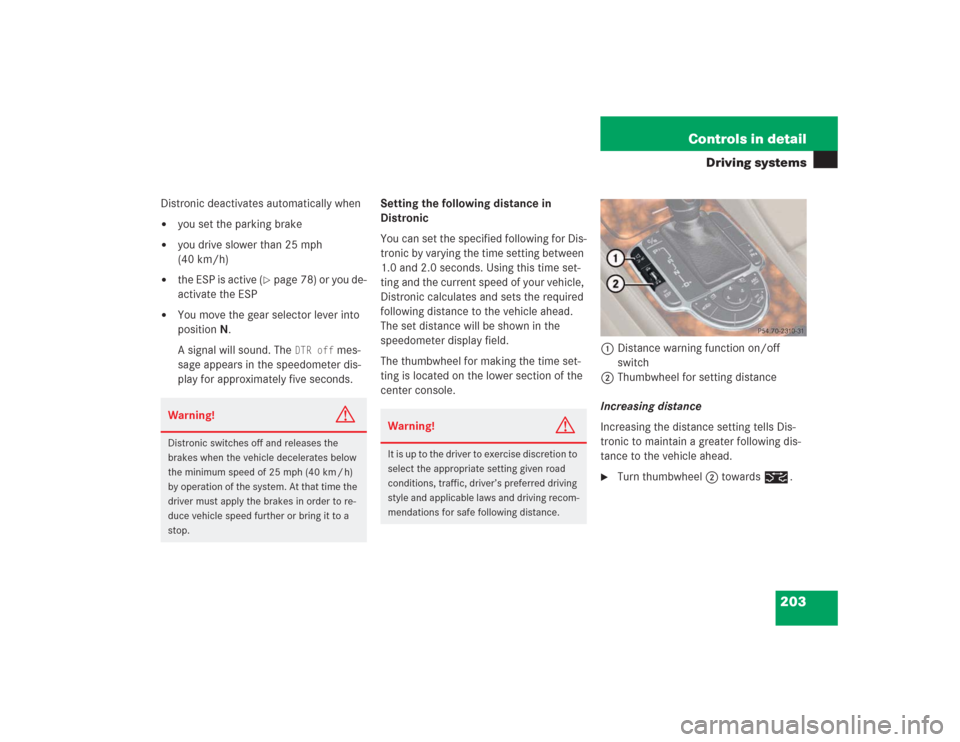
The thumbwheel for making the time set-
ting is located on the lower section of the
center console.1Distance warning function on/off
switch
2Thumbwheel for setting distance
Increasing distance
Increasing the distance setting tells Dis-
tronic to maintain a greater following dis-
tance to the vehicle ahead.
�
Turn thumbwheel2 towards ¯.
Warning!
G
Distronic switches off and releases the
brakes when the vehicle decelerates below
the minimum speed of 25 mph (40 km / h)
by operation of the system. At that time the
driver must apply the brakes in order to re-
duce vehicle speed further or bring it to a
stop.
Warning!
G
It is up to the driver to exercise discretion to
select the appropriate setting given road
conditions, traffic, driver’s preferred driving
style and applicable laws and driving recom-
mendations for safe following distance.
Page 213 of 434
212 Controls in detailDriving systemsEach warning indicator is divided into six
yellow and two red segments for either
side of the vehicle. The Parktronic system
is ready when the border around the indi-
cator is illuminated.
The position of the gear selector lever de-
termines which warning indicators will be
activated.
As your vehicle approaches an object, one
or more segments will come on, depending
on the distance. When the eighth segment
comes, you have reached the minimum
distance.
�
Front area: An intermittent acoustic
warning will sound as the seventh seg-
ment comes on and a constant acous-
tic warning lasting a maximum of three
seconds will sound for the eighth seg-
ment.
�
Rear area: An intermittent acoustic
warning will sound when the first seg-
ment comes on. This signal quickens
with each additional segment lit. When
the eighth segment illuminates, the
acoustic warning becomes a constant
signal. The signal is canceled when the
gear selector lever is placed in
positionD orP.
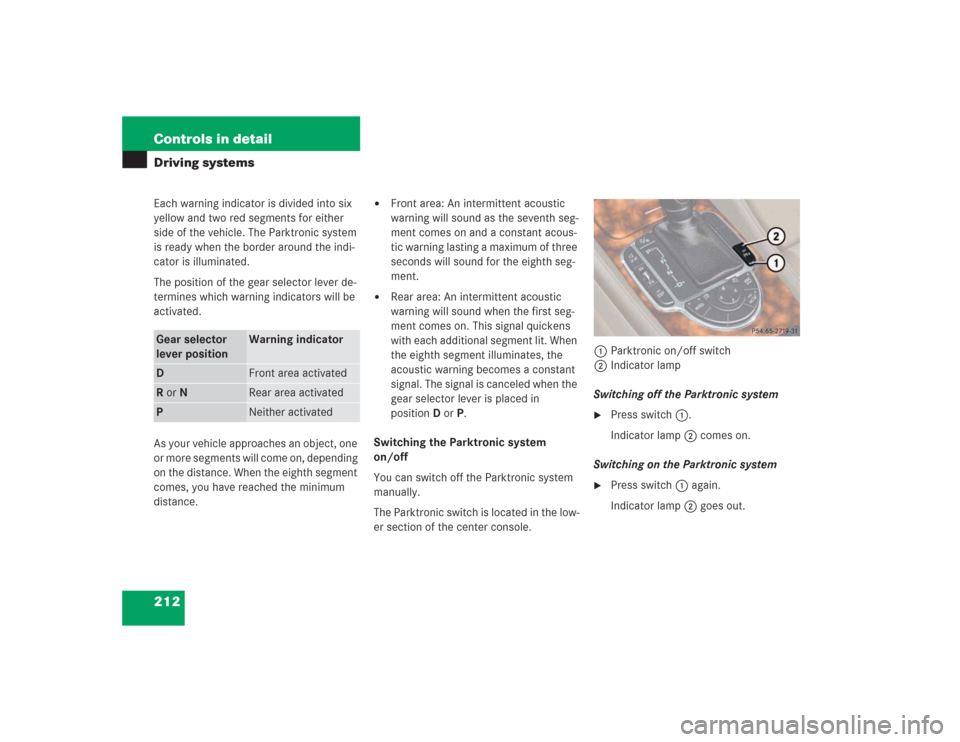
Switching the Parktronic system
on/off
You can switch off the Parktronic system
manually.
The Parktronic switch is located in the low-
er section of the center console.1Parktronic on/off switch
2Indicator lamp
Switching off the Parktronic system
�
Press switch1.
Indicator lamp2 comes on.
Switching on the Parktronic system
�
Press switch1 again.
Indicator lamp2 goes out.
Gear selector
lever position
Warning indicator
D
Front area activated
R or N
Rear area activated
P
Neither activated