Page 319 of 435
318 Practical hintsWhat to do if …?Symbol messagesDisplay symbol
Display message
Possible cause
Possible solution
@
AIRMATIC
STOP, CAR TOO LOW!
The vehicle is parked on an extremely
uneven surface.
�
Press the vehicle level control button to
select the raised vehicle level
(�page 219).
The vehicle level control is malfunction-
ing.
�
Stop and press the vehicle level control
button to select a higher vehicle level
(�page 219).
�
Do not turn steering wheel too far to
avoid damaging the front fenders.
�
Listen for scraping noises.
�
Do not exceed a speed of 50 mph
(80 km/h).
�
Visit an authorized Mercedes-Benz center
as soon as possible.
AIRMATIC
DRIVE CAREFULLY!
The capability of the AIRMATIC system is
restricted.
�
Do not exceed a speed of 50 mph
(80 km/h).
�
Visit an authorized Mercedes-Benz center
as soon as possible.
Page 320 of 435
319 Practical hints
What to do if …?
Display symbol
Display message
Possible cause
Possible solution
@
DISPLAY MALFUNCTION
VISIT WORKSHOP!
The display for AIRMATIC or the AIRMAT-
IC system itself is malfunctioning.
�
Visit an authorized
Mercedes-Benz Center as soon as possi-
ble.
AIRMATIC
LEV. SEL. CANCELED!
�
You have exceeded a speed of
75 mph (120 km/h).
or
�
You have maintained a speed of be-
tween 50 mph (80 km/h) and 75 mph
(120 km/h) for more than 5 minutes.
�
Press the vehicle level control button to
adjust the vehicle level (
�page 219).
Page 340 of 435

339 Practical hints
What to do if …?
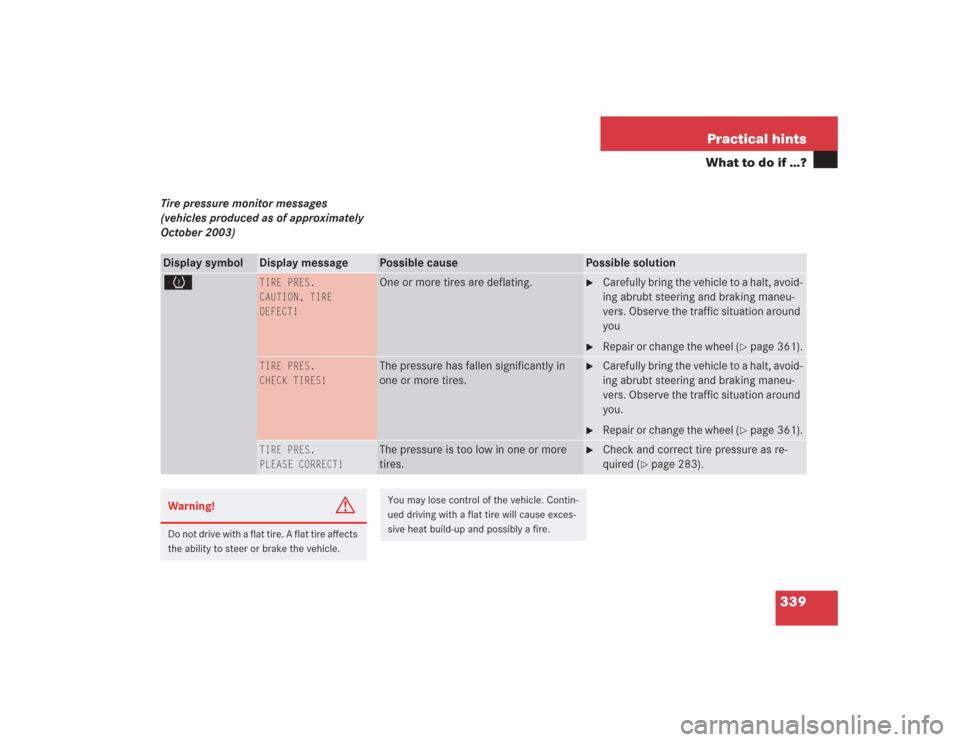
Tire pressure monitor messages
(vehicles produced as of approximately
October 2003)Display symbol
Display message
Possible cause
Possible solution
H
TIRE PRES.
CAUTION, TIRE
DEFECT!
One or more tires are deflating.
�
Carefully bring the vehicle to a halt, avoid-
ing abrubt steering and braking maneu-
vers. Observe the traffic situation around
you
�
Repair or change the wheel (
�page 361).
TIRE PRES.
CHECK TIRES!
The pressure has fallen significantly in
one or more tires.
�
Carefully bring the vehicle to a halt, avoid-
ing abrubt steering and braking maneu-
vers. Observe the traffic situation around
you.
�
Repair or change the wheel (
�page 361).
TIRE PRES.
PLEASE CORRECT!
The pressure is too low in one or more
tires.
�
Check and correct tire pressure as re-
quired (
�page 283).
Warning!
G
Do not drive with a flat tire. A flat tire affects
the ability to steer or brake the vehicle.
You may lose control of the vehicle. Contin-
ued driving with a flat tire will cause exces-
sive heat build-up and possibly a fire.
Page 341 of 435

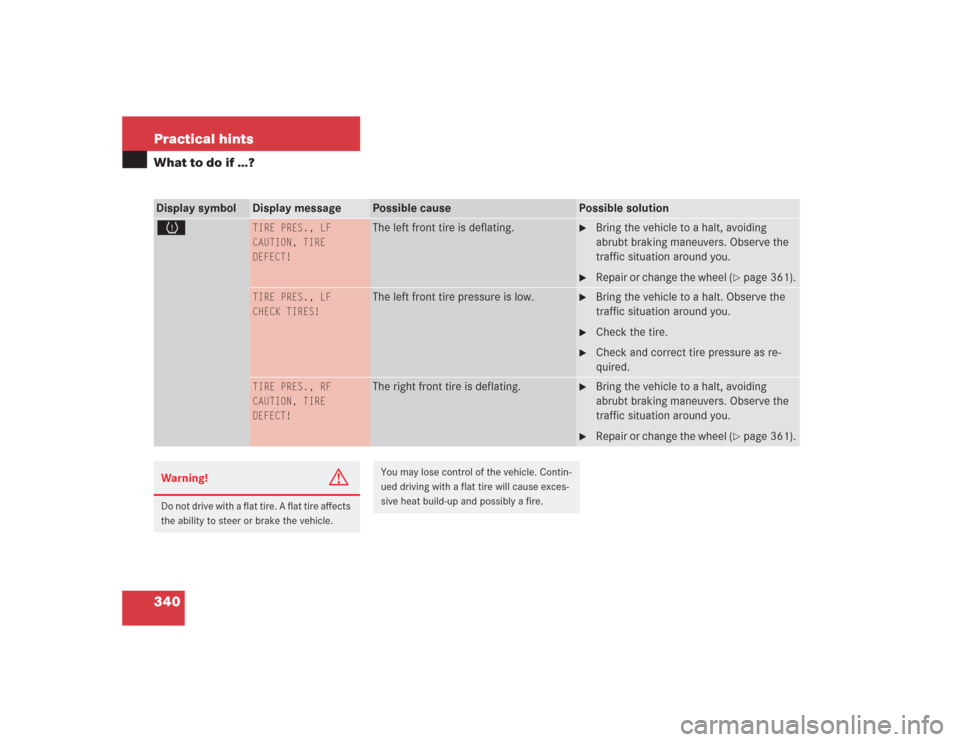
340 Practical hintsWhat to do if …?Display symbol
Display message
Possible cause
Possible solution
H
TIRE PRES., LF
CAUTION, TIRE
DEFECT!
The left front tire is deflating.
�
Bring the vehicle to a halt, avoiding
abrubt braking maneuvers. Observe the
traffic situation around you.
�
Repair or change the wheel (
�page 361).
TIRE PRES., LF
CHECK TIRES!
The left front tire pressure is low.
�
Bring the vehicle to a halt. Observe the
traffic situation around you.
�
Check the tire.
�
Check and correct tire pressure as re-
quired.
TIRE PRES., RF
CAUTION, TIRE
DEFECT!
The right front tire is deflating.
�
Bring the vehicle to a halt, avoiding
abrubt braking maneuvers. Observe the
traffic situation around you.
�
Repair or change the wheel (
�page 361).
Warning!
G
Do not drive with a flat tire. A flat tire affects
the ability to steer or brake the vehicle.
You may lose control of the vehicle. Contin-
ued driving with a flat tire will cause exces-
sive heat build-up and possibly a fire.
Page 342 of 435
341 Practical hints
What to do if …?
Display symbol
Display message
Possible cause
Possible solution
H
TIRE PRES., RF
CHECK TIRES!
The right front tire pressure is low.
�
Bring the vehicle to a halt. Observe the
traffic situation around you.
�
Check the tire.
�
Check and correct tire pressure as re-
quired.
TIRE PRES., LR
CAUTION, TIRE
DEFECT!
The left rear tire is deflating.
�
Bring the vehicle to a halt, avoiding
abrubt braking maneuvers. Observe the
traffic situation around you.
�
Repair or change the wheel (
�page 361).
TIRE PRES., LR
CHECK TIRES!
The left rear tire pressure is low.
�
Bring the vehicle to a halt. Observe the
traffic situation around you.
�
Check the tire.
�
Check and correct tire pressure as re-
quired.
Warning!
G
Do not drive with a flat tire. A flat tire affects
the ability to steer or brake the vehicle.
You may lose control of the vehicle. Contin-
ued driving with a flat tire will cause exces-
sive heat build-up and possibly a fire.
Page 343 of 435

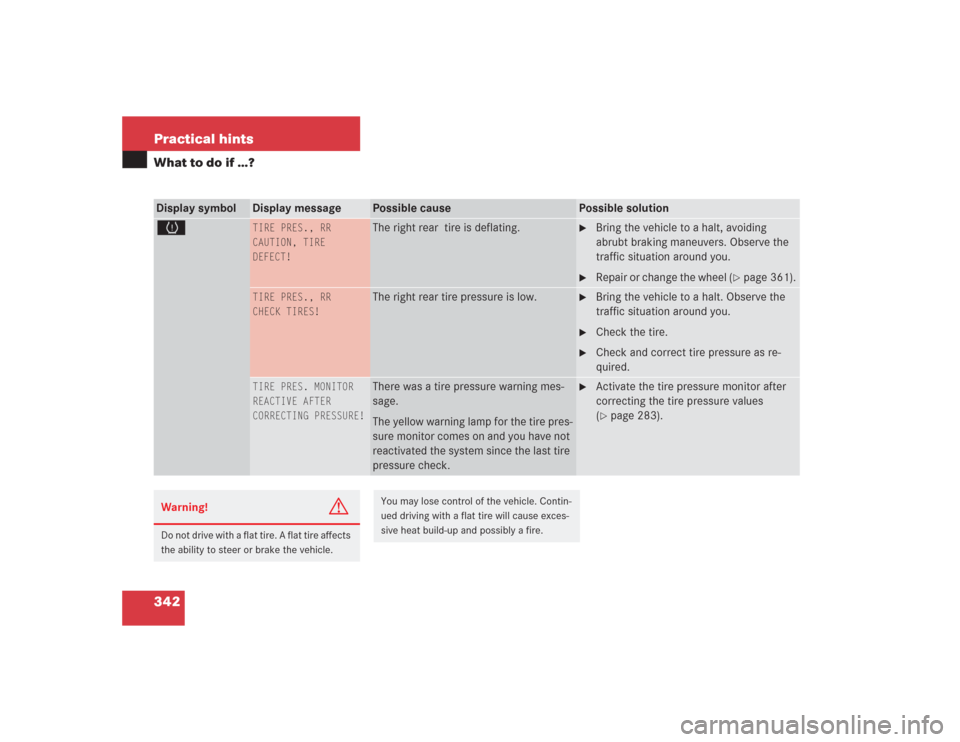
342 Practical hintsWhat to do if …?Display symbol
Display message
Possible cause
Possible solution
H
TIRE PRES., RR
CAUTION, TIRE
DEFECT!
The right rear tire is deflating.
�
Bring the vehicle to a halt, avoiding
abrubt braking maneuvers. Observe the
traffic situation around you.
�
Repair or change the wheel (
�page 361).
TIRE PRES., RR
CHECK TIRES!
The right rear tire pressure is low.
�
Bring the vehicle to a halt. Observe the
traffic situation around you.
�
Check the tire.
�
Check and correct tire pressure as re-
quired.
TIRE PRES. MONITOR
REACTIVE AFTER
CORRECTING PRESSURE!
There was a tire pressure warning mes-
sage.
The yellow warning lamp for the tire pres-
sure monitor comes on and you have not
reactivated the system since the last tire
pressure check.
�
Activate the tire pressure monitor after
correcting the tire pressure values
(�page 283).
Warning!
G
Do not drive with a flat tire. A flat tire affects
the ability to steer or brake the vehicle.
You may lose control of the vehicle. Contin-
ued driving with a flat tire will cause exces-
sive heat build-up and possibly a fire.
Page 355 of 435

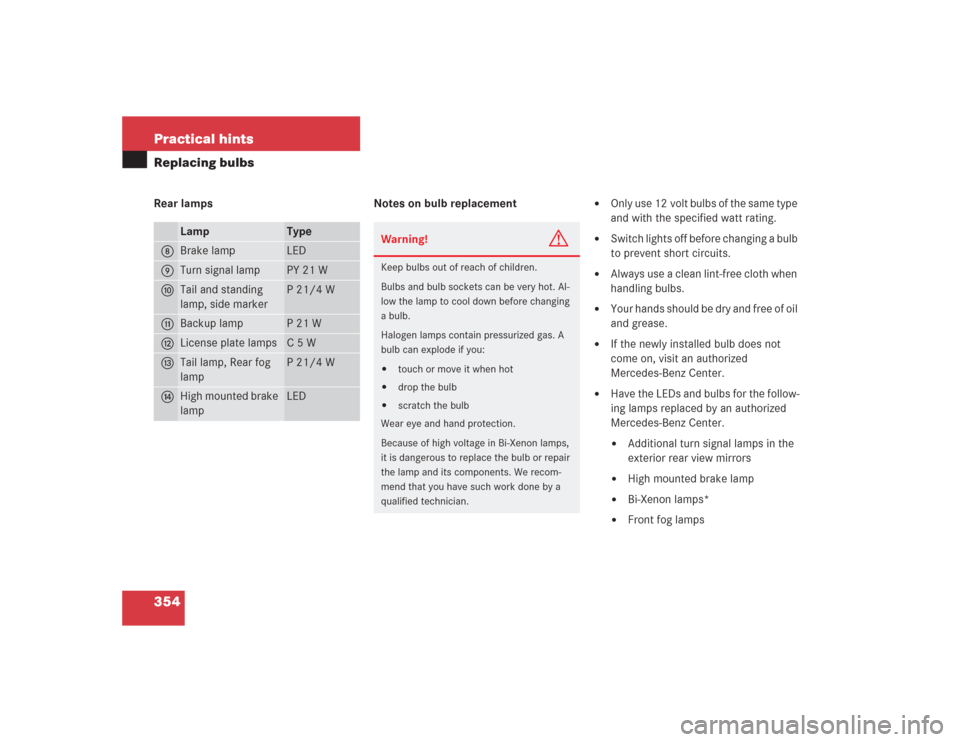
354 Practical hintsReplacing bulbsRear lamps Notes on bulb replacement
�
Only use 12 volt bulbs of the same type
and with the specified watt rating.
�
Switch lights off before changing a bulb
to prevent short circuits.
�
Always use a clean lint-free cloth when
handling bulbs.
�
Your hands should be dry and free of oil
and grease.
�
If the newly installed bulb does not
come on, visit an authorized
Mercedes-Benz Center.
�
Have the LEDs and bulbs for the follow-
ing lamps replaced by an authorized
Mercedes-Benz Center.�
Additional turn signal lamps in the
exterior rear view mirrors
�
High mounted brake lamp
�
Bi-Xenon lamps*
�
Front fog lamps
Lamp
Type
8
Brake lamp
LED
9
Turn signal lamp
PY 21 W
a
Tail and standing
lamp, side marker
P 21/4 W
b
Backup lamp
P21W
c
License plate lamps
C5W
d
Tail lamp, Rear fog
lamp
P 21/4 W
e
High mounted brake
lamp
LED
Warning!
G
Keep bulbs out of reach of children.
Bulbs and bulb sockets can be very hot. Al-
low the lamp to cool down before changing
a bulb.
Halogen lamps contain pressurized gas. A
bulb can explode if you:�
touch or move it when hot
�
drop the bulb
�
scratch the bulb
Wear eye and hand protection.
Because of high voltage in Bi-Xenon lamps,
it is dangerous to replace the bulb or repair
the lamp and its components. We recom-
mend that you have such work done by a
qualified technician.
Page 356 of 435
355 Practical hints
Replacing bulbs
Replacing bulbs for front lamps
1Headlamp cover for fog lamp
2Headlamp cover for high beam halogen
headlamp bulb, parking and standing
lamp
3Headlamp cover for Bi-Xenon* (low and
high beam) or halogen (low beam)
headlamp bulb4Bulb socket for fog lamp
5Bulb socket for parking and standing
lamp
6Electrical connector for high beam
halogen headlamp bulb
7Electrical connector for low beam
headlamp bulb
8Bulb socket for turn signal lampReplacing low beam bulbs
Bi-Xenon* headlamp
Halogen headlamp
�
Switch off the lights.
�
Open the hood (
�page 272).
�
Press the tab on cover3 and remove
cover.
�
Pull connector7 off of the lamp.
�
Release the retaining springs and take
out the bulb.Warning!
G
Do not remove the cover for the Bi-Xenon
headlamp. Because of high voltage in Xenon
lamps, it is dangerous to replace the bulb or
repair the lamp and its components. We rec-
ommend that you have such work done by a
qualified technician.
��