Page 72 of 227

63 Audio
DVD operation
Automatic screen off
Upon loading a DVD, the following mes-
sage will appear: To prevent the driver from being
distracted, the picture is faded
out.�
Treat DVDs with care to prevent
malfunctions during playback.
�
Do not scratch, touch or soil your
DVDs.
�
Do not attach labels to or write on your
DVDs.
General information on DVD operation
Warning
G
In order to avoid distraction which could
lead to an accident, the driver should insert
DVDs with the vehicle at a standstill and
operate the audio system only if permitted
by road, weather and traffic conditions.
Bear in mind that at a speed of just 30 mph
(approximately 50 km/h), your car covers a
distance of 50 feet (approximately 14 m)
every second.
Warning
G
The CD/DVD drive is a Class 1 laser pro-
ducts. There is a danger of invisible laser ra-
diation when you open or damage the cover.
Do not remove the cover. The CD/DVD drive
does not contain any parts which can be ser-
viced by the user. For safety reasons, have
any necessary service work performed by
qualified personnel.iYour CD/DVD drive has been designed
to play CDs/DVDs which correspond to
the EN 60908 standard.
If you insert thicker data carriers, e.g.
ones that have data on both sides (one
side with DVD data, the other side with
audio data), they cannot be ejected and
will damage the drive.
!The COMAND system is capable of
playing DVDs. However, in order to
avoid driver distraction, the video func-
tion is disabled and no images will be
shown on the COMAND screen.
� DVD operation
Page 74 of 227

65 Audio
DVD operation
�
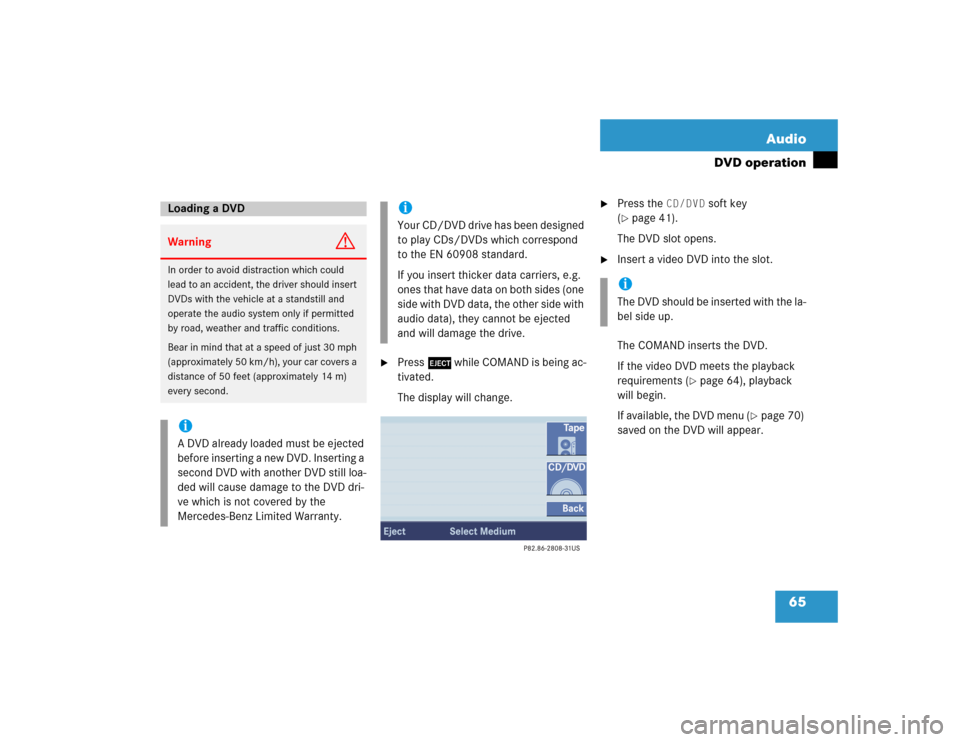
Press l while COMAND is being ac-
tivated.
The display will change.
�
Press the
CD/DVD
soft key
(
�page 41).
The DVD slot opens.
�
Insert a video DVD into the slot.
The COMAND inserts the DVD.
If the video DVD meets the playback
requirements (
�page 64), playback
will begin.
If available, the DVD menu (
�page 70)
saved on the DVD will appear.
Loading a DVD Warning
G
In order to avoid distraction which could
lead to an accident, the driver should insert
DVDs with the vehicle at a standstill and
operate the audio system only if permitted
by road, weather and traffic conditions.
Bear in mind that at a speed of just 30 mph
(approximately 50 km/h), your car covers a
distance of 50 feet (approximately 14 m)
every second.iA DVD already loaded must be ejected
before inserting a new DVD. Inserting a
second DVD with another DVD still loa-
ded will cause damage to the DVD dri-
ve which is not covered by the
Mercedes-Benz Limited Warranty.
iYour CD/DVD drive has been designed
to play CDs/DVDs which correspond
to the EN 60908 standard.
If you insert thicker data carriers, e.g.
ones that have data on both sides (one
side with DVD data, the other side with
audio data), they cannot be ejected
and will damage the drive.
iThe DVD should be inserted with the la-
bel side up.
Page 83 of 227

74 AudioDVD operationChanging the camera view�
During playback of the DVD, activate
the DVD settings menu (
�page 71)
�
Press the
Angle
soft key.
A list of the available camera views will
appear.
�
Use g or G to select the desired
camera view.
�
Press E.
The selected camera view is used.
�
Display the soft keys (
�page 67).
�
Press the
Brightn.
, Contr.
or
Color
soft key.
�
Press h or H.
The respective setting is changed.
If several movies are on the DVD, you can
select a movie directly.
Movies can be selected while the DVD is
played back or stopped.
E.g.: Select movie no. 3
�
Press 3.
The 3rd movie starts after a short
while.
iYou can only change the camera view if
several camera views are stored on the
DVD. The number of available
camera views depends on the DVD.
iThe
Angle
soft key cannot be selected
if the Settings menu is activated from
within the DVD menu (
�page 70).
In this case, select the camera view in
the DVD menu.
Some DVDs supporting different
camera views don’t offer a switch
option. In this case, select the camera
view in the Settings menu.
Adjusting brightness, contrast and
color
Selecting a movieiMovie selection may also be possible in
the DVD menu saved on the DVD
(�page 70).
Page 91 of 227
82 Satellite radio*Satellite radio operationAutomatic station scan
The stations in the selected category can
be scanned in numerical order for 8 se-
conds each.�
In the Satellite radio main menu, press
the
Scan
soft key.
The scan function will begin.
Scan
will
appear in black lettering.Ending scan function and playing a
station
�
Press the
Scan
soft key again.
The station selected will appear with
the station name.
Scan
will appear in
white lettering again.
Station selection via direct channel
entry
�
Press *.
Input line will appear.
�
Enter the number of the channel you
wish to select, e.g. 55.
The channel you have selected will be-
gin to play. The corresponding station
name will appear, if station is available.iError messages will be displayed in the
multifunction display.
Page 100 of 227
91 Telephone*
Important notes
�
The message
Activating Telepho-
ne. Please Wait.
appears.
COMAND prepares the telephone for
use. Select other system functions, e.g.
radio, by pressing the corresponding
button or wait until the telephone is ac-
tive.
�
One of the two messages
Telephone
Unavailable
or
Telephone
Not
Inserted
appears.
Please connect the mobile phone.
�
One of the two messages
Telephone
Error
or
Telephone
Not In-
stalled
appears.
Please contact an authorized
Mercedes-Benz Center.GSM mobile phone
�
If the message
Check SIM Card
(Emergency Call “911” Only
Possible With Tel.)
:
�
Insert the SIM card into the mobile
phone (Telephone Operating
Manual).
Page 102 of 227

93 Telephone*
Telephone operation
You can make an emergency call to an
emergency rescue station with a mobile
communication network.
The emergency call will be placed as long
as the corresponding mobile communicati-
on network is available. To do this, switch
the telephone on if you have not already
done so.
�
TDMA/CDMA mobile phone
The emergency call will also be placed
if the phone is locked (
�page 94).
�
GSM mobile phone
If no SIM card is in the phone or SIM
PIN is not entered, you can only make
an emergency call at the mobile phone.
Emergency calls may not be possible with
all mobile phone networks or if certain net-
work services and/or telephone functions
are active. Check with your local network
operating company.
If you cannot make an emergency call, you
must initiate rescue measures yourself.
Emergency call “911”iThis function places a call to the local
911 provider. It does not initiate a
Tele Aid* call.
Warning
G
The 911 emergency call system is a public
service. Using it without due cause is a cri-
minal offense.
Page 110 of 227
101 Telephone*
Telephone operation
Selecting an entry from the answered
calls list
The COMAND automatically generates a
list of the last 10 calls received. The list is
sorted chronologically with the most
recently received call at the top of the list.
Displaying the list�
In the
Dialed
numbers list
(
�page 100), press h until
Answered
calls list appears.
The list is displayed and the most
recently dialed number is highlighted. The status bar shows:
�
the caller’s name if her or his name and
number are stored in the phone book
�
the message
Unknown
Name
if no entry
is available
�
the telephone numberYou can select the following functions:
�
Changing list display (
�page 100)
�
Selecting an entry and begin dialing
(�page 100)
�
Ending a call (
�page 99)
Missed calls
If there are one or more missed calls avai-
lable on the mobile phone, a correspon-
ding message will appear.
�
Press the
Back
soft key to return to the
Telephone menu.
Page 121 of 227
112 NavigationImportant notesIf your vehicle has been transported (e.g.
by a car, train or ferry) the system may
make navigation announcements which do
not correspond to the vehicle’s position.
The system needs to redetermine its
position.
Determining the location after the
vehicle has been transported
The system will need some time to
determine its location after the car has
been transported. The time required for
the system to do so varies from case to
case.
�
Switch the COMAND on.
�
Activate the Navigation main menu
(�page 114).
The navigation DVD needs to be in the
navigation computer (
�page 111).
�
Drive and press c.
The display will change to the map
display.
Drive until the position or the road
indicated correspond to the real
circumstances. The system is now
correctly adjusted.
Route guidance after the vehicle has
been transported