Page 45 of 376

45 Getting started
Driving
�
Release the parking brake by lifting
lever1 up slightly, pressing button2
on the lever and moving lever1 down
to the stop.
The warning lamp; (USA only) or
3 (Canada only) in the instrument
cluster goes out.
Driving
�
Depress the brake pedal.
�
Move gear selector lever to positionD
orR.
�
Release the brake pedal.
�
Carefully depress the accelerator.
Once the vehicle is in motion, the auto-
matic central locking system engages
and the locking knobs drop down.After a cold start, the automatic transmis-
sion shifts at a higher revolution. This al-
lows the catalytic converter to reach its
operating temperature earlier.
Warning!
G
It is dangerous to shift the gear selector le-
ver out ofP or N if the engine speed is high-
er than idle speed. If your foot is not firmly
on the brake pedal, the vehicle could accel-
erate quickly forward or in reverse. You
could lose control of the vehicle and hit
someone or something. Only shift into gear
when the engine is idling normally and when
your right foot is firmly on the brake pedal.
!In order to avoid damaging the trans-
mission,�
wait for the gear selection process
to complete before setting the vehi-
cle in motion.
�
place the gear selector lever in
positionR only when the vehicle is
stopped.
!If you hear a warning signal when driv-
ing off, you have forgotten to release
the parking brake.
Release the parking brake.
!Do not run cold engine at high engine
speeds. Running a a cold engine at high
engine speeds may shorten the service
life of the engine.iYou can open the doors from inside at
any time. Open doors only when the
conditions are safe to do so.
You can deactivate the automatic
locking using the control system
(�page 133).
!Simultaneously depressing the acceler-
ator pedal and applying the brake re-
duces engine performance and causes
premature brake and drivetrain wear.
Page 51 of 376

51 Getting started
Parking and locking
�Parking and locking
You have now completed your first drive.
You have properly stopped and parked
your vehicle. End your drive as follows.
Parking brake
1Lever
2Button�
Pull lever1 up as many notches as
possible.
When the engine is running, the warn-
ing lamp; (USA only) or3
(Canada only) in the instrument cluster
will be illuminated.
Warning!
G
Wait until the vehicle is stationary before re-
moving the SmartKey from the starter
switch. The vehicle cannot be steered when
the SmartKey is removed.Warning!
G
With the engine not running, there is no
power assistance for the brake and steering
systems. In this case, it is important to keep
in mind that a considerably higher degree of
effort is necessary to brake and steer the ve-
hicle.
Warning!
G
Do not park this vehicle in areas where com-
bustible materials such as grass, hay or
leaves can come into contact with the hot
exhaust system, as these materials could be
ignited and cause a vehicle fire.
To reduce the risk of personal injury as a re-
sult of vehicle movement, before turning off
the engine and leaving the vehicle always:�
Keep right foot on brake pedal.
�
Pull the parking brake lever up as many
notches as possible.
�
Move the gear selector lever to
positionP.
�
Slowly release brake pedal.
�
When parked on an incline, turn front
wheels towards the road curb.
�
Turn the SmartKey to starter switch
position0 and remove.
�
Take the SmartKey and lock vehicle
when leaving.
Page 56 of 376

56 Safety and SecurityOccupant safety
�In this section you will learn the most im-
portant facts about the restraint systems
of the vehicle.
Occupant safety
The restraint systems are�
Seat belts
�
Emergency tensioning device
�
Airbags
�
Child seats
�
Child seat recognition
�
Lower anchors and tethers for children
(LATCH)
As independent systems, their protective
effects work in conjunction with each oth-
er.The 1indicator lamp in the instrument
cluster (
�page 25) comes on:
�
for about four seconds when you turn
the SmartKey in the starter switch to
position1.
�
for about four seconds when you start
the engine by turning the SmartKey.
The 1indicator lamp goes out shortly
after you start the engine. This shows that
the restraint systems are operational.
iFor information on infants and children
traveling with you in the vehicle and re-
straint systems for infants and chil-
dren, see “Children in the vehicle”
(�page 65).
iThe 1indicator lamp remains lit if
the SmartKey is turned to position2
and left there. The indicator lamp will
go out when you start the engine.
Page 75 of 376

75 Safety and Security
Driving and safety systems
Continuous steady brake pedal pressure
yields the advantages provided by the ABS,
namely braking power and the ability to
steer the vehicle.
On slippery road surfaces, the ABS will re-
spond even with light brake pressure. The
pulsating brake pedal can be an indication
of hazardous road conditions and func-
tions as a reminder to take extra care while
driving.
The -indicator lamp in the instrument
cluster (
�page 24) comes on when you
turn the SmartKey to position2. It goes
out when the engine is running.Braking
At the instant one of the wheels is about to
lock up, a slight pulsation can be felt in the
brake pedal, indicating that the ABS is in
the regulating mode.
�
Keep firm and steady pressure on the
brake pedal while experiencing the pul-
sation.
Emergency brake maneuver
�
Keep continuous full pressure on the
brake pedal.LOW RANGE– ABS
During off-road driving a special low range
system for the antilock brake system (ABS)
is operational with transfer case in position
LOW (
�page 145).
An improved braking action (dig-in effect)
is obtained for vehicle speeds up to
37 mph (60 km/h) through a change in the
ABS control function.
For more information, see “Practical hints”
(
�page 252).
iIf the ABS is malfunctioning, the BAS,
EBB, ESP and 4-ETS are also switched
off.
Normal driving and braking functions
are still available.
Page 77 of 376

77 Safety and Security
Driving and safety systems
4-ETS
The 4-ETS improves vehicle’s ability to uti-
lize available traction, especially under
slippery road conditions. The brakes are
applied to the spinning wheel and power is
allowed to flow to the wheel(s) with trac-
tion.
The 4-ETS function is available between ve-
hicle speeds of 0 mph (km/h) and 37 mph
(60 km/h).
The ESP warning lampv in the instru-
ment cluster (
�page 24) comes on when
you turn the SmartKey to position2. It
goes out when the engine is running.
The ESP warning lampv starts to flash
at any vehicle speed, as soon as the tires
lose traction and the wheels begin to spin.For more information, see “Practical hints”
(
�page 257).
Warning!
G
When you see the ESP warning lamp
v
flashing in the instrument cluster, then pro-
ceed as follows:
�
While driving off, apply as little throttle
as possible.
�
While driving ease up on the accelera-
tor.
�
Adapt your speed and driving style to
the prevailing road conditions.
Failure to observe these guidelines could
cause the vehicle to skid.
The 4-ETS cannot prevent accidents result-
ing from excessive speed.
!The engine must be shut off when�
the parking brake is being tested on
a brake test dynamometer.
�
the vehicle is being towed with one
axle raised.
Otherwise, the 4-ETS will engage the
brakes and seriously damage the brake
system.
Page 80 of 376

80 Safety and SecurityDriving and safety systems
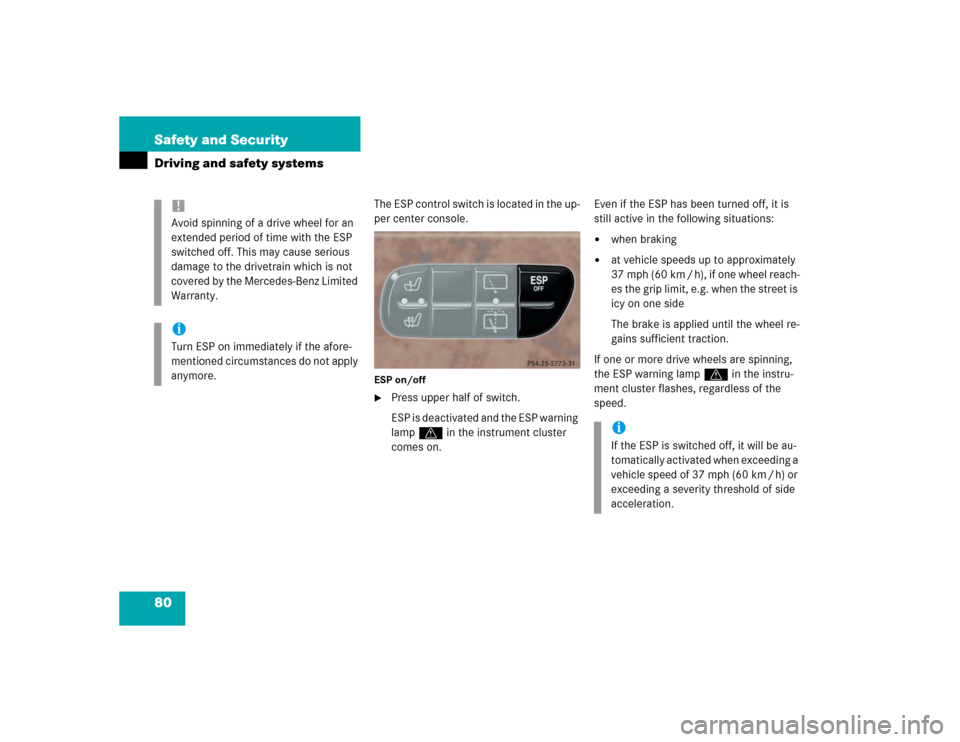
The ESP control switch is located in the up-
per center console.ESP on/off�
Press upper half of switch.
ESP is deactivated and the ESP warning
lamp v in the instrument cluster
comes on.Even if the ESP has been turned off, it is
still active in the following situations:
�
when braking
�
at vehicle speeds up to approximately
37 mph (60 km / h), if one wheel reach-
es the grip limit, e.g. when the street is
icy on one side
The brake is applied until the wheel re-
gains sufficient traction.
If one or more drive wheels are spinning,
the ESP warning lampv in the instru-
ment cluster flashes, regardless of the
speed.
!Avoid spinning of a drive wheel for an
extended period of time with the ESP
switched off. This may cause serious
damage to the drivetrain which is not
covered by the Mercedes-Benz Limited
Warranty.iTurn ESP on immediately if the afore-
mentioned circumstances do not apply
anymore.
iIf the ESP is switched off, it will be au-
tomatically activated when exceeding a
vehicle speed of 37 mph (60 km / h) or
exceeding a severity threshold of side
acceleration.
Page 85 of 376
85 Controls in detail
Locking and unlocking
Seats
Memory function
Lighting
Instrument cluster
Control system
Automatic transmission
Transfer case
Differential locks
Good visibility
Climate control
Power windows
Sliding/pop-up roof
Driving systems
Loading
Useful features
Page 97 of 376
97 Controls in detail
Seats
Removing rear seat head restraints�
Pull out head restraint with both hands.
Installing rear seat head restraints
�
Insert the head restraint and push it
down to the stop.
Ensure proper head restraint positioning
(
�page 36).
Multicontour seat*
The multicontour seat has a movable seat
cushion and inflatable air cushions built
into the seat backrest to provide additional
lumbar and side support.
The seat cushion movement and amount of
seat backrest cushion height and curva-
ture can be continuously varied with regu-
lators on the right side of the seat after
turning the SmartKey in the starter switch
to position2.1Seat cushion length
2Backrest bottom
3Backrest center
4Backrest side bolsters
�
Make sure the ignition is switched on.
All the lamps in the instrument cluster
come on.
Seat cushion length
�
Adjust the seat cushion to the length of
your upper leg using switch1.
iThe head restraint(s) should be stored
in a secure place.