Page 111 of 442

111 Controls in detailSeats
Removing and installing rear seat head
restraints
For removing and installing rear seat head
restraints, see “Expanding the cargo ar-
ea*” (
�page 239)
Multicontour seat*
The multicontour seat has a movable seat
cushion and inflatable air cushions built
into the backrest to provide additional lum-
bar and side support.
The seat cushion movement, backrest
cushion height and curvature can be con-
tinuously varied with switches on the right
side of the seat after turning the SmartKey
in the starter switch to position2 or press-
ing the KEYLESS-GO* start/stop button
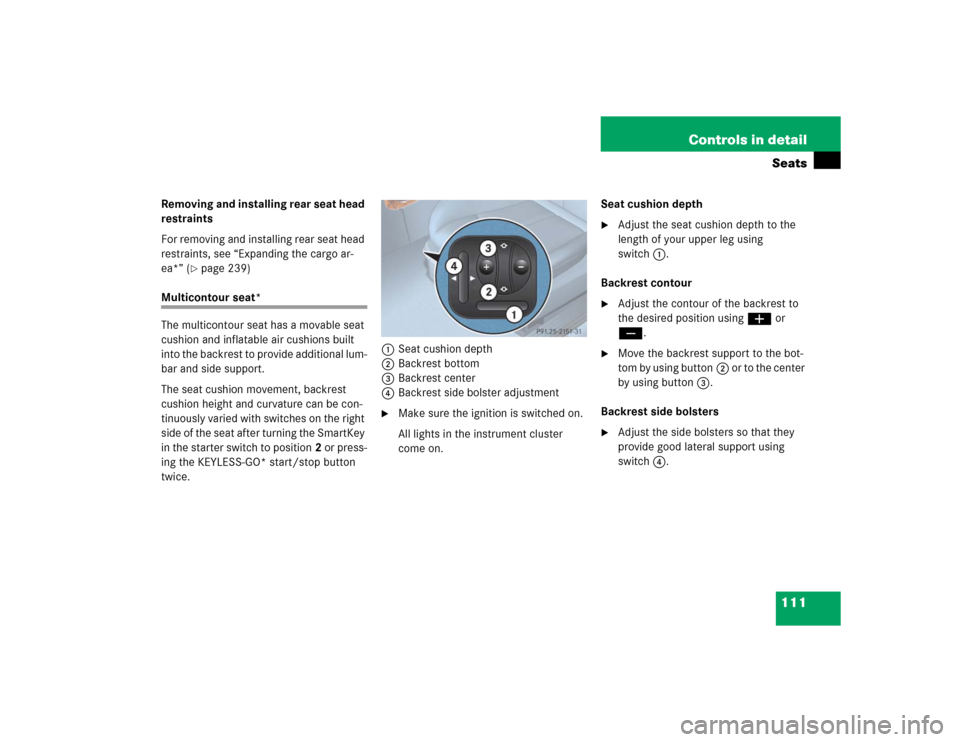
twice.1Seat cushion depth
2Backrest bottom
3Backrest center
4Backrest side bolster adjustment
�
Make sure the ignition is switched on.
All lights in the instrument cluster
come on.Seat cushion depth
�
Adjust the seat cushion depth to the
length of your upper leg using
switch1.
Backrest contour
�
Adjust the contour of the backrest to
the desired position using æ or
ç.
�
Move the backrest support to the bot-
tom by using button2 or to the center
by using button3.
Backrest side bolsters
�
Adjust the side bolsters so that they
provide good lateral support using
switch4.
Page 112 of 442

112 Controls in detailSeatsDrive - Dynamic seat*
The Drive - Dynamic seat automatically ad-
justs the lateral support provided by the
backrest to your driving style.
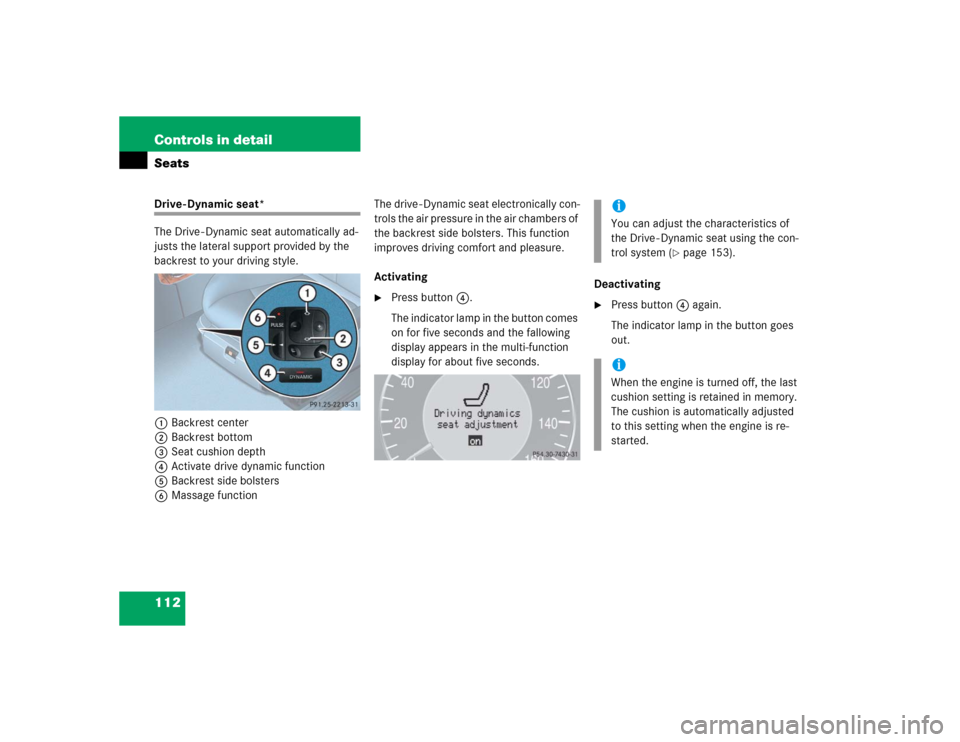
1Backrest center
2Backrest bottom
3Seat cushion depth
4Activate drive dynamic function
5Backrest side bolsters
6Massage functionThe drive - Dynamic seat electronically con-
trols the air pressure in the air chambers of
the backrest side bolsters. This function
improves driving comfort and pleasure.
Activating
�
Press button4.
The indicator lamp in the button comes
on for five seconds and the fallowing
display appears in the multi-function
display for about five seconds.Deactivating
�
Press button4 again.
The indicator lamp in the button goes
out.iYou can adjust the characteristics of
the Drive - Dynamic seat using the con-
trol system (
�page 153).
iWhen the engine is turned off, the last
cushion setting is retained in memory.
The cushion is automatically adjusted
to this setting when the engine is re-
started.
Page 114 of 442

114 Controls in detailSeatsSwitching seat heating off�
Press button1 repeatedly until all in-
dicator lamps go out.
Seat ventilation*
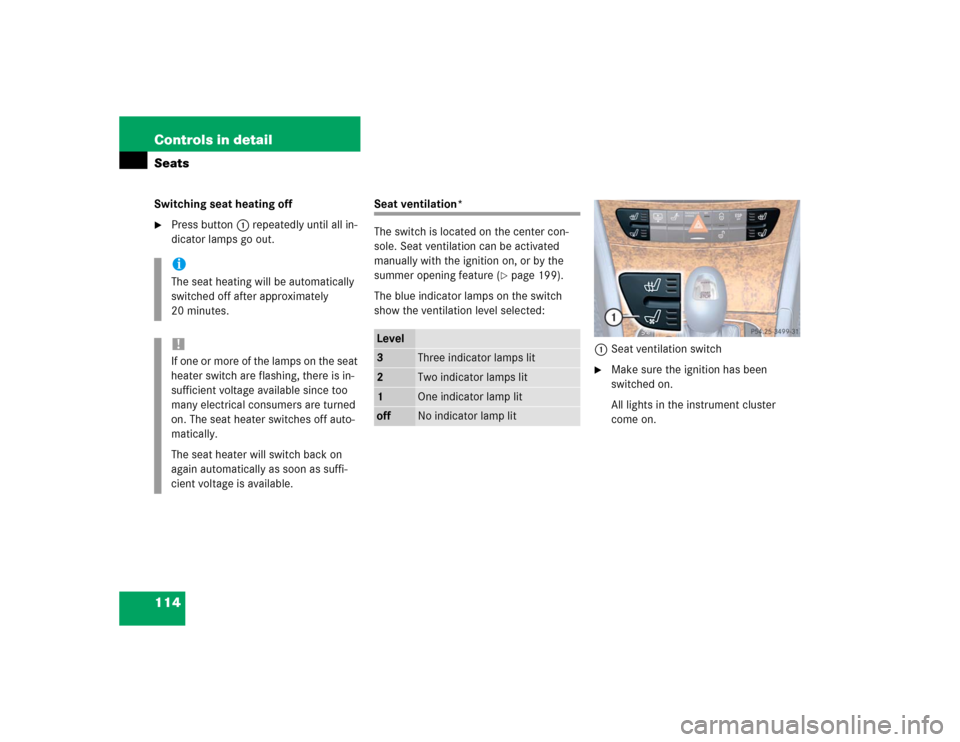
The switch is located on the center con-
sole. Seat ventilation can be activated
manually with the ignition on, or by the
summer opening feature (
�page 199).
The blue indicator lamps on the switch
show the ventilation level selected:
1Seat ventilation switch
�
Make sure the ignition has been
switched on.
All lights in the instrument cluster
come on.
iThe seat heating will be automatically
switched off after approximately
20 minutes.!If one or more of the lamps on the seat
heater switch are flashing, there is in-
sufficient voltage available since too
many electrical consumers are turned
on. The seat heater switches off auto-
matically.
The seat heater will switch back on
again automatically as soon as suffi-
cient voltage is available.
Level3
Three indicator lamps lit
2
Two indicator lamps lit
1
One indicator lamp lit
off
No indicator lamp lit
Page 115 of 442
115 Controls in detailSeats
Switching seat ventilation on�
Press button1 repeatedly until the
desired ventilation level is set.
Switching seat ventilation off
�
Press button1 repeatedly until all in-
dicator lamps go out.iThe seat ventilation is automatically set
to the highest level if activated via sum-
mer opening feature (
�page 199).
!If one or all of the lamps flash on the
seat ventilation switch, there is insuffi-
cient voltage due to too many electrical
consumers being switched on. The seat
ventilation switches off automatically.
The seat ventilation will switch back on
again automatically as soon as suffi-
cient voltage is available.
Page 117 of 442

117 Controls in detail
Memory function
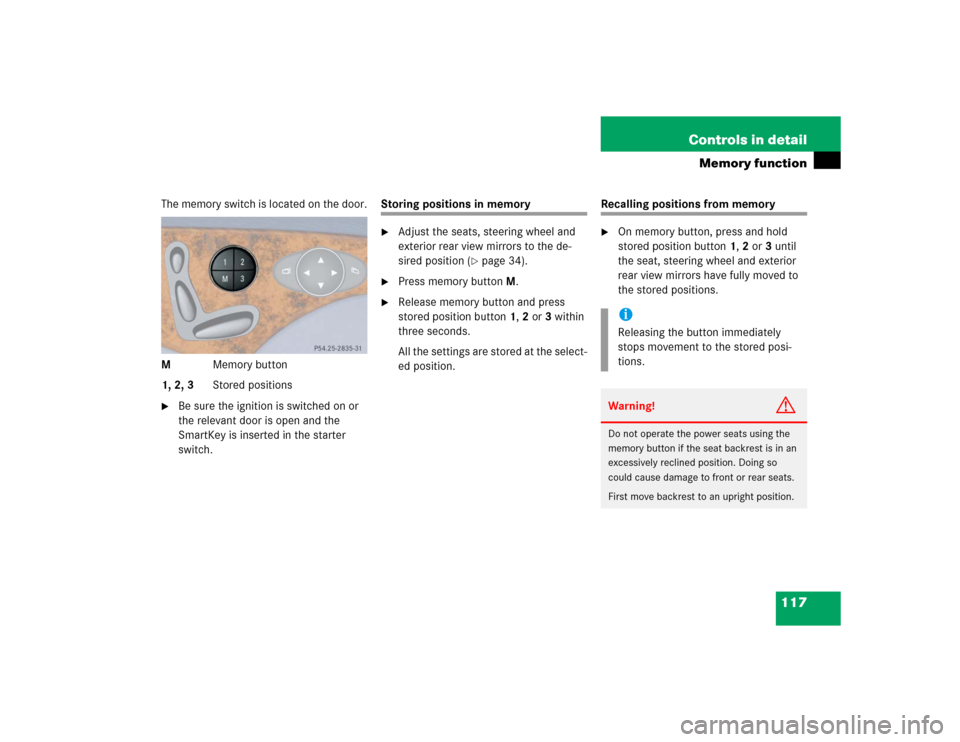
The memory switch is located on the door.
MMemory button
1, 2, 3Stored positions�
Be sure the ignition is switched on or
the relevant door is open and the
SmartKey is inserted in the starter
switch.
Storing positions in memory�
Adjust the seats, steering wheel and
exterior rear view mirrors to the de-
sired position (
�page 34).
�
Press memory buttonM.
�
Release memory button and press
stored position button 1, 2 or 3 within
three seconds.
All the settings are stored at the select-
ed position.
Recalling positions from memory�
On memory button, press and hold
stored position button1, 2 or3 until
the seat, steering wheel and exterior
rear view mirrors have fully moved to
the stored positions.iReleasing the button immediately
stops movement to the stored posi-
tions.Warning!
G
Do not operate the power seats using the
memory button if the seat backrest is in an
excessively reclined position. Doing so
could cause damage to front or rear seats.
First move backrest to an upright position.
Page 237 of 442
237 Controls in detail
Loading
�
Pull release handle1.
The seat cushion automatically springs
upward slightly.
1Seat cushion
2Seat backrest
�
Grip the back of seat cushion1 and
fold forward.
�
Push the rear seat head restraints all
the way in.
�
Pull the handle in the trunk.
The seat backrest is released and the
head restraints fold back.
�
Fold the seat backrest forward.
iIf tall persons have occupied the driv-
er’s and front passenger seats, it may
be necessary to move these seats for-
ward slightly in order to fold the rear
seat backrests forward.
iI f t h e r e a r c e n t e r s e a t i s t o b e o c c u p i e d
while driving, it may be necessary to
fold the seat belt buckle up again.
!Make sure the head restraints fit all the
way into the seat cushion pockets. This
will prevent the backrests from being
damaged during loading.
Page 245 of 442
245 Controls in detail
Useful features
�
To open air vent slide the lever up.
�
To close air vent slide the lever down.Storage compartment in the rear cen-
ter console
�
Briefly press the top of the compart-
ment.
It extends automatically.Ruffled storage bags
Ruffled storage bags are located on the
back of the front seats.
iThe compartment can get very warm
due to its confined space. When storing
heat sensitive objects (e.g. groceries)
in the compartment, close the air vent
while heating the passenger compart-
ment
Warning!
G
The ruffled storage bag is intended for stor-
ing light-weight items only.
Heavy objects, objects with sharp edges or
fragile objects may not be transported in the
ruffled storage bag.
The ruffled storage bag cannot protect
transported goods in the event of an acci-
dent.
Page 417 of 442

417 Index
A
ABS 74, 411
ABS control 75
Malfunction indicator lamp 310
Messages in display 319
Warning lamp 310
Accelerator position, automatic
transmission 164
Accident
In case of 50
Activating
Air conditioning (cooling) 182, 194
Air recirculation mode 180, 191
Anti-theft alarm system 84
Automatic climate control 186
Central locking (control system) 149
Charcoal filter 192
Climate control 176
Defrosting 179
Distance warning function* 223
Distronic* 219
Easy-entry/exit feature* 150
ESP 79
Exterior headlamps 47
Exterior lamps 120Front fog lamps 122
Hazard warning flasher 124
Headlamps 47
High beams 123
Ignition 31
Ignition with KEYLESS-GO* 33
Immobilizer 53, 83
Rear fog lamp 121, 122
Rear window defroster 173
Residual heat 182, 194
Seat heater* 113
Tow-away alarm 85
Windshield wipers 48
Adding
Engine oil 284
Additional turn signal 359
Adjustable air vents, rear passenger
compartment 195
Adjusting 34
Air distribution 178, 189
Air volume 178, 179, 190
Backrest tilt 36
Exterior rear view mirror 38
Head restraint height 36
Head restraint tilt 36Instrument cluster illumination 126
Interior rear view mirror 38
Mirrors 38
Multicontour seat* 111
Seat cushion depth 111
Seat cushion tilt 36
Seat fore and aft adjustment 35
Seat height 36
Seats 34
Steering column height 37
Steering wheel 37
Adjusting steering column in or out 37
Adjusting steering column up or down 37
Adjusting the dynamic seat 153
Air conditioning (cooling)
Turning off 182, 194
Turning on 182, 194
Air distribution
Adjusting 178, 189
Air pressure see Tire inflation
pressure 290
Air recirculation mode 180, 191
Activating 180, 191
Deactivating 181, 192