Page 82 of 442
82 Safety and SecurityDriving safety systemsFour wheel electronic traction system (4MATIC) with the ESP
Models with all-wheel-drive only.
The 4MATIC improves vehicle’s ability to
use available traction, e.g. during winter
operation in mountains under snowy
conditions, by applying power to all four
wheels.
Warning!
G
If you see the ESP warning lampv flash-
ing in the speedometer, proceed as follows:�
While driving off, apply as little throttle
as possible
�
While driving, ease up on the accelera-
tor
�
Adapt your speed and driving style to
the prevailing road conditions
Failure to observe these guidelines could
cause the vehicle to skid.
The ESP cannot prevent accidents resulting
from excessive speed.!Do not tow with one axle raised.
Otherwise the transfer case can be
damaged, which is not covered by the
Mercedes-Benz Limited Warranty.
!Performance testing must only be con-
ducted on a two-axle dynamometer.
Otherwise the transfer case can be
damaged, which is not covered by the
Mercedes-Benz Limited Warranty.!Because of the ESP’s automatic opera-
tion, the engine and ignition must be
shut off (SmartKey in starter switch
position0 or1 or KEYLESS-GO
start/stop button* in position0 or1)
when the parking brake is being tested
on a brake test dynamometer.
Active braking action through ESP may
otherwise seriously damage the front
or rear axle brake system.
Operational tests with the engine
running can only be conducted on a
two-axle dynamometer.
Page 83 of 442
83 Safety and Security
Anti-theft systems
�Anti-theft systems
Immobilizer
The immobilizer prevents unauthorized
persons from starting your vehicle.
Activating�
With the SmartKey: Removing the
SmartKey from the starter switch acti-
vates the immobilizer.
�
With KEYLESS-GO*: Turning off the en-
gine by means of the KEYLESS-GO
start/stop button on the gear selector
lever activates the immobilizer.Deactivating
�
With the SmartKey: Inserting the
SmartKey in the starter switch deacti-
vates the immobilizer.
�
With KEYLESS-GO*: Starting the en-
gine by means of the start/stop button
on the gear selector lever deactivates
the immobilizer.
iIn case the engine cannot be started
(yet the vehicle’s battery is charged),
the system is not operational. Contact
an authorized Mercedes-Benz Center
or call 1-800-FOR-MERCedes (in the
USA), or 1-800-387-0100 (in Canada).
Page 84 of 442

84 Safety and SecurityAnti-theft systemsAnti-theft alarm system
Once the alarm system has been armed, a
visual and audible alarm is triggered when
someone opens�
a door
�
the trunk
�
the hood.
The alarm will stay on, even if the activat-
ing element (a door, for example) is imme-
diately closed.
The alarm system will also be triggered
when
�
someone attempts to raise the vehicle.Arming the alarm system
The alarm system is armed within approxi-
mately ten seconds after locking the vehi-
cle with the SmartKey or KEYLESS-GO*.
The turn signal lamps flash three times to
indicate that the alarm system is activated.
The indicator lamp in the central locking
switch (
�page 25) begins to flash after
arming the alarm system.Disarming the alarm system
The alarm system is disarmed when you
unlock your vehicle with the SmartKey or
KEYLESS-GO*. The turn signal lamps flash
once to indicate that the alarm system is
deactivated.
iIf the alarm stays on for more than
20 seconds, an emergency call is initi-
ated automatically by the Tele Aid sys-
tem* (
�page 250) provided Tele Aid
service was subscribed to and properly
activated, and that necessary cellular
service and GPS coverage are avail-
able.
iIf the turn signal lamps do not flash
three times one of the following ele-
ments may not be properly closed:�
a door
�
the trunk lid
Close the respective element and lock
the vehicle again.
Page 85 of 442
85 Safety and Security
Anti-theft systems
Canceling the alarm
With the SmartKey�
Insert the SmartKey in the starter
switch.
or
�
Press the Œ or ‹ button on the
SmartKey.
The alarm is canceled.
With KEYLESS-GO*
�
Grasp the outside door handle.
or
�
Press the KEYLESS-GO* start/stop
button.
The alarm is canceled.
Tow-away alarm
Once the tow-away alarm is armed, a visual
and audible alarm will be triggered when
someone attempts to raise the vehicle.Arming the tow-away alarm
When you lock your vehicle, the tow-away
alarm is automatically armed after about
30 seconds.
When you unlock your vehicle, the
tow-away protection disarms automatical-
ly.
Disarming the tow-away alarm
To prevent triggering the tow-away alarm
feature, switch off the tow-away alarm be-
fore towing the vehicle, or when parking on
a surface subject to movement, such as a
ferry or auto train.
The button is located on the overhead con-
trol panel.
iThe tow-away protection alarm is trig-
gered, for example, if the vehicle is lift-
ed on one side.
If the alarm stays on for more than
20 seconds, an emergency call is initi-
ated automatically by the Tele Aid sys-
tem* (
�page 250), provided that the
Tele Aid service was subscribed to and
properly activated, and that necessary
cellular service and GPS coverage are
available.
Page 86 of 442
86 Safety and SecurityAnti-theft systems1Tow-away alarm off button�
Switch off the ignition and remove the
SmartKey.
�
Press button1.
The indicator lamp in the button comes
on briefly.
�
Exit and lock your vehicle with the
SmartKey or (vehicles with KEY-
LESS-GO*) the lock button at each
door handle.
The tow-away alarm remains disarmed un-
til you lock your vehicle again.Canceling tow-away alarm
To cancel the alarm:
With the SmartKey
�
Insert the SmartKey in the starter
switch.
or
�
Press the Œ or ‹ button on the
SmartKey.
With KEYLESS-GO*
�
Grasp the outside door handle.
or
�
Press the KEYLESS-GO start/stop but-
ton.
iYou cannot disarm the tow-away alarm
when the ignition is switched on.
Page 116 of 442
116 Controls in detailMemory function
�Memory function
You can store up to three different settings
per SmartKey.
The following settings are saved for each
stored position:�
Driver’s seat and backrest position
�
Steering wheel position
�
Driver’s side exterior rear view mirror
position
�
Passenger side exterior rear view mir-
ror position
�
Front passenger seat position
These SmartKey-dependent memory set-
tings can be deactivated if desired
(
�page 152).
!Prior to operating the vehicle, the driv-
er should check and adjust the seat
height, seat position fore and aft, and
seat backrest angle if necessary, to en-
sure adequate control, reach and com-
fort. The head restraint should also be
adjusted for proper height. See also the
section on airbags (
�page 57) for
more information on proper seat posi-
tioning.
In addition, adjust the steering wheel to
ensure adequate control, reach, opera-
tion and comfort. Both the interior and
outside rear view mirrors should be ad-
justed for adequate rear vision.
Fasten seat belts. Infants and small
children should be seated in a properly
secured restraint system that complies
with U.S. Federal Motor Vehicle Safety
Standards 213 and 225 and Canadian
Motor Vehicle Safety Standards 213
and 210.2.
Warning!
G
Do not activate the memory function while
driving. Activating the memory function
while driving could cause the driver to lose
control of the vehicle.
Page 121 of 442
121 Controls in detail
Lighting
Daytime running lamp mode�
Turn exterior lamp switch to
positionM orU.
When the engine is running, the low beam
headlamps are automatically switched on.
In low ambient light conditions the parking
lamps will also switch on.
Canada only
When you shift from a driving gear to
positionN orP, the low beam switches off
(with a three-minute delay).
For nighttime driving you should turn the
exterior lamp switch to positionB to
permit activation of the high beam head-
lamps.USA only
The high beam headlamps can also be ac-
tivated when driving with the daytime run-
ning lamp mode activated and exterior
lamp switch in positionM.
To activate the daytime running lamp
mode, see “Setting daytime running lamp
mode” (
�page 146).
Locator lighting and night security illu-
mination
Locator lighting and night security illumi-
nation are described in the control system
section under “Setting locator lighting”
(
�page 147) and “Setting night security il-
lumination” (
�page 148).
iWith the daytime running lamp mode
activated, the low beam headlamps will
not be switched off automatically.iThe front fog lamps and rear fog lamp
cannot be switched on manually with
exterior lamp switch in positionU.
To activate the fog lamps, turn exterior
lamp switch to positionB and pull
the exterior lamp switch to first or sec-
ond stop (
�page 122).
iSee notes on the exterior lamp switch
(�page 119).
Page 148 of 442
148 Controls in detailControl systemSetting night security illumination (Exte-
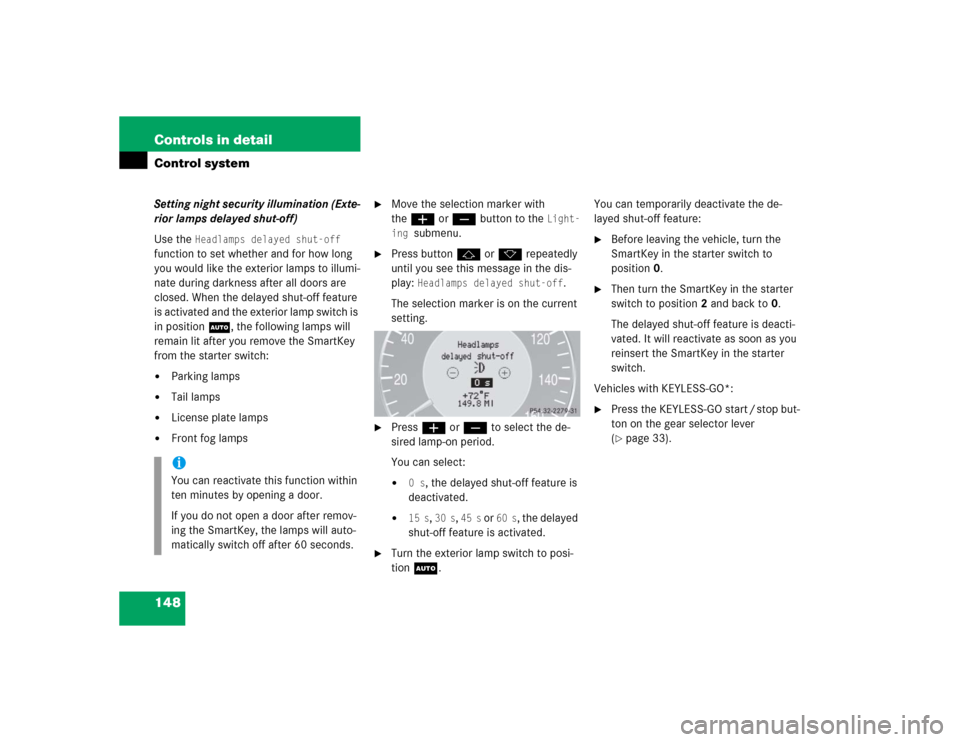
rior lamps delayed shut-off)
Use the
Headlamps delayed shut-off
function to set whether and for how long
you would like the exterior lamps to illumi-
nate during darkness after all doors are
closed. When the delayed shut-off feature
is activated and the exterior lamp switch is
in position
U
, the following lamps will
remain lit after you remove the SmartKey
from the starter switch:
�
Parking lamps
�
Tail lamps
�
License plate lamps
�
Front fog lamps
�
Move the selection marker with
theæ orç button to the
Light-
ing
submenu.
�
Press buttonj ork repeatedly
until you see this message in the dis-
play:
Headlamps delayed shut-off
.
The selection marker is on the current
setting.
�
Pressæ orç to select the de-
sired lamp-on period.
You can select:�
0 s
, the delayed shut-off feature is
deactivated.
�
15 s
, 30 s
, 45 s
or
60 s
, the delayed
shut-off feature is activated.
�
Turn the exterior lamp switch to posi-
tion U.You can temporarily deactivate the de-
layed shut-off feature:
�
Before leaving the vehicle, turn the
SmartKey in the starter switch to
position0.
�
Then turn the SmartKey in the starter
switch to position2 and back to0.
The delayed shut-off feature is deacti-
vated. It will reactivate as soon as you
reinsert the SmartKey in the starter
switch.
Vehicles with KEYLESS-GO*:
�
Press the KEYLESS-GO start / stop but-
ton on the gear selector lever
(�page 33).
iYou can reactivate this function within
ten minutes by opening a door.
If you do not open a door after remov-
ing the SmartKey, the lamps will auto-
matically switch off after 60 seconds.